

-
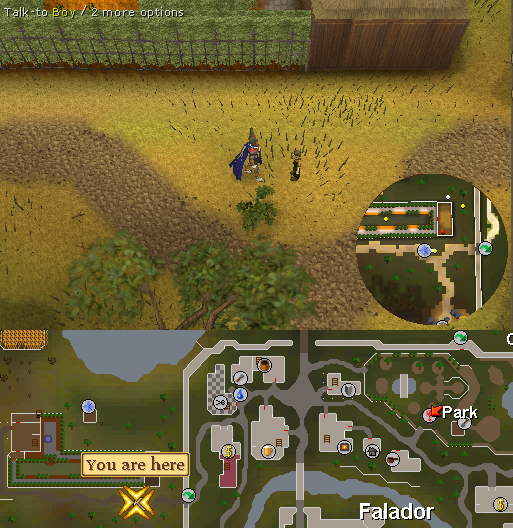
Talk to the Harvey, West of Falador. He will tell you that he has lost his Ball to the witch, Nora T. Hagg, and that she locked it in her shed.
-
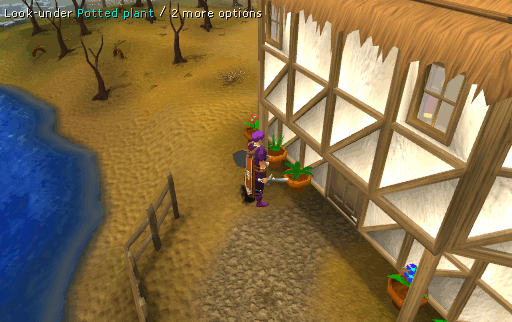
Head Northwest to the front door of the witch's house, only to find out that the door is locked. Look under one of the nearby potted plants to find a Door key. Use the key to open the door, and pick up the Diary from the table. Read it to learn more about the witch, Nora T. Hagg.
-
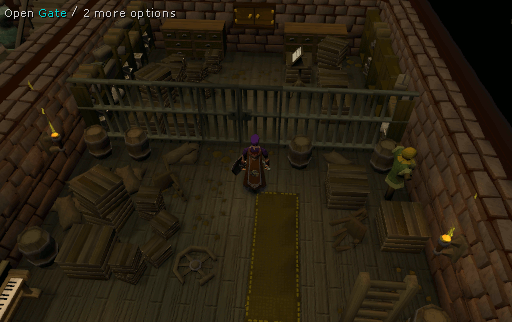
Open the door to the north and go down the ladder into the basement. Put on the Leather gloves and go through the gate. Open and search the wall cupboard for a Magnet.
Note: Make sure you are wearing the Leather gloves when you try to open the gate, or you will be dealt some damage. If you forgot to bring the gloves, then search the nearby crates, boxes, and sacks until you find a set of gloves.
-
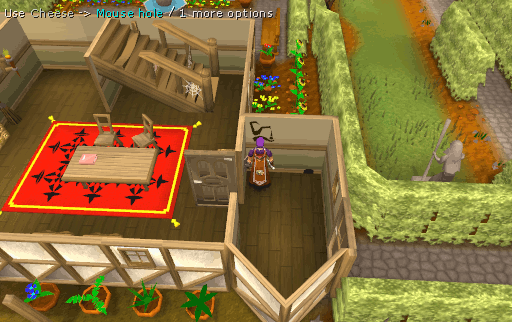
Head back upstairs to the main room, and enter the small room to the south. Use the piece of Cheese with the mouse hole to lure the mouse out. Then, quickly use the Magnet with the mouse. It will flee back into its hole and with it unlocking the door to the garden.
Note: If you leave the house, then you will have to gather another piece of Cheese to unlock the door to the garden again.
-
Enter the garden and make your way to the shed at the very end of it. Hide behind the hedges as the witch walks by to prevent her from seeing you. Make sure you are standing next to the center of each hedge or she will still be able to catch you. When you have made it to the shed, try to open the door only to find out that it is locked.
Note: If Nora T. Hagg does catch you, she will teleport you out of her house and take the ball and key. You will then have to gather another piece of Cheese to unlock the door to the garden again and start all over.

-
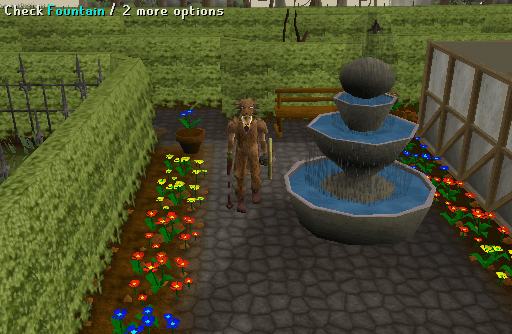
Walk along the hedges towards the fountain on the other end of the garden and check it to find a Key. Remember to stay hidden when the witch approaches.
Note: In order to obtain the Key from the fountain, you must have read the Diary and need to have it your inventory.
-
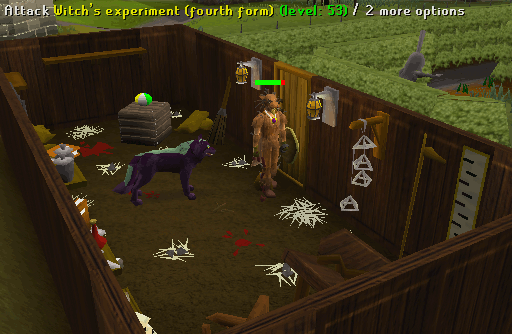
Return to the shed and use the Key to access it. When you enter it and try to grab the Ball, the Witch's experiment will attack you. You must have defeated all its four forms before you will be able to grab the Ball.
- 1st form: Skavid (level 16)
- 2nd form: Giant Spider (level 23)
- 3rd form: Bear (level 37)
- 4th form: Wolf (level 49)
Note: If you leave the shed during the battle (dying excluded), you will have to kill the Experiment's previous forms again. So make sure you have enough food to eat when you enter the shed. There is, however, a safespot between the sacks and a crate.
-
Once you have defeated the Experiment, grab the Ball. You can now make your way back through the garden or teleport out and return the Ball back to the Boy.
Note: Do not let Nora catch you otherwise she will take the ball from you and you will have to repeat the above steps!
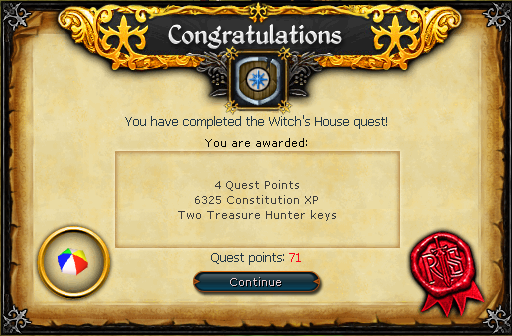
Congratulations! Quest Complete!
This Quest Guide was written by Gnat88 and Alfawarlord. Thanks to Fireball0236, DRAVAN, quaruki, Weezy, Deano, jc jc2, Keystone, Hotwheels_10, Gluten E, Carson Renee, Charg3dAx1om, AlexMLKlein, and Jarkur for corrections.
This Quest Guide was entered into the database on Sat, Feb 28, 2004, at 04:32:32 PM by Monkeychris and CJH, and it was last updated on Sat, May 23, 2020, at 12:23:07 PM by Alk12.
If anything is incorrect or missing, or if you have any new information to submit to this database, please submit it to us on our Content Submissions Forums.
If you see this guide on any other site, please report it to us so we can take legal action against anyone found stealing our content. This guide is copyrighted by RuneHQ, and its use on other sites is expressly forbidden. Do not ask if you can use our guides or images, the answer is and always will be NO!
Print this page with images - Back to the Quest Guide Index Page - Back to Top
