

*Toolbelt Works.
-
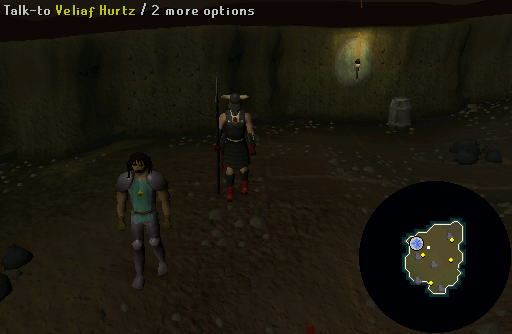
Head down the trapdoor at the back of Canifis' pub. Once downstairs, search the wall to the south to open a hidden door. Run south and squeeze yourself between the stalagmites along the eastern side of the tunnel. Talk to Veliaf Hurtz in the Myreque hideout and ask him about joining his group. He will give you a long speech about the history of Morytania. Afterwards, ask him about the job and he will tell you to check out the town of Burgh de Rott for a relocation of the group.
Note: The easiest way to reach Canifis is via the Canifis Lodestone Or by using the Fairy Ring code D-L-S.
-
Exit the hideout and travel south through the cave, and out the doors. Continue southeast through the swamp until you get to a wooden bridge suspended between 2 trees. Climb up the tree, walk across the bridge, and climb down the other side. Keep on going south until you reach the swampy boat to Mort'ton. Climb aboard the boat, and when you reach land, go southwest to a bridge that leads to the new city.
-
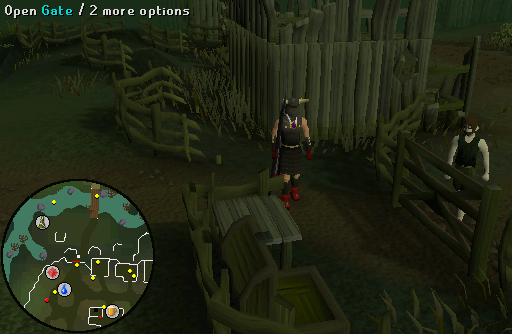
When you reach the city, attempt to open the gate only to find out that you are not able open it. Talk to Florin, wandering around near the gate, who complains about food and tells you to get out. Put a piece of food in the chest outside of the gate. Talk to Florin again and he will now grant you the access to the city.
-
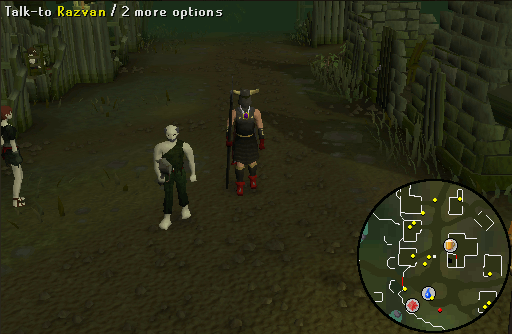
Enter the city and ask Razvan about a possible location or setting up a group. He will say that you can use the basement of the Inn if you clear the rubble.
-
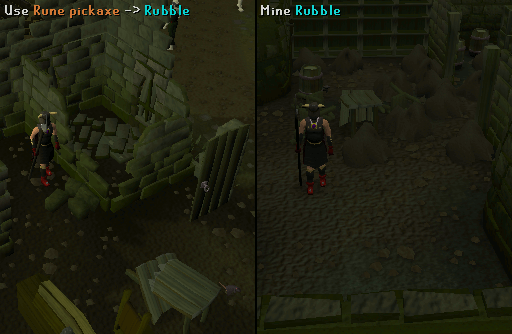
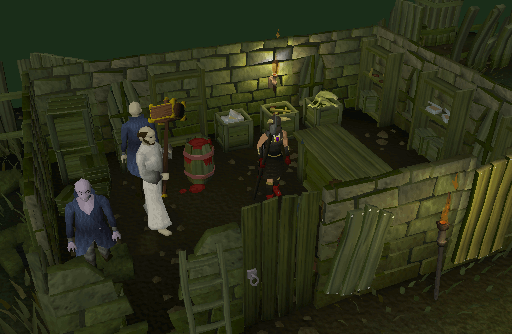
Enter the Inn and climb over the broken down wall. Mine through the rubble that is covering the trapdoor. Then enter the trapdoor. Once you have entered the basement, you will need to mine all 15 piles of rubble on the ground, each bucket can hold 3 piles of rubble, make sure you have inventory space. Some of the rubble piles will have various nails, Broken glass, and a Muddy rock. You will come across a Plaster fragment and a Dusty scroll. Once all the piles have been removed, a cut scene will occur, in which you will notice a plaque on the wall.
Note: If you leave the basement, the dust will turn back into rubble, which you will have to mine again. If you forgot to bring a bucket, one spawns near the well to the west of the Inn.
-
Read both the Plaster fragment and a Dusty scroll to learn more about the storyline of the quest. Leave the pub and tell Razvan that you want to help the city. He will tell you to go talk to Aurel, the general store owner, and help him fix his building.
-
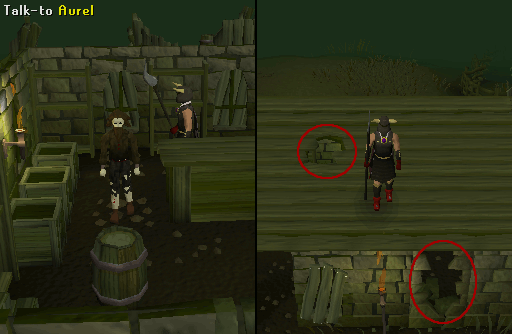
Head east to the general store and talk to its owner Aurel. He will ask you to fix the roof and one of the walls. Go up the ladder in the front of the building and repair the roof using a Hammer, 3 Planks, and 12 Nails. Go down, and fix the wall on the front using the remaining 3 Planks, and 12 Nails.
Note: If you completed the Shades of Mort'ton and forgot to bring a Hammer and Planks, then you may purchase these at the Mort'ton's general store.
-
After you have repaired the store, Aurel will want it stocked. He will give you a Crate and ask you to fill it with 3 Tinderboxes, 10 Bronze hatchets, and 10 Snails or 10 Mackerels. Leave the city for
Canifis. Once there, withdraw from the bank the items Aurel desires and put them into the Crate. Before you leave take the remaining 5 Planks, 20 Nails, and 1 Swamp paste out of the bank.
Note: Whether Aurel asks for 10 Snails or 10 Mackerels differs from player to player. The easiest way to reach Canifis is via the Canifis Lodestone. Or you can take the swampy boat into the swamp, for the fee of 10 Coins or for free if you have the Ring of charos (a) at your disposal. When you have reached the swamp, go down into the tunnels and up the ladder into Canifis' pub.
-
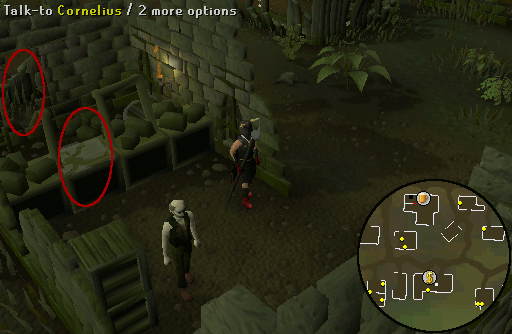
Return to the general store and give the Crate to Aurel. He will tell you to repair the bank. Repair the bank booth using a Hammer, 2 Planks, 8 Nails, and 1 Swamp paste. Head outside and repair wall with the remaining 3 Planks and 12 Nails. When you have repaired the bank, talk to Cornelius. He will ask you to recruit someone to become the banker. Talk to him again, and ask him if he fancies the job. He will accept your offer and take place behind the booth. From now on you will be able to access Burgh de Rott's bank.
Note: If you completed the Shades of Mort'ton and forgot to bring a Hammer and Planks, then you may purchase these at the Mort'ton's general store.
-
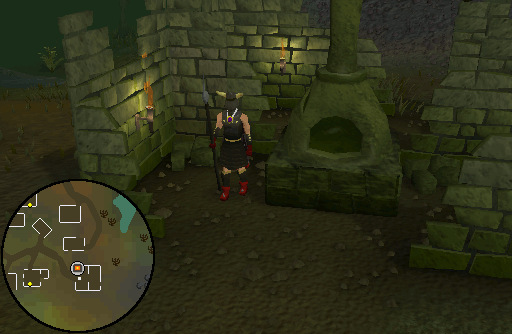
Talk to Razvan or any other villager, and ask them what to do now. They will ask you to fix the furnace. Take 2 Steel bars, 1 Coal, and a Tinderbox to the furnace. Use a Steel bar with the furnace to repair it. Now, put a piece of Coal into the furnace and light it with the Tinderbox. When you have lit the furnace, a cut scene with Vanstrom will occur.
Note: Watch out for Vyrewatches (level 75-78) along the eastern edge of the town.
-
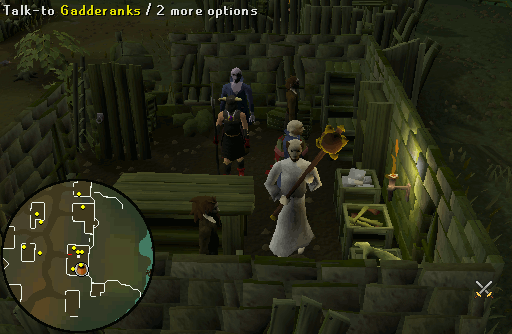
Now, you must prepare yourself for a battle. Make sure to bring a Silver sickle or a Silver sickle(b). Head to the general store and talk to Gadderanks. He will explain that he is taking the villagers' blood. Talk to Wiskit and then to one of the Vampyre juvinates. All of them will confirm the statement.
-
Gadderanks will interfere and try to kill you. Since he is only level 58, he is an easy target. Once he is dead, equip your Silver sickle or Silver sickle (b) and attack the 2 Vampyre juvinates (level 63) and (level 58) that try to protect him. Veliaf Hurtz will appear and help you in killing the 2 Vampyre juvinates.
Note: You must kill the 2 Vampyre juvinates with a Silver sickle or a Silver sickle(b).
-
After you have killed them, Gadderanks will tell you about vampires being scared of Garlic, Silver dust, Clean harralander, Red spiders' eggs, and the potion you make with them. He will then die. After he is dead, Aurel will give you the Gadderhammer, left behind by Gadderanks. Now, talk to Veliaf Hurtz who will tell you to meet him back at the Myreque Hideout to organize his group. Before you leave Burgh de Rott, go to the bank and prepare yourself for a battle. It is also recommend that you withdraw a Steel helm, Steel chainbody, Steel platelegs, Silver sickle and 15 Cooked Stews/Salmon/Slimey eels/Snails as they are recommended in one of the following steps.
-
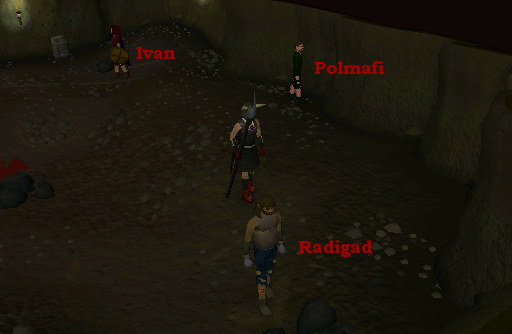
Head back to the hideout and talk Veliaf Hurtz there. He will ask you to tell Polmafi Ferdygris and Radigad Ponfit to go to the new hideout in the basement of Burgh de Rott's pub and to take Ivan Strom to the temple of Paterdomus. Talk to Polmafi or Radigad and they will inform their companion about it.
-
This step is optional, but if you wish to allow Ivan Strom to defend and heal himself during the next step, you must do this step. Use one of 15 Cooked Stews/Salmon/Slimey eels/Snails on him and he will either accept it or tell you that he likes a different kind of food. You can also give him a Steel helm, Steel chainbody, Steel platelegs, and a Silver sickle to increase his defence.
-
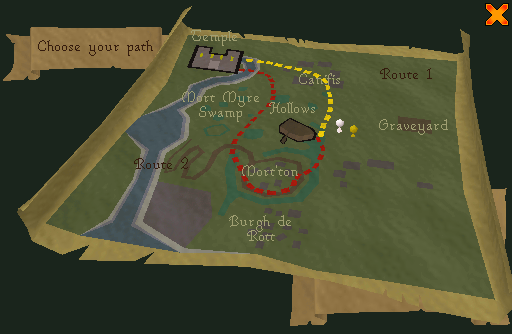
Now, talk to Ivan Strom and he will tell you to lead the way. Choose one of the two routes, as shown in the image below.
NOTE: Do not fear for your items. If you die, your gravestone will apper next to Ivan back in the hideout
On the shorter route you may get attacked by 2 Vampyre juvinates (level 68) whilst on the longer route you may encounter 4 Vampyre juvinates (level 70). It is recommended that you take the shorter route as you will only have to deal with 2 Vampyres. If you do get attacked, try to position Ivan close to the exit and yourself in front of him to prevent the Vampyres from attacking him.
Note: If you fail to escort him to the temple, simply "escape" from the fighting area and talk to Ivan again at the hideout. Also, you must have a Silver Sickle with you or you cannot defeat the Vampyres and continue.
-
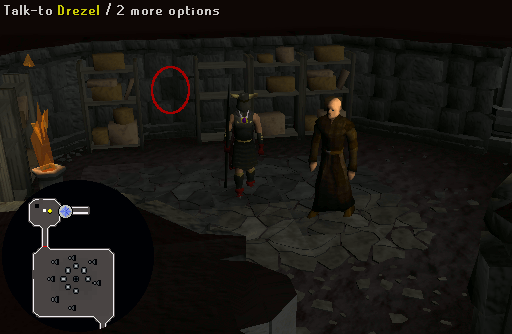
Once you have brought Ivan Strom to the temple, talk to Drezel about Ivandis. If you talk to him long enough, he will give you the key to the secret Temple library key. Use the key with the keyhole on the eastern wall to unlock the trapdoor nearby.
-
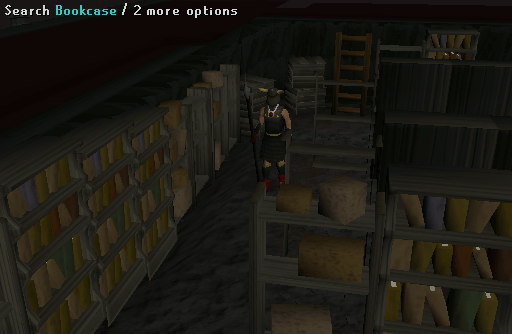
Go down the trapdoor into the library. Search the bookcases for The Sleeping Seven and read it. You may also come across a Battered tome and a Leather book. Both books contain more information about Morytania, but you are not obliged to read them for the quest.
-
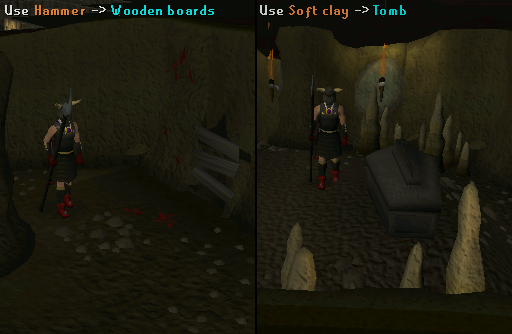
Head to Canifis's bank and withdraw a Hammer, Soft clay, Sapphire, Mithril bar, Silver bar, Rope, Water rune, and a Cosmic rune. Go down into the Myreque tunnel again and use a Hammer on the boarded up hole to uncover it. Walk east to
Ivandis's tombstone and use the Soft clay with it to produce a Rod clay mould
-
Take the Rod clay mould, Sapphire, Mithril bar, Silver bar, Water rune, and Cosmic rune to a furnace. Use the Silver bar with a furnace to smith a Silvthrill rod. Now cast a Enchant level 1 jewelery spell on it to create an enchanted Silvthrill rod.
Note: The nearest furnace, the one which you fixed a few steps ago, can be found in Burgh de Rott. If you're not on the normal magic spell book you can buy an Enchant sapphire tab instead of switching spell books.
-
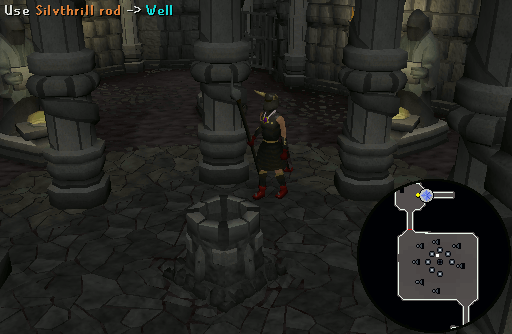
Head back to the basement of the temple of Paterdomus, and use the enchanted Silvthrill rod and Rope with the well to transform it into a Rod of ivandis.
-
Head back to Burgh de Rott and give the Rod of ivandis to Veliaf Hurtz in the basement of the pub, which now functions as the new Myreque hideout.
Congratulations! Quest Complete!
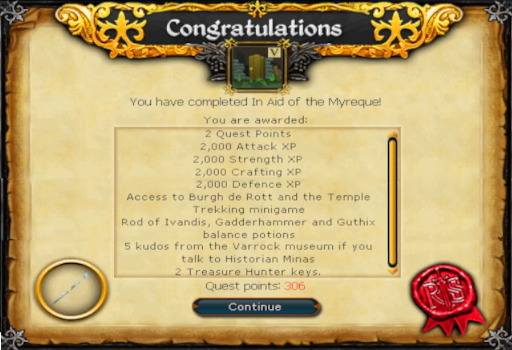
Rod of Ivandis and Guthix balance potion:


With the completion of the In Aid of the Myreque, you unlock the ability to kill Vampyre juvinates and Vampyre juveniles. To kill them, you must first get them down to 1/3 of their health using any kind of weapon. You then use the Rod of ivandis's special attack to freeze them. Once frozen use a Guthix balance potion on them to finish it off. They then will then either die completely, turn into a human and give you a reward, or become a stronger Vampyre Juvinate that you have to fight.
This Quest Guide was written by Meowmix686, Tenseiken, and Alfawarlord. Thanks to Bombmagnet2, Fancynance, Budmash, trekkie, HvBurrito, count earnil, mstreefland, beau champ, GodsWorship, darkalice, Zevenberge, Inaithnir, Jimmy839, ape aaron, Cricket55416, axeking187, Im4eversmart, smartyarty256, dark_rage321, Watsermetjou, yuan43, poj7326, Sw1ndla, carduel, Random605, Stumbler69, tafkan, Sir_Karamu, Elite_Lancer, LogGamer, p4plus2, Gamblinjoker, Andro_Girl, Olorin, Chaosblade77, Mythiquedame, thinlizzy5, 2003 Veteran, Maith3, and Olllivander for corrections.
This Quest Guide was entered into the database on Wed, Mar 22, 2006, at 04:39:43 PM by Im4eversmart, and it was last updated on Thu, Sep 22, 2022, at 02:40:52 PM by Robbie.
If anything is incorrect or missing, or if you have any new information to submit to this database, please submit it to us on our Content Submissions Forums.
If you see this guide on any other site, please report it to us so we can take legal action against anyone found stealing our content. This guide is copyrighted by RuneHQ, and its use on other sites is expressly forbidden. Do not ask if you can use our guides or images, the answer is and always will be NO!
Print this page with images - Back to the Quest Guide Index Page - Back to Top
