

-
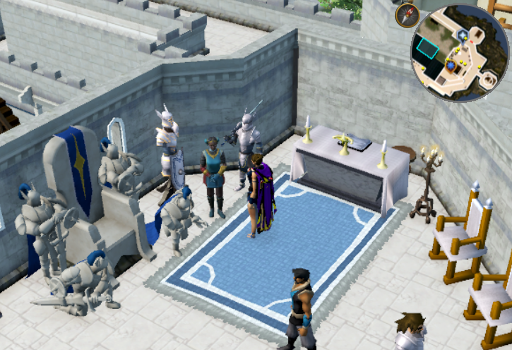
Talk to Adrasteia and accept the quest when prompted. You will be given a cutscene in which Adrasteia explains that the Zamorakians are falling into civil war without their leader on Gielinor. The people are divided heavily between those who favor Moia and those who favor Bilrach. Adrasteia wants you to hunt down Moia. After the cutscene, she will ask you to talk to an agent of hers who she has assigned to accompany you.
-
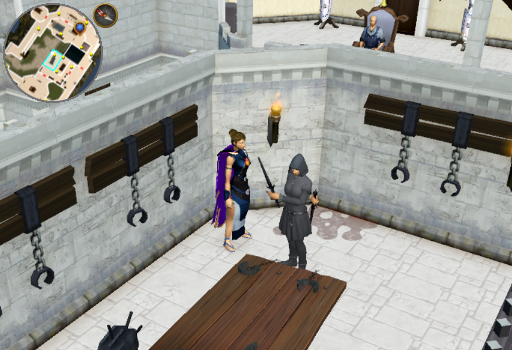
Descend the stairs from the throne room and make your way to the interrogation room, North West of the Library, where Adrasteia has been having the White Knights dispose of their literal dirty laundry. Talk to Anne Dimitri in the North cell and she will mention that she thinks Bilrach is a bigger threat than Moia and that Adrasteia's history with Moia is clouding her judgment. You are prompted to agree with Anne or Adrasteia, but orders are orders, so the choice is irrelevant. She will suggest meeting at the Wilderness wall North East of Edgeville.
Some quick words of reassurance: some of this will take place in the wilderness, but it will be an instanced version, so you will not encounter any other players, and even if you could, you can choose to opt out of PvP combat by talking to Vala near the Wilderness wall.
-
Make your way to the meeting place North of Edgeville/the Grand Exchange. The fastest methods are teleports to the Grand Exchange (such as a Grand Exchange Teleport, Ring of Wealth, or Luck of the Dwarves) coupled with the agility shortcut on the North West wall, the Wilderness sword teleport, and the Edgeville lodestone. Talk to Anne and, when prompted, say you are ready to enter the instanced version of the Wilderness.

-
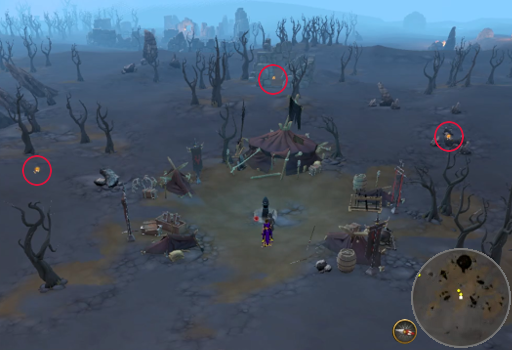
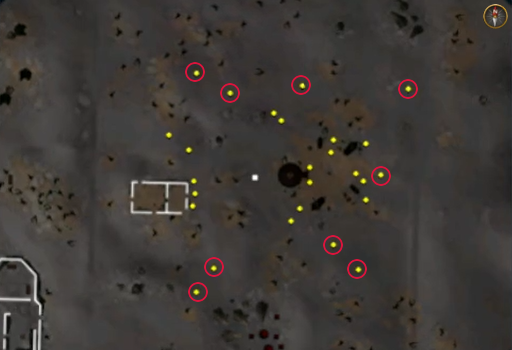
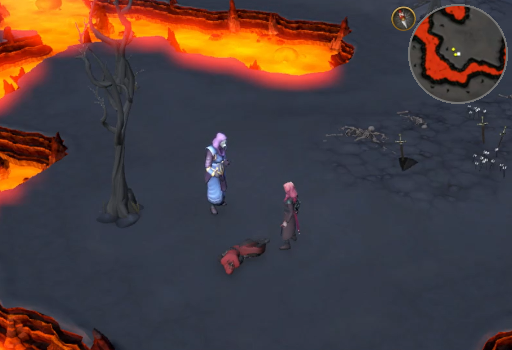
Entering the instance will put you at an abandoned Warbands camp near the Red Dragon Isle where you will have a short discussion with Anne. When it concluded she will run to the faded memory at the center of the camp which she believes is from Moia. Anne says the memory is too weak in its current state, but she knows some magic that could strengthen it. She needs you to find things in the area that resonate with the memory. On the minimap you will be able to see three additional yellow dots ("Point of interest") beyond the faded memory and Anne. Those are the things you must inspect for the purposes of Anne's spell. Inspect all three of them and then return to Anne.
-
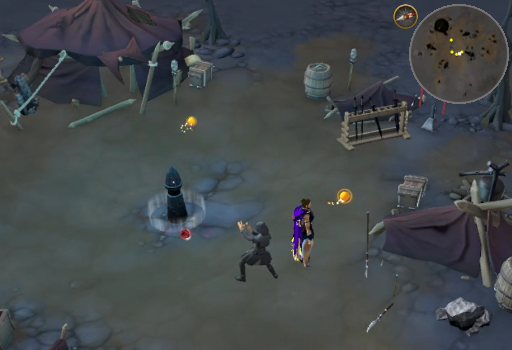
Talk to Anne Dimitri. After some babbling, she will say that she's going to draw out nearby memories and she will need you to capture them for her. Once you say you are ready and end the dialog, memory fragments will begin to appear around the camp. Capture 6 of them and talk to Anne again. She will tell you that she has gotten the memory about as stable as she can, but the next part is up to you because she's "not touching Moia's psyche with a ten-foot pole."
-
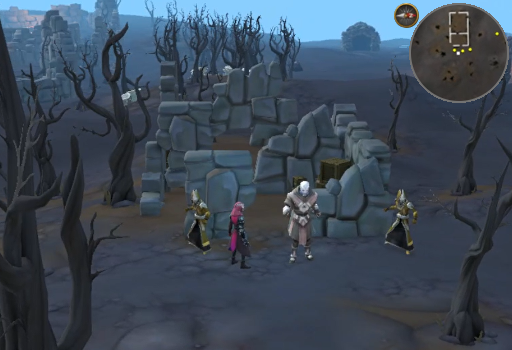
Interact with the memory and the scenery will change, as will you. For the duration of your time in her memory, you will control Moia. Make your way through the camp to the West and talk to Bilrach by the ruins. After Moia updates him on her exploits regarding their current mission, the camp will be attacked by demons and some of their human followers. You will need to control Moia to defeat 9 of the enemies to progress. Her basic attacks deal 9,000 damage to her target and she has access to three abilities (on hotkeys 1-3):
- Vault: Dash to the target location or enemy, dealing damage in a small area on arrival. 5 second cooldown.
- Drain: Channel to drain life points from your current target. Moving or performing another action will interrupt this ability. 8 second cooldown.
- Blast: Deal heavy damage to all nearby enemies. 18 second cooldown.
Should you be slain as Moia, you will return to Anne at the Wilderness entrance and be given the choice to try this fight again at an easier difficulty (50% less damage) or the same difficulty. However, this fight can be done fairly easily. Try to attack only one at a time, using Vault to reach them and then just repeatedly using Drain. Each time you kill an enemy, they will drop a health orb, which will heal you for about 25% of your total hitpoints; these will disappear if they are not used. Note that you can also rest here to help slowly regain some health if needed.
Once you have defeated your 9 enemies, the remaining battles will vanish.
-
Talk to Bilrach again. He will curse K'ril for his betrayal and order you to find and eliminate whoever has been planning the attacks on them. When the dialog ends, you will be ejected from the memory and relay all you learned to Anne. Complete the dialog and you will find yourself at the Red Dragon Isle with Anne.
-
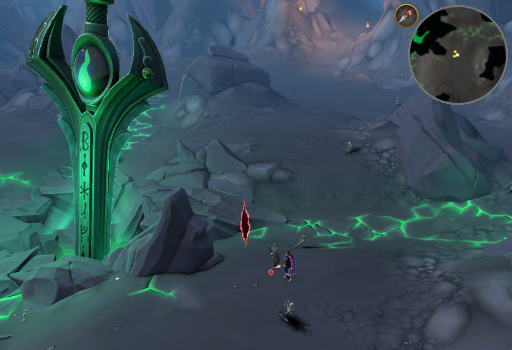
Continue talking to Anne. You will be given some optional talking points, but to progress you need only select option 4, "We should move on". Like the memory at the Warband camp, this one will require some Points of interest to strengthen it. The Points of interest can all be found on the Red Dragon Isle. Capture all 3 and talk to Anne. She will draw out more memory fragments for you to capture. Capture all 6 of them, talk to Anne again, and interact with the Restored Memory to enter Moia's memory once more.
-
Upon entering her memory, Moia will be using a communicator to talk with Bilrach. Once the dialog ends, you will be given another combat scenario like the one in step 6. Clear out all 6 of the enemies. Once again, for the best chance of success, try to fight only one at a time.
-
Once they are all dead, head to the South West corner of the Red Dragon Isle and talk to the Wounded Cultist to learn that Avaryss, one of the Twin Furies, is coordinating K'ril Tsutsaroth's attacks from the Infernal Source. Adrasteia will appear to confront Moia, but turn out to be Trindine in disguise. She will offer assistance in the form of a diabolus/phylactery to trap Avaryss' soul, although it's clear that her intention is merely to prolong the civil war. After Trindine leaves, Moia will then update Bilrach on the situation, but she will omit the encounter with Trindine from the conversation. Once the dialog is over, you will once again be ejected from Moia's memories and Anne will ask you to tell her what you learned.
-
When the dialog ends, you will be taken to the center of the Wilderness, where the Sword of Edicts first crashed. Finish conversing with Anne, follow her to the memory near the Sword and speak with her again. Once finished, interact with the Restored memory to enter Moia's memory yet again.
-
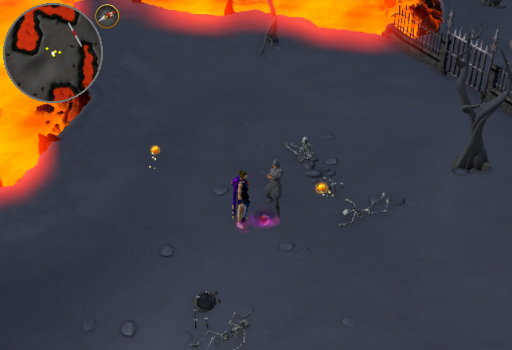
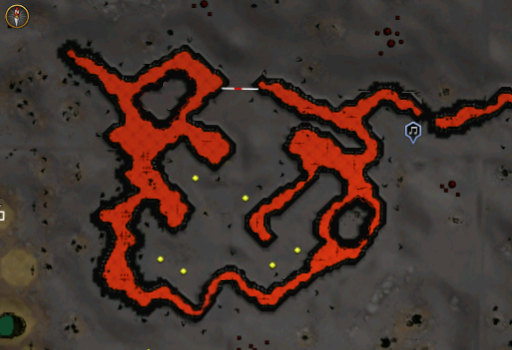
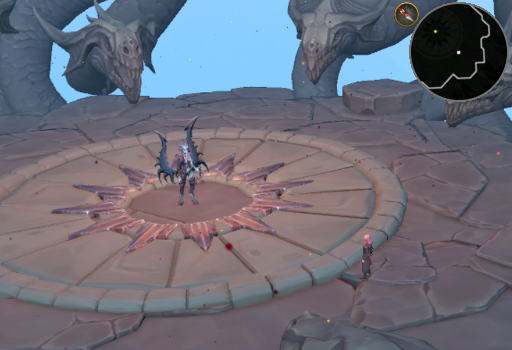
You will find yourself as Moia at the center of Dagon's Prison. Talk to Avaryss and you will rapidly enter a final fight as Moia. Avaryss will call on 4 chaos demons, but Moia will use the diabolus/phylactery to trap them immediately. However, Avaryss will not be overcome that easily. In this fight, she has 500,000 hitpoints and will be using magic, unlike fighting the Twin Furies in the Heart. It is suggested to use Vault to dash to her, Blast immediately, and then just spam Drain and Blast until she dashes away. When she does, use Vault to close the distance, then continue using Drain and Blast as before.
After a while, she will dash around to 3 different spots in the arena. At the destination each dash, she will spawn a chaos vortex. Once she stops dashing, the vortices will start moving, dealing magic damage around them rapidly until they despawn about 20 seconds later. Use Vault to avoid them while staying in range of Avaryss.
Additionally she will summon 2 Chaos demons roughly each minute. DO NOT IGNORE THEM. If you let them pile you while you focus on Avaryss, they will ruin your day. Immediately work on killing them, using all 3 of Moia's abilities to clear them as fast as possible. Each one will drop a health orb, which you should use as soon as you see it. Once you have used both health orbs, carry on as before and finish Avaryss off.
Once finished, Avaryss will mock Moia as she uses the diabolus/phylactery to seal Avaryss away and you will be ejected from the final memory.
-
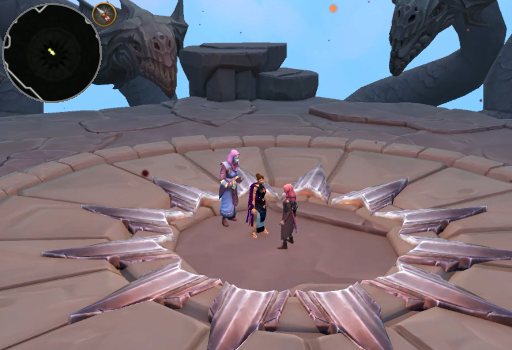
While you were in the memory, Anne will have gotten the hydraportal working and you will both join the real Moia within the arena. Talk to Moia and she will tell Trindine to drop the disguise. Shocker? Not really, it was pretty obvious. You will be given options of what to tell Moia, but they are irrelevant. Enjoy the short cutscene and you will find yourself where you met Anne/Trindine in the Wilderness. Finish the conversation with Trindine and she will suggest you report back to Adrasteia.
-
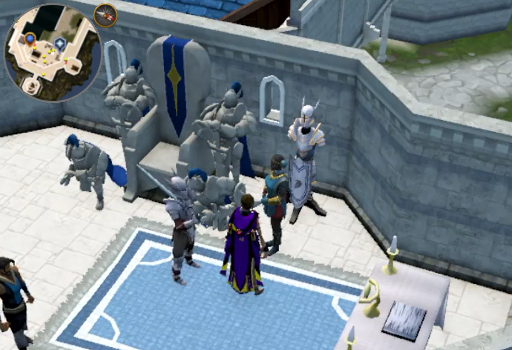
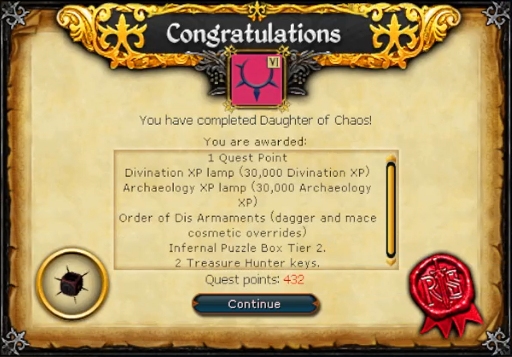
Return to Adrasteia in the Throne room of Falador Castle and talk to her. You fill her in on what transpired on your mission. Finish the conversation to receive your reward.
Congratulations, Quest Complete!
This Quest Guide was written by Sy Accursed, 3ter 1, and ChathMurrpau.
This Quest Guide was entered into the database on Mon, Aug 15, 2022, at 02:34:08 AM by Chath, and it was last updated on Sun, Aug 28, 2022, at 11:56:29 PM by Chath.
If anything is incorrect or missing, or if you have any new information to submit to this database, please submit it to us on our Content Submissions Forums.
If you see this guide on any other site, please report it to us so we can take legal action against anyone found stealing our content. This guide is copyrighted by RuneHQ, and its use on other sites is expressly forbidden. Do not ask if you can use our guides or images, the answer is and always will be NO!
Print this page with images - Back to the Quest Guide Index Page - Back to Top
