

Raksha, the Shadow Colossus
Desperate Creatures
Recommended Quest(s):
Desperate Measures| Slayer bell | Knife* |
| Master Archaeologist's Outfit *1 | Invitation box *2 | Sixth-age circuit *3 | Desert amulet (2 , 3, or 4) *4 | ||||
| Wicked hood *5 | Falador Teleport method | TokKul-Zo | Blank observation | ||||
| Food/Enhanced excalibur | Memory strand | Distorted engrammeter |
- Archaeology journal
- Skeletal horror teleport spell (requires completion of Fur 'n Seek Wish List)
- The Book of Char or 5 Metallic dragon trinkets (Teleport to Rune dragon, items consumed)
- The Heart teleport
- Traveller's Necklace
| Archivist's memory | Bik memory | Ful memory | Jas memory | ||||
| Wen memory | Charged observation | Saradomin summoning ritual | Silent bell | ||||
| Silent bell (blessed) | Restricted memory | Restricted engram | Trindine memory |
-
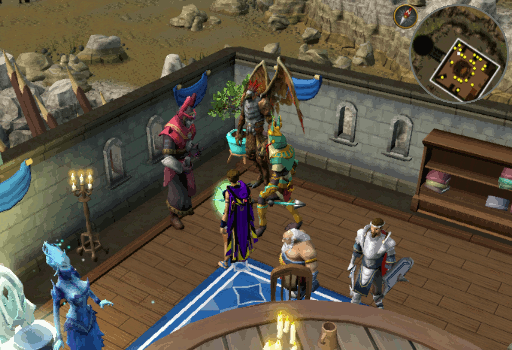
While speaking to Azzanadra, he will express his, Armadyl's, and Icthlarin's discomfort about Seren's influence. Accept the quest then some dialogue and a cutscene will ensue in which Azzanadra explains that the real threat isn't elder gods, but their unborn children and that you must prevent the elder god's eggs from hatching.
-
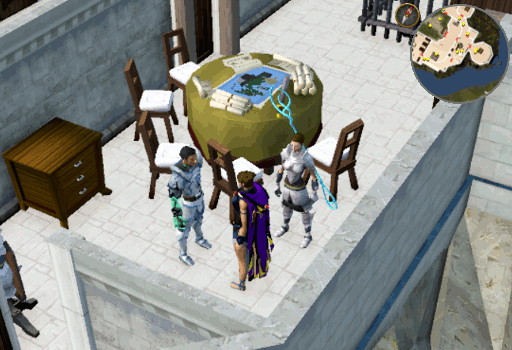
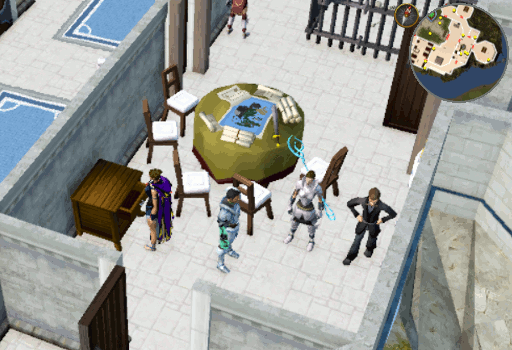
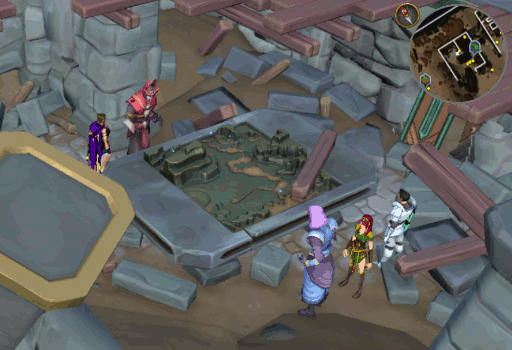
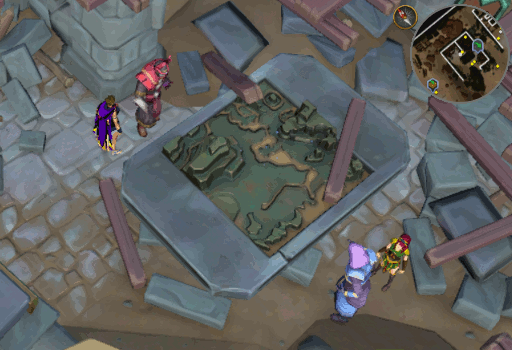
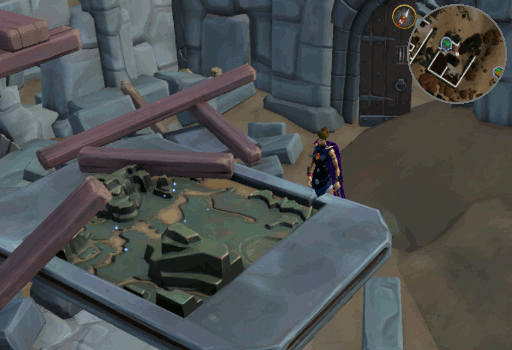
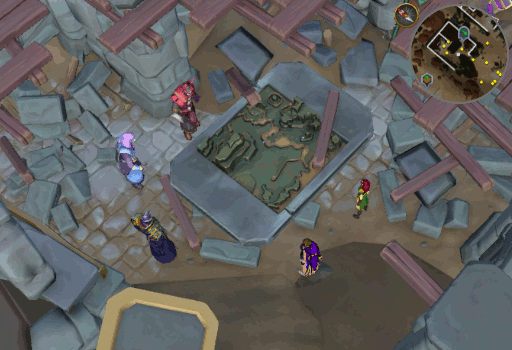
After a bit more dialogue, Azzanadra will ask you to meet him at Kharid-et. Use your Archaeology journal, outfit, or teleport to go get there. Enter the main fortress and head to the Praetorium war table. Here you will find Azzanadra talking to Trindine. After a moment, they will notice you have arrived and a discussion of your plan of action will commence. Following some dialogue, Azzanadra will tell you to meet him at the World Gate. Suspiciously, he will ask Trindine to hang on a moment as he has other orders for her, but you should run along to the gate where he will catch up.
-
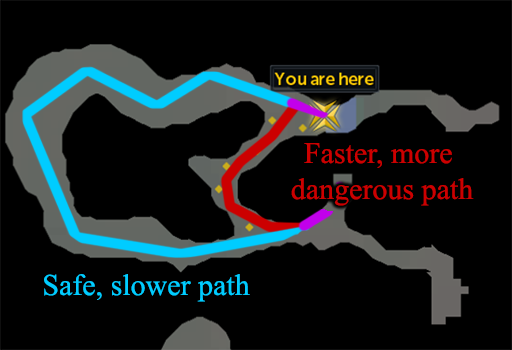
The fastest way to access the World Gate is with the Sixth-age circuit teleport or to teleport using The Book of Char, but the Eagle's Peak lodestone isn't far North if you do not have these options. Be sure to bring some food or other means of restoring health with you (Enhanced excalibur), especially players with lower levels, as well as the Distorted engrammeter and Blank observation if you have them.
Once you arrive, talk to Azzanadra again and he will tell you that you need to make your way back to the Elder halls in Freneskae starting at the Approach - no quick teleport to the Hall. Each time you see Azzanadra you will be required to speak with him, be sure to finish your conversation with him so that he will continue on to the next location - choosing "let's just keep going" (option 4) us the fastest option. To reenter the area after leaving, you will need to talk to him by the Gate before going through the portal. Note that you cannot use surge in this area of Freneskae and you will always start back at the beginning of the approach if you leave.
-
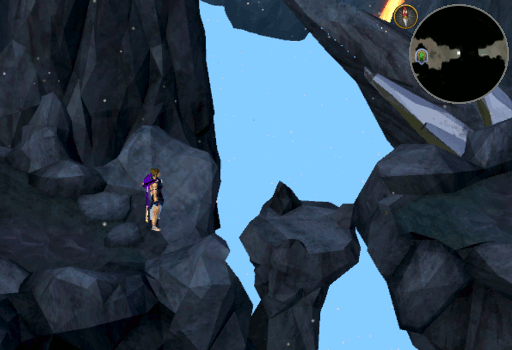
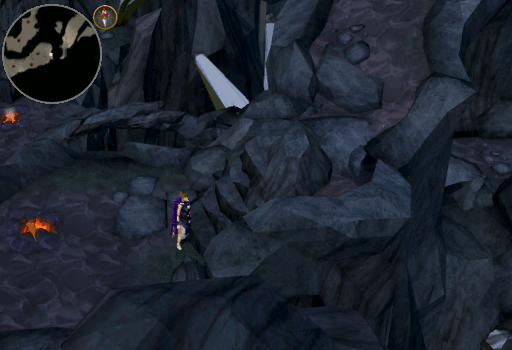
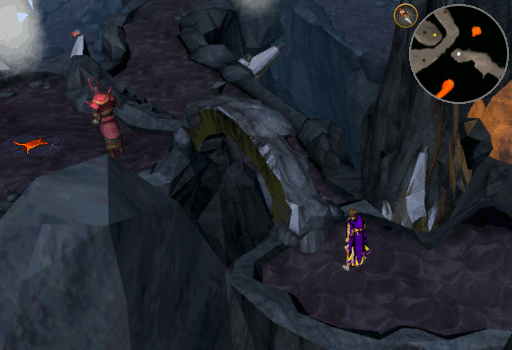
Start by running East and jumping from the ledges to the next major cliff face. You will need to click the area near your feet to jump across twice - one click per jump.
-
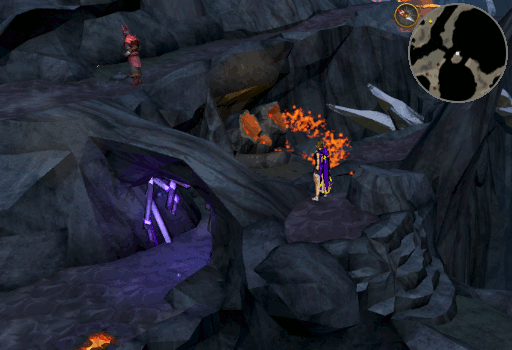
The path will split in two areas covered in volcanic vents. Take the Southern path and climb up the cliffside. Note that standing near and running closly past/though the vents when they erupt will deal damage to you.
-
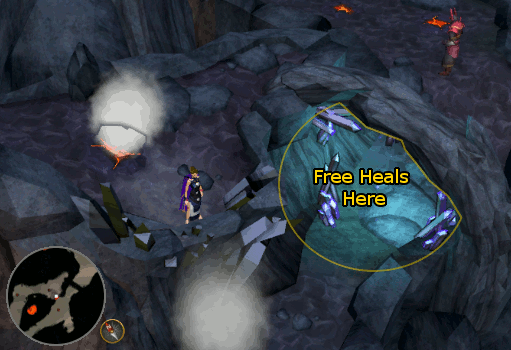
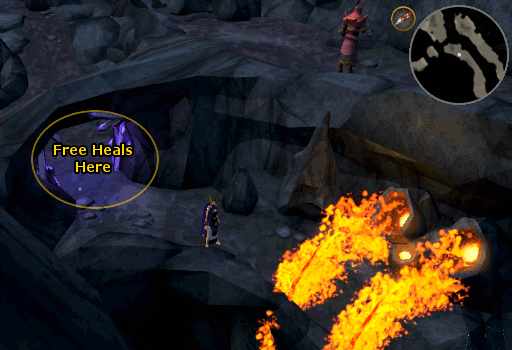
Continuing East, the path will curve slightly north with two more vents and end in a drop you must climb down. On the other side of the drop will be an arch with some light beneath it, standing within this area will heal you 10% of your total health per tick.
-
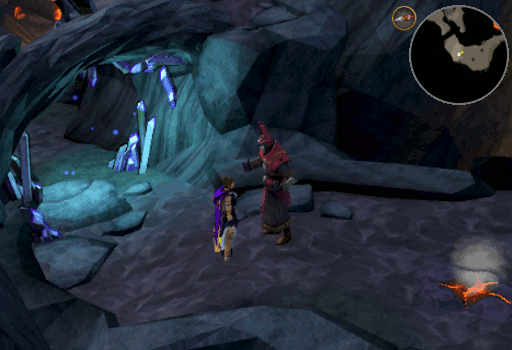
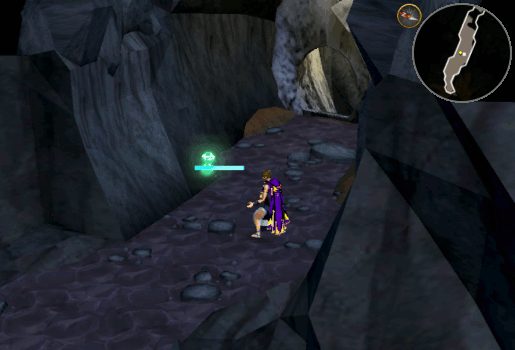
A handful of paces North West you will find Azzanadra. Choose any of the discussion points and he will conclude by teleporting further along the path.
-
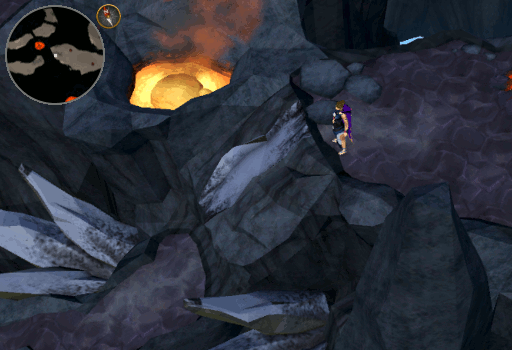
Walk North past the two vents and you will find some stepping stones to the West. Cross them then climb the cliffside just beyond.
-
Atop the cliffside, you will find a circular platform with a vent and a path that leads East. Follow it East until it turns North and continue to the end of it. At the end, there will be an overhang that you can wall run across to meet Azzanadra. Talk to him again until he teleports to the next spot.
-
On the North side of the platform where you just spoke with Azzanadra there will be a cliffside to the East. Climb down it.
-
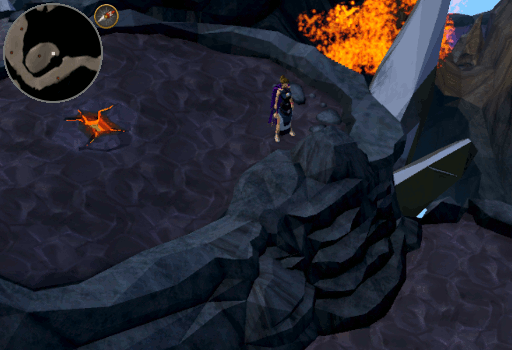
Once you are off the cliff side, avoid the vents as you go South and then make a turn to the West. The path ends in a slope that you must slide down.
-
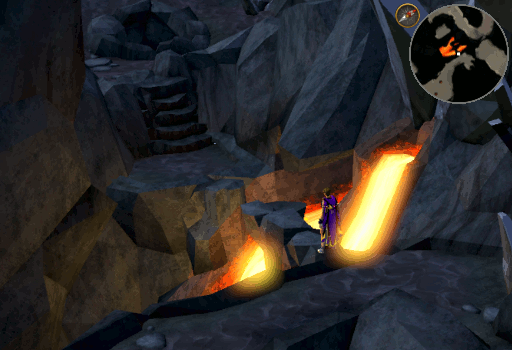
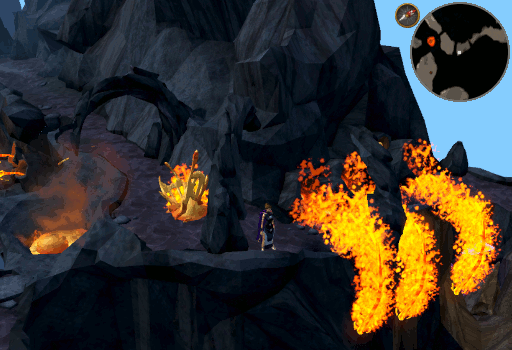
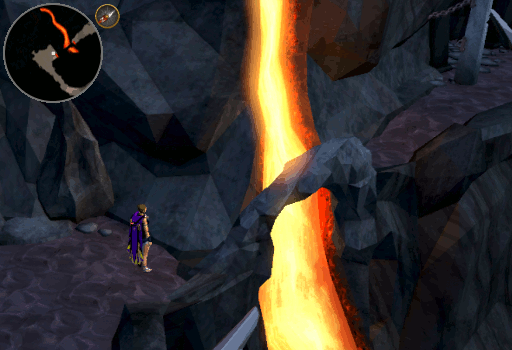
At the bottom of the slope, there will be two holes that jet out lava. The best way to handle these is to simply walk through them if you have over 3,000 hitpoints remaining, as on the other side is another arch where you can heal - note that you will need to spam click as you will stop when hit by the lava. Otherwise, wait until both of them spurt fire then run across. This will minimize the number of times they can hit you if you time it right. Be sure to heal up in the arch - this is the last one.
-
This next part can be done two ways depending on your hitpoints and your patience as they both lead to the same spot. If you just want this done and you aren't all that worried about your hitpoints, take the first path heading South - covered in vents. Otherwise, follow the path continuing West. Once you have passed the place where the paths meet up again, continue East and take the path that turns North.
-
After climbing the cliffside, walk across the formation to meet with Azzanadra. Talk to him for the final time in the Approach before continuing on.
-
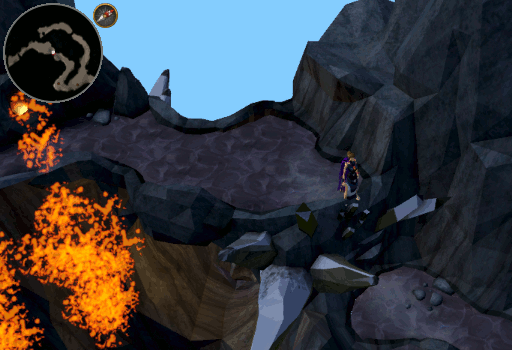
Head East along the path. At random intervals, the lava pool below will spurt lava along the path, so be wary of that. Right before the path turns North there will be two arches. Contrary to what you might think, they DO NOT provide cover from the lava. Like the wall near the last healing arch, you will now encounter 3 more lava jets along your path. Either spam-click them and hope for the best or attempt to time it so you can minimize the damage.
-
Once past the lava jets, the path will come to and end. Along the East side you will be able to climb down a drop.
-
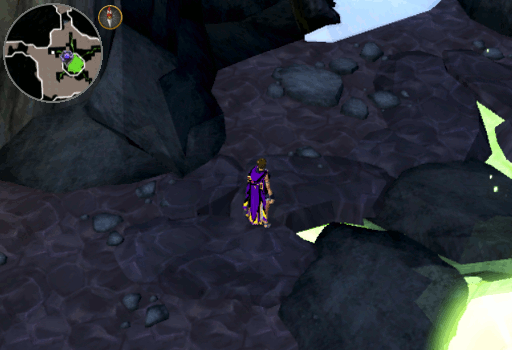
Follow the path, passing two vents, and take the Eastern path when it splits. It will come to an end at a rock bridge that you must traverse.
-
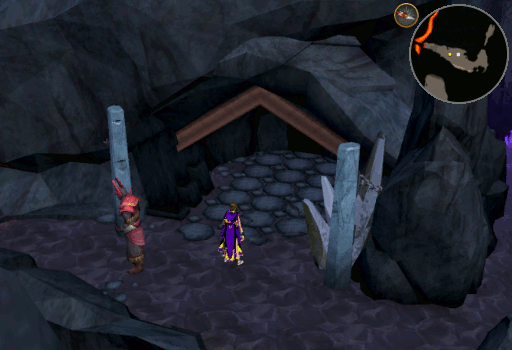
Azzanadra will be waiting on the other side of the bridge. You don't need to talk to him, simply enter the opening to skip through the other parts of Freneskae and straight to the Elder Halls.
-
Start by running East and jumping from the ledges to the next major cliff face. You will need to click the area near your feet to jump across twice - one click per jump.
-
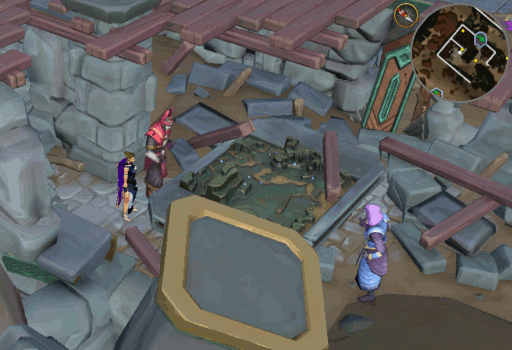
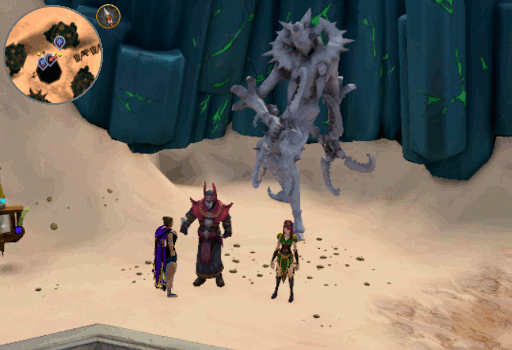
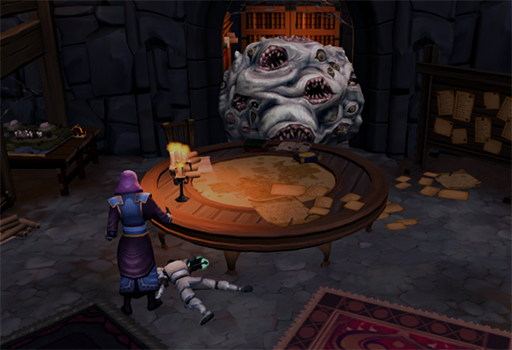
Upon entering the halls you will find that Ariane is there. She apparently had some visions after Xenia died and believes Gielinor is under threat. After some brief discussion so that you are all on the same page, Ariane will suggest examining the egg fragments closely. Azzanadra mention there is one at the end of each hallway.
-
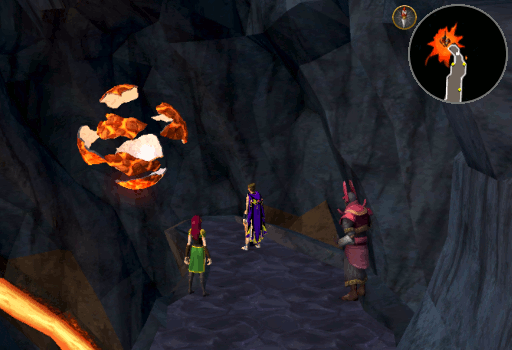
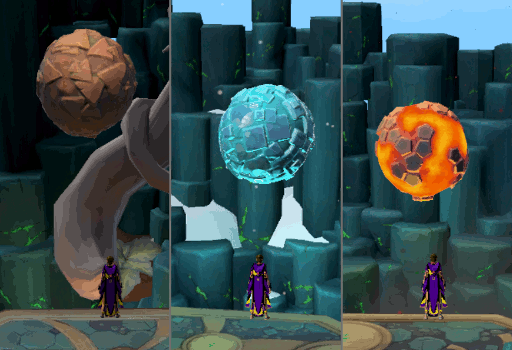
Head down each hallway and inspect the fragmented spheres. Each one will trigger a cutscene conversation between the three of you. Some speculation about the nature of the Elder gods will occur, but nothing more. Head back to the center and talk to Azzanadra.
-
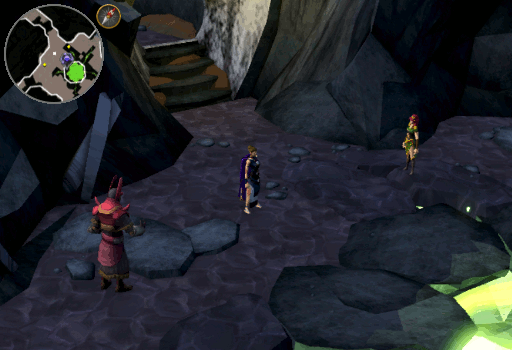
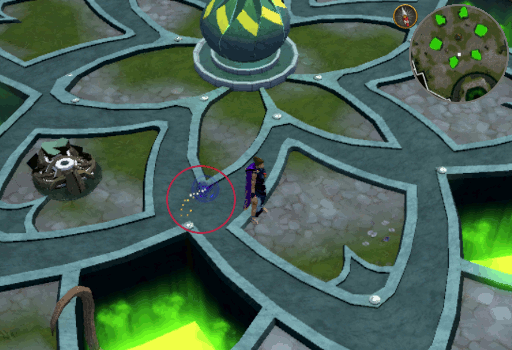
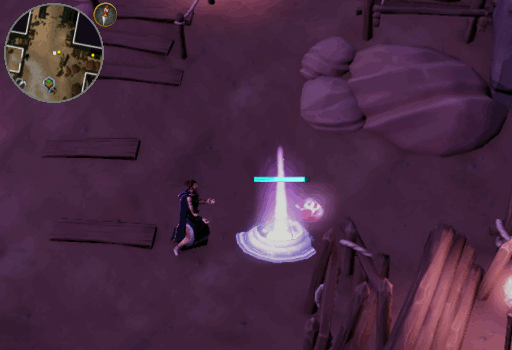
If you kept your Blank observation from the Heart of Stone, you will need it now. If not, no worries, Azzanadra will give you a new one. In each hall, there is a wisp related to the elder god whose egg resided within it. Gather memories from each of them until you have 50 of each: of Bik, Ful, Jas, and Wen memories (they stack). These are Mah's memories of these elder gods, so there aren't any for her.
-
Once you have all of the memories, inspect the Blank observation and it will absorb them, creating a Charged observation. Talk to Azzanadra and he will take the Charged observation. He will fail to learn anything, but Ariane will try and get a lot of information which she will present to you in cutscene form. The short version is that the eggs hatched, sucked all life out of Frenskae, and laid new eggs in Gielinor, which will bring the same fate in time.

-
After some conversation, Azzanadra will tell you to meet Trindine in Falador to get the Saradomin Crown to help them locate the eggs before he teleports away. At that point, you will be greeted by two voices: one light and one shadow. They are... something, but they won't tell you what and they live in your head. WOO!
-
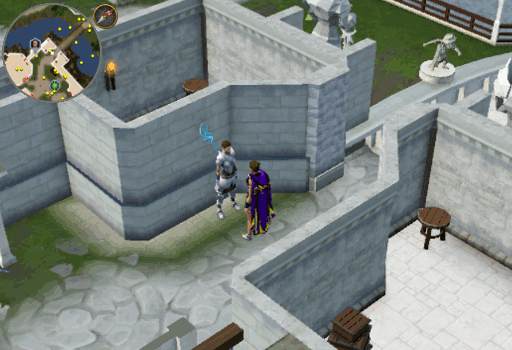
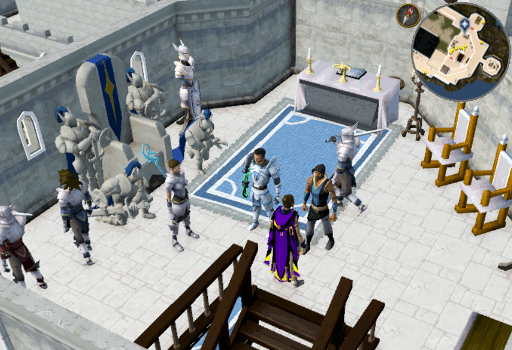
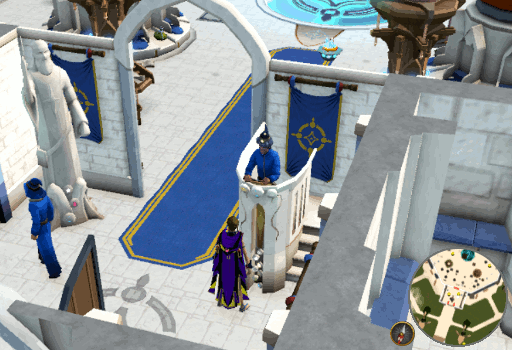
Travel to Falador Castle and you will be called over by Sir Upticious, who is right by the entrance. Well, it's actually Trindine, but she's incognito! She will ask you to investigate Saradomin's throne room upstairs while she investigates other locations.
-
Enter the castle to the East and take one of the ladders to the second floor. From here, walk West into the room with Sir Renitee and climb the stairs into the throne room. Talk to Father Frith and you will learn that Saradomin is out traveling right now, but he has a temple knight here. Go back down the stairs and then the ladder to the East and you will find Sir Owen with Trindine in disguise.

-
Talk with Sir Owen about his frustrations and he will leave to confront Father Frith in the throne room after you explain why you need to speak with Saradomin. Return there and talk to Father Frith.
-
He will be stubborn and insist that him contacting Saradomin to bring him back isn't his decision and that you should take it up with Sir Amik Varze.
-
Climb down the stairs and head to the West tower then climb to the third floor and talk to Sir Amik Varze. Regardless of what you tell him (you have the option to lie), he will tell you he won't ask Father Firth to call Saradomin back unless Padomenes says it's okay to do so. Once you finish talking to Sir Amik Varze, you will move out of earshot of him with Trindine and Sir Owen where the rant about the beaurocracy will briefly continue.
-
Return to the ground floor then step out into the courtyard and talk to Padomenes. This will prove to be another step in the bureaucracy because he will insist that he can't help you until the white knights have better armor and Sir Vyvin is being difficult about it - this is slowly becoming "One Small Favor" after another.
-
Return to the Throne room upstairs and continue the bureaucracy with Sir Vyvin. Long story short, he will insist that he "can't" give out any new armor until it has been blessed by Saradomin despite the fact you need the armor to call him back. Sir Owen will have another outburst and claim that if there is a ritual to call Saradomin back then it must be written down somewhere. The three of you will abandon the bureaucracy route and forge forward to the ritual on your own!
-
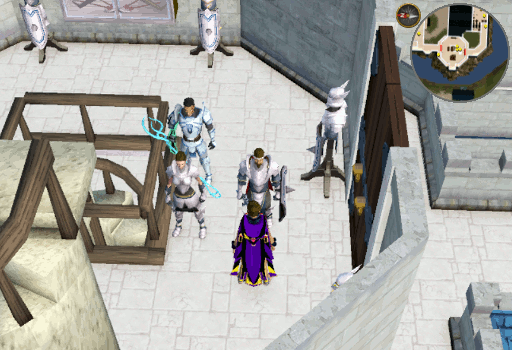
Climb down the stairs then the ladder to the East and return to the room where you found Sir Owen. Search the cupboard behind him for ritual forms. Unfortunately, none of them will be what you are looking for and all Sir Owen will have found is a reference to Saint Elspeth's birthday. This will suddenly cause Sir Owen to remember that a safe has recently been installed in Sir Renitee's office, perhaps the birthdate is a hint to the code!
-
Climb the Eastern ladder again and enter the room to the West which overlooks the Courtyard. Along the Northern wall, you will find a safe. Simply click it and Sir Owen will open it to find the Summoning ritual instructions. After some dialogue wherein Sir Owen will correctly surmise Trindine's identity, you will split up the tasks for the ritual to call back Saradomin.
-
At this point, go get your Slayer bell if you don't have it with you already and head over to the temple in Paterdomus. The fastest method is to use the Skeletal horror teleport or the Invitation box (using the Invitation box, you will need to open it twice). Go into the basement of the temple via the mausoleum and head to the well in the central chamber. Right click the slayer bell and select cut clapper to create a Silent bell. Use the Silent bell on the well to bless it, thus creating a Silent bell (blessed). After all that nonsense, you can finally get a hold of Saradomin.
-
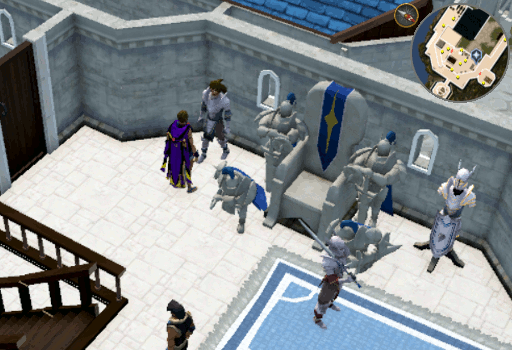
Return to the Throne room in Falador Castle then ring the Silent bell (blessed) three times and call out Saradomin's name each time you are prompted. You will be given some talking options and you must say the following things in this order:
- The world is in danger.
- We are concerned about Seren.
- We need to find the eggs.
- We need your crown.
-
Return to Azzanadra at Kharid-et and speak with him. After some discussion he will send you and Trindine to seek out the TokHaar, Guthix, and the Saradomin Wizards. Guthix may be dead, but his memories live on.
-
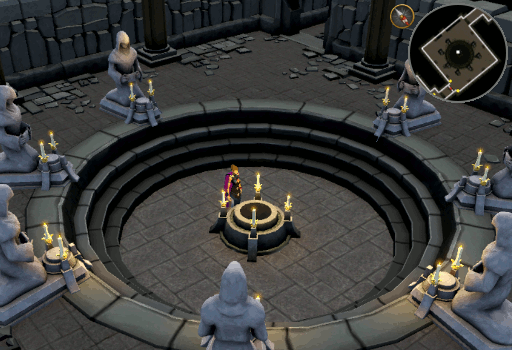
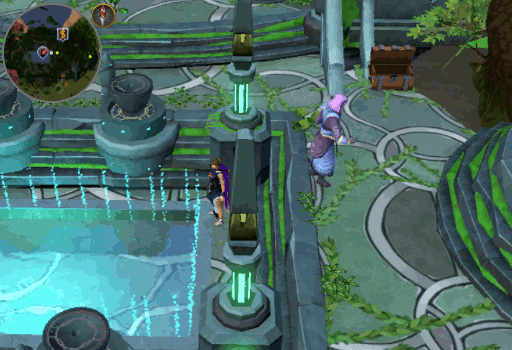
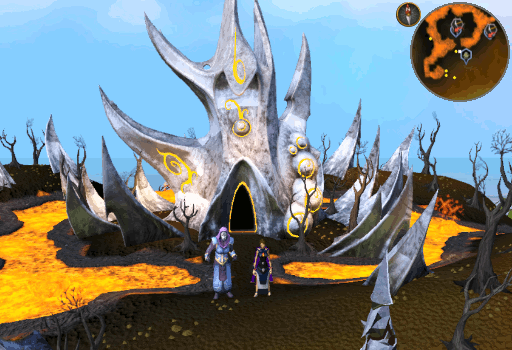
Travel to the Memorial to Guthix (quickly reached via Memory strand teleport) and enter the Hall of Memories by stepping into the pool and continuing the quest when the game prompts you. The Archivist will attempt to activate defense protocols, but you can stop it by telling it to reboot after several failed attempts to confuse it (it doesn't matter which options you choose when prompted). It will flag Trindine as friendly and release 6 Archivist's memories into the room.
-
Capture the memories and then talk to The Archivist. It will start booting back up. To make it boot faster, spend some time talking with Trindine. Once you have exhausted the dialogue, it will release six Restricted memory into the room.
-
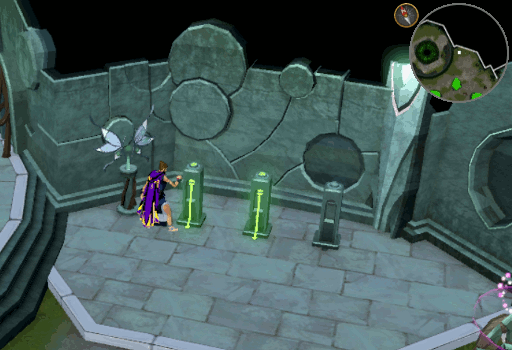
Capture the Restricted memory and use them on the plinths at the North end of the room - 3 on the East and 3 on the West. The memory bud in the center of the room will open, but no memory will appear. Search the memory bud to receive a Restricted engram.
-
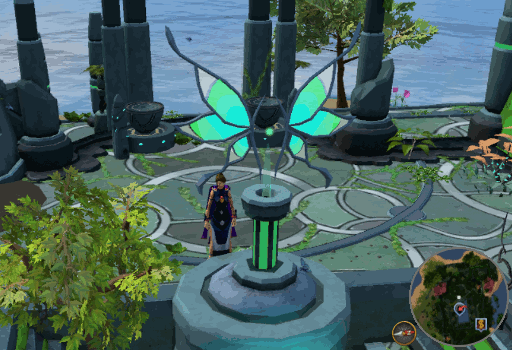
Trindine will question what you have, after explaining that it needs to be used on the Fountain of Energy outside, she will tell you to go outside to take care of that while she double checks that you didn't miss anything within the Hall of Memories. Exit via the pool to the South and use the engram on the Fountain of Energy outside. It will reveal that Guthix planned his death to stand against the threat of the elder gods, but will not reveal anything new about the eggs.
-
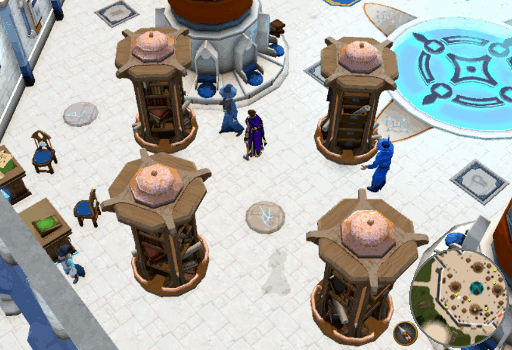
Travel to the Wizards' Tower and you will be met by Trindine, alias Wizard Trindy, at the entrance. After vouching for "Trindy", Wizard Valina will let you in. Once inside Trindine will suggest that she look through the East shelves while you look through the West shelves. Look through the four shelves on the West side of the hall and enjoy some banter from the weird things inside your head, then talk to Trindine again.
-
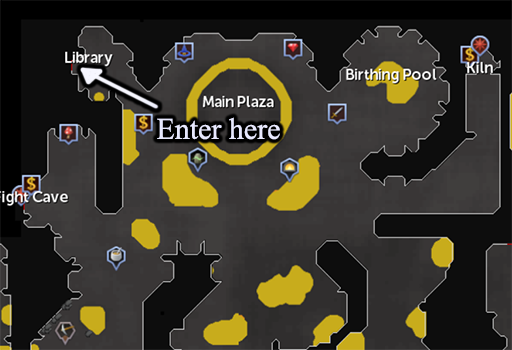
Go to Karamja and meet Trindine outside the entrance to TzHaar City. After a short chat, enter the city and you will be met by TzHaar-Ga'al-Kot who will inform you that the "TokHaar are at the main plaza". Head over there and talk to TokHaar-Hok. Trindine and TzHaar-Ga'al-Kot will check out the library while you chat with TokHaar-Hok. TokHaar-Hok's mind, so to speak, has been taken over by "the TokHaar" who is the sacred lava, the Kiln. They know of the Elder Halls on Gielinor as they helped shape it but they will refuse to tell you the location.
-
Head to the library in the North West corner of the city, enter it, and talk to Trindine. She will tell you that they have not found anything useful and translating everything in the hopes of finding something useful would take a very long time. With all your objectives sorta-kinda completed, return to Azzanadra in Kharid-et.
-
Upon your return, you will find Sir Owen missing and Ariane unconscious. Talk to Azzanadra and, after a bit of dialogue explaining what has transpired, Ariane will wake up and tell you that the eggs are in The Heart of Gielinor. Azzanadra will tell Trindine to find Sir Owen while the remainder of you locate the eggs.
-
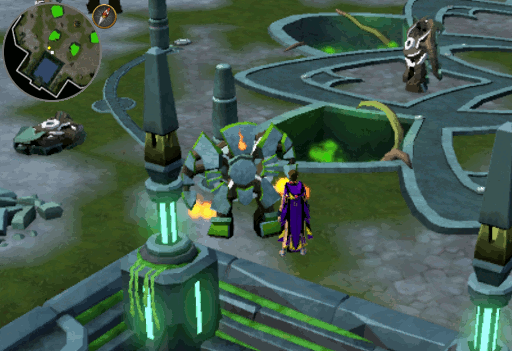
Travel to the The Heart of Gielinor and talk to Azzanadra outside. He will inform you that Zamorakian and Zarosian forces have left The Heart and the only forces remaining are Gregorovic and all of Seren's. Enter The Heart and continue the quest when prompted.
-
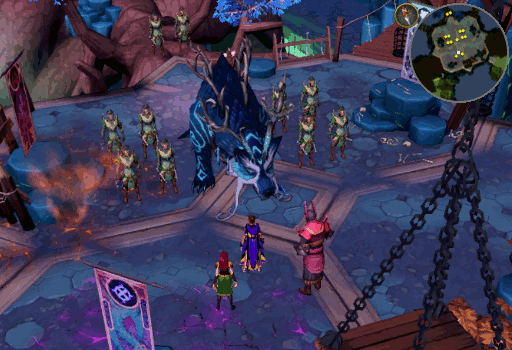
Upon entering The Heart you will be met with Helwyr and the other Seren forces. After some arguing, Gregorovic will appear and start a brawl which he will take elsewhere. With the others gone, Ariane will open the entrance to the Gielinorian Elder Halls.
-
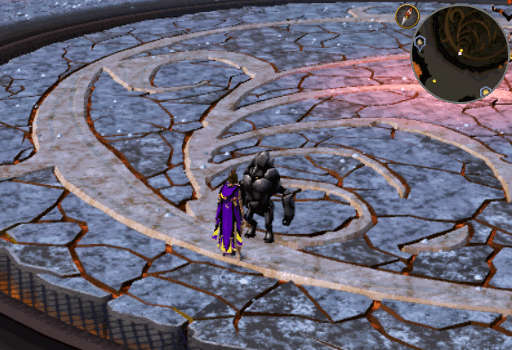
Much like the Freneskae Elder Halls, you will find yourself in a central area with tunnels leading out from it. At the end of each of the three Northern tunnels is an Elder God's Egg. Observe them all. At the last one you observe, the two things in your head will start arguing about whether or not you have finished and you will realize that Trindine has been withholding information.
-
Return to Kharid-et and make your way to the Praetorian war table. On the way, if you destroyed your Blank observation, you will trip over one and pick it up, as you will need it shortly. Once at the table, you will notice that no one is there. The voices will begin talking and inform you that Trindine's Anima is leaking into the shadow realm. They suggest that you might be able to locate some of her memories to find out what she was planning to do with the access to places your presence granted her.
-
Walk South towards the nearest pylon; simply walking close to it should flood you with shadow anima. Should this fail, you can click it and use the charge option. Once filled with Shadow anima, stand by any four of the Shadow anchors in the main fortress to supercharge them. Note that you do NOT need to recharge at a pylon, simply go to 4 anchors after being charged.

-
Once you have charged the shadow anchors, the room will darken and you will see Trindine wisps in the fortress. Harvest Trindine memories from one until you have 50 with which you can charge the Blank observation by inspecting it. The voices will then translate it for you, revealing that she was looking to steal some things.
-
Return to the Hall of Memories and enter the pool, continuing the quest when prompted, then talk to The Archivist. It will inform you that Trindine accessed a memory called "The Elder Crown" and then erased it.
-
Head back to the Wizards' Tower and talk to Wizard Valina. Speaking with her will reveal that Trindine stole a book about Saradomin's Crown called "The Cartalian Heresy."
-
Finally, return to TzHaar City and speak with TzHaar-Ga'al-Kot in the main plaza. Talking to him will tell you about Trindine's apparent interest in a an elder tool called "The Locator."
-
Having visited all 3 locations and learning what Trindine has been up to, the voices and yourself will decide to go to Ariane to see if she can help figure out what Trindine is up to. Return to the Elder Halls within the The Heart of Gielinor. Talk to Ariane and you will give her the Blank observation, allowing her to show you a memory. Cutscene time! It is revealed that Sir Vey Lance is a disguised demon named Veilinius and that the Temple Knights have been doing the will of Zaros rather than Saradomin.
-
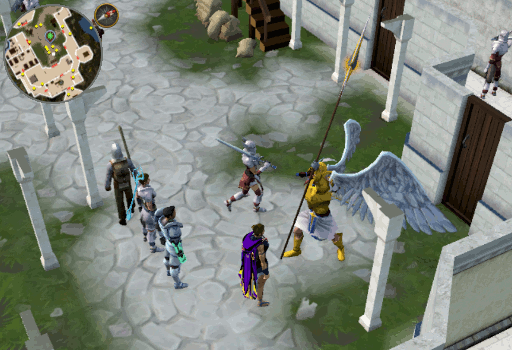
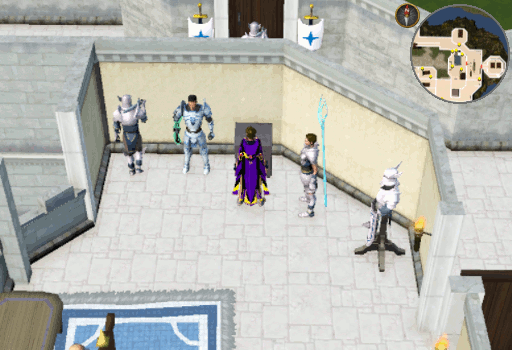
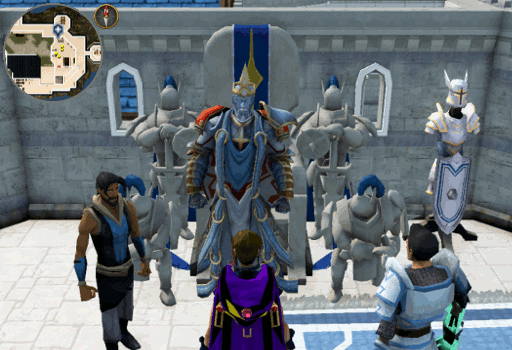
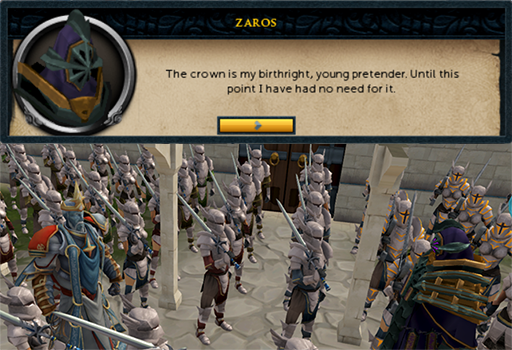
Make your way back to Falador Castle and speak to Ariane at the entrance to begin a cutscene in which Saradomin returns to inspect the knights. Trindine and Veilinius are present, in disguise, and Sir Amik Varze welcomes Saradomin into the crowd of knights. You will be given the option to warn Saradomin or pretend everything is fine, but either way, his crown will be stolen.
-
Once the cutscene completes, return to Kharid-et and talk to anyone by the Praetorian war table. Zaros will issue some orders before teleporting away. Some discussion will occur, and Azzanadra will leave. Trindine will tell you she returned the book (but not Sir Owen, whoops) then she will teleport off to take care of him, leaving only Ariane remaining. Talk with Ariane and she will tell you that she plans to put a group of researchers on the eggs, but that you shouldn't visit to avoid drawing unnecessary attention to them.
Congratulations, Quest Complete!
This Quest Guide was written by 3ter 1. Thanks to ChathMurrpau and Sy Accursed for corrections.
This Quest Guide was entered into the database on Mon, May 31, 2021, at 05:39:36 PM by 3ter1, and it was last updated on Thu, Mar 16, 2023, at 03:08:42 AM by KsbSingle.
If anything is incorrect or missing, or if you have any new information to submit to this database, please submit it to us on our Content Submissions Forums.
If you see this guide on any other site, please report it to us so we can take legal action against anyone found stealing our content. This guide is copyrighted by RuneHQ, and its use on other sites is expressly forbidden. Do not ask if you can use our guides or images, the answer is and always will be NO!
Print this page with images - Back to the Quest Guide Index Page - Back to Top
