

80+ Attack, Strength, Ranged and Magic
110+ Combat
43+ Prayer
Know how to face off against several enemies at once
Tier 80+ Weapons
Table of Contents
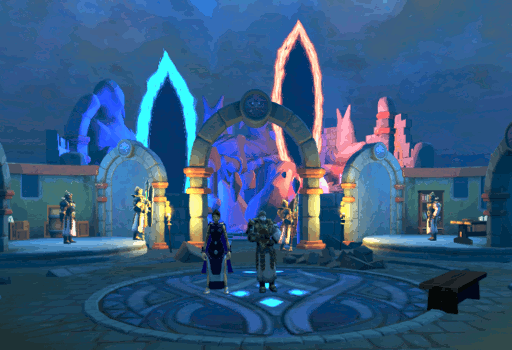
Shattered Worlds is a safe, members only, minigame located in the Southernmost part of the Lumbridge Swamp. When you get there, talk to Kenton Decarte to get started. He will explain what Shattered Worlds is. To your left will be a bank where you can bank your items (if you are a member) and to the right, is the reward shop.
Red:
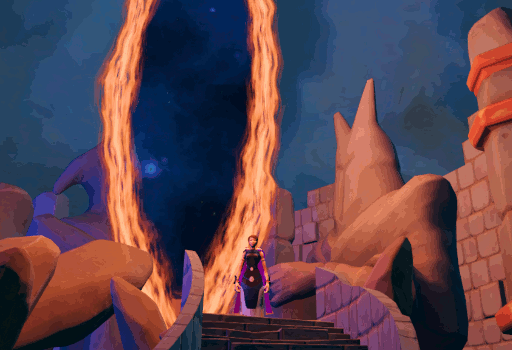
The red portal is the challenge portal. Here you can do up to 3 challenges and receive rewards (anima) from completing each one. The higher tier you have completed, the better the reward.
- Bronze - 250,000
- Silver - 1,000,000
- Gold - 7,500,000
Blue:
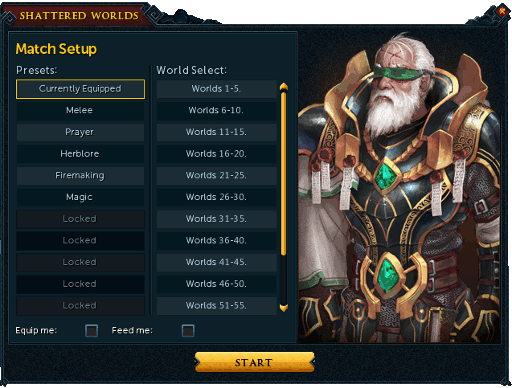
The blue portal is the normal portal, and is where I suggest you start. When you click the blue portal, it will give you the highest world you can start from; Which should be 1-5 when you first start. At the bottom, there is an option that says "Feed me" and "Equip me". Clicking the "Feed me" option will give you food (scaled to your HP level) per 5 worlds. When you press "Equip me" it will give you up to tier 60 hybrid equipment, depending on your defence level. I would only suggest using these if you are a super low level or want to attempt the game for the first time without using your own gear.
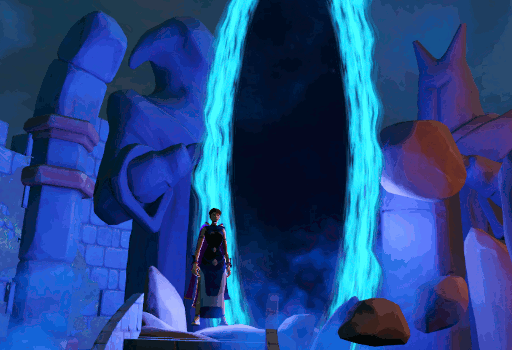
It is highly suggested that you bring at least tier 75 armor and tier 80 weapons, as when you go up in the worlds, they get harder and the "Equip me" option will not do you much good.
Worlds must be completed in groups of 5 without banking. Familiars are allowed and are highly suggested to bring.
Start Screen:
Mutators are what give this game a twist. They pop up every now and then in groups of 3 and you must choose one. The green ones are positive, red ones are negative, and gray ones are neutral.
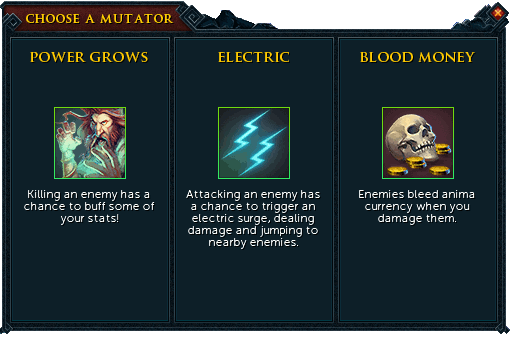
List soon to come!
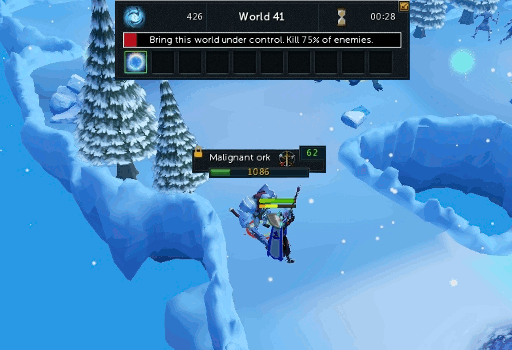
The main objective is to kill off at least 75% of the enemies in each world. If you end up completing a world within 3 minutes, you have the chance to skip between 1 and 3 worlds. In the long run this can earn you more anima and make the game more interesting and harder. Once you complete 5 worlds, you will be sent to a lounge area where you can choose to end the game by looting the chest (which gives even more anima) or to continue on into the portal.
Note: There is a bank in the lounge area which you can use to stock up on items and potions, if needed, before moving onto your next set of worlds.
As you get higher into the worlds, the monsters increase in number and difficulty. Watch how you play your moves. Using big AOE abilities might just get you killed. If you do end up dying, don't worry! You will get sent back to the lounge with a safe death. You will then loot the chest and head back out the blue portal. Once you click the blue portal, it will show you your stats for that particular run. Then exit and continue again if you wish or come back at a later date.
When you click the blue portal again, you will see (depending on how far you got) more worlds to choose from. If you are a low level, you might want to start from the beginning and work your way up. if you are a higher level, you might want to start from the middle or higher worlds since they are more scaled to your level.
Magic: I've experienced using magic as the best way to go. On the low and mid worlds, you can use AOE's without worry, allowing you to ease through them with no problem. In the higher worlds, it comes in handy as all the monsters are weak to your particular combat style and you can do a lot of damage from a distance, which makes it safer.
Minimum requirements I would use is Subjugation armor with a chaotic staff. This will allow you to have some fun and get the mid-level worlds. Although, if you wish to continue onto the higher worlds, I would suggest getting at least tier 87+ staff and tier 80+ armor.
Melee: Using melee was a tad bit difficult. The lower worlds were fine, but once I got to the mid-level worlds, using the AOE's and being right in the middle of everything so I could attack was a disaster. Note that I am using full Bandos, with a Dragon Rider lance and sharks. I was taking a lot of damage with Soul Split and even with Protection prayers. This is not recommended to do unless you have a Scythe and Tier 85+ Power armor.
Ranged:: Using range is a good method with duel weapons. Using AOE's on lower worlds and picking out the crowd at higher worlds makes the difference. Use your best gear and at least Armadyl when going in. Do not use AOE's if you are in a high world (50+) or are a low combat level.
At the top of your Screen, you will see a bar that shows you your current stats. The red bar shows your progress through the world and will turn green when you kill at least 75% of the enemies in the world. The Blue swirl of anima will show how much anima you have gained throughout your streak. If you hover over it, you can look to see how much anima you have gained throughout your total gameplay of Shattered Worlds. Underneath the progress is where your mutators will be. You can hover over them to see their name and what they do. Lastly, you will see some footage of Shattered Worlds and what it could look like to you. Please note there are 7 different Biomes in shattered worlds.
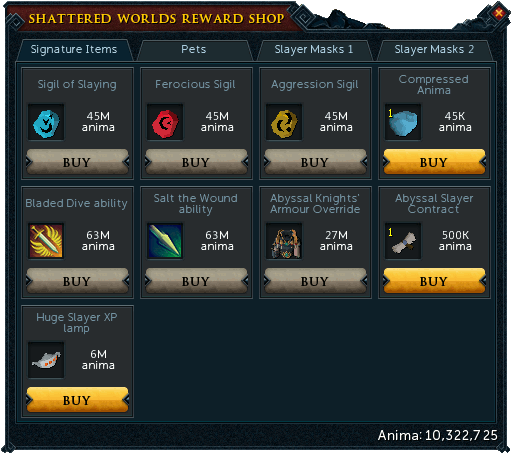
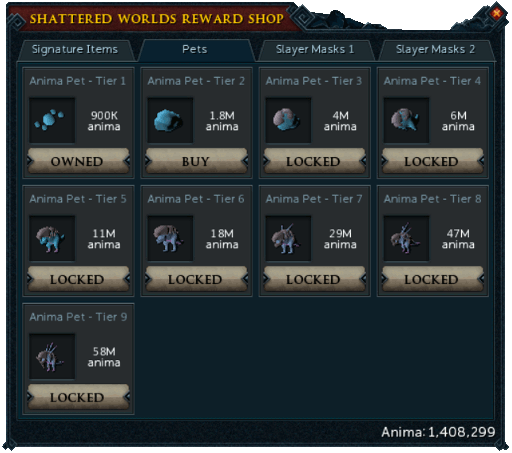
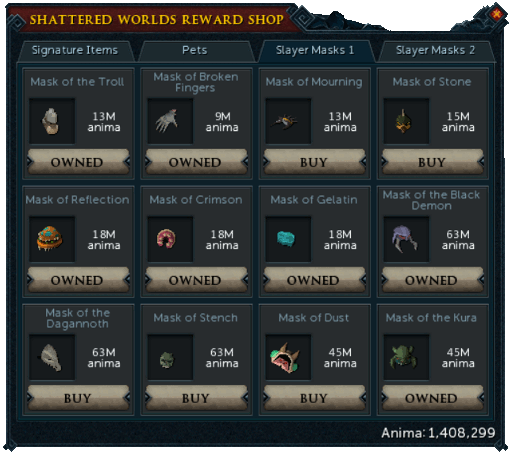
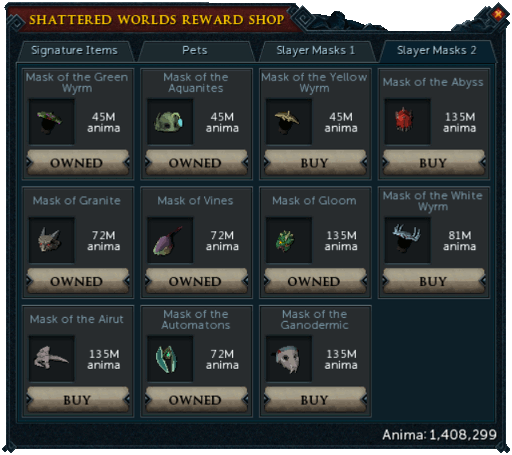
Talk to Abyssal Knight Quartermaster. The currency for Shattered worlds is Anima. Anima is awarded to you by completing each world (which we will get into later on.) In the shop, there are 2 new abilities, 3 new sigils, Shattered world pets (you have to make the pet with anima), and of course all of the slayer masks! Ironman/Ironwoman are available to buy everything located within the shop. There is also a rare Hound pet, which you can receive from opening the chest.
Signature Items:
| Sigil of slaying | Ferocious sigil | Aggression sigil | Compressed anima | ||||
| Bladed Dive ability | Salt in the Wound ability | Abyssal Knights' Armour Override | Abyssal Slayer Contract | ||||
| Huge Slayer XP lamp |
Pets:
| Anima Pet - Tier 1 | Anima Pet - Tier 2 | Anima Pet - Tier 3 | Anima Pet - Tier 4 | ||||
| Anima Pet - Tier 5 | Anima Pet - Tier 6 | Anima Pet - Tier 7 | Anima Pet - Tier 8 | ||||
| Anima Pet - Tier 9 |
Slayer Mask I:
Slayer Mask II:
This Minigame Guide was written by Numerous One and Zooom. Thanks to ChathMurrpau for corrections.
This Minigame Guide was entered into the database on Fri, Sep 08, 2017, at 02:46:32 PM by ChathMurrpau, and it was last updated on Sun, Feb 02, 2020, at 07:31:32 PM by Chath.
If anything is incorrect or missing, or if you have any new information to submit to this database, please submit it to us on our Content Submissions Forums.
If you see this guide on any other site, please report it to us so we can take legal action against anyone found stealing our content. This guide is copyrighted by RuneHQ, and its use on other sites is expressly forbidden. Do not ask if you can use our guides or images, the answer is and always will be NO!
Print this page with images - Back to the Minigame Guide Index Page - Back to Top
