

60 Smithing (to use the furnace for free and use the anvils)
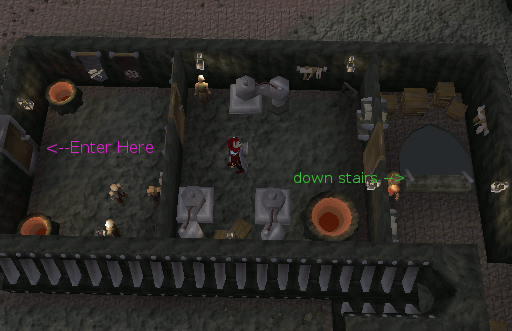
Table of Contents:
- Getting The Furnace Going
- Smelting The Ores
- Armour Store And Anvils
- Hints and Tips
- Soloing the Blast Furnace
To get the blast furnace going, there are a lot of things you and your team must do.
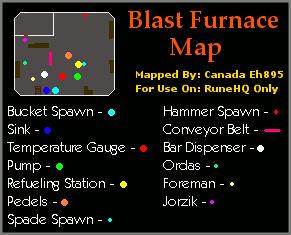
This part requires 30 Strength to operate, and pumps the superheated air between the stove and the furnace. It will also controls the temperature gauge (see below) . When the Temperature Gauge watcher tells you to stop, you must stop pumping. If you do not stop operating the pump, the furnace will overheat and you will take 10-20 damage. You receive 2 Strength XP per half of a second you are using the pump.
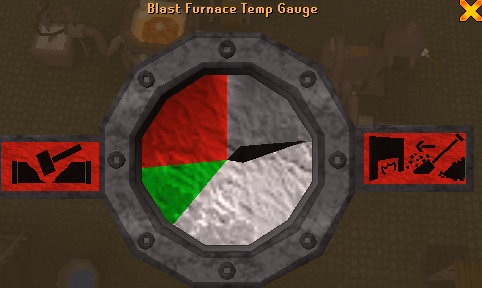
The temperature gauge is controlled by the pump, as explained above. When the needle drops into the white zone, you need to tell the person who is keeping an eye on the pump to start pumping. When it raises into the red zone, you need to tell the person operating the pump to stop.

In order to take care of this part, you will need a spade, 30 Firemaking, and a fast click. Take your spade and click the "Collect Coke" button on the coke holder. Then, click on the "Refuel Stove" button, and you are done, for now. There are three color stages for the stove. White, yellow, and red. You do not need to pump as long when the stove is red hot, but you may end up needing to fix the parts more often. Per time you refuel the stove, you receive 5 Firemaking XP.
The pedals are required to move the conveyor belt, which takes the ore into the furnace. To use the pedals you will need 30 Agility. You can only operate the pedals for so long, because it drains your energy slowly down to nothing. When your energy falls to 0 you will automatically hop off the pedals. You receive 3 Agility XP per 1% of energy used.
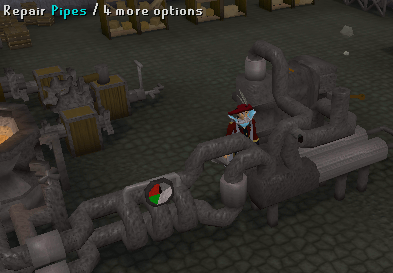
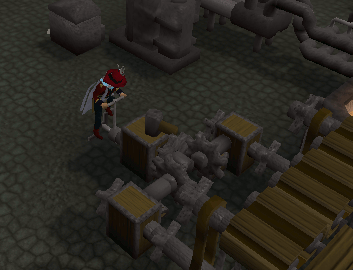
There are a lot of parts around the area that break quite often. To fix these parts you will need level 30 Crafting and a hammer. For each part fixed you receive 50 Crafting XP.
-
To start using the furnace, you will need ores. You can either mine your own ores, or buy them from Ordan, the ore seller. This shop sells ores up to mithril, but only stocks up on 100 ores per type. Additionally, Ordan will also un-note the ores you gathered yourself.

-
Next, you must to talk to the Blast Furnace Foreman, located in the southern part of the furnace area. He he will only let you use the furnace for free if you have a Smithing level of 60 and above. If your Smithing level is lower than 60, you will have to pay him 2500 coins for 10 minutes at the furnace (1250 gp with a Ring of charos (a)).
-
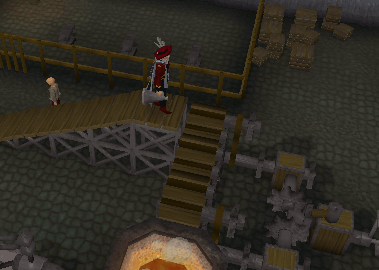
Head up the ramp, and put the ores on the conveyor belt.
-
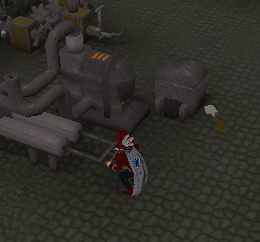
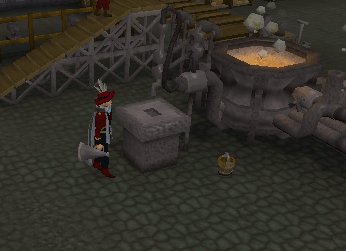
Go back down the ramp, and go over to the bar dispenser. Since the bars are still hot, you must use a Bucket of water on the bar dispenser to cool down the bars.
-
Once the bars have cooled down, remove them from the dispender.
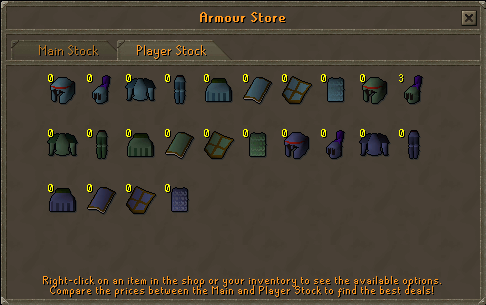
Armour Store:
The Armour Store, owned my Jorzik, sells all types of armor from mithril up to rune. However, this store has no main stock and only sells the armor supplied by players.
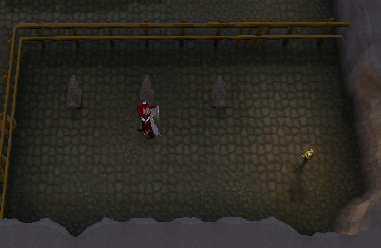
Anvils:
In a fenced off area next to the entrance to the furnace, you will find three anvils. Only players with a Smithing level of 60 are allowed in.
- You use notes with the store to save on long bank runs.
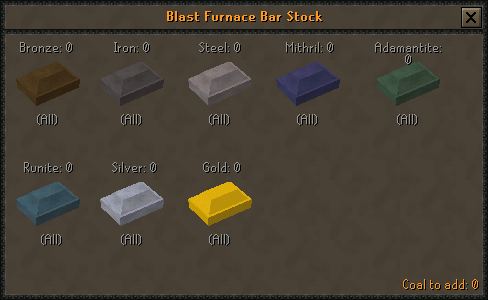
- You can store up to 200 coal in the furnace until you have to use it.
- You can store up to 28 bars in the furnace until you have to take them out.
- When using goldsmith gauntlets, you do receive a bonus for smelting gold ores.
- In the lower right corner of the interface of the bars you remove, you will find the amount of coal you have put in the dispenser . The amount of coal are saved, even if you log out.
- Smith and Hi-alchemy on site.
- Smith stackable items (knives, dart tips and arrow heads).
- Bring noted ores
- Your ores can be unnoted by Orzan for the following prices:
| Ore | Cost (gp) |
| Copper | 10 |
| Tin | 10 |
| Iron | 8.5(rounded down) |
| Silver | 37 |
| Coal | 22.5 (rounded down) |
| Gold | 75 |
| Mithril | 81 |
Note: Orzan does not unnote Adamantite or Runite ore.
This section covers spending extended amounts of time down at the Blast Furnace with little or no bank runs. If you intend to use your bank a lot, it is better just to use the normal blast furnace method on the Blast Furnace world 58. The 3 anvils located nearby require 60 smithing and play an very important part in this method.
Items Needed: 50K coins and a Hammer.
Items Recommended: Nature runes and a Staff of fire (if you tend on making non-stackable items), Boots of lightness, Penance gloves, and a Spotted/Spottier cape.
What items are needed depend on your strategy. If you are planning on smithing non-stackable items and not spending time running to the bank, then you will need a Staff of fire and Nature runes to high alchemy them. Before heading down into the basement with the furnace, equip the Staff of fire and carry the 50k coins, Hammer, and Nature runes in your inventory. If you are going for stackable items you do not have the bring Nature runs and a Staff of fire, but you will need more money to buy/unnote your ores.
Here are the steps to follow with the intention of making steel items:
- Buy/unnote 25 iron ore and place them on belt.
- Buy/unnote 25 coal and place them on belt.
- Operate the pedals until the ore goes into furnace, up to 75 ore on the belt is more efficient than 25 ore at a time.
- If parts on the conveyor break, repair them and return to the pedals.
- Grab a spade, and place only 8 shovels of coke into furnace.
- Operate the pump.
-
Select the statistics tab on the control panel. This is the tricky part, put your mouse cursor over the Strength Skill icon to see your skill experience gain. If nothing breaks or is broken, then your strength will increase. It takes about 90 strength XP (equals about 30 seconds) for the smelter to go into the green which you will hear as a plop and can see if you angle the screen to view the dispenser. This way, you do not need someone keeping an eye on the temperature gauge.
- If you hear a broken sound or see that your strength is not going up, quickly repair pipes and return to pump.
- If you had to repair pipes 3 times or more, add 8 more shovels of coke to furnace to refuel it.
- If your strength is not going up and none of your pipes are broken, you will have to fix a broken part on the conveyor.
- Grab a bucket and fill with water.
- Use the bucket with water on the molten bars in the dispenser.
- Drop the bucket and the spade.
- Remove all bars from the dispenser.
- Head to anvil area and smith 5 platebodies or a stackable item of choice. If you are going with non-stackable items you will have to High alchemy the plates.
- To continue this method, start again from step 1 and repeat as desired.
Notes:
- You can use the above mentioned steps for iron/mithril/adamant/rune items by multiplying the required amount of coal.
- For the smithing of Iron, disregard the steps on coal.
This Minigame Guide was written by Canada Eh895, Tristian12 and Tarojun. Thanks to Nuke-Marine, Elyria1, DRAVAN, Agamemnus, Aakanaar, Nuke-Marine, Gondomwinges, tellgod, Greg, Bootstrap666, Kittyhawk, DarkBlitz, Burtybob, Phox1616, Munter and Alfawarlord for corrections.
This Minigame Guide was entered into the database on Thu, Aug 25, 2005, at 12:11:13 PM by Fireball0236, and it was last updated on Wed, Jan 17, 2018, at 10:45:36 PM by DRAVAN.
If anything is incorrect or missing, or if you have any new information to submit to this database, please submit it to us on our Content Submissions Forums.
If you see this guide on any other site, please report it to us so we can take legal action against anyone found stealing our content. This guide is copyrighted by RuneHQ, and its use on other sites is expressly forbidden. Do not ask if you can use our guides or images, the answer is and always will be NO!
Print this page with images - Back to the Minigame Guide Index Page - Back to Top
