

Transportation
All forms of transportation that are based with an NPC or through an object in the world (Rune essence mine, Spirit Trees, ships, etc) are marked on the mini-map and on the world map with the right-facing green with orange trim arrow. All other forms (Lyre, jewelry, etc) is obviously not displayed on the mini-map.
Table of Contents
Teleports are the easiest way to get around for most people with decent magic levels. The following is a table of regular magic teleports.
| Image | Level | Name | Runes |
 |
10 | South Feldip Hills Teleport | 1 Law, 1 Water, 1 Air |
 |
25 | Varrock Teleport | 1 Law, 3 Airs and 1 Fire |
 |
31 | Lumbridge teleport | 1 Law, 3 Airs and 1 Earth |
 |
37 | Falador Teleport | 1 Law, 3 Airs and 1 Water |
 |
40 | Teleport To House | 1 Law, 1 Air and 1 Earth |
 |
45 | Camelot Teleport | 1 Law and 5 Airs |
 |
51 | Ardougne Teleport | 2 Laws and 2 Waters |
 |
58 | Watchtower Teleport | 2 Laws and 2 Earths |
 |
61 | God Wars Dungeon Teleport* | 2 Laws and 2 Fires |
 |
61 | Trollheim Teleport* | 2 Laws and 2 Fires |
 |
64 | Ape Atoll Teleport* | 2 Laws, 2 Waters, 2 Fires and 1 Banana |
 |
70 | Mazcab Teleport | 3 Cosmic, 1 Law, and 1 Soul |
*God Wars Dungeon Teleport requires completion of The Mighty Fall, Trollheim Teleport requires completion of Eadgar's Ruse, and Ape Atoll Teleport requires completion of the King Awowogei sub-quest of Recipe for Disater.
There are also Teleother spells that, upon the target's approval, teleport someone else to a location.
| Image | Level | Name | Runes |
 |
74 | Teleother Lumbridge | 1 Law, 1 Earth and 1 Soul |
 |
82 | Teleother Falador | 1 Law, 1 Water and 1 Soul |
 |
90 | Teleother Camelot | 1 Law and 2 Souls |
Ancient Magick is very expensive to use. Some of these teleports don't have much use as of yet. The following is a list of Ancient Magick teleports.
| Image | Level | Name | Runes |
 |
54 | Paddewwa Teleport (Edgeville Dungeon) |
2 Laws, 1 Fire and 1 Air |
 |
60 | Senntisten Teleport (West Of Digsite) |
2 Laws and 1 Soul |
 |
66 | Kharyrll Teleport (Canifis Bar) |
2 Laws and 1 Blood |
 |
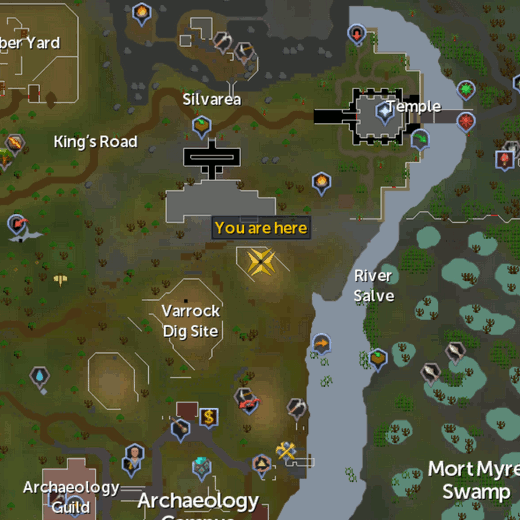
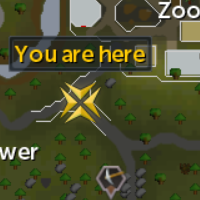
72 | Lassar Teleport (Ice Mountain) |
2 Laws and 4 Waters |
 |
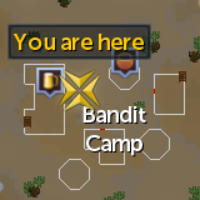
78 | Dareeyak Teleport (Ruins West Of The Bandit Camp - Level 17 Wilderness) |
2 Laws, 3 Fires and 2 Airs |
 |
84 | Carrallangar Teleport (Graveyard of Shadows - Level 19 Wilderness) |
2 Laws and 2 Souls |
 |
90 | Annakarl Teleport (Demonic Ruins - Level 62 Wilderness) |
2 Laws and 2 Bloods |
 |
96 | Ghorrock Teleport (Ice Plateau - Level 65 Wilderness) |
2 Laws and 8 Waters |
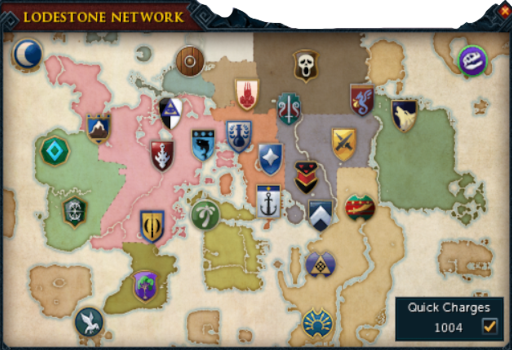
Home Teleport/Lodestone Network
The home teleport uses the "lodestone network." This network includes many different cities across the map. No magic level or runes are required. In order to use the lodestone network you must activate each lodestone by first traveling to the lodestone and clicking "Activate" on the actual lodestone. After that, you are free to teleport using that lodestone whenever you wish.
Casting this spell takes a long time, so it is not recommended to use in dire situations.
It is possible to obtain "Quick Teleports". These are the ability to teleport to locations without having to wait through the animation. You can get these by activating Vis wax and choosing to turn it into Quick Teleports. Each Vis wax can become 10 charges; you are able to store up to 4,000 charges. If you have the box on the bottom right corner of the network map checked, they will be automatically used. Or, if you would like to only use it on occasion, you can right click the city and choose to make it quick.
To activate the lodestone network, click the home teleport button  on any spellbook or in the bottom left corner of the minimap.
| Map Icon | Location | Map Image | Notes | Members Only? |
| Anachronia | 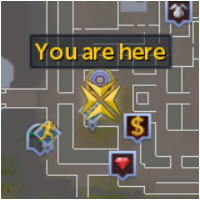 |
This lodestone is built in the center of the Anachronia Base Camp using 150  Stone and 150 Stone and 150  Clay. Clay.See our Anachronia Base Camp special report for more information. |
Yes | |
| Al Kharid |  |
North of the palace | No | |
| Ardougne |  |
North city entrance, West of wheat field | Yes | |
| Ashdale | 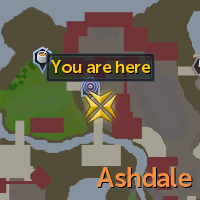 |
Center of the island | No | |
| Bandit Camp | 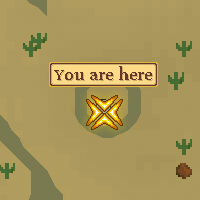 |
Southeast of the camp in the desert. Requires the completion of the Desert Treasure quest. | Yes | |
| Burthorpe | 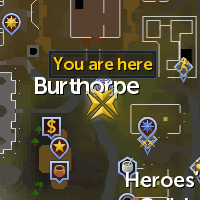 |
Unlocked by default Northeast of the bank |
No | |
| Canifis | 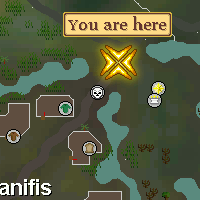 |
North of Canifis | Yes | |
| Catherby | 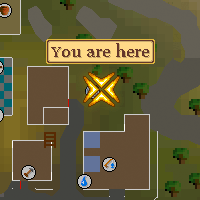 |
North of the fishing shop | Yes | |
| Draynor Village | 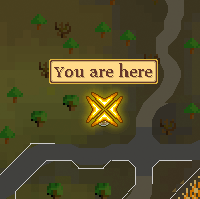 |
By the junction that leads to Draynor Manor, North of the city | No | |
| Eagle's Peak |  |
West of Tree Gnome Stronghold | Yes | |
| Edgeville | 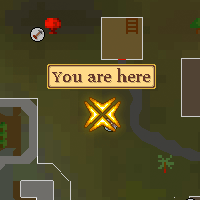 |
East of Monastery, Northwest of the bank | No | |
| Falador | 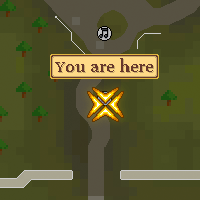 |
North of the North gate | No | |
| Fremennik Province | 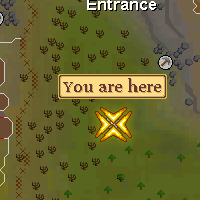 |
East of Rellekka | Yes | |
| Karamja | 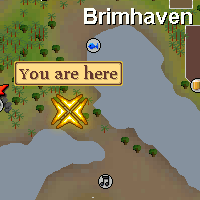 |
South of Brimhaven | Yes | |
| Lumbridge | 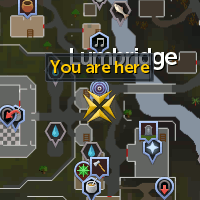 |
Unlocked by default At the castle gate |
No | |
| Lunar Isle | 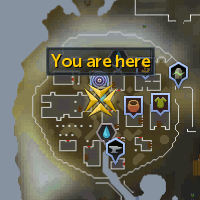 |
Southwest of the bank in the main city Lunar Diplomacy required |
Yes | |
| Menaphos |  |
Inside the main Plaza. The Jack of Spades required. |
Yes | |
| Oo'glog | 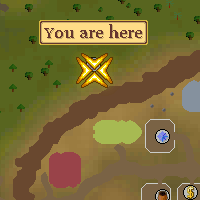 |
North of Oo'glog | Yes | |
| Port Sarim | 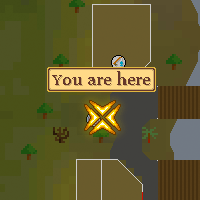 |
Between the fishing and cooking shops | No | |
| Prifddinas | 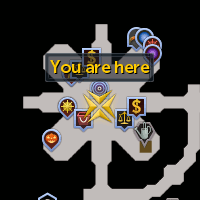 |
Center of the Tower of Voices | Yes | |
| Seers' Village |  |
West of the bank | Yes | |
| Taverley | 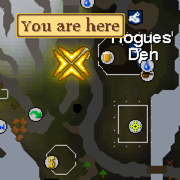 |
South of the house portal, North of the bank | No | |
| Tirannwn | 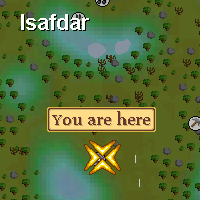 |
In a clearing with the Elf Tracker | Yes | |
| Varrock |  |
By the South gate of the city | No | |
| Wilderness Volcano | 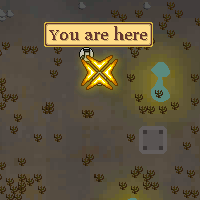 |
South side of the volcano | No | |
| Yanille | 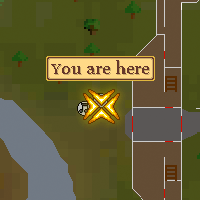 |
Outside of the West gate | Yes |
Rune/Pure essence can only be mined in one place, but getting to that place can be done by having various contacts teleport you there.
| Contact | Location | Notes | Map | Members |
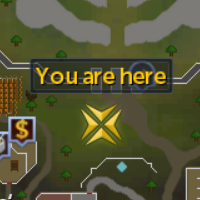
| Aubury | Located in the Varrock magic shop just South of the East bank | This is the fastest method to Mine Rune essence for non-members as the bank is right North of the magic shop. | 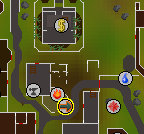 |
 |
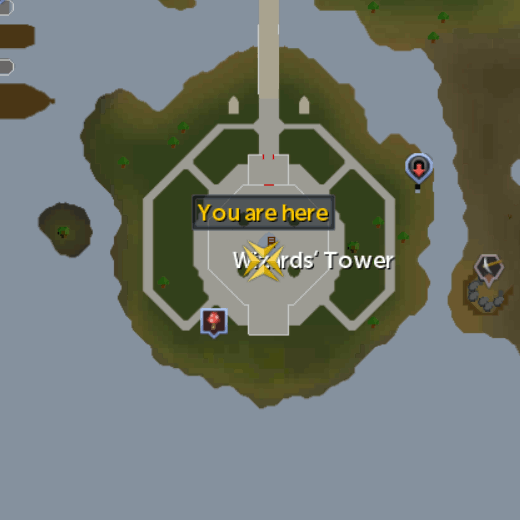
| Archmage Sedridor | Located on the third floor of the Wizards' Tower just South of Draynor Village | It is not suggested you use this method as the closest bank is in Draynor Village which is a fairly far for Rune/Pure essence Mining. However, the closest bank deposit box is on the top floor of the tower, which is a pretty short walk. | 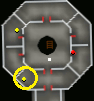 |
|
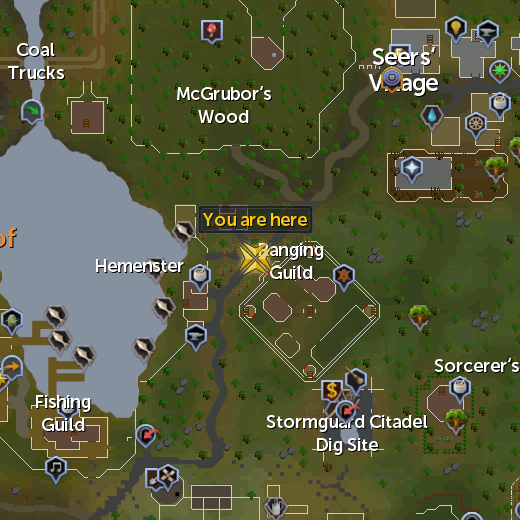
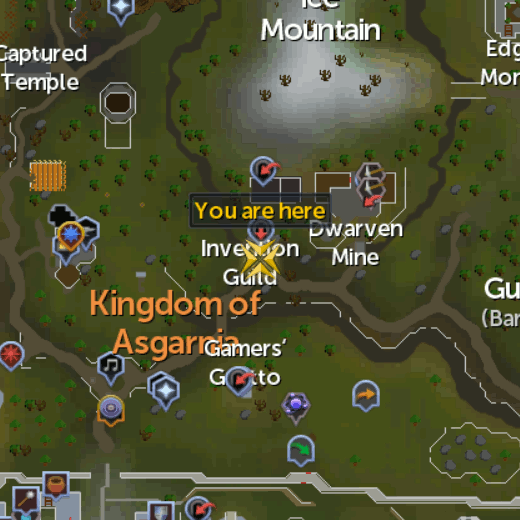
| Wizard Distentor | Located in the Wizards' Guild just West of the Yanille bank, level 66 Magic required to enter the guild, or lower using Wizard's mind bomb. | As you can see on the map below it is a straight path from the bank to the Wizards' Guild, therefore this is the fastest way for Mining Rune/Pure essence. | 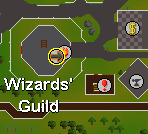 |
 |
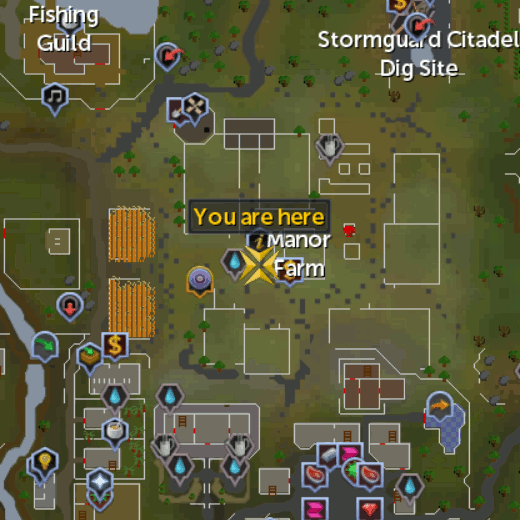
| Wizard Cromperty | Located in East Ardougne, the house just North-East of the Ardougne market area | The closest bank is just South of the market area. | 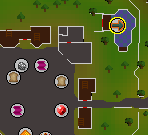 |
|
| Brimstail | Hiding in a cave in the South-West corner of Tree Gnome Stronghold | There are no monsters in this dungeon so it is 100% safe to everyone who is willing to enter it. This method isn't very worthwhile as the closest bank is the one just South of The Grand Tree, which is fairly far away from the Wizard Brimstail. | 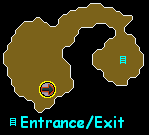 |
|
Before you can use the Fairy Rings, you must have gotten the Fairy Godfather's permission to use them. This requires partial completion of A Fairy Tale Part II - Cure a Queen (step 6). At this point, you must be wielding a Dramen staff or Lunar staff to use the rings. The staff will no longer be necessary after completion of A Fairy Tale Part III - Battle at Orks Rift.
To use the rings, equip your staff of choice if necessary, Right-click any ring and choose "Select Destination" to open the interface and choose your destination. Alternatively, you can Left-click the ring and travel to the main ring in Zanaris (just North West of the path to the Cosmic Altar) then click the ring again to open the interface, but this is no longer required.
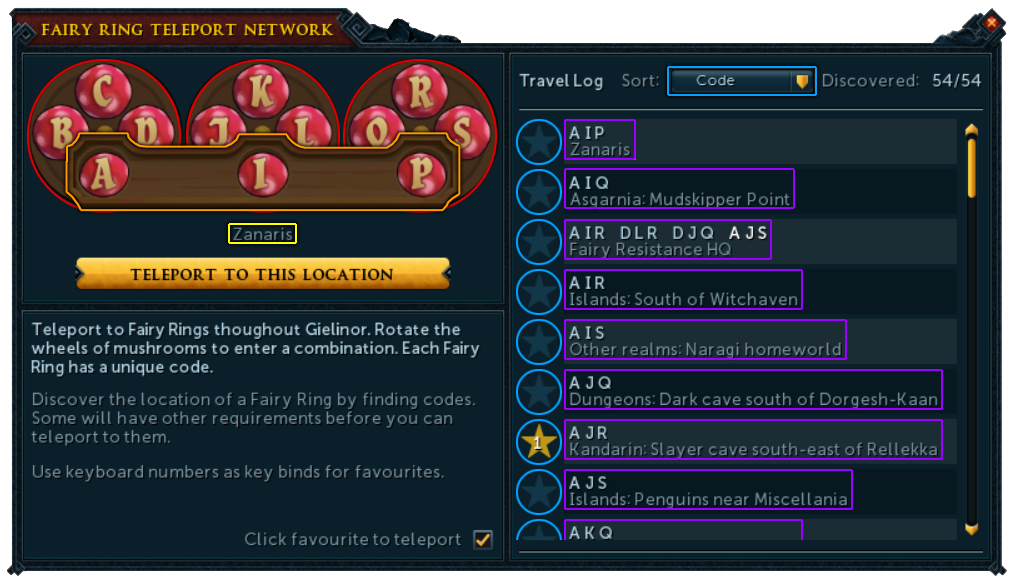
As seen above, the Left interface has 3 wheels (circled in red) with various letters that must be selected to choose the desired location. Each location will have its own special code, determined by which letters fall in the bottom row (outlined in orange; see table below for destinations). The letters can be changed by clicking the letter to the Left or Right of the currently selected letter until your desired letter is chosen. If you have the code in your travel log (which is the Right side of the interface), then the destination of the code will appear below the code (outlined in yellow). The box at the bottom determines whether clicking on a favorited code will immediately teleport the player (with the box checked) or merely move the rings to show the favorited code (with the box unchecked), forcing them to click the necessary bottom to teleport to the location.
On the Right side of this window is a travel log which keeps track of where each code will take you. It can be ordered alphabetically by code, destination, or favourites by using the drop down menu in the top Right corner (outlined in blue). The option to order them by favorites will put all your favorited locations at the top of the list and organize the remaining locations alphabetically by code. There are currently 54 locations that can be recorded in the travel log, which is tracked in the upper Right corner.
In the travel log, regardless of how it is organized, each location will be listed with a star to the Left of its entry (circled in blue), the code on a top line, and the corresponding location on a bottom line (both outlined in purple). Pretty straightforward. Clicking a blue star will favorite a code and turn the star yellow. Clicking the now yellow star will to unfavorite it. Favoriting a destination, up to 10 total, allows for easier access to it through the sorting function. Note that the number assigned to each location is based on the order they are favorited in. The number a favorited code has in its star (1-10, with 10 being a 0) can be used as a hotkey to quickly teleport to that location. As such, the player in the example above can pull up the fairy ring interface and press 1 to immediately teleport to location A-J-R.
It is also worth noting that any locations that you have not traveled to using the fairy ring will not appear in the travel log and any code not in the travel log will appear as a simple "???" when selected using the wheels. This also applies to any codes that currently do not go anywhere, such as A-J-P.
Below is a list of all available destinations. Note that after you have discovered a location's code, it can be viewed via tooltip on the world map. Most images below can be clicked to see a larger map area.
| Code | Location | Location Image |
| A I P | "Nowhere". Chosing this solo destination will return you to the main Fairy Ring in Zanaris. | None. |
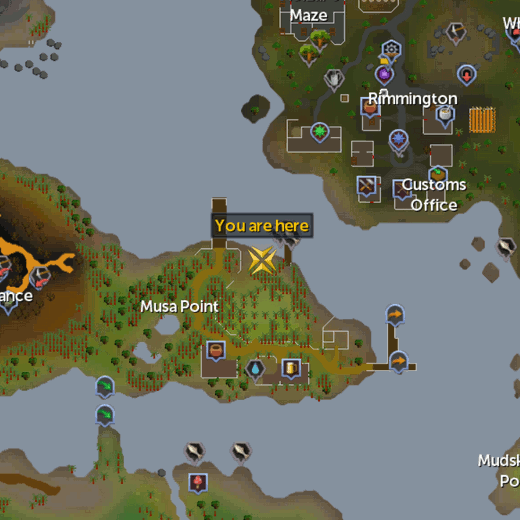
| A I Q | Mudskipper Point. | 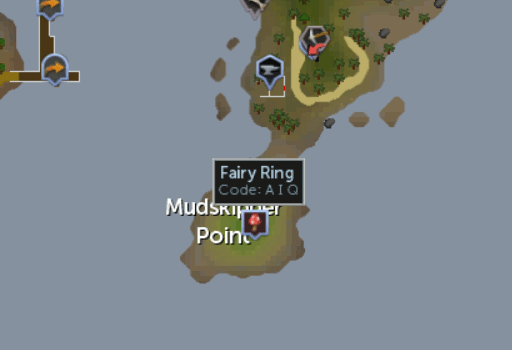 |
| A I R | Island South of Witchaven. | 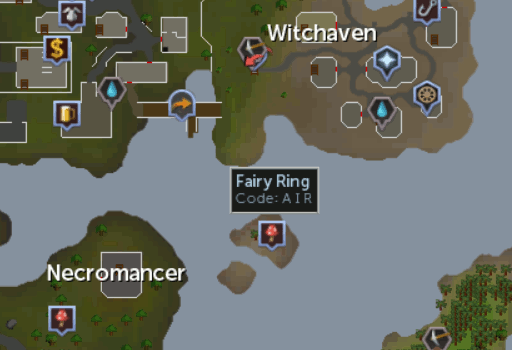 |
| A I S | Naragi homeland, from The World Wakes quest. Note: Unlocked after completion of this section of the quest. |
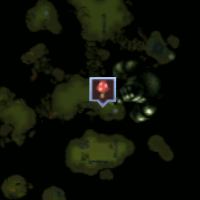 |
| A J P | "Nowhere". Chosing this solo destination will return you to the main Fairy Ring in Zanaris. | None. |
| A J Q | Dorgesh-Kaan Agility course. | 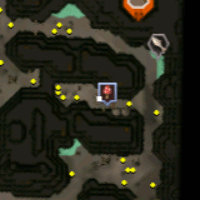 |
| A J R | Golden apple tree Slayer Dungeon. | 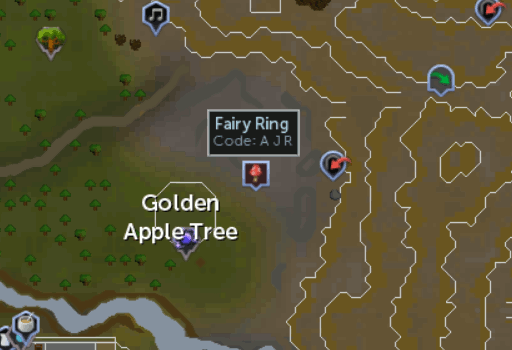 |
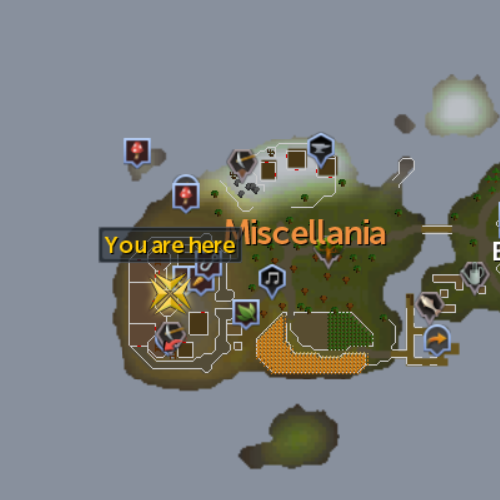
| A J S | Small island with penguins, North West of Miscellania. | 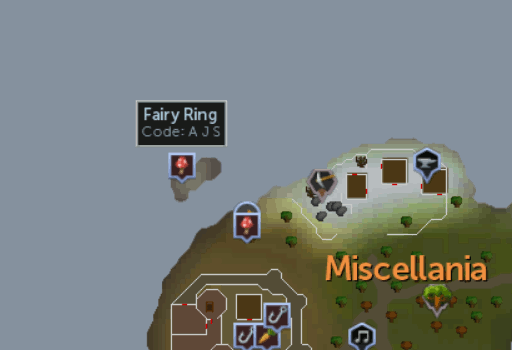 |
| A K P | "Nowhere". Chosing this solo destination will return you to the main Fairy Ring in Zanaris. | None. |
| A K Q | Piscatoris Hunting Grounds. | 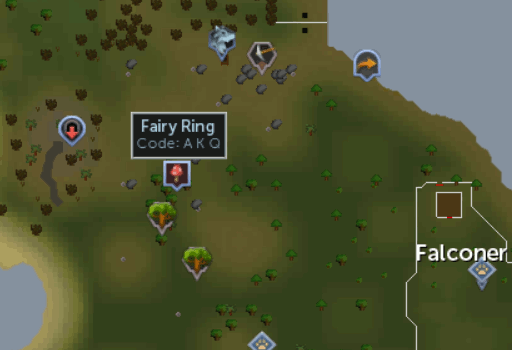 |
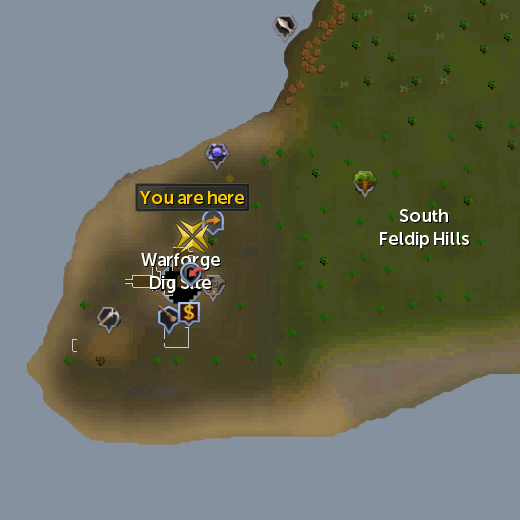
| A K S | Feldip Hills. | 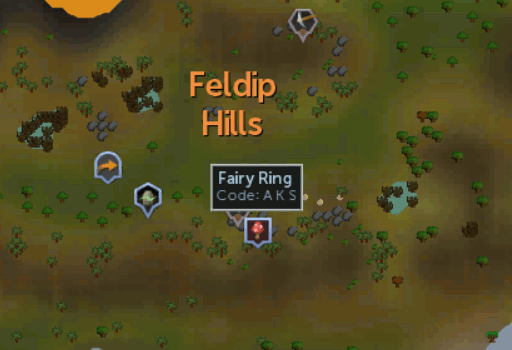 |
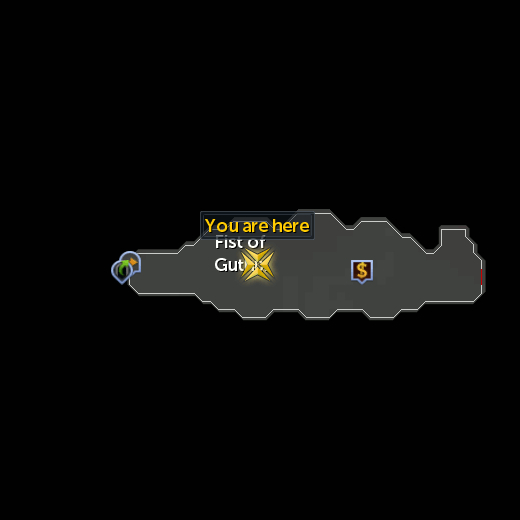
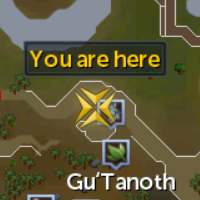
| A L P | Near Gu'Tanoth. | 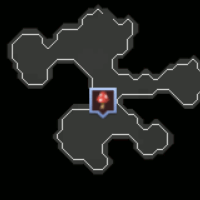 |
| A L Q | Haunted Woods East of Canifis. | 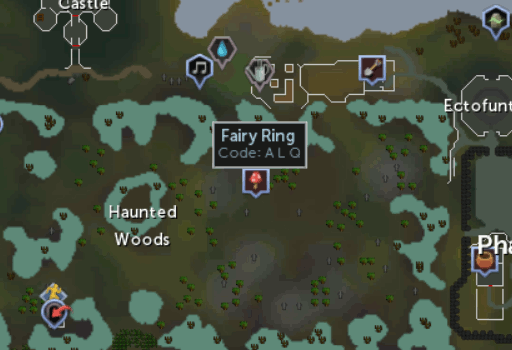 |
| A L R | A section of the Abyss that contains all creatures from the Runecrafting Abyss as well as Abyssal Demons in a non-multicombat area. Cannot be used for Runecrafting and you are neither skulled or drained of Prayer when you enter. | 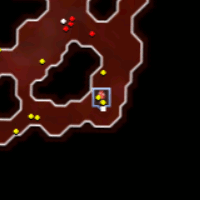 |
| A L S | McGrubber's Wood, West of Seers' Village. | 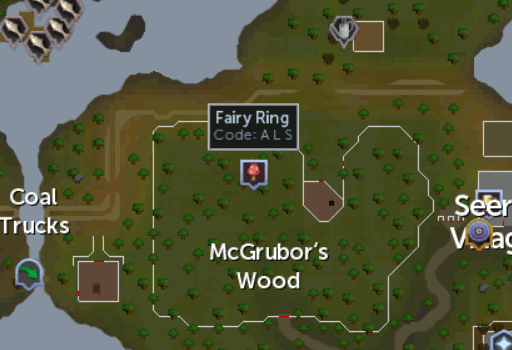 |
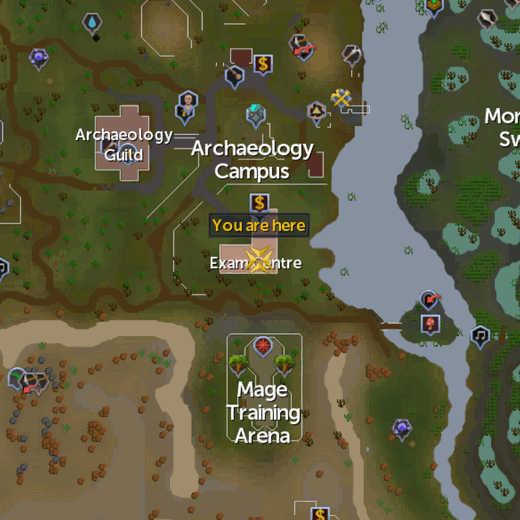
| B I P | Polypore Dungeon on an island on the River Salve, East of the Mage Training Arena. | 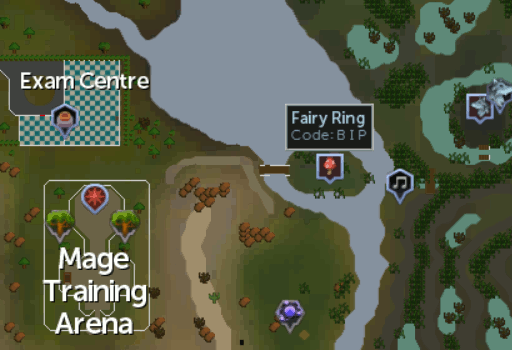 |
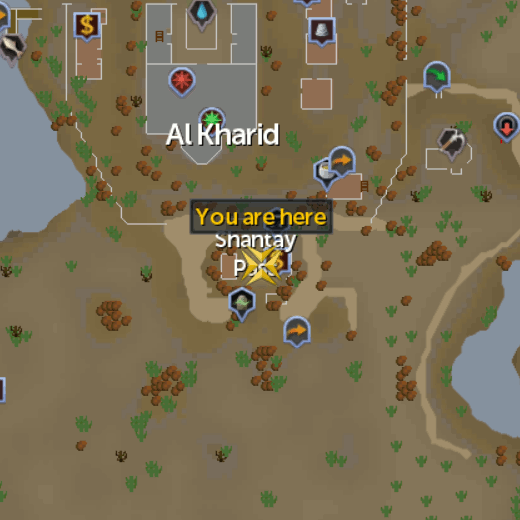
| B I Q | Kharidian desert, halfway between Shantay pass and Kalphite lair. | 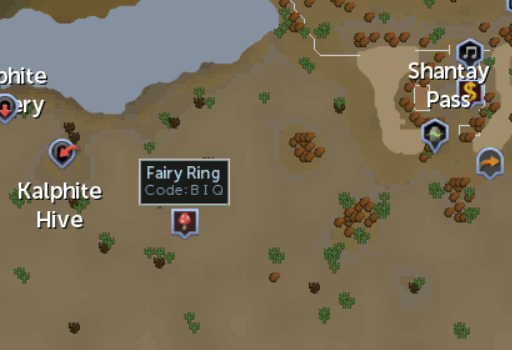 |
| B I R | Other Realms - Sparse Plane | 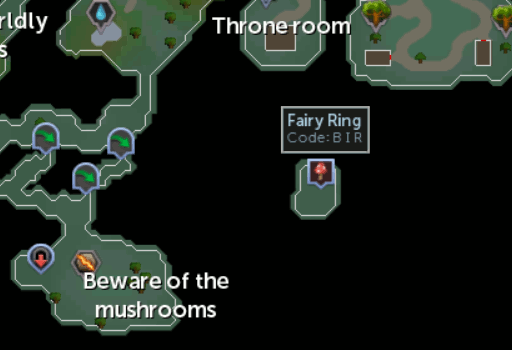 |
| B I S | Unicorn enclosure in Ardougne zoo. |  |
| B J P | "Nowhere". Chosing this solo destination will return you to the main Fairy Ring in Zanaris. | None. |
| B J Q | Ancient Cavern Note: Need to repair ring with 5 Bittercap mushrooms and a Spade. |
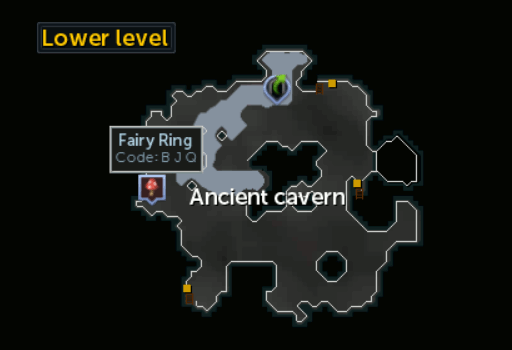 |
| B J R | Fisher King's Realm Note: Only works after completion of Holy Grail. |
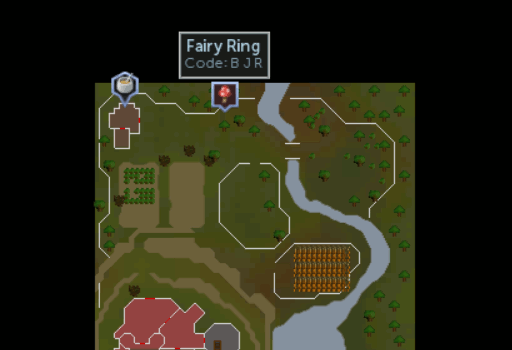 |
| B J S | The Lost Grove Note: Need to repair ring with 5 Bittercap mushrooms and a Spade. |
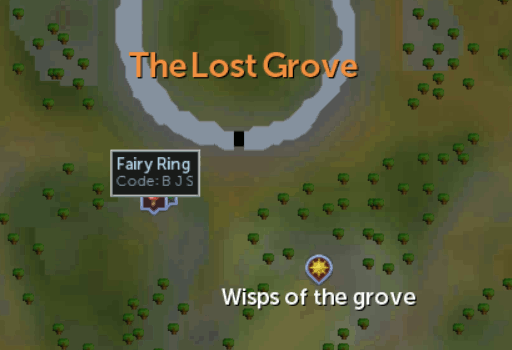 |
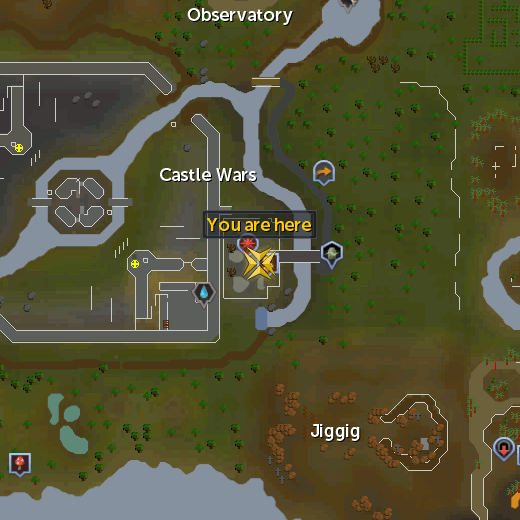
| B K P | South West of Castle Wars. | 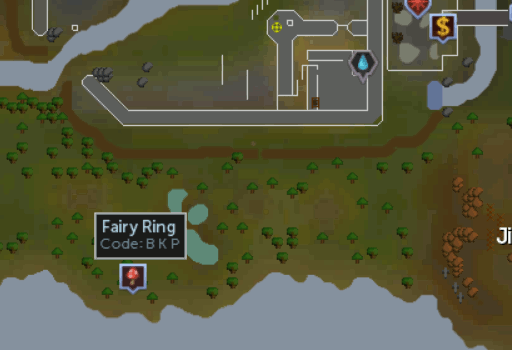 |
| B K Q | Enchanted Valley. | 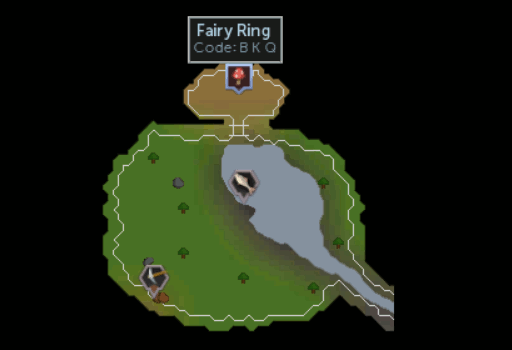 |
| B K R | Morytania swamp, South East of the gate. | 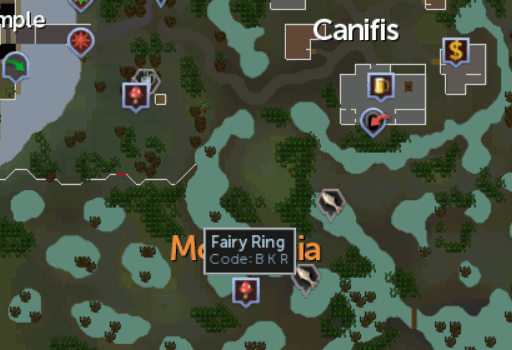 |
| B K S | "Nowhere". Chosing this solo destination will return you to the main Fairy Ring in Zanaris. | None. |
| B L P | TzHaar City. | 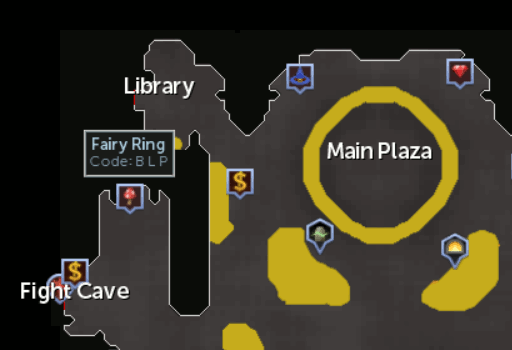 |
| B L Q | Yu'Biusk |  |
| B L R | Outside Legends' Guild. | 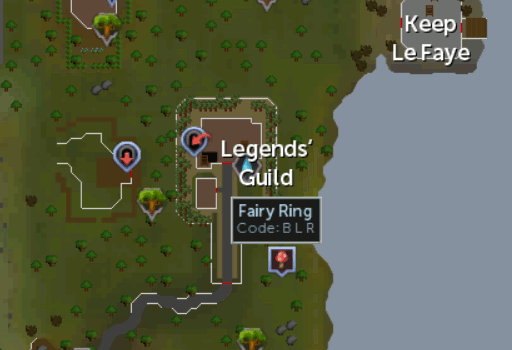 |
| B L S | "Nowhere". Chosing this solo destination will return you to the main Fairy Ring in Zanaris. | None. |
| C I P | Miscellania, North of the castle. | 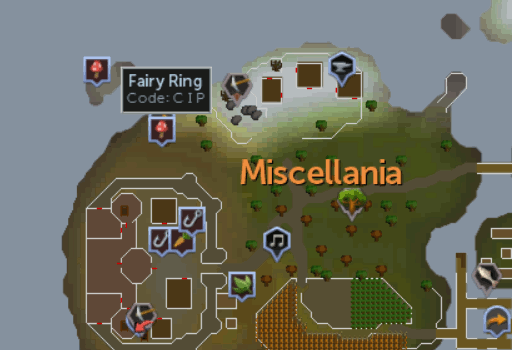 |
| C I Q | South of Tree Gnome Village maze, North West of Yanille. | 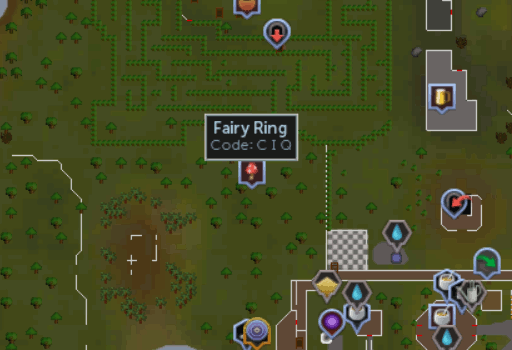 |
| C I R | "Nowhere". Chosing this solo destination will return you to the main Fairy Ring in Zanaris. | None. |
| C I S | Other Realms - ScapeRune (Evil Bob's island). | 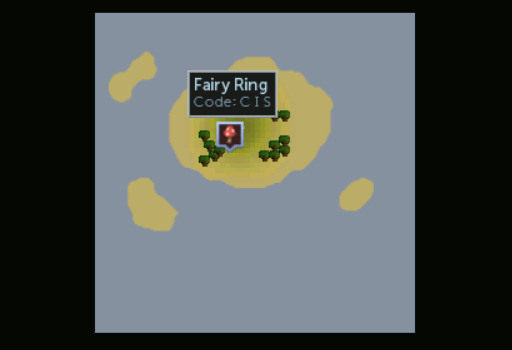 |
| C J P | "Nowhere". Chosing this solo destination will return you to the main Fairy Ring in Zanaris. | None. |
| C J Q | "Nowhere". Chosing this solo destination will return you to the main Fairy Ring in Zanaris. | None. |
| C J R | Eastern Fairy Ring West of Sinclair Mansion, North East of Seers' Village. | 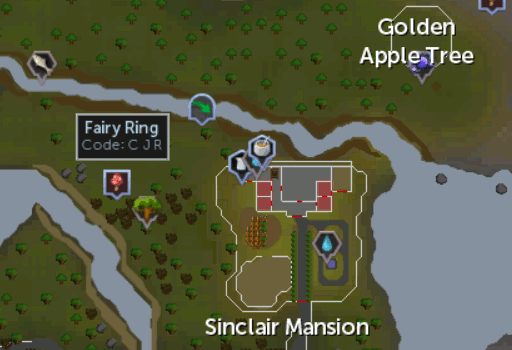 |
| C J S | Karamja, in the Kharazi Jungle South East of Shilo Village. | 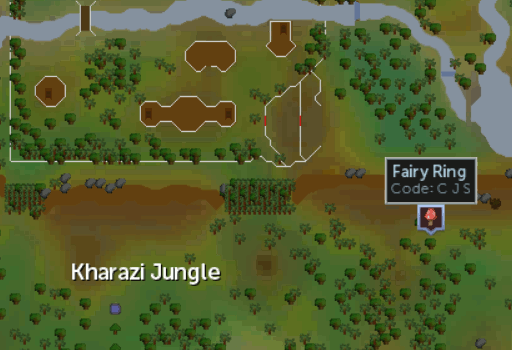 |
| C K P | Cosmic entity's plane, wherd you find Starflowers. | 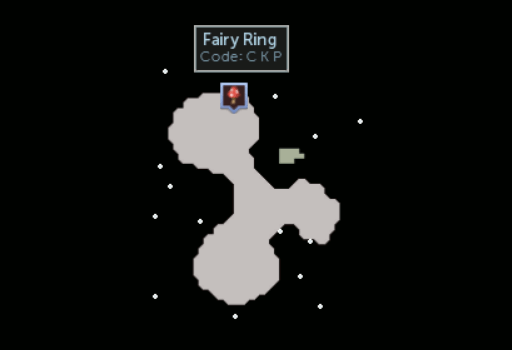 |
| C K Q | Menaphos Imperial District | 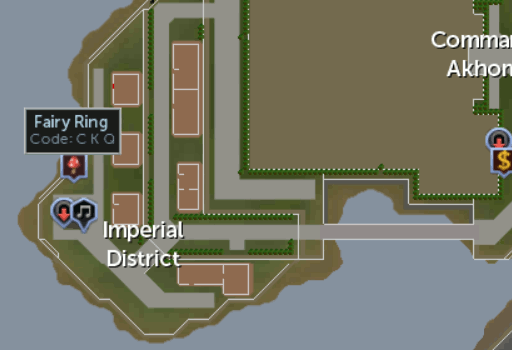 |
| C K R | Karamja, South of Tai Bwo Wannai. | 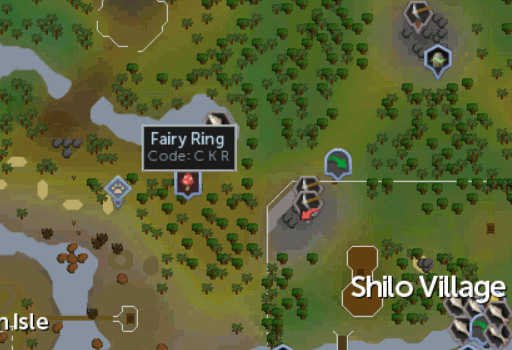 |
| C K S | Morytania, next to the mushroom patch West of Canifis. | 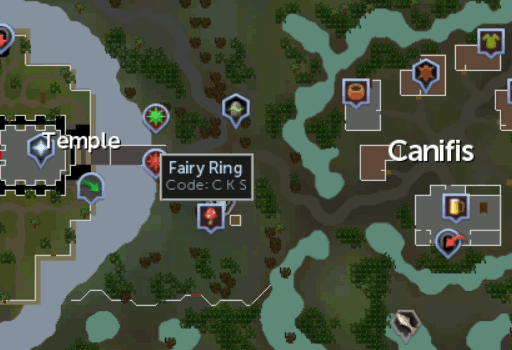 |
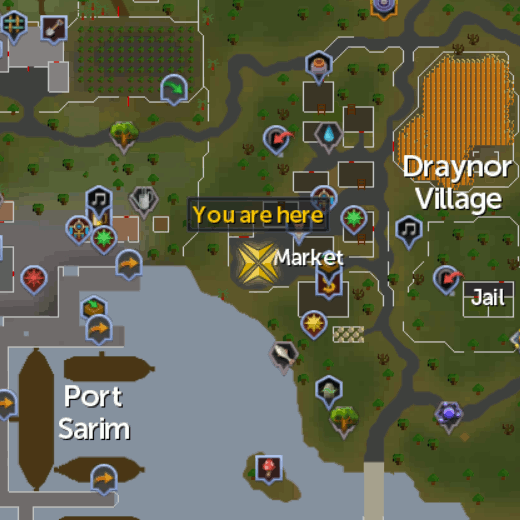
| C L P | Island East of Port Sarim, South of Draynor Village . | 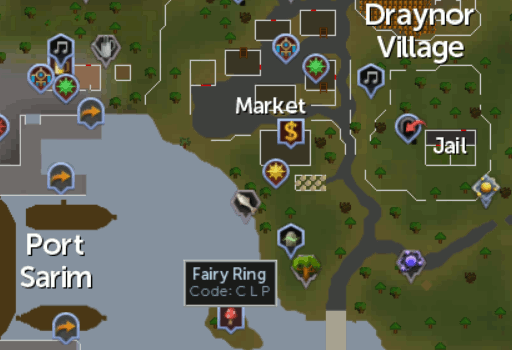 |
| C L Q | "Nowhere". Chosing this solo destination will return you to the main Fairy Ring in Zanaris. | None. |
| C L R | Mango Tree, near Ape Atoll Agility course. | 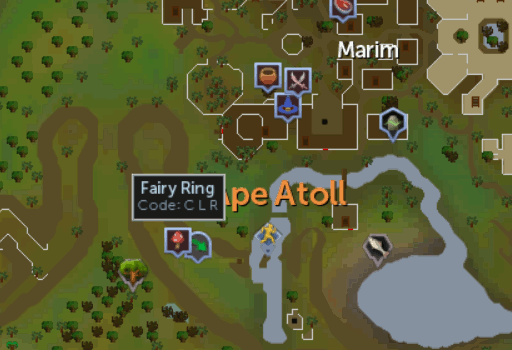 |
| C L S | Hazelmere's peninsula, East of Yanille. | 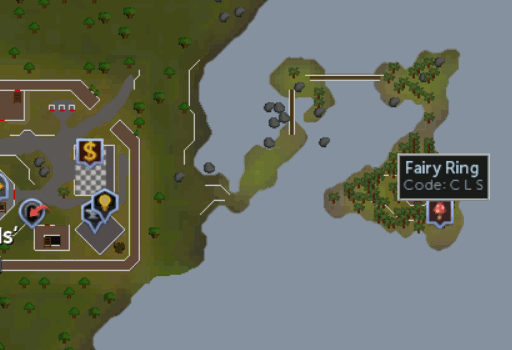 |
| D I P | Mos Le'Harmless Note: Need to repair bridge with 8 Planks and 16 Nails. Only 1 bridge can be fixed from the side, the other will need to be repaired from the island side. |
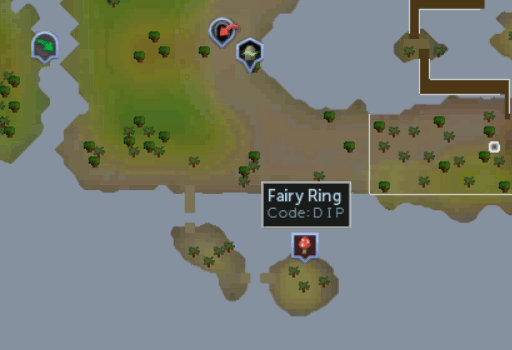 |
| D I Q | "Nowhere". Chosing this solo destination will return you to the main Fairy Ring in Zanaris. | None. |
| D I R | Gorak Plane. | 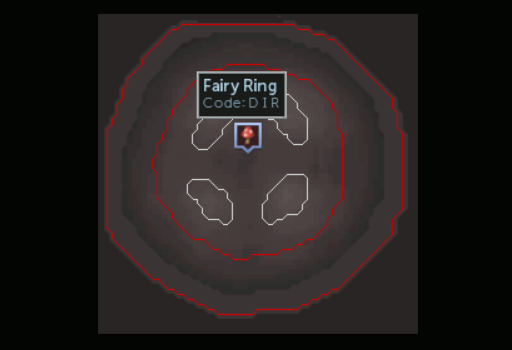 |
| D I S | Wizards' Tower . | 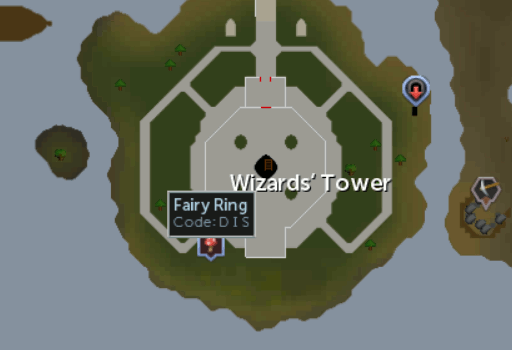 |
| D J P | South East of Ardougne, at Necromancer's tower. | 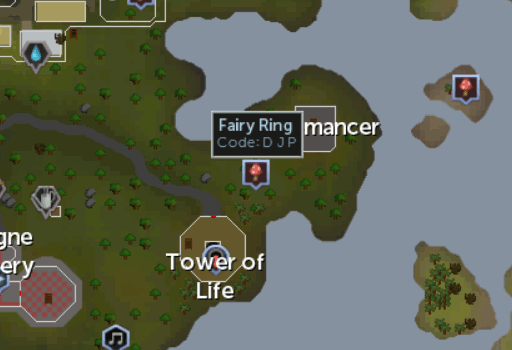 |
| D J Q | "Nowhere". Chosing this solo destination will return you to the main Fairy Ring in Zanaris. | None. |
| D J R | Western Fairy Ring West of Sinclair Mansion, North East of Seers' Village. |  |
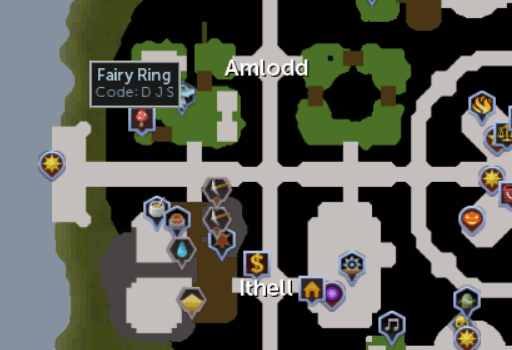
| D J S | Amlodd District Note: Completion of Plague's End is required. |
 |
| D K P | Karamja, Karambwan fishing loaction. | 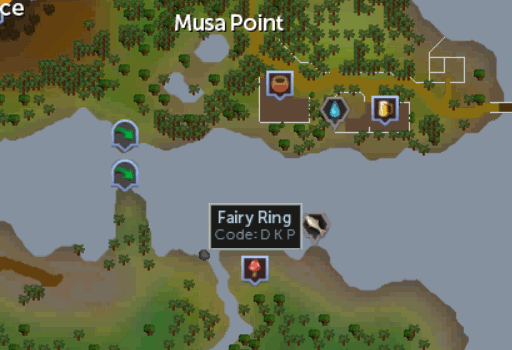 |
| D K Q | Glacor cave Note: Completion of Ritual of the Mahjarrat is required. |
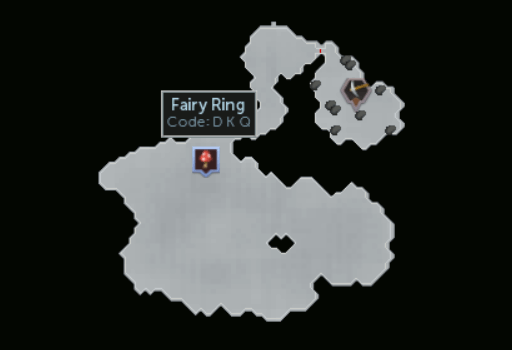 |
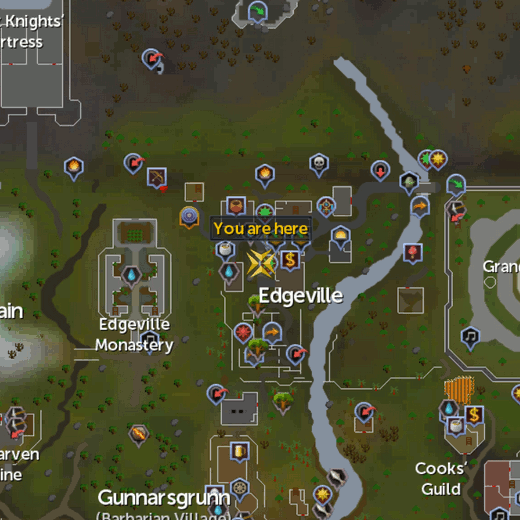
| D K R | Between Edgeville and the Grand Exchange. | 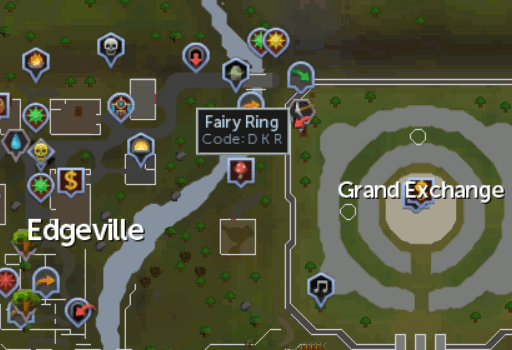 |
| D K S | Trollweiss Hunter Area, North East of Rellekka. | 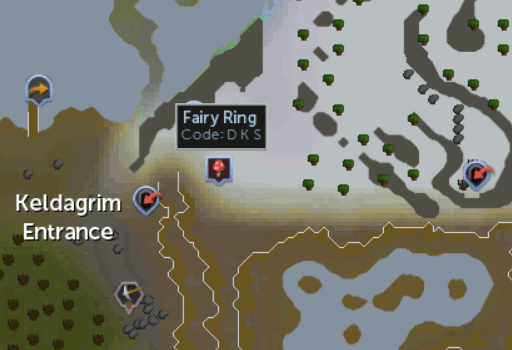 |
| D L P | "Nowhere". Chosing this solo destination will return you to the main Fairy Ring in Zanaris. | None. |
| D L Q | Desert lizards, North of Nardah. | 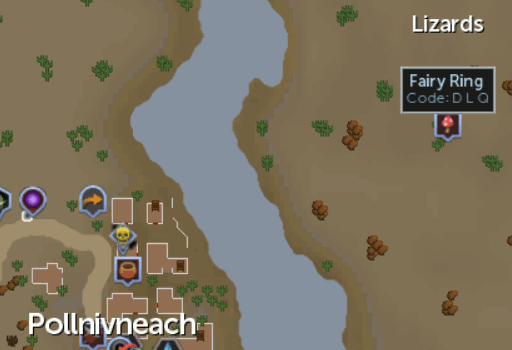 |
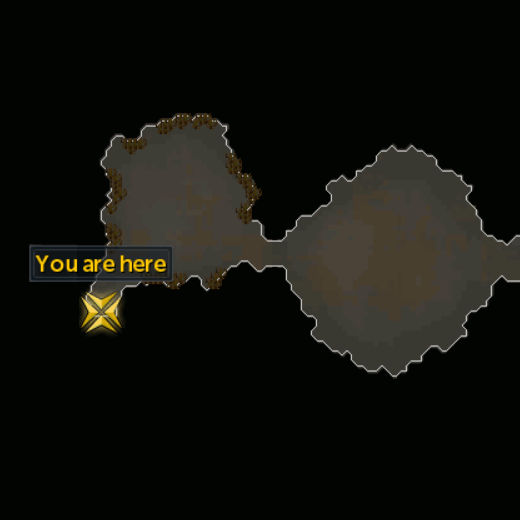
| D L R | Isafdar, island in the Poison Waste area. | 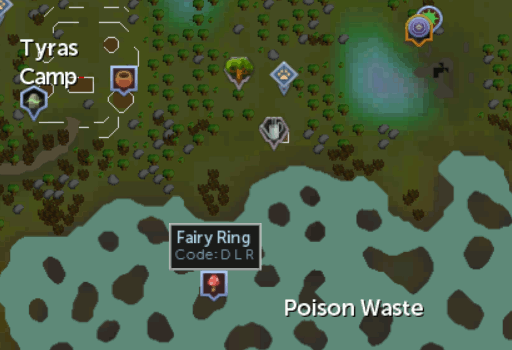 |
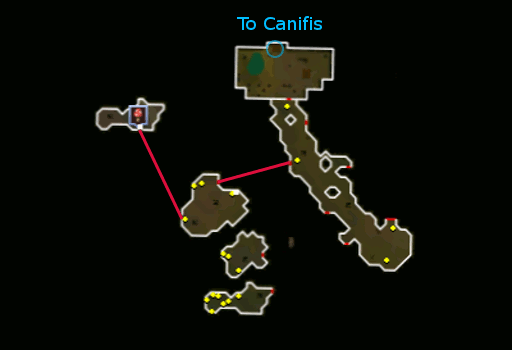
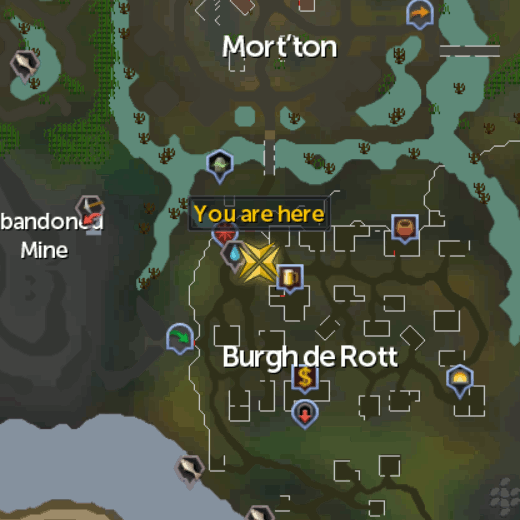
| D L S | Passage between Canifis and Mort'ton Note: Completion of In Search of the Myreque is required. |
 |
There are also combinations of codes, that take you several steps from the original ring, which are used to reach specific Quest based locations. These locations can still be reached (in 1 jump) post-quest from your Travel log.
 Amulet of glory
 Combat bracelet
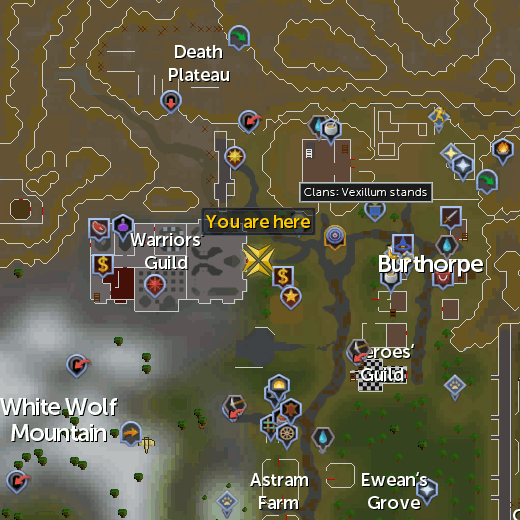
 Digsite pendant
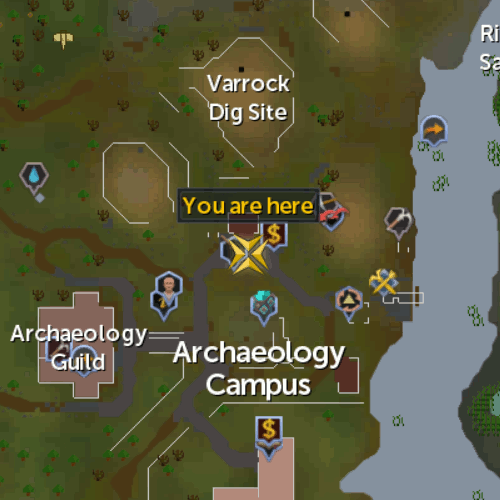
 Games necklace
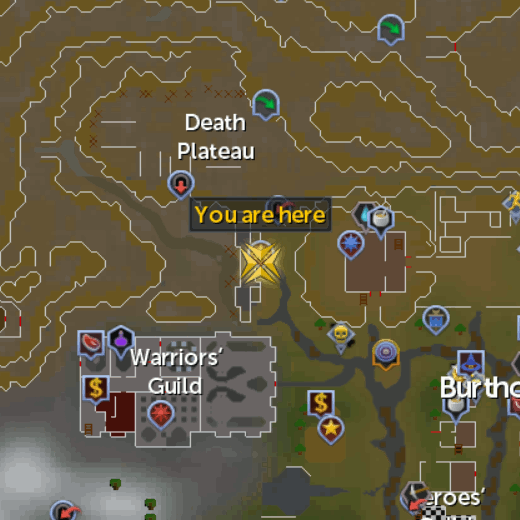
 Luck of the dwarves
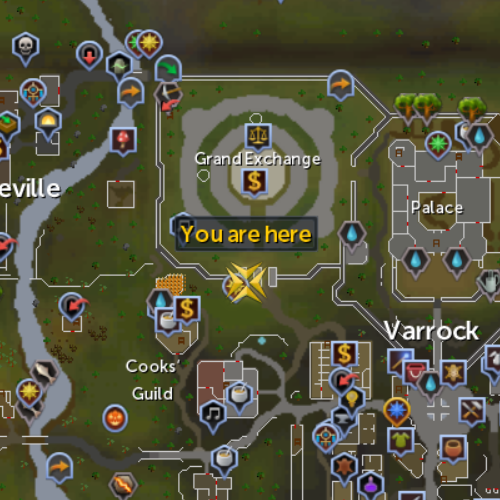
 Ring of duelling
 Ring of wealth
 Skills necklace
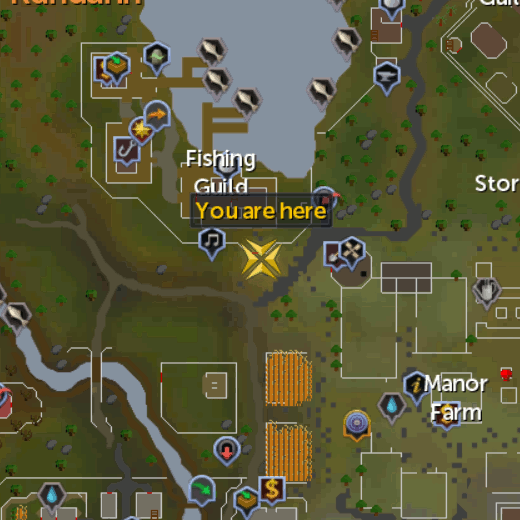
 Traveller's Necklace
Achievement Reward Outfit Teleports


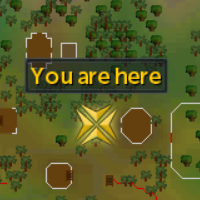
Map of portals:
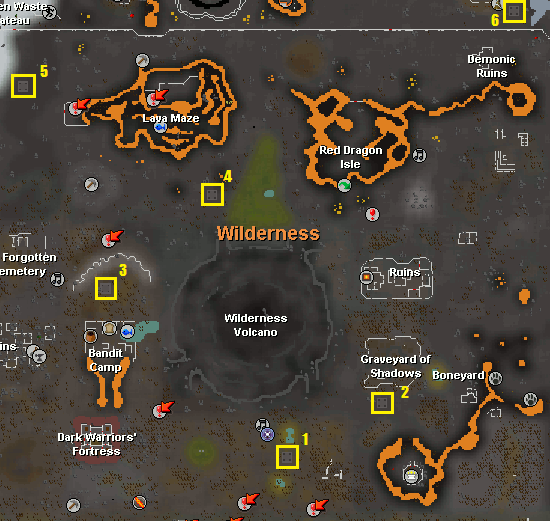
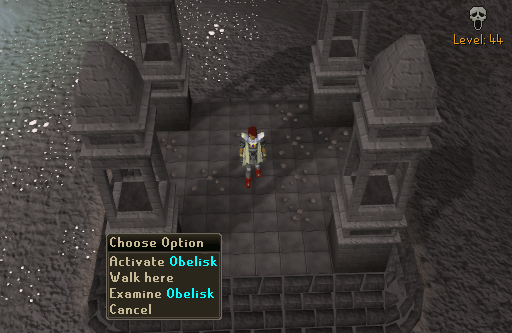
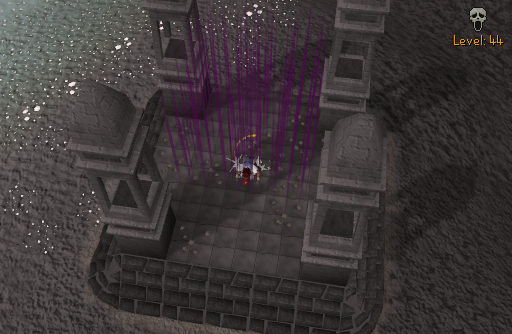
There are six obelisks located in the wilderness in various levels. The portals only teleport to each other and do so in a random fashion. You can activate the obelisks by activating one of the four Obelisks at each portal and then moving to the center area of the obelisk to be teleported. You can also activate the obelisks to teleport someone else. These obelisks will teleport any and all players that are in the center area of the portal.
Some nearby interests of the various portal locations:
- Level 13 - Edgeville, Mage of Zamorak, Graveyard, Chaos temple.
- Level 19 - Chaos temple, Salamander hunting area, Boneyard, Ruins, Black Unicorns (lvl 27), Green Dragons (lvl 79).
- Level 27 - Hobgoblin mine, Chaos Dwarves (lvl 48), Bandit Camp.
- Level 35 - Canoe route exit, Red Dragon Isle, Moss Giants (lvl 48).
- Level 44 - Ice Warriors (lvl 57), Ice Giants (lvl 53), Entrance to King Black Dragon, Lava Maze.
- Level 50 - Rogues' Castle, Chaos Elemental (lvl 305), Scorpion Pit
WARNING: If you are being attacked by another player, the teleport may also transport your attacker as well. The teleport might also transport you to an area where you can be attacked because you have moved deeper into the wilderness. Basically, the portals may either help or hinder you by transporting you to a different level in the Wilderness, so do not count on them to get you out of trouble.
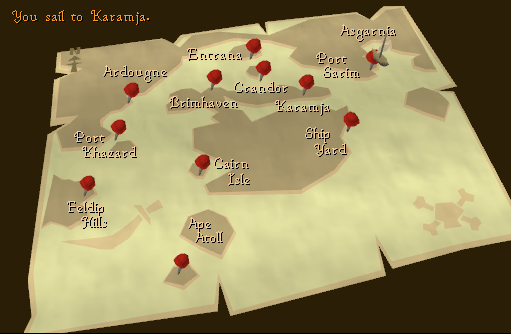
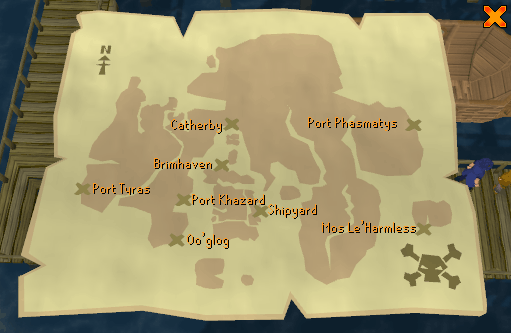
This ship network will allow you to travel from dock to dock all around the world of Runescape. However, this doesn't come without a fee, the prices determine on which quests you have completed and if your carrying a Ring of charos (a). If you have completed the Cabin Fever quest all prices will be halved and if wearing a Ring of charos (a), the cost will be halved again, which results in the price decreasing rapidly.
Notes:
- The prices displayed at the ships traveling to Mos L'harmless are already halved as traveling to there already requires you to have completed the Cabin Fever Quest.
- the prices displayed in the table below are the original values, this means that they aren't the prices when wearing a Ring of charos (a) or when you have completed the Cabin fever Quest. The Completion of the Cabin Fever quest or when wearing a Ring of charos (a), the prices will be halved, so if you have completed the Cabin Fever quest, and are wearing a Ring of charos (a), the price will be halved twice.
- X means that you aren't able to travel that way. For example: you cant travel from Brimhaven to Brimhaven or from Port Phasmatys to Mos Le'harmless.
- To travel to Mos Le'Harmless you must have completed the Cabin Fever Quest.
- To travel to Port Tyras you must have completed the Regicide Quest.
- To travel to Port Phasmatys you must have completed the Ghost Ahoy Quest.
| Depature Docks Below | Brimhaven | Catherby | Port Sarim | Port Phasmatys | Port Tyras | Port Khazard | Karamja | Ship Yard | Mos Le'Harmless |
| Brimhaven | X | 480 | 1600 | 3650 | 8000 | 1600 | 200 | 400 | 725 |
| Catherby | 480 | X | 1000 | 3250 | 8000 | 1600 | 480 | 1600 | 625 |
| Port Sarim | 1600 | 1000 | X | 650 | 3200 | 1280 | X | 400 | 325 |
| Port Phasmatys | 3650 | 3250 | 2050 | X | 3200 | X | 1850 | 1850 | X |
| Port Tyras | 8000 | 8000 | 8000 | 8000 | X | 3200 | 8000 | 8000 | 2000 |
| Port Khazard | 1600 | 1600 | 1280 | 4850 | 3200 | X | 1600 | 1600 | 1025 |
| Karamja | 200 | 480 | X | 1850 | 3200 | 400 | X | 200 | 225 |
| Ship Yard | 400 | 1600 | 400 | 1850 | 3200 | 720 | 200 | X | 225 |
| Mos Le'Harmless | 725 | 625 | 325 | X | 2000 | 1025 | 1025 | 257 | X |
From Port Sarim, you can talk to either Seaman Lorris, Seaman Thresnor, or Captain Tobias. They will take you to the Musa Point Dock, East of Brimhaven, for 30 gp. If you are wearing Karamja gloves 1, Karamja gloves 2, or Karamja gloves 3, then it will only cost 15 gp.
The Musa Point dock on the northeast side of Karamja goes back to Port Sarim as well. To go to Port Sarim from this dock, talk to a Customs Agent. They will ask to search you, and you should let them. As long as you aren't carrying Karamja rum, they will let you go to Port Sarim for only 30 gp. If you are wearing Karamja gloves 1, Karamja gloves 2, or Karamja gloves 3, then it will only cost 15 gp.
North of Brimhaven there is a dock to Ardougne. Once again there are Customs Agents that will ask to search you and charge you 30 gp for passage. Let them search you, pay the 30 gp and the boat takes you to Ardougne. If you are wearing Karamja gloves 1, Karamja gloves 2, or Karamja gloves 3, then it will only cost 15 gp.
At Ardougne, talk to Captain Barnaby there and he'll charge you 30 gp to go to Brimhaven. If you are wearing Karamja gloves 1, Karamja gloves 2, or Karamja gloves 3, then it will only cost 15 gp.
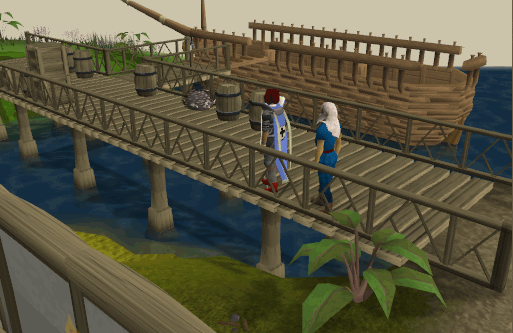
Just south of Cairn Isle on Karamja (West of Shilo Village) is a boat dock for the Lady of the Waves. You can go up the ladder to the dock and walk across onto the boat. Give Captain Shanks your ticket (purchased in Shilo Village for 20 - 50 gp) and travel to either Port Sarim or Port Khazard.
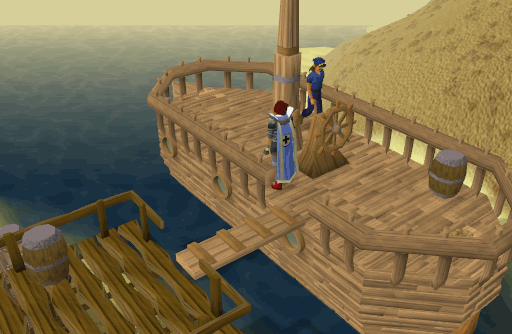
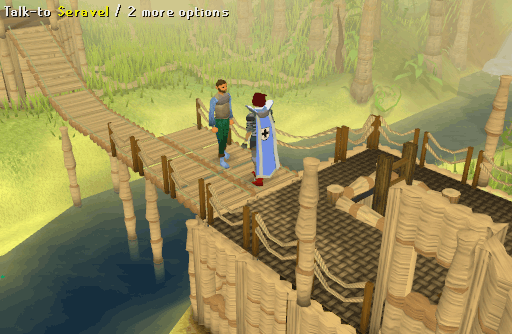
Buy tickets for the Lady of the Waves in Shilo Village from Seravel, upstairs in the Fishing Shop. They cost 25 gp each.
At Port Sarim you can talk to the Monks of Entrana on the dock and they will take you for FREE to Entrana. However, if you are wearing\holding any weapon, armor, or mystic robes, you will not be allowed to go to Entrana.
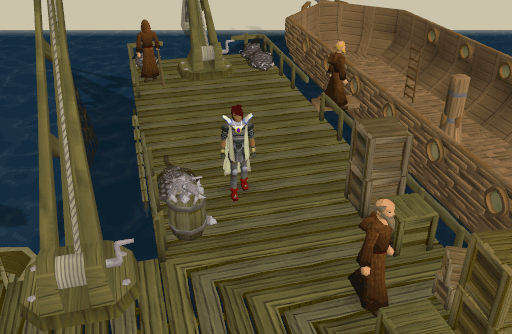
At Entrana, talk to the Monks of Entrana on the dock to go back to Port Sarim.
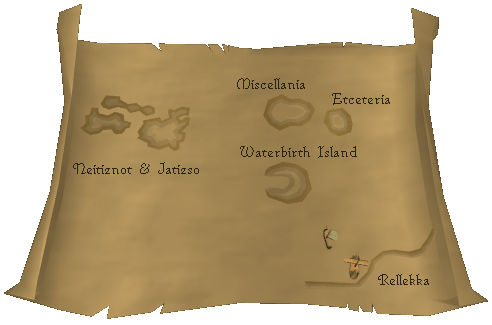
To get to Miscellania, talk to the Sailor on the dock north of the market in Rellekka. If you have done the Fremennik Trials Quest, he will take you to Miscellania for free, otherwise you cannot reach Miscellania.
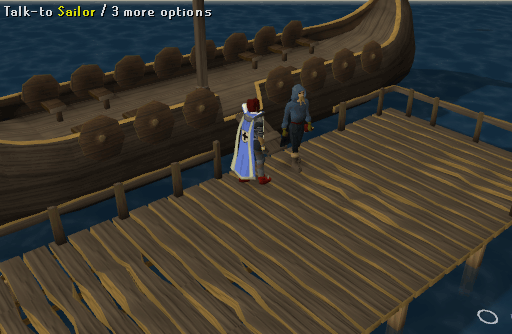
On Miscellania, talk to the Sailor to get back.
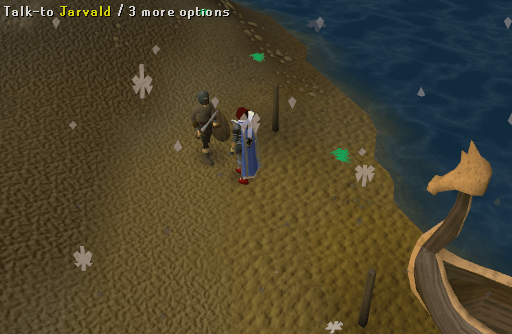
You can board the ship to the Waterbirth island in Rellekka on the most north-western dock. Right click Jarvald then click "Travel Jarvald", or if you like a nice chat with him then just normal left click on him.
If you have had enough and you want to go back to Rellekka then simply go back to the east side of the Waterbirth Island and talk or travel Jarvald.
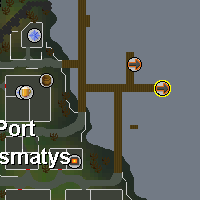
To travel to the Void Knight Outpost you should go to Port Sarim. Then go the the most South-eastern dock and talk to Squire. He will take you to the Void Knight Outpost.
If you want to go back to Port Sarim then go to the north part of the Void Knight Outpost on to the dock and talk to Squire once again. He will take you back to the Port Sarim docks.
To go to the Piscatoris Fishing Colony island you must travel west of the Tree Gnome Stronghold and talk to a lady named Kathy Corkat. Pay her 50 coins to travel to the north to the Piscatoris Fishing Colony island.
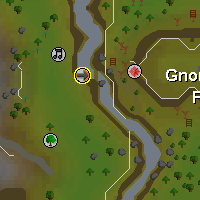
To travel back simply talk to Kathy Corkat again and she will take you back to the west of the Tree Gnome Stronghold for free.
You need to have atleast started the Rum Deal quest to use this transportation method. To travel simply talk to Pirate Pete (North East of the ectofuntus), he will knock you down and when you wake up your on Braindeath Island.
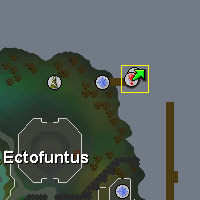
To travel back simply talk to cap'n Braindeath.
You need to have atleast started the Cabin Fever quest to travel with Bill Teach. Board the ship then talk to Bill, you will either sail to Mos Le'Harmless or you will end up in a pirate fight (only when doing quest).
To get to Jatizso, talk to Maria Gunnars. To get to Neitiznot, talk to Mord Gunnars. If you want to get back from Jatizso or Neitiznot to Rellekka again, simply talk to Maria or Mard.
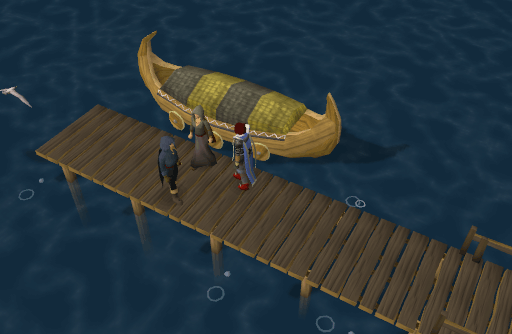
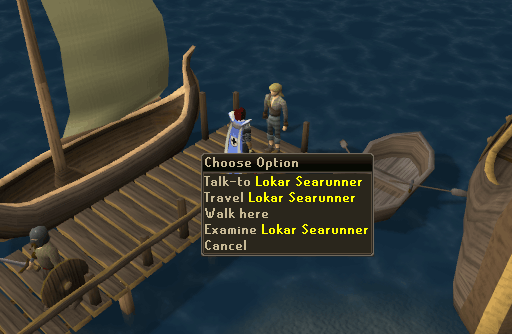
To get to Lunar Isle, talk to Lokar Searunner on Rellekka dock. If you have Seal of Passage, he'll let you travel without any questions. If you do not have Seal of Passage, he will tell you that you might be in trouble. Seal of Passage isn't needed to travel, but you will not be able to talk to anyone on Lunar Isle because they will send you back to Rellekka dock again.
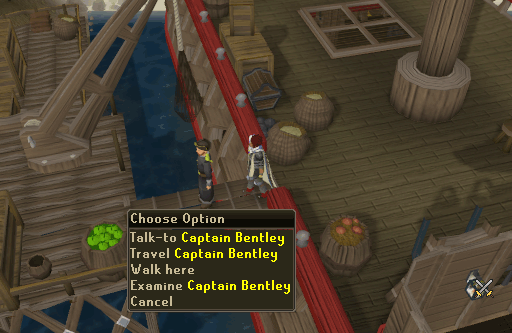
Once you arrive to Pirates' Cove, go up the ladders and you will see a ship. Talk to Captain Bentley in order to get to Lunar Isle. Simply talk to Captain again if you want to get back.
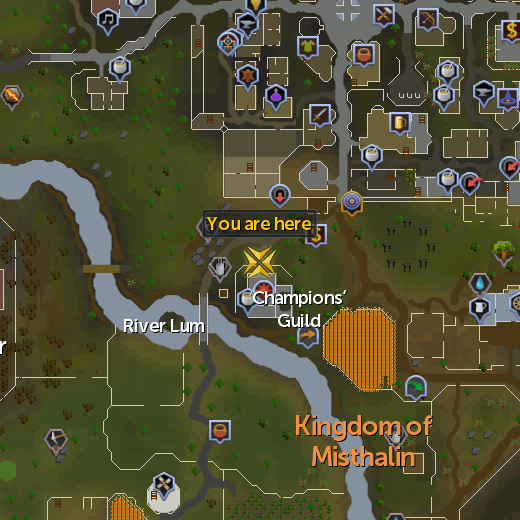
The Canoe transportation system is described in detail in the Woodcutting skillguide. All Canoe Stations are located on the east river bank of the river Lum. You can travel North or South just by clicking on the desired station. The better the canoe, the further you can travel.
The canoes allow you to travel between the following places (here sorted from South to North):
- Lumbridge
- Champions Guild
- Barbarian village
- Edgeville
- Wilderness pond (lvl-35 and there no canoe tree here!)
-
Mine Carts:
Port Sarim - Karamja - free
-
Ships:
Ardougne to Brimhaven - free
-
Devices:
Flying carpet - Reduces the price by 25 gp

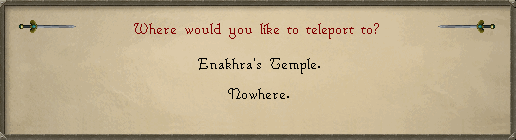
The camulet, which you gain from Enakhra's Lament quest, allows you to teleport next to the pyramid, South of the Bandit Camp in the Kharidian desert.
To teleport, simply rub the amulet in your inventory.
The camulet has 4 charges and one charge is used every time you teleport. When there are no charges left, you can recharge it by using camel dung on the camulet.

The Fremennik Trials Quest is required to be able to enchant a Lyre. You may have as many lyres as you want; in order to make more cut branches from the tree and buy gold fleece from the Troll. Spin the fleece and use it on the lyre. You can re-enchant any Lyre by offering the Fossegrimen a Raw shark like you did in the quest, which will give it two uses, a manta ray which will give it three uses, or a Sea Turtle which will give it four uses. You may also wear your Ring of Charos (a) and enchant it with a bass, this will give it two uses. Playing the Enchanted Lyre will teleport you to Rellekka.

The Ghosts Ahoy Quest awards successful questers with the Ectophial. To use it simply click empty Ectophial and you will instantly be teleported to the Ectofunctus. This is a great way to get to the Slayer Tower, Canifis, and Skullball. Its also a great thing for intense combat since unlike teleport runes, it takes up one spot and unlike rings or amulets, it doesn't have interruptible menus.

First obtained when starting Mourning's End, Part 1 quest. It teleports you to the elf village of Letya. It is limited upto 3 uses normally before it must be recharged by the roving elf Ilfeen for a price. Additional teleport crystals can be obtained as drops from the elves around Letya. Useful since, as with harp and ectophial, it's a one click teleport. It places you near a bank, prayer altar and three Magic Trees.
| Recharge time | Cost |
| 1 | 750 gp |
| 2 | 600 gp |
| 3 | 450 gp |
| 4 | 300 gp |
| 5 and later | 150 gp |

A Broomstick is obtained during the Swept Away quest. It provides unlimited teleports to the Sorceress's Garden. To use it, you must wield it and then operate it.
Ardougne to Deserted Keep Lever
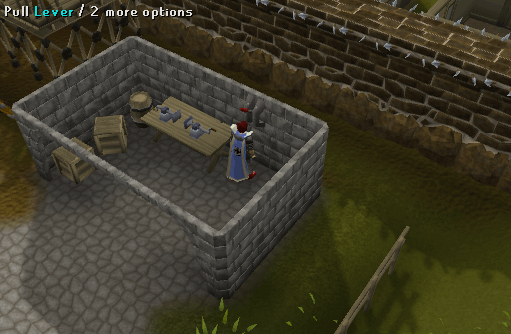
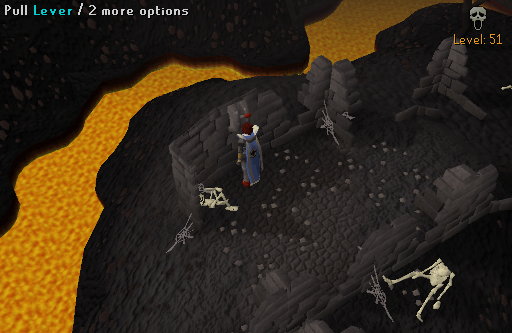
West of the Ardougne Castle but still in East Ardougne there is a shack that is just north of the northern watchtower that is next to the gate to West Ardougne. Inside is a lever. Pull the lever in the shack and it will teleport you to the Deserted Keep in level 55 wilderness. There is a lever there to pull to get back to Ardougne. This a great way to get to the Mage Arena and Rogues' Castle. You need to bring a sharp object (as in a weapon or knife) to cut through the web to get out of the Deserted Keep area.
Ardougne lever:
Wilderness lever:
This place is just west of the Deserted Keep (see above) and it is the only safe spot in the wilderness where you can't be attacked, and is the only place where you can teleport above level 20 wilderness. This level 55 wilderness place is used for banking (only bank in the wilderness!), buying runes (they sell cheep laws and nats), doing the Mage Arena miniquest, and buying/changing god capes and staffs. To get to the lever you must have a sharp object (as in a weapon or knife). You need that sharp object to cut through two webs to get to the lever. Just pull the lever and you are safe! Pull the lever in the Mage Arena ready room to get back out to the wilderness (but remember, you can teleport here!). If the webs aren't cut when you get back into the wilderness, you'll have to recut them.
Note: The actual mage arena where you fight mages is in the wilderness and you can be killed by Revenants.
Safe zone lever:
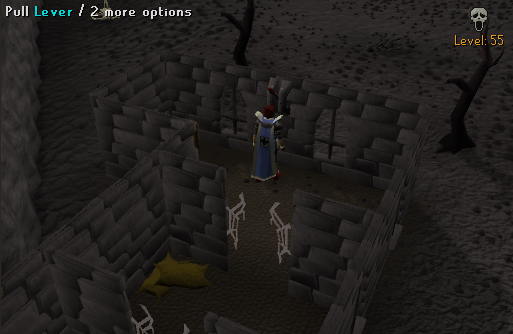
Safe zone:
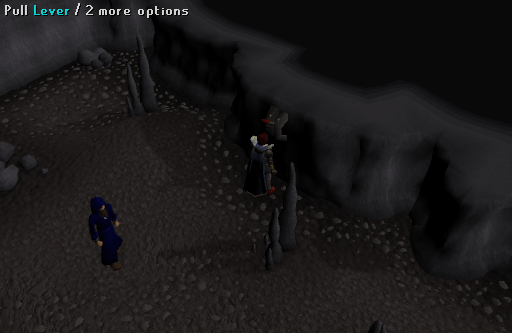
Rifts are an interesting, fast, and rather dangerous way of getting around. You must first complete a small miniquest to use rifts, click HERE to see how. Now, after completing that miniquest, just go back to the Zamorak Mage in the Wilderness, right-click him, and select Teleport.
Note: This does NOT work from Varrock or if you have any Saradomin items with you.
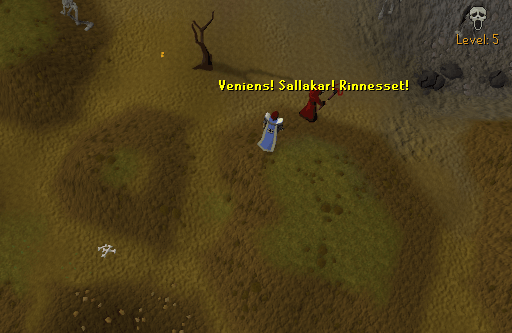
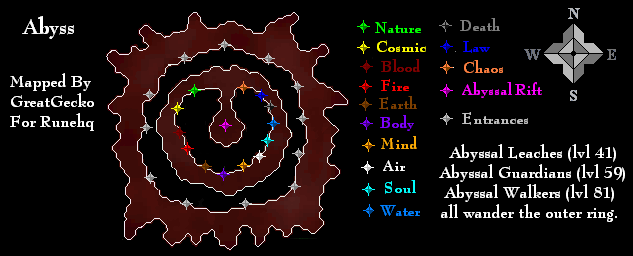
Now, you've been teleported to the mysterious Abyssal Space where you can use the Rifts to get around to many places around the world. As a note of caution: you ALWAYS get a skull above your head, ALWAYS lose all your prayer points, and the whole Abyssal Space is all multicombat, so this place is not a very friendly place to hang out. And the outer ring is literally crawling with level 81 Abyssal Walkers, level 59 Abyssal Guardians, and level 41 Abyssal Leeches that are all agressive. Ok, now you're in the outer ring of the Abbysal Space and you need to get into the inner ring to get to the rifts. To do so you either have to chop through tendrils with an axe (woodcutting), mine through the "rocks" with a pickaxe (mining), burn a boil (firemaking), distract the eyes (theiving), or crawl up the hole (agility). (You get 25 exp in the skill you used to get into the inner ring as an added bonus) Once in the inner ring, simply find the rift you wish to use to get to where you want to go. Each rift teleports you to that specific runecrafting altar. Also know that you do NOT have to have the runecrafting level to craft to runes to go to that altar, so a lvl 20 runecraft can still go to the chaos altar. This is a one way trip however, so don't go into the wrong rift.
List of Locations:
- Air - West of Varrock.
- Earth - Northeast of Varrock.
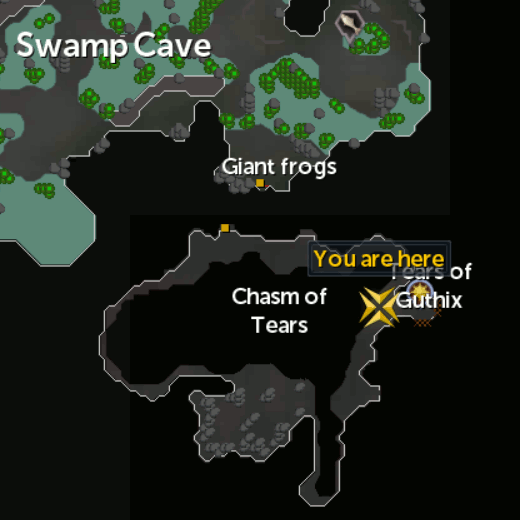
- Water - In the Lumbridge swamps.
- Fire - Just a few feet north of the entrance to the Al Kharid duelling Arena.
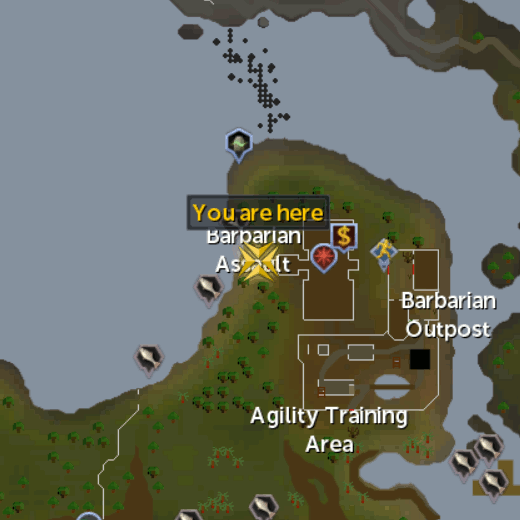
- Body - Just west of the Barbarian Village.
- Cosmic - Zanaris (Lost City) (MUST have complete the Lost City quest to get here).
- Chaos - Lvl 9 wilderness northeast of Edgeville.
- Nature - On the north of the Shilo Village on Karamja.
- Law - North Entrana island (Can NOT have any weapons, armor, or mystic robes to go here).
- Death - Not useable at this time.
- Blood - At the end of the tunnels in the laboratory in the Meiyrditch area.
- Soul - Not useable at this time.
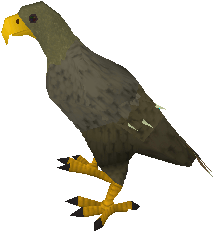
In order to use the Eagle Transportation, you must have completed the Eagles' Peak quest.
After, you have spoken to Charlie at the Ardougne Zoo, go to a bank, grab a rope and a teasing stick OR a thatch spar OR a garden cane and head back to Eagles' Peak.
(Note: Rope can be bought from general stores, from Shantay from Shantay Pass, and Ned for 15 gp. You can also find rope at the Desert and Polar Eagles' caves, later to be detailed).
- You can buy a teasing stick from a hunter store.
- You can get a thatch spar from the Tai Bwo Wannai Clean Up mini-game.
- You can get a garden cane from the Creature of Fenkenstrain quest.
Once you enter the Eagles' Peak cave, head southwest and go east from Nickolaus. From there, you will meet three eagles.
*Note: You do not need to unlock all three caves to use a specific eagle. For example, if you unlocked the jungle eagle, you do not need to unlock the polar and desert eagle in order to use the jungle eagle.
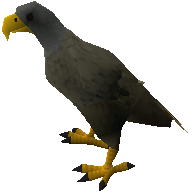
Jungle Eagle
-
First, use your rope on the Jungle Eagle.
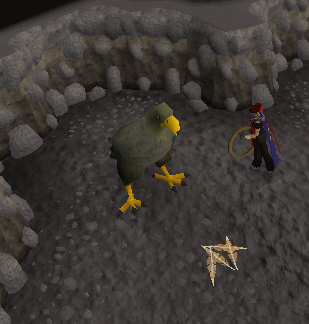
-
You will enter a funny cutscene.
-
When you arrive at the Jungle Eagles' cave, you will see two cave exits. Exit out the smaller cave.
-
Outside, you will see a small vine. Use the teasing stick with the small vine.
-
The vine takes approximately 20 minutes to grow. You can not re-enter the cave, until it is fully grown.
(Note: If you have done the Fairy Tale II quest or can use the fairy rings, you can use the code "AKS" to go to the Felip hunter area, you be close to the gnome pilot. From there, walk southwest towards the hunter guide symbol and the cave should be directly to the west of him)
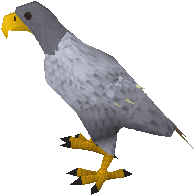
Polar Eagle
-
To go to the the Polar Eagles' cave, head north to the Trollweiss Hunting area.
-
Go due north and past the tracking area.
Teleport to Camelot or house teleport if your house is located in Relekka is recommended.
(Note: If you have done the Fairy Tale II quest or can use the fairy rings, you can use the code "DKS" to go to the Trollweiss Hunter area and walk to the cave)
-
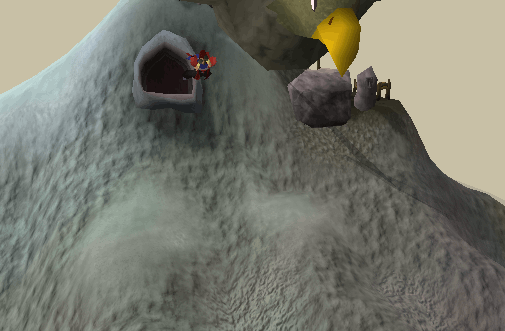
Once you go to the end, head due east and will see the cave.
-
Climb up the rocks, and enter the cave. You need 35 Agility to climb up the rocks.
-
Use the rope on the Polar Eagle. You will return to the Eagles' Peak once more.
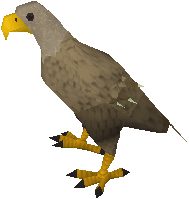
Desert Eagle
-
Go to Al Kharid. Teleport by Ring of duelling or Glory Amulet is recommended.
-
Grab a Shantay pass and waterskins. You can buy them from Shantay at the entrance of Shantay Pass. (Note: If you have done the Fairy Tale II quest or can use the fairy rings, you can use the code "DLQ" to go to the Nardah hunter area and walk north to the cave)
-
Head due east and cross the bridge of the River Elid.
-
At the bridge, go all the way north, close to some mining rocks, and you will see a cave.
-
Enter the cave, push the boulder, and rope the Desert Eagle. You need 45 strength to push the boulder.
Karamjan Jungle Eagle
-
Head over to the giant root northeast of Shilo Village . Note: The area in and around the vine is full of aggressive and poisonous monsters! It is advised to bring armor, food, and antipoisons! A machete is also needed to cut through some of the hanging vines.
-
You should start by entering here.
-
Next head south and climb down. Now head northwest and climb down another vine to get back onto the ground level.
-
Immediately to the south of you, you will see the vines forming some sort of gate, with smaller vines hanging from it. Cut through them and crawl through. Go through another one of these, then climb up the vine to the southwest.
-
Climb up twice and you will find the platform with the eagle.
-
You will return to the Eagles' peak with all the three eagles once again.
Last, you can rope the Jungle eagle once more, exit the cave, and check on your vine.
Congratulations, you can now use all three caves!
Last words, the Eagle Transportation system is an effective way to transport between hunting areas.
-
The Jungle Eagle brings you west of the hunter guide in Feldip Hunter area.
-
The Polar Eagle brings you north of the Polar/Trollweiss Hunter area.
-
The Desert Eagle brings you to the Desert/Nardah Hunter area.
- The Karamjan Jungle Eagle brings you to the top of the Back to my Roots vine.
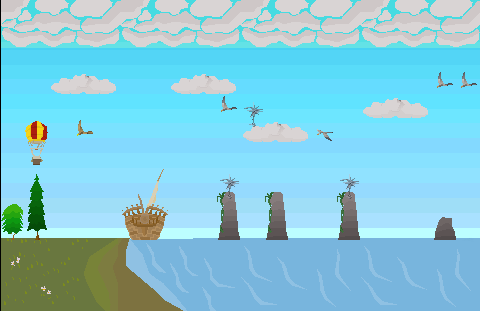
This transportation method comes with completion of Enlightened Journey. It does have some requirements and, in order to fly to a location, you must first unlock it. To unlock a location, you must successfully fly there from Entrana using the controls on the panel that will appear. Failing will mean you crash, and requires you to try the route again. Each location also has an associated Firemaking level.
The Hot Air Balloon system runs on a payment system of charges. The charges are gained by giving noted or unnoted logs to any of the balloon assistants. They can store up to 4000 charges but the logs CAN NOT be withdrawn. See the table below for which logs are accepted and how many charges each log gives.
All the requirements for each Location are shown in the table below. The "Cost to Unlock" is the number of charges used to unlock the route on the first use. Charges per trip are the number of charges used in each subsequent trip.
| Destination | Cost to Unlock | Charges per trip | Firemaking Level Required | NPC at Ballon |
| Entrana | Unlocked During the Quest | 1 Charge | 20 | Auguste |
| Taverley | Unlocked During the Quest | 1 Charge | 20 | Assistant Stan |
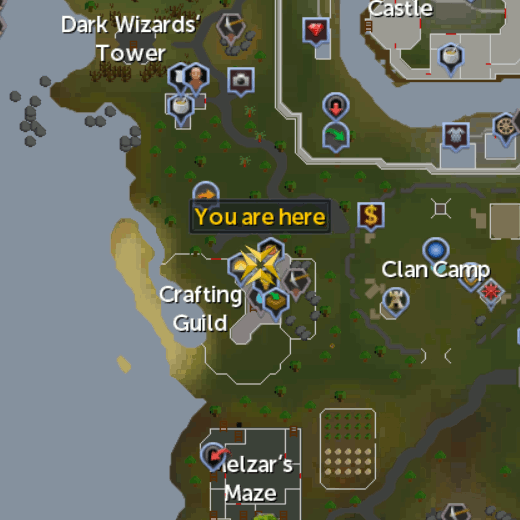
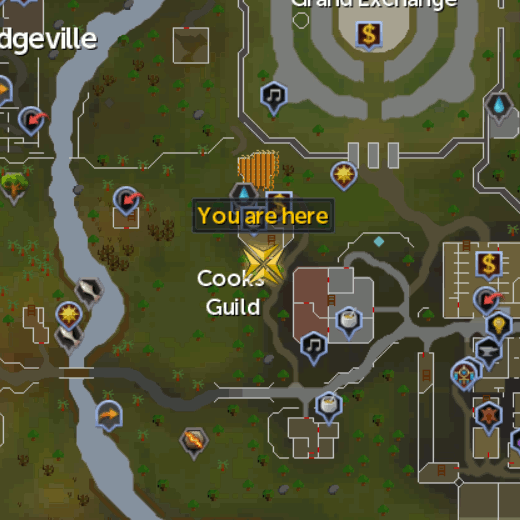
| Crafting Guild | 20 Charges | 2 Charges | 30 | Assistant Brock |
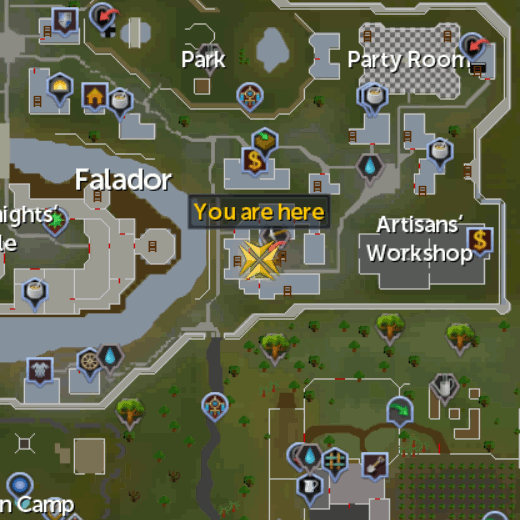
| Varrock | 30 Charges | 3 Charges | 40 | Assistant Serf |
| Castle Wars | 40 Charges | 4 Charges | 50 | Assistant Marrow |
| The Grand Tree | 50 Charges | 5 Charges | 60 | Assistant Le Smith |
| Log Type | Charges per log | Price per Log | Price per Charge |
| Logs | 1 | 1,560 Coins | 1,560 Coins |
| Oak logs | 2 | 944 Coins | 472 Coins |
| Willow logs | 3 | 1,016 Coins | 339 Coins |
| Teak logs | 3 | 320 Coins | 107 Coins |
| Mahogany logs | 4 | 394 Coins | 99 Coins |
| Arctic pine logs | 4 | 1,083 Coins | 271 Coins |
| Eucalyptus logs | 4 | 672 Coins | 168 Coins |
| Yew logs | 4 | 658 Coins | 165 Coins |
| Magic logs | 5 | 902 Coins | 180 Coins |
| Elder logs | 6 | 10.3k Coins | 1,717 Coins |
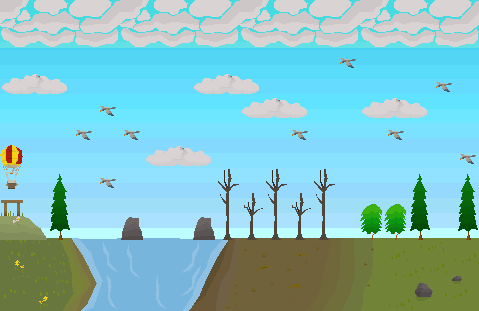
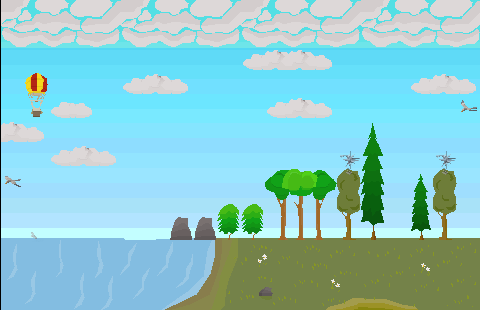
Sequences to Unlock a Destination:
| Screen 1 | |
| Relax x3 | 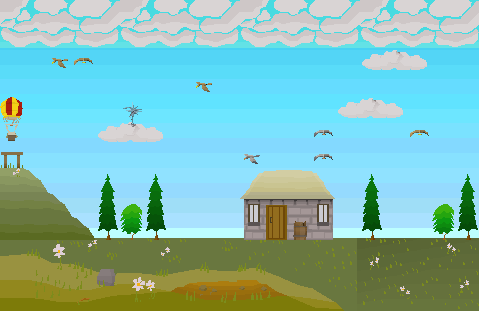 |
| Burn log x2 | |
| Relax x2 | |
| Pull emergency rope | |
| Relax x4 | |
| Burn log | |
| Pull emergency rope | |
| Relax x2 | |
| Pull normal rope | |
| Relax | |
| Burn log | |
| Relax | |
| Screen 2 | |
 |
Relax |
| Pull normal rope | |
| Relax x2 | |
| Burn log | |
| Relax x3 | |
| Pull emergency rope | |
| Burn log | |
| Relax x2 | |
| Burn log | |
| Relax x6 | |
| Screen 3 | |
| Relax x3 | 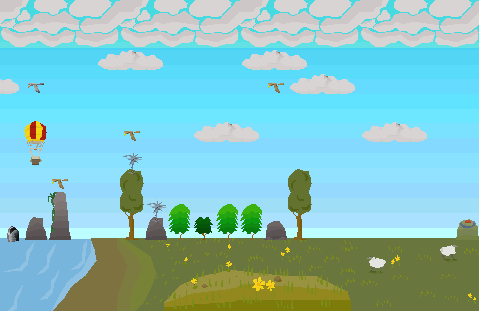 |
| Drop sandbag | |
| Relax x5 | |
| Pull emergency rope | |
| Relax x3 | |
| Pull normal rope x2 | |
| Relax x3 | |
| Screen 1 | |
 |
Relax |
| Drop sandbag x2 | |
| Relax x2 | |
| Pull normal rope x2 | |
| Relax x2 | |
| Pull emergency rope | |
| Burn log | |
| Pull normal rope | |
| Burn log | |
| Relax x2 | |
| Pull normal rope | |
| Burn log x2 | |
| Relax x2 | |
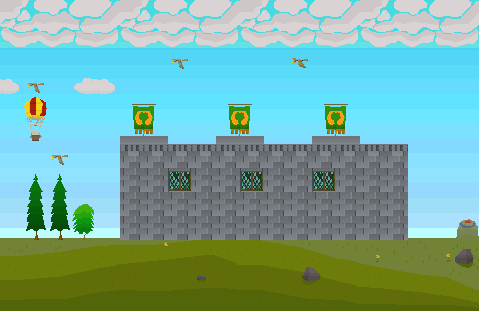
| Screen 2 | |
| Relax x6 | 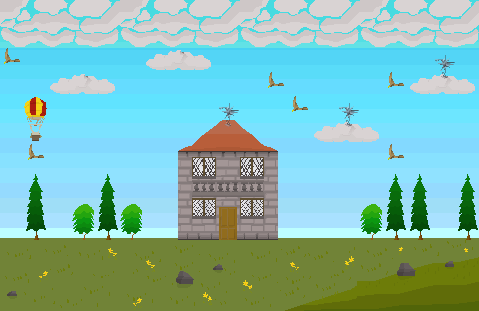 |
| Burn log x2 | |
| Pull normal rope x4 | |
| Relax x2 | |
| Drop Sandbag | |
| Relax x4 | |
| Screen 3 | |
 |
Relax x3 |
| Drop sandbag | |
| Relax | |
| Pull emergency rope | |
| Drop sandbag | |
| Relax x3 | |
| Pull emergency rope | |
| Drop sandbag | |
| Relax | |
| Pull normal rope | |
| Relax | |
| Pull emergency rope x2 | |
| Relax | |
| Screen 1 | |
| Drop sandbag x2 | 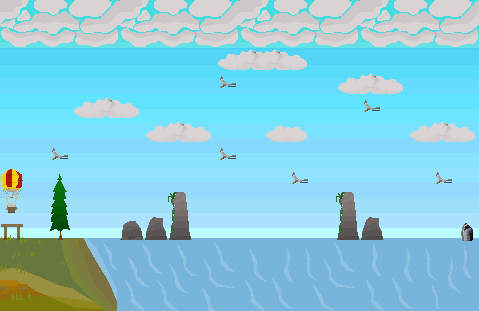 |
| Burn log | |
| Relax x5 | |
| Pull emergency rope | |
| Relax | |
| Burn log | |
| Relax x2 | |
| Pull emergency rope | |
| Relax x2 | |
| Drop sandbag | |
| Relax x3 | |
| Screen 2 | |
 |
Burn Log |
| Relax x2 | |
| Pull emergency rope | |
| Relax x5 | |
| Pull normal rope | |
| Relax x2 | |
| Drop sandbag | |
| Relax x2 | |
| Pull emergency rope | |
| Burn log | |
| Pull normal rope | |
| Relax | |
| Screen 3 | |
| Burn Log | 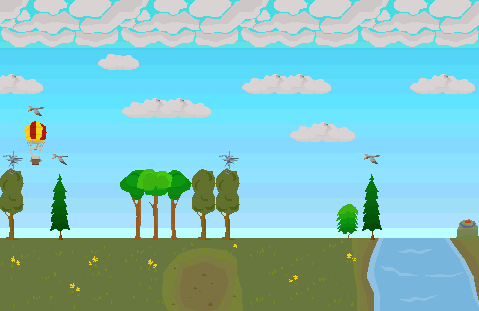 |
| Relax x2 | |
| Pull normal rope | |
| Relax x3 | |
| Burn log | |
| Pull emergency rope | |
| Relax x4 | |
| Drop sandbag | |
| Pull emergency rope | |
| Pull normal rope | |
| Relax x2 | |
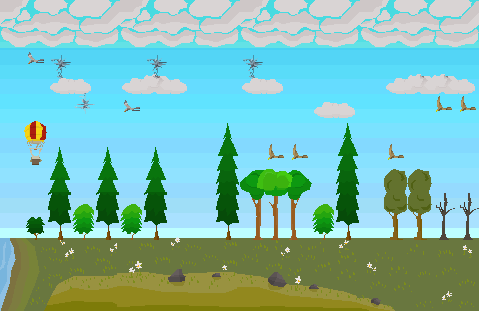
| Screen 1 | |
| Relax x7 | 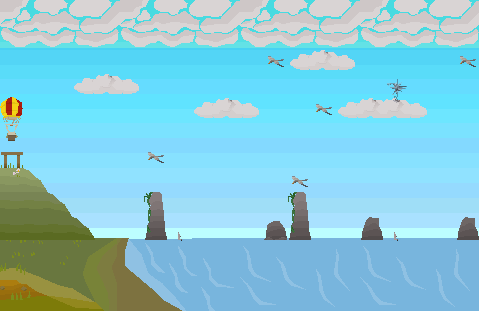 |
| Pull normal rope | |
| Relax x12 | |
| Screen 2 | |
 |
Burn log |
| Pull normal rope | |
| Burn log | |
| Pull normal rope | |
| Burn log | |
| Relax x2 | |
| Burn log | |
| Pull normal rope | |
| Relax x2 | |
| Drop sandbag | |
| Relax x2 | |
| Pull emergency rope | |
| Relax | |
| Pull normal rope | |
| Relax x2 | |
| Screen 3 | |
| Burn log x3 | 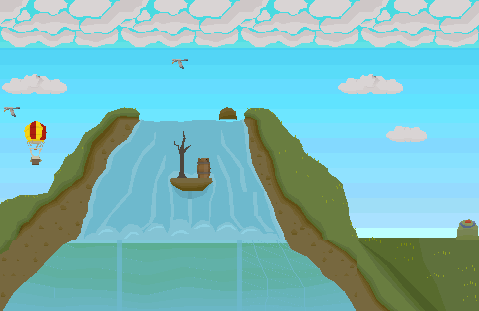 |
| Relax x2 | |
| Pull normal rope | |
| Burn log | |
| Relax x5 | |
| Pull emergency rope | |
| Relax | |
| Pull emergency rope | |
| Pull normal rope | |
| Relax x2 | |
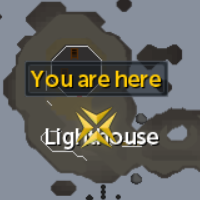
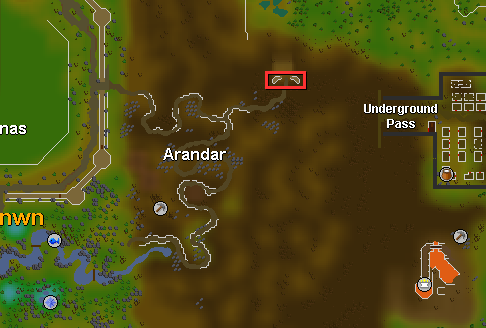
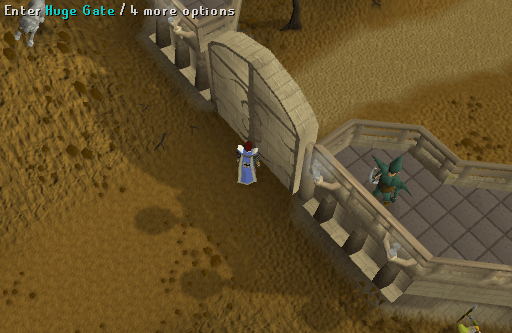
After doing the Regicide quest, you can use the Huge Gate south of the Tree Gnome Stronghold, west of Ardougne, and in the northeast corner of Arandar. It's the red square in the map below. This gate allows you to get Isafdar and the Elven lands there without going through the dreaded Underground Pass.
The Huge Gate
After doing the Fishing Contest, you can take a tunnel under White Wolf Mountain so you dont have to walk over it. This is also where one of the mine carts from Keldagrim goes to.
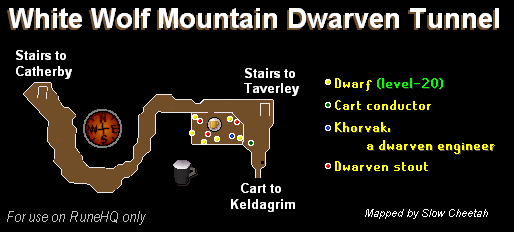
Taverley entrance:

Catherby entrance:
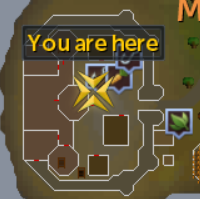
On the top floor of the Wizards' Guild in Yanille (lvl 66 magic required) there are three portals in three different sides of the room.
- East - Wizards Tower southeast of Draynor.
- West - Thormacs Tower southwest of Seer's Village.
- South - Dark Wizards Tower.
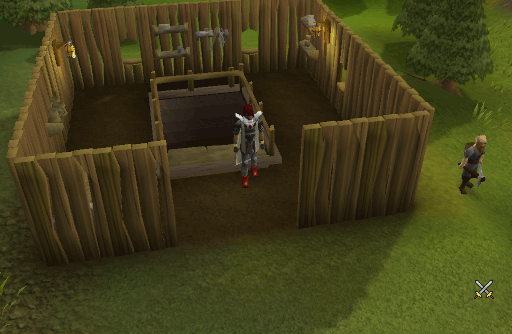
The In Search of the Myreque Quest is required to use this route.
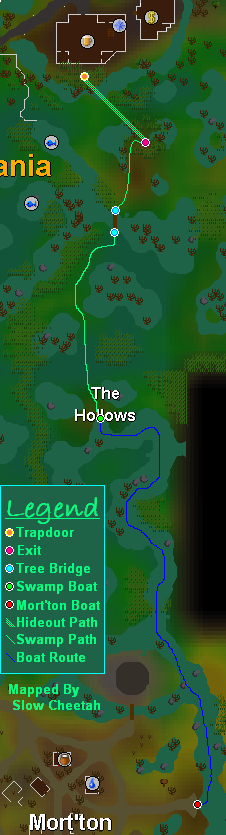
Just south of Canifis' Hair of the Dog Tavern (Beer Mug sign) is a small trapdoor entrance to the Myreque hideout.
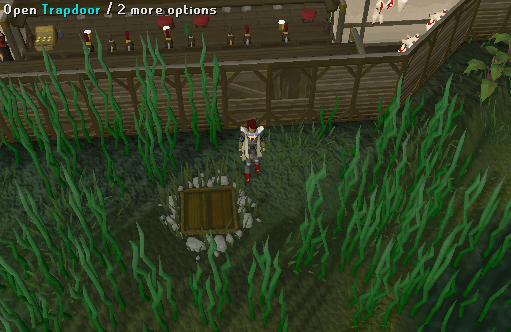
Go down the trapdoor and through the cave to the wooden doors. Climb up the tree and and walk across each segment of the bridge. Then you have to right-click the tree to get the climb down option. Continue south a bit to get to the boat to Mort'ton.
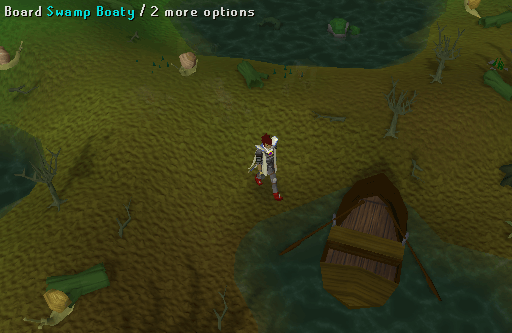
You land in your boat on the east side of Mort'ton. Click ride the boat and pay Cyreg Paddlehorn 10 gp to get a ride back to the swamps.

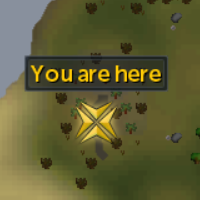
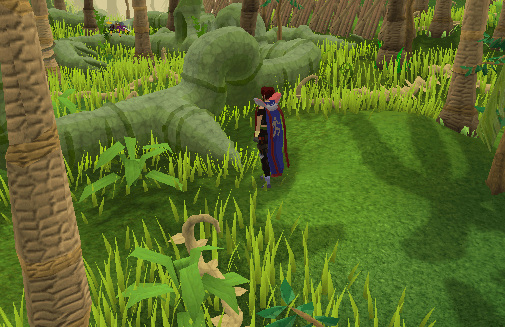
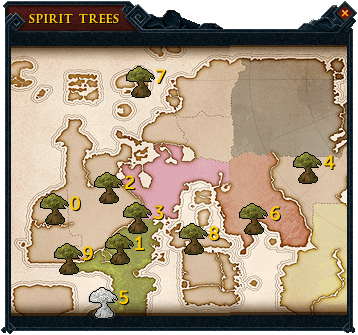
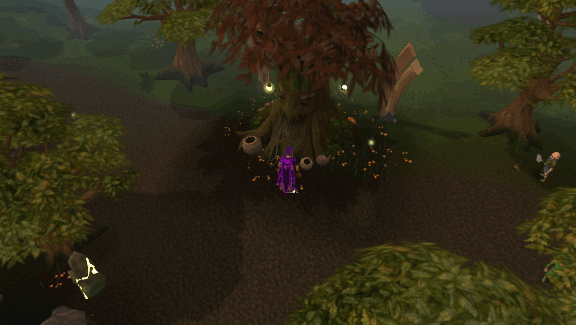
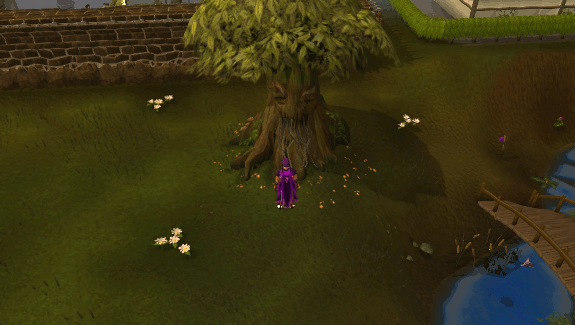
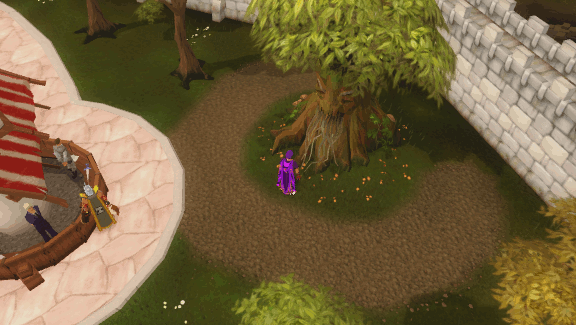
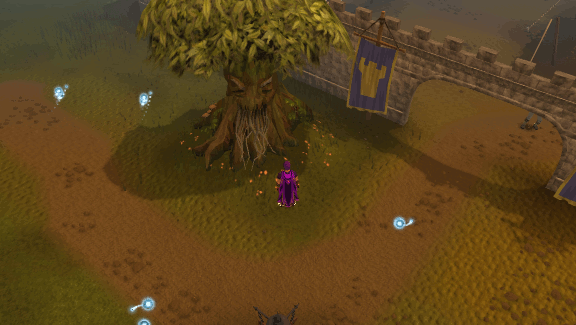
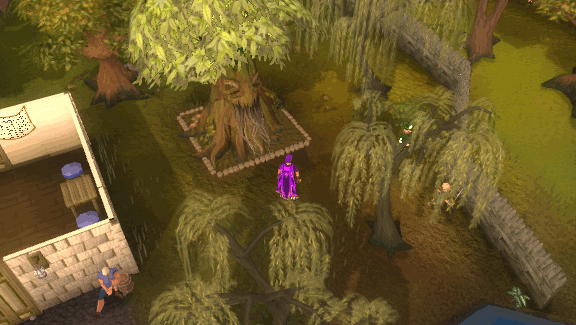
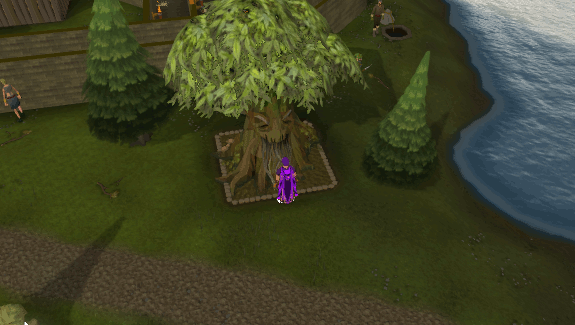
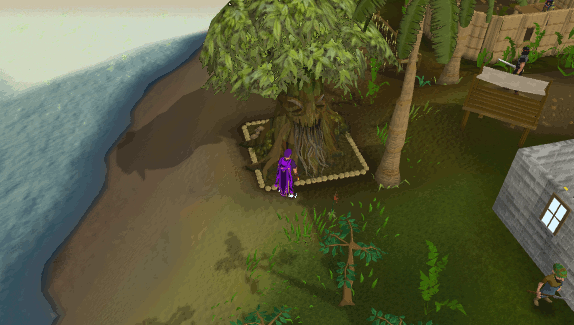
The Tree Gnome Village Quest is required to use these trees. There are 10 different Spirit Tree locations (the white tree is where you are currently at):
-
Tree Gnome Village.

-
Tree Gnome Stronghold, northwest of the entrance to the Agility Course and southwest of the Grand Tree.
-
Battlefield of Khazard, northwest of the Clock Tower and southwest of the Carnillean Mansion in East Ardougne.
-
Northeast corner of the Grand Exchange in Varrock.
-
Outside the entrance to Mobilising Armies.
-
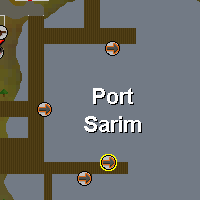
East of the bar in Port Sarim.*
-
South of Etcetaria castle.*
-
Southeast of Brimhaven docks.*
-
Upon completion of The Path of Glouphrie, you can use the spirit tree in the Poision Waste area.
-
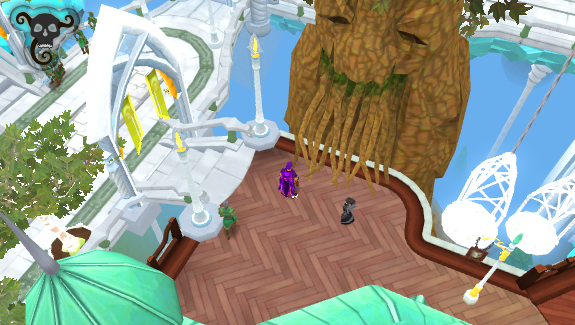
Upon completion of Plague's End, you can use the tree in the Crwys Sector of Prifddinas.
*Must first be grown in the Spirit Tree patch using a Spirit sapling.
The Grand Tree Quest is required to use the gnome gliders. To use a glider, talk to the Gnome pilot near the glider and he will display a map for you. When traveling from anywhere but the Grand Tree, you must first fly to Ta Quir Priw (Grand Tree). From the Grand Tree you can then fly anywhere. NOTE: Sometime you can crash and land short of where you are headed.
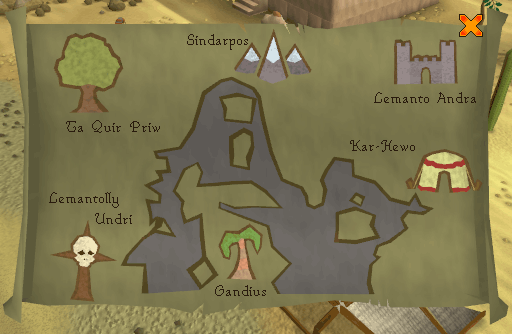
Here is a translated list of the places you can fly:
- Ta Quir Priw - The Grand Tree.
- Lemantolly Undri - Western Feldip Hills (requires One Small Favor Quest).
- Gandius - Just south of the Ship Yard on eastern Karamja.
- Kar-Hewo - Al Kharid.
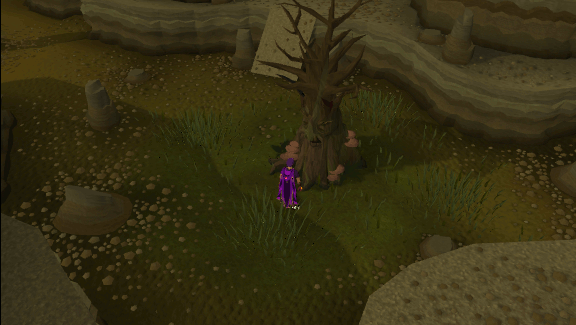
- Lemanto Andra - You usually crash just west of the Digsite.
- Sindarpos - White Wolf Mountain.
During and after the Monkey Madness Quest, you can talk to the gnome Daero at Blurberry's Bar in the Grand Tree to be taken to the secret military glider hangar. From there, speak to Waydar to get a flight to Crash Island (East of Ape Atoll). Upon landing, talk to the gnome Lumdo for a quick boat ride to Ape Atoll. Do this in reverse to get back.
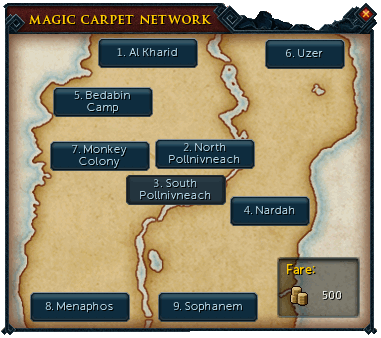
There are Rug Merchants in 9 locations throughout the Kharidian Desert. You can talk to them and ask about the rugs, Ali, or the monkey nearby. You can also fly to different locations (once unlocked) using the Magic Carpet. It will initially cost 1,000 coins per trip.
After completion of The Feud, you can speak to Ali Morrisane. He'll ask to help in his business and offer in exchange a reduction of the carpet price. From then on, it will cost 500 coins per trip.
You can reduce the cost once more by equipping your Ring of charos. This will reduce the price from 500 to 375 coins per trip.
The Carpet locations include:
- Al Kharid (Do No Evil required to unlock)
- North Pollnivneach
- South Pollnivneach (Do No Evil required to unlock)
- Nardah
- Bedabin Camp (The Tourist Trap required to unlock)
- Ruins of Uzer (The Golem required to unlock)
- Monkey Colony* (Do No Evil required to unlock)
- Menaphos (Icthlarin's Little Helper required to unlock)
- Sophanem (Icthlarin's Little Helper required to unlock)
*Note that the Monkey colony is the only carpet will not allow you to travel to all other locations. From there you can only reach Southern Pollnivneach and Al Kharid, and it will not charge a fee.
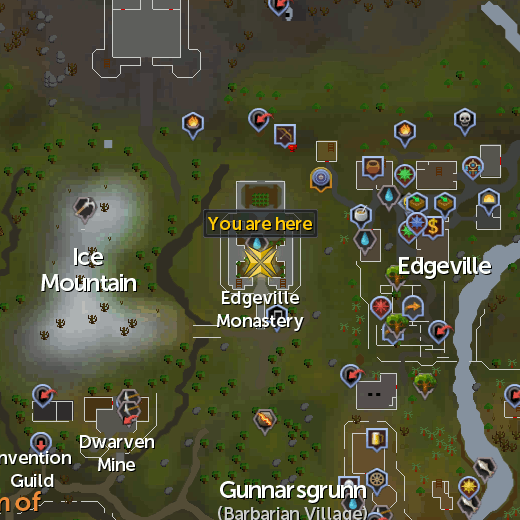
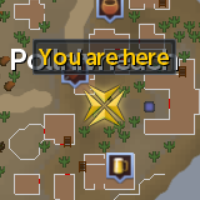
The Giant Dwarf Quest is required to use the dwarven mine cart system. The mine cart system is now free to use. The system hub is in southeastern Keldagrim. From there you may travel to the dwarven tunnel under White Wolf Mountain (must have completed Fishing Contest Quest) or to a point near the General Store in the Dwarven Mines under Ice Mountain.
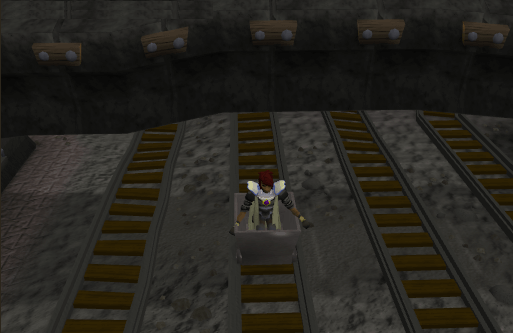
Minecart ride!
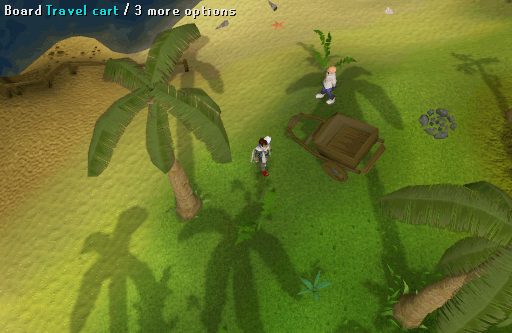
The Shilo Village Quest is required to use the Shilo cart system. Just south of the Brimhaven dock to Ardougne, there is a Cart and a man named Hajedy.
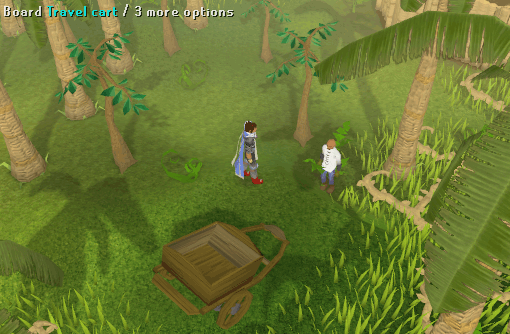
In Shilo Village, east of the general store and west of the Bank, there is another cart.
This Special Report was written by Slow Cheetah. Thanks to Fireball0236, Bectemir, Maonzhi, Mythiquedame, oakey_82, Carduel, Alk12, LogGamer, Blazedman, matt03030, Halk 5, gondomwinges, Runehq user, Darkstar5757, Im4eversmart, Lewt04, pokemama, bloodyneck, the_peleton, Imperial G96, Calvin406, Omaarr, longinius, Nuke-Marine, Ghoulies, Ponteaus, Shebok10, Garagedwella, NuclearBlade, amiele, yoshiman89, Aakanaar, falcon0300, varinathras, purplepartyhat, Peo, Killmouski, Viceroy10, InuYasha3336, tino_pham, Creepy, pretty_baby, assasin99911, Clamball, Chaosblade77, burtonboy127, DownStrike, alexon47, ossie000, Gregmasta, Jett_man, Skeletonmat, Taavi, Alfawarlord, Thehi, Jakesterwars, PkassosDream, lgunited623, magicbearer, Realruth, BobbehMan, Paige, Scott, Egekalaycan, M0o0o0o0oshu, Ninja2Dan, Mimz, Noble_K, Javezz, Asher404, ChathMurrpau,Ksb Single, 3ter 1, and Numerous One for corrections.
This Special Report was entered into the database on Mon, Jun 13, 2005, at 01:57:09 PM by Lewt04, and it was last updated on Tue, Apr 02, 2024, at 04:47:14 AM by NumerousOne.
If anything is incorrect or missing, or if you have any new information to submit to this database, please submit it to us on our Content Submissions Forums.
If you see this guide on any other site, please report it to us so we can take legal action against anyone found stealing our content. This guide is copyrighted by RuneHQ, and its use on other sites is expressly forbidden. Do not ask if you can use our guides or images, the answer is and always will be NO!
Print this page with images - Back to the Special Report Index Page - Back to Top
