

Table of Contents
- Introduction
- Quests & Random Requirements
- Mini-games, D&Ds, and Activities
- Mini-Quests
- Lorebooks & Journals
- Dungeoneering Journals
- Post Quest Rewards
To get started, you simply need to quest and skill quite a bit fear not, you can do these as you go, and at your own pace. The required skills to obtain this cape are as follows.
| 90 Attack | 91 Constitution | 95 Mining |
| 90 Strength | 90 Agility | 90 Smithing |
| 90 Defence | 90 Herblore | 90 Fishing |
| 90 Ranged | 90 Thieving | 91 Cooking |
| 90 Prayer | 91 Crafting | 92 Firemaking |
| 93 Magic | 90 Fletching | 90 Woodcutting |
| 99 Runecrafting | 99 Slayer | 90 Farming |
| 90 Construction | 90 Hunter | 90 Summoning |
| 117 Dungeoneering | 90 Divination | 128 Combat |
In addition to these skills, you will need to have completed 30 Tasks.
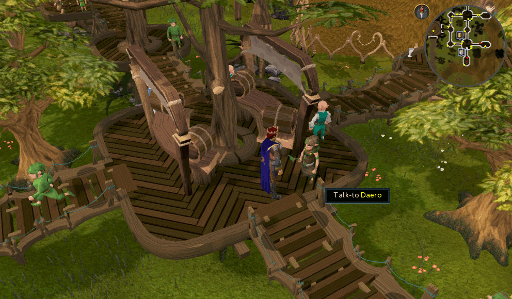
After you have completed all of the requirements, you can talk to Curator Haig Halen in the Varrock Museum for 120,000 coins.
Quests and Random Requirements
Master Quester - Complete all quests. (X/399)
This requirement is pretty straightforward, you simply need to complete all quests in Runescape. You can find all our Quest Guides here.
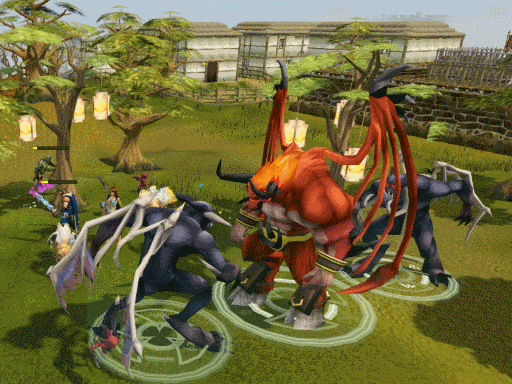
Annihilator – Earn the ‘Annihilator’ title by fighting all four nihil at once.
This is obtained during or after Fate of the Gods by engaging all four Nihils in combat at once before killing them. We have written a short guide on how one of our RHQ'ers found easiest, but this requirement can be done many ways.
Location
- Freneskae - Pit. Accessed via the World Gate.
Recommended gear
- T80+ Armor
- T80+ Weapon
- Vampirism scrimshaw
- Brawler/Sharpshooter aura
Inventory
- Overload
- Prayer renewal
- 2 Super restore flasks
- Rocktails, Rocktail soup, Great Gunkan, or Sharks for remainder of inventory
Familiar
- Yak filled with food
- Unicorn Stallion + scrolls
Nihil
All four Nihil have a special attack signified by a 'Hiss' above them. Their special attacks are as follows:
- Blood - Heals when attacked based on the amount of damage you would of hit for.
- Shadow - Casts a shadow which will hit three times for 500 damage each. Move to avoid damage.
- Smoke - Casts smoke barrage, doesn’t cause damage. Lowers stats at a rate of 5 per tick. Can be avoided with Overloads or by moving 2+ spaces away from your location at time of the cast.
- Ice - Stuns for 6 seconds. Can be negated by using Anticipation beforehand or Freedom after being stunned.
The Fight
There are many different approaches. This one personally works best for me, but changing the order may be required in order to get a successful kill. The same start of lowering health points will work for any order.
- First attack Blood Nihil, lower health to ~5k
- Attack Smoke and Shadow, getting both to ~5k health
- Attack Ice Nihil
- Kill Blood Nihil
- Kill Shadow Nihil
- Kill Smoke Nihil
- Kill Ice Nihil
Bridge over Fremmy Waters - Complete all the unabridged Fremennik sagas.
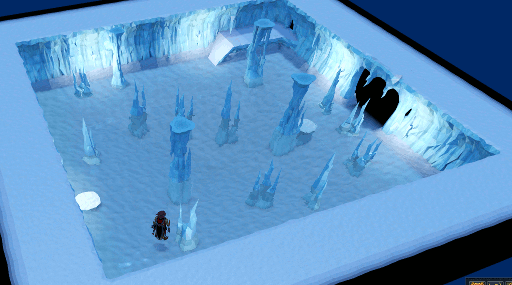
To complete this requirement, you will need to unfreeze Skaldrun in Daemonheim before you can start. He is randomly found on the frozen floors (Floors 1-11) when Dungeoneering. Be aware that to find him, you must be on complexity 2 or higher. After you unfreeze him with a tinderbox and logs, or a fire-based spell, he can be found on the surface of Daemonheim West of Thok.
To be able to start one of the five sagas, you will need to find a specific item while Dungeoneering. These items will jolt his memory and enable him to tell you the story. See our Fremennik Sagas guide for how to complete each Saga as well as general details about them.
Please note that you must specifically complete the unabridged versions of the Sagas for credit. This is also a requirement for the Hard Daemonheim Tasks.
Challenging Chat - Hear Vorago's introduction dialogue.
Travel to the cave where Vorago is located, just North of Falador's lodestone. Enter the cave and chose “Start Encounter”.

This will then take you to a cave where you must jump across three agility gaps before you can talk to Vorago. After going through the dialogue about challenging him, you will get an in-chat announcement that states the following.
"You can now challenge Vorago to fight, 20 seconds after the challenge, Vorago will hit 50,000 damage across you and other players who chose to join you. Be ready! Only players who have also spoken to Vorago this far will be offered the option to join a fight if you initiate a challenge."
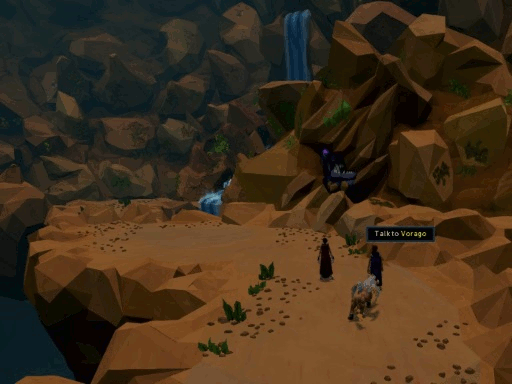
Occasionally when in a fight with other players, Vorago will be occupied and you will not be able to speak to him about his challenges. After you have received this notice, you will have completed this requirement.
Got a Vyre Reputation - Unlock the Vyrelord/Vyrelady title and reach maximum vyre reputation.
To unlock this title, you can complete it either during or after The Branches of Darkmeyer by doing various task during the quest for Reputation with the Vyres. Please see steps 18 through 29 in the quest guide for information that offers reputation gains. You can also come back after you’ve completed the quest and repeatedly kill Captured Meiyerditch Citizens for reputation, as this also works.
Kudos to You – Reach full Kudos with the Varrock Museum. (X/198)
To complete this requirement, you will need to obtain 198 kudos. You can obtain kudos by doing various things around and for the Museum in Varrock such as: taking the Natural history quiz, cleaning digsite specimens, quest stories, building the Statue of Dharmaroc from the Shattered Heart mini-quest, and speaking to Mr. Mordaut about dragonkin. See our Varrock Museum guide for more information.
Stay Safe – Fully complete the Stronghold of Player Safety.
To complete this requirement, you need to traverse the dungeon beneath the Misthalin Training Centre of Excellence, just North of Barbarian Village. Here you will collect 2 experience lamps, an emote, coins, and special gloves.
Stay Secure – fully complete the Stronghold Security.
To complete this requirement, you will need to traverse the dungeon deep beneath Barbarian Village, otherwise known as Gunnarsgrunn. You will need to complete all four floors and obtain the rewards of coins, emotes, and a pair of special boots.
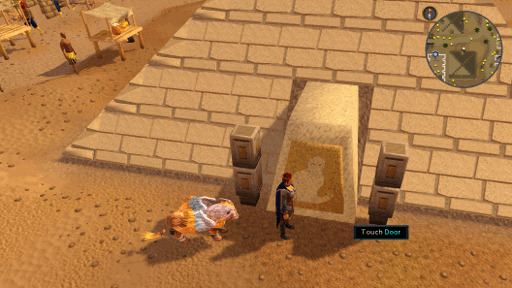
The History of Slayer – Uncover all of the murals inside the Sunken Pyramid.
To uncover the murals, you will need to have 99 Slayer and completion of The Jack of Spades. Completion of the quest will enable you to access the Sunken Pyramid where you will learn about monster souls and how to collect them. There is a total of 146 monster souls that can be collected with Ushabti. When you collect 30, 70, 90, and finally 110 souls, you will acquire a new mural within the pyramid. You must look at each mural to unlock the next. Looking at the 4th and final mural will complete this requirement.
Mini-Games, D&D's, and Activities
All Rise - Complete all Court Cases.
These are fairly straightforward so the hardest part is obtaining them. They can most easily be found from searching Caskets. It is generally around 100-150 caskets for most people to obtain all 16 court summons. Please see our Court Case guide if you need assistance completing the cases.
Note: You can only have one court summons at a time, and you must either complete the trial or drop the summon to obtain another. If you drop a court summon for a case you've not completed, you can reobtain the court summons for that Court Case in the future.
Three's A Kiln - Claim the Enhanced Fire Cape override from TzHaar-Mej-Jeh.
You must complete the Fight Kiln by surviving 37 brutal waves and defeat Har-Aken after completing the Fight Caves and obtaining a Fire Cape to sacrifice to TokHaar-Hok. (Please note, the cape is only required for first entry)
You will obtain one of three capes upon completion of the fight kiln dependent on your combat style. You must complete the kiln with melee, ranged, and magic for these capes. You can trade the TokHarr-Kal-Ket, TokHaar-Kal-Xil, and TokHaar-Kal-Mej for an Enhanced Fire Cape cosmetic override by talking to TzHaar-Mej-Jeh.
Complete Trekky - Fully level up all Temple Trekking companions.
To complete Temple Trekking completely, you must have completed Priest in Peril, Nature Spirit, In Search of the Myreque, In Aid of the Myreque, and Legacy of Seergaze. It is recommended to have an 80+ combat level as well.
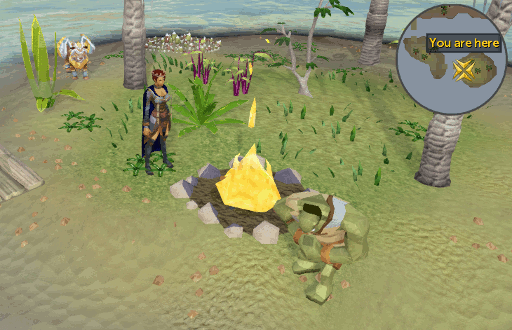
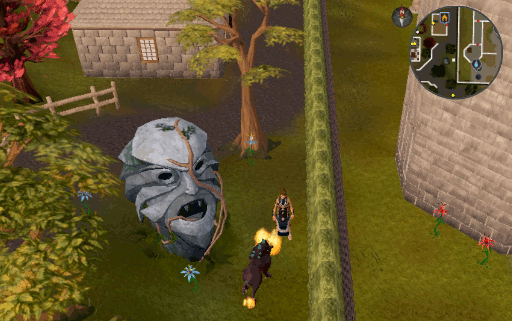
Arise from the Ash - Defeat the Phoenix once, after ‘In Pyre Need’.
For this, you'll need to head to the Piscatoris Fishing Colony. Head South, near the West coast, to the area with the dead trees and enter the cave.
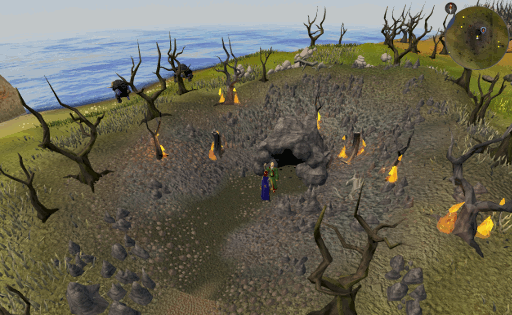
Upon entering the cave you'll see various monsters and a tree. Head to the tree, snip a twig, and continue onto the next room until you have five twigs. If your combat level is high enough, you will be able to simply ignore the NPC's while you run directly to each twig.
After you have obtained all five twigs (Cinnamon twigs, Sassafras twigs, Ailanthus twigs, Cedar twigs, and Mastic twigs) you will proceed into another cave, in which the Phoenix is located. Fletch the twigs into ribbons, then use them on the pyre (clicking craft will do this for you). This will summon the phoenix which you will now need to battle. Once the phoenix has been defeated, it will crawl onto the pyre which you must now light. The Phoenix will go up in flames and be reborn. Be sure to speak with the phoenix at this point to receive Phoenix quills. If you do not have a knife and tinderbox on your tool-belt, you will need to bring these items. Choose the “escape” option for a chance to obtain a Phoenix eggling.
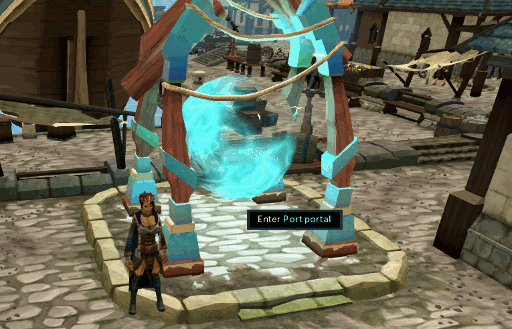
Eastern Adventurer – Complete storylines in your Player-Owned Port.
You will need to obtain 90 in each of twelves skills (you only need one of the twelve to begin) and enter the Ports Portal in Port Sarim then speak to The Partner to begin. From there you will need to send out Special Voyages. Each day you have a chance of attracting an adventurer to your port. The adventurers are related to each of the required skills and will only be accessible if you have level 90 in the corresponding skill.
- The Assassin: Slayer
- The Whaler: Fishing
- The Missionary: Prayer
- The Occultist: Runecrafting
- The Biologist: Herblore
- The Convict: Thieving
- The Trapper: Hunter
- The Chef: Cooking
- The Architect: Construction
These adventurers offer three kinds of missions: resource missions, story missions, and scroll missions. Story missions let you continue through the storyline of that adventurer. These are the missions you are going to want to focus on for this requirement.
Circus of Fire - Unlock the Firemaker's Outfit from the circus.
To unlock the Firemaker's Outfit, you must have completed The Firemaker's Curse. You must breathe fire 6 times to complete the performance for Sera, and perform 6 tricks for Emmett in the Circus. You will need 500+ Points to obtain each of the two outfit pieces (Firemaker's Tabard and Firemaker's Skirt/Trousers) from Sera and Emmett which is simple enough, as you just do whatever tricks the crowd asks for. To complete all of the Firemaking circus tricks, you must have 95 Firemaking, but is not required for this.
Trials of the Heart - Claim the Helm of Trials.
If you have at least 300 Quest points and have completed The Blood Pact, you can speak with Xenia or Ilona in Lumbridge to obtain the Helmet of Trials.
Lurgon's Run - Unlock the Dorgesh-Kaan food trading minigame.
Return to Dorgesh-Kaan and talk to Lurgon, who is found wandering around the middle of the marketplace. He will then tell you the basics of the mini-game and tell you that you first need permission from a random council member. Find this councilor using the table below and ask for permission, which they will instantly grant. Return to Lurgon and you will have completed this requirement.
| Councillor | Location |
| Ur-lun | With Ur-pel in the South-East of the city. |
| Ur-meg | In a house West of the Market and South of Barlak's shop. |
| Ur-pel | With Ur-lunin the South-East of the city. |
| Ur-taal | With Ur-zek in the North-West city outside of Odlak's labratory near the pond. |
| Ur-tag | East of the meeting room on the first floor in the North-East of the city. |
| Ur-vass | North-East of the market and East of the fountains. |
| Ur-zek | With Ur-taal in the North-West city outside of Odlak's labratory near the pond. |
Memories of Guthix – Attune and hand all engrams in to the Memorial to Guthix.
This is completed by collecting Memory strands while training Divination. You will have to complete a full set of 'charged' engrams to complete this requirement. Please see our Memorial to Guthix guide for assistance.
Abyssal Reach - Unlock access to the Abyss.
To gain access to the Abyss, you must complete the Mage of Zamorak mini-quest. To start this, you must talk to the Mage of Zamorak located North of Edgeville.
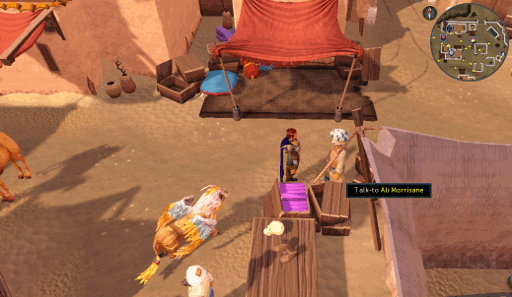
Ali The Trader - Unlock all Rogue Trader merchandise.
To unlock all of the merchandise, you must do three different tasks for Ali Morrisane: one for Runes, one for Blackjacks, and one for Clothing. Please see the Rogue Trader guide for more assistance completing this requirement.
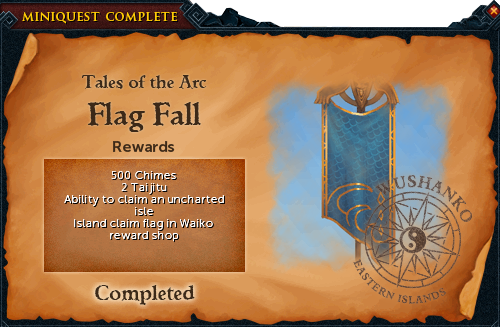
Arc I – Flag Fall - Compete the ‘Flag Fall’ miniquest.
Flag Fall is a short mini-quest within the Arc. You must have completed Impressing the Locals as well before you are able to start this one. It is also required to have 90 Woodcutting and 90 Fishing to travel to Uncharted isles.
Arc II – Head of the Family - Complete the ‘Head of the Family’ miniquest.
Head of the Family is a short mini-quest within the Arc. You must have completed Impressing the Locals as well before you are able to start this one. It is also required to have 90 Woodcutting, 91 Cooking and 90 Fishing to begin this mini-quest.

Arc III – Spiritual Enlightenment - Complete the ‘Spiritual Enlightenment’ miniquest.
Spiritual Enlightenment is a mini-quest within the Arc. You must have completed Impressing the Locals as well before you are able to start this one. It is also required to have 90 Woodcutting, 90+ Slayer and 90 Fishing to begin this mini-quest.

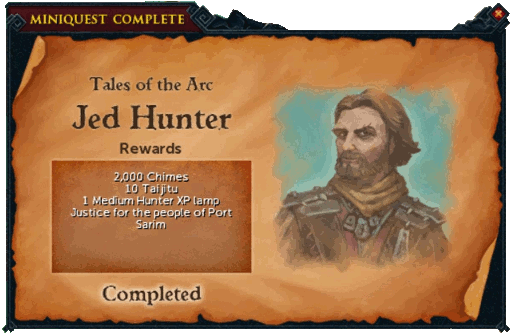
Arc IV – Jed Hunter - Complete the ‘Jed Hunter’ miniquest.
Jed Hunter is a short mini-quest within the Arc. You must have completed Impressing the Locals as well before you are able to start this one. It is also required to have 90 Woodcutting, 91 Cooking and 90 Fishing to begin this mini-quest.
Arc V – Eye for an Eye - Complete the ‘Eye for an Eye’ miniquest.
Eye for an Eye is a short mini-quest within the Arc. You must have completed Impressing the Locals as well before you are able to start this one. It is also required to have 90 Woodcutting, 91 Cooking and 90 Fishing to begin this mini-quest.

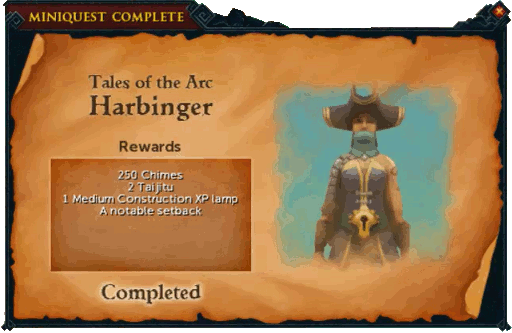
Arc VI – Harbinger of Doom - Complete the ‘Harbinger of Doom’ miniquest.
Harbinger of Doom is a short mini-quest within the Arc. You must have completed Impressing the Locals as well before you are able to start this one. It is also required to have 90 Woodcutting, 91 Cooking and 90 Fishing to begin this mini-quest.
Arc VII – Tuai Leit’s Own - Complete the ‘Tuai Leit's Own’ miniquest.
Tuai Leit's Own is a short mini-quest within the Arc. You must have completed Impressing the Locals as well before you are able to start this one. It is also required to have 90 Woodcutting, 91 Cooking and 90 Fishing to begin this mini-quest.

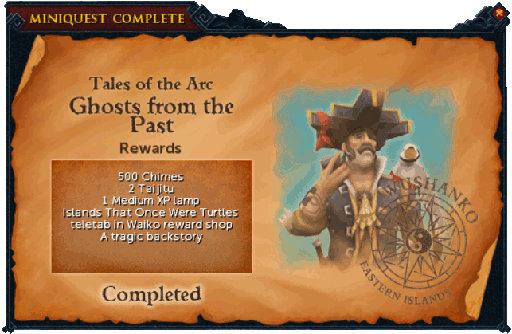
Arc VIII – Ghosts from the Past - Complete the ‘Ghosts from the Past’ miniquest.
Ghosts from the Past is a short mini-quest within the Arc. You must have completed Impressing the Locals as well before you are able to start this one. It is also required to have 90 Woodcutting, 91 Cooking and 90 Fishing to begin this mini-quest.
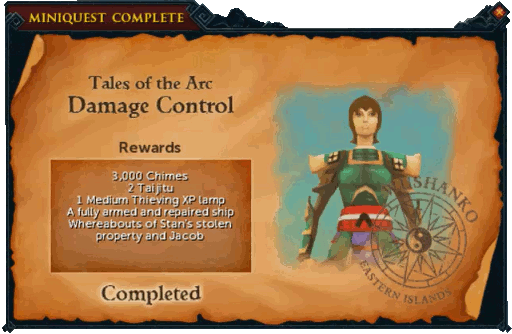
Arc IX – Damage Control - Complete the ‘Damage Control’ miniquest.
Damage Control is a short mini-quest within the Arc. You must have completed Impressing the Locals as well before you are able to start this one. It is also required to have 90 Woodcutting, 91 Cooking and 90 Fishing to begin this mini-quest.
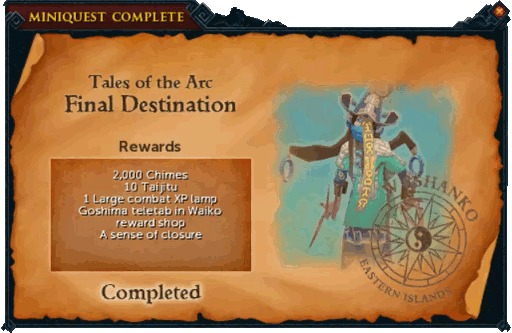
Arc X – Final Destination - Complete the ‘Final Destination’ miniquest.
Final Destination is a short mini-quest within the Arc. You must have completed Impressing the Locals as well before you are able to start this one. It is also required to have 90 Woodcutting, 91 Cooking and 90 Fishing to begin this mini-quest.
Banking History - Find all hidden treasure from the ‘Making History’ quest.
This is completed by traveling around Runescape with your Enchanted key and finding the 11 hidden treasures. See our Treasure Hunting mini-quest for the locations.
Count All Light Fingers - Fully upgrade the Thieves' Guild..
After you finish Buyers and Cellars, Darren Lightfinger has a few other odd-jobs of the sneaky kind he needs done. As you complete these extra capers, the facilities will expand, giving you access to new areas inside the Thieves' Guild.
Fred's Shearings - Claim 1,940 coins from Fred the Farmer after the ‘Sheep Shearer’ miniquest.
After completion of the Sheep Shearer mini-quest, speak to Fred the Farmer to obtain your coins.
Koschei's Cache - Complete the ‘Koschei's Troubles’ miniquest and unlock all jewel memories.
To start the Koschei's Troubles mini-quest you must have completed Ritual of the Mahjarrat and Blood Runs Deep along with having 90 Strength and Prayer. You will need Balmung for this mini-quest as well.
After you have completed the mini-quest you need to talk to Kharshai again with your gem. Ask him about the jewel and it will release a memory. Interact with the gem to change its color and enable him to recall another memory. Repeat this until you have spoken to him with a red, blue, and green gem. Note that the color of your Balmaug will change color to match the gem.
Memoirs of a Mahjarrat – Complete the ‘Mahjarrat Memories’ miniquest.
In order to complete this requirement, you will need 60 Divination and to have completed both Missing, Presumed Death and Koschei's Troubles. See our Mahjarrat Memories guide to help Kharshai collect the memories of the other Mahjarrat.
Myreque in Memoriam – Complete construction of the Myreque memorial and help Veliaf move on.
After completing the The Lord of Vampyrium you can speak to Veliaf Hurts, just North of the Canifis lodestone to help him build statues for the Myreque Memorial. When you have also completed River of Blood, return to Veliaf, speak to him, and he will leave, thus fully completing the requirement. This will only work if you have all statues completed, as shown below. Please see our In Memory of the Myreque guide for more details on how to complete this memorial.
Nomad's Genesis – Complete the ‘Tales of Nomad’ miniquest.
To complete this requirement, you will need to locate memories throughout Gielinor. Please see our Tales of Nomad guide for assistance completing this mini-quest.
On a Mission From... The Gods - Complete the ‘God Emissaries’ miniquest.
To complete the God Emissaries mini-quest, you will need a handful of easily obtained items and do various tasks to align yourself with a God Faction of your choice. There are multiple Emissaries you can choose from. This requirement should take roughly an hour or so, depending on how quickly you move through it.
One Foot in the Grave – Attend the funeral of Clarence the mage, and receive your reward.
To complete this requirement, you will need to have completed Hand in the Sand and Back to my Roots to begin the Wizard Burial mini-quest. This can be started at any time by speaking to Zavistic Rarve outside the Wizards' Guild in Yanille.
Sentient Letters – Collect all of the letters from the Senntisten digsite. (X/4)
The Senntisten scrolls are found randomly while skilling inside the Empty throne room located East of The Dig Site. These scrolls will be obtained in the following order: Letter signed 'Pontifex Madromurt', Letter signed 'Pontifex Nabor', Letter signed 'Pontifex Bilrach', and the damaged digsite letter. Once you obtain them, you will need to give them to Celia Diggory. She will translate them and enable you to ask for a copy of the text. Please see our Empty Throne Room guide for activities that can be done here.
Sheep Shearer – Complete the ‘Sheep Shearer’ miniquest.
The Sheep Shearer mini-quest requires talking to Fred the Farmer in Lumbridge, to help him you simply need to shear 20 of his sheep and turn the wool into balls of black wool.
Skeletal Wishes – Help the Odd Old Man complete his creepy tasks.
For this requirement, you will need to complete both his Rag and Bone Man wish list and his Fur ’n’ Seek wish list(both posted on the front of his hut), fight the Skeletal horror, and agree to help him rebuilt it.
To complete both wish lists, you must obtain a specific bone from several monsters throughout Runescape; See the bottom of Fur 'n' Seek and Rag and Bone Man for the list of bones and which monsters drop them. Take the bones in groups as opposed to all at once, doing so will reduce how many bones you need to collect overall. When bringing the bones to him, you will also need an empty pot, Jug of Vinegar, and logs for each bone. Add the vinegar to a pot then place a bone inside. Use the pot boiler near the Odd old man to polish the bones then speak with him to give them to him.
When all the bones have been turned in, speak with the Odd old man to claim part of your reward. Then climb over the Bone stile North of him and walk up the hill to fight the Skeletal horror. Upon completion, speak once again to the Odd old man and agree to help destroy the Skeletal horror each week so that it won’t take over Gielinor.
Slime and Snails and God Wars Tales - Compete Tales of the God Wars.
This is a mini-quest that was released prior to the release of The Heart of Gielinor. For this you will need 70 Constitution and 70 Agility or Strength. Just south of Nardah there has been a discovery, you must speak to The Curator just outside of it to start.
Soft Kitty, Purple Kitty - Complete the Purple Cat miniquest.
After completing Swept Away, you may speak with Wendy about purple cats. She will tell you that you need to obtain the Magic unguent which is in the basement of Betty’s Magic store. See our Purple Cat guide for more on how to obtain the Magic unguent and the ability to have purple cats.
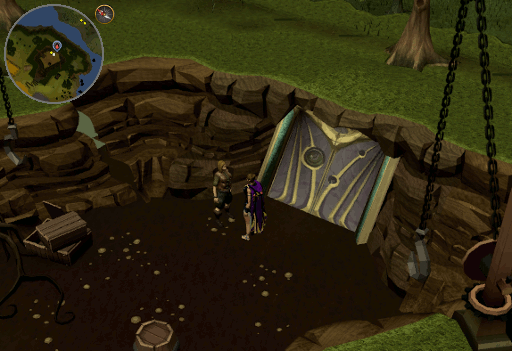
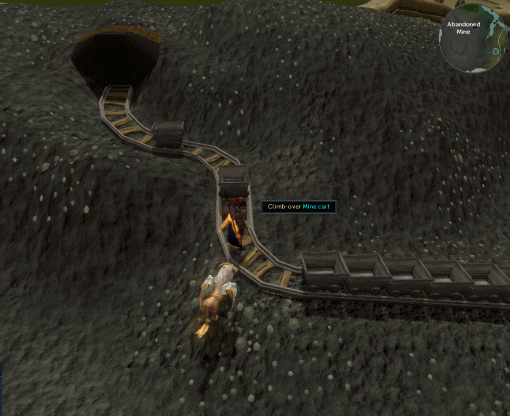
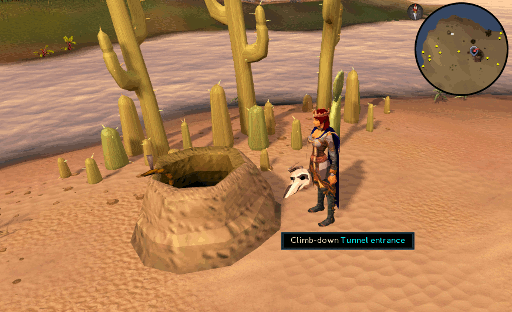
Tell Tale Tarn – Find out about Tarn Razorlor's secrets.
The Lair of Tarn Razorlor is a mini-quest featuring Tarn Razorlor himself, where you must navigate the Haunted Mine before you can begin your way through The Lair of Tarn Razorlor and claim his diary. Note that you do not need a Salve amulet to complete this requirement. The entrance to the Abandoned mine is shown below.
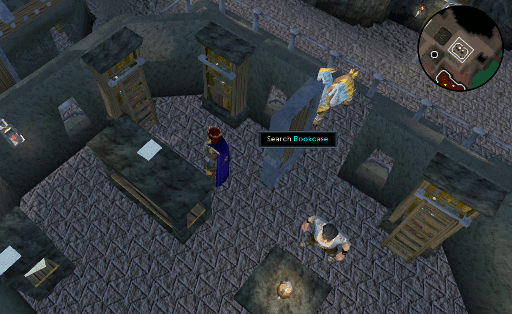
To Ga'al or Not to Ga'al – Find TzHaar-Ga’al-Kot.
After completion of The Brink of Extinction, you can find the Ga'al hiding by doing the following steps:
- Obtain about 600 Obsidian shards.
- Within the Fight Cauldron, equip at least 1 piece of obsidian armor and donate 15,000 Tokkul to the coffer South of the bank.
- Unequip any obsidian armor, TokHaar-Kal, and/or fire capes you may be wearing.
- Equip an uncharched Tokkul-Zo.
- Leave TzHaar City with the number of Obsidian shards equal to 1/10th of the current Runedate (this can be found in your captain's log from Player Owned Ports). So, if the year is 5919.63, you will need 591 shards.
- Outside the city, use a Ring of visibility on a Ring of stone.
- Speak with TzHaar-Ga'al-Kot and ask him about reading the ancient TzHaar language. He will offer to meet you in the Fight Cauldron which will finish the requirement. You are free to speak with him at the book case or not.
Note that the shards will not be consumed during these steps, only the Tokkul will be used.

What's Mine Is Also Doric's - Complete all of the Doric & Boric tasks.
Upon completion of What's Mine is Yours, Doric and Boric will offer you some tasks in exchange for charges on the Gofannon amulet you receive from the quest.
Witch's Potion - Complete the ‘Witch's Potion’ miniquest.
This is a former quest that was changed to a mini-quest in June 2010. If you completed it as a quest, it will count as credit toward the requirement. If not, you can use our Witch's Potion mini-quest guide to help complete this requirement.
You be Dead – Bury all of the goblin priests in Yu’biusk.
To complete this task you will need to enter the cave to the East of the Fishing Guild with a Ghostspeak amulet, Ring of visibility, and some food before returning to Yu’biusk. See our Hopespear's Will guide for more details.
Daemonology of Celerity - Claim the Malleus daemoniorum.
This book is obtained from Brother Celerity in the Edgeville monastery. To obtain this book, first talk to him about the Demon Flash Mobs, then take part and kill a mob. Return to Brother Celerity and talk to him again, he will then give you the book. It details various information on the demon flash mobs including weaknesses, strengths, and tiers of difficulty.
Diaries of the Clans – Find the clan journal pages from the Hefin Agility Course in Prifddinas.
The Voice of the Elders is a book relating to the Elven clans of Prifddinas, and is a reward for completing the Hefin Agility Course. This book contains two volumes, each with 4 chapters about an Elven clan. The chapters are unlocked by completing 20 laps of the Hefin Agility Course, meaning 160 laps are needed to complete the entire book.
Diary of Oreb – Discover and read all five journals of The Magister.
The Magister’s journals are always obtained in order from 1 to 5. They describe bits of his life including musings of the underworld and about the people of Menaphos. Journals are best obtained from The Magister himself, though they can also be obtained as drops from monsters within the Sophanem Slayer Dungeon. As such, a minimum of 88 Slayer is required to complete this requirement, as well as completion of The Jack of Spades.
Diary of the Gods - Find all five God Wars journals.
These five journals are dropped by the five God Wars generals: K'ril Tsutsaroth, Commander Zilyana, General Graador, Kree'arra, and Nex. They are only dropped when the general themselves drop a unique rare drop such as the godswords. These books cannot be dropped by the minions of the generals.
Do a Minion, Take Notes - Complete the Dominion journal..
The Dominion journal is a book made up of 20 pages found when opening the rewards box inside the Dominion Tower. The higher your dominion factor when opening the rewards box the better chance of pages. The 20 pages are exchanged for the book by talking to the Strange Face. One of the easiest ways to obtain pages is to play Climber Mode and get as high as you can before claiming your reward. To give an idea: hitting floor 20 gives 200,000 dominion factor, which normally gives 1 or 2 pages in the reward box. However, please note that if you reach a boss that you cannot defeat it is better to leave than lose as this reduces your dominion factor.
Don't Fear the Ripper - Find and read all five Miner's journals and the diary of Jebediah Omnis.
These books are dropped by Ripper Demons outside of Al Kharid. The journals are dropped in order, with the diary dropped after the 5th journal. Each book has a drop rate of 1/100 and you do not need to be on assignment to receive the drop.
Dragonkin Logs – Find and read the adamant dragon journals.
These books are drops from Adamant dragons following the completion of Hero's Welcome and One of a Kind. They can only be obtained from the dragons inside of the Dragonkin Lair inside of the Ancient Cavern. They have a rough drop chance of 1/100 and are classed as a Rare drop. They are dropped in the following order: Sakirth's, Strisath's, Kalibath's, and Phalak's.
Dusting Murial - Update the Dragonkin Primer with murals in Brimhaven dungeon and Mount Firewake.
This book is obtained originally during One of a Kind, to complete it, you must cleanse the murals in Brimhaven Dungeon and Mount Firewake using a fully charged Dragonfire shield (you can also use the Magic or Ranged version) with the Dragonkin primer in your inventory; cleaning the murals without it will fail to fulfill the requirement, though you can return to the murals with the book later to complete it.
The Brimhaven Dungeon mural is located directly East after climbing down the stairs into the Adamant dragon section of the dungeon. The Mount Firewake mural is located inside the structure next to the anvil on Kesthi (accessed through the World Gate). Cleansing the mural in Brimhaven gives 10,000 Firemaking experience and the mural on Mount Firewake gives 80,000 Firemaking experience.
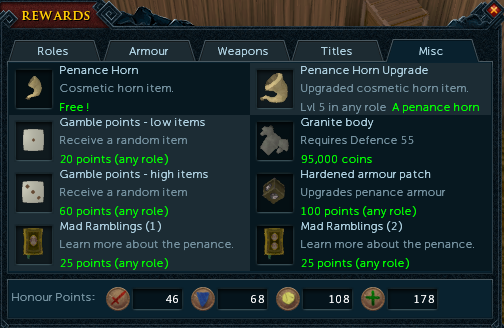
Enough of the Crazy Walking - Purchase the Mad Ramblings.
The Mad Ramblings, also known as the Account of Aesa Fellsdottir part one and two are a buyable reward from Barbarian Assault. There are two journals to purchase, each buyable for 25 Honour Points in any role.
Explore for Nestor - Find and read the Explorer's notes in the Keldagrim library.
The Explorer's Notes is a book written by a famous dwarven explorer named Nestor Peregrine. It can be found inside the Keldagrim Library on the ground floor. The book tells of his adventures beyond Trollheim.
Forcae's Mettle - Complete Forcae's journal. (X/10)
This journal is a drop from Rune or Adamant dragons and is a book relating to the creation of Metal Dragons. It has a drop rate of roughly 1/20 from either dragon. There are 10 pages in this journal and are as follows: Skrael 14, Skrael 18, Skrael 32, Skrael 35, Kalur 12, Kalur 42, Rosli 1, Rosli 15, Rosli 28, Rosli 39. The easiest way to obtain these is to grind out killing Adamant dragons with the best gear you own. Remember to bring anti-fires!
Grondabans’ Legacy – Obtain Grondaban’s stalker notes from the stalker dungeon.
To obtain Grondaban’s stalker notes, you must have completed Dishonour among Thieves. Use the Communication device, obtained during the quest, to access Zamorak’s Hide out. Once there, walk through the Western door to access the Stalker Dungeon. The Journal can be found near the portal at the North end of the room. Simply pick it up the notes to complete the requirement.
Kaiki's Tusks - Complete Kaigi's journal.
This journal is dropped by Airuts. There are 4 pages in total and are rare drops. It details how Tuska came to the Naragi homeworld a couple of years after Saradomin destroyed Askroth. You do not need to be on task to receive these drops.
Let Us Give Ugthanks - Find and read the Ugthanatos journal.
This journal is a drop from Camel Warriors in the desert. It details the Ugthanatos' creation and relationship with Akthanakos who camels consider a god. It has a drop rate of roughly 1/25 and you do not need to be on assignment to receive the drop.
Library of Nex - Find and read the books from the Nex: Angel of Death encounter.
These books are a 100% drop for any Nex: Angel of Death kill that you survive. If you do not receive them upon her death, you can search the teleport shard at the end of the kill for them.
Lovingly Crafted – Discover and read all five Horror journals.
The Horror journals are each obtained a different way. For this requirement, you can find and read the first four in any order, but the 5th book (Blasphemous journal) must be obtained last.
| Journal | Where Found | Location Image |
| Decaying | Skeletal horror drop (guaranteed) | 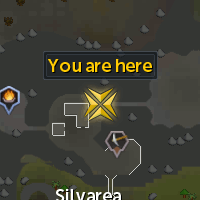 |
| Festering | Unspeakable horror drop (uncommon) | 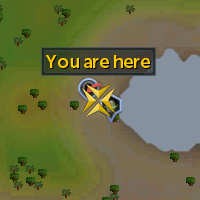 |
| Pestilent | In a jungle plant on North West Mos Le’Harmless |  |
| Rotten | Completion of Hooded Pirate mini-quest |  |
| *Blasphemous | In a dirt mound North East of the Mos Le’Harmless wheat field. | 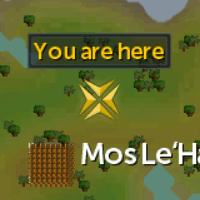 |
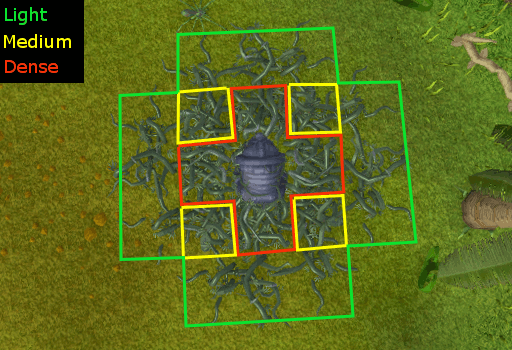
Meeting Your Idols – Investigate an overgrown Karamjan idol to discover an ancient tale.
Two ancient idols can be found on Karamja Island Map. One just West of the Shipping yard and the second slightly North of the Jadinko Lair entrance. Either alone or with a group, you will need to clear the area surrounding the idol by chopping 1 light, 4 medium, and 4 dense jungle vines before clearing off the overgrown idol itself. Chopping these vines requires 81 Woodcutting. When you have cleared off the idol, a surge of magic will give you one of several possible boosts. You will need to investigate the idol to obtain the book and complete the requirement.
Ocellus Virius Notus- Complete History of the Order of Ascension. (X/22).
This book details the Order of Ascensions history and is dropped by members of the Order. The book has 22 pages in total and is dropped by all Order of Ascension creatures. Once completed, this book can be used on Ocellus Virius for more lore.
One Final Ride - Find and read the Last Riders book, dropped by the Kind Black Dragon.
This book is a drop from the King Black Dragon. It is a very rare drop and therefore can be considered a difficult drop to obtain. It details the background story of the Dragon Riders. When dropped a loot beam will be shown, the best way to obtain this book is to grind out killing the King Black Dragonn. Please note that when the King Black Dragon drops the journal for one player, it drops for everyone who participated in that kill.
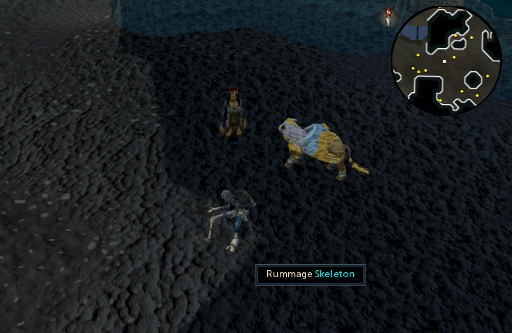
Otto the Ancient - Find all Ancient Cavern pages.
This book contains 26 pages all of which are obtained in the Ancient Cavern. The book is first given to you during Barbarian Training by Otto Godblessed. Pages can be obtained in two ways. Firstly, as a drop by all creatures in the cavern, except for Waterfiends and Brutal Green Dragons. When a page is dropped by a creature it is guaranteed to unlock a new page. The second method involves rummaging through the skeletons inside the dungeon, however, when obtaining them this way, they have a chance to drop a duplicate page. Therefore, it is recommended to kill creatures instead.
Quiet but Deadly Lore – Defeat the Queen Black Dragon and obtain all four dragonkin journals.
These journals are dropped by the Queen Black Dragon, there are four in total. The first book is a guaranteed drop by the Queen Black Dragon upon your first kill. The second book is a common drop, the third an uncommon drop, and the fourth a rare drop. They detail the findings of Kerapac the Dragonkin.
Scabigail – Complete the Scabaras research.
To complete the Scabaras research you will need to have finished Dealing with Scabaras. You will then need to obtain 19 different pieces of papyrus by killing: Skeletons, Dried zombies, Scabarites, and/or Mummies found in the areas surrounding Lead archaeologist Abigail. Once you have found a Scarabite note, you will need to copy it to your log (done by clicking the note). When you have obtained and copied all 19 notes, the requirement will autocomplete.
Scribblings of a Dragonkin – Find ‘Vicendithas’ Scribblings’ located in the Edimmu Resource Dungeon.
When you have 115 Dungeoneering, you can enter the Edimmu Resource Dungeon found in the Meilyr district. Once inside, walk North and East around the corner. Search the Dragonkin altar found at the end of the hall to obtain the scribblings and complete the requirement.
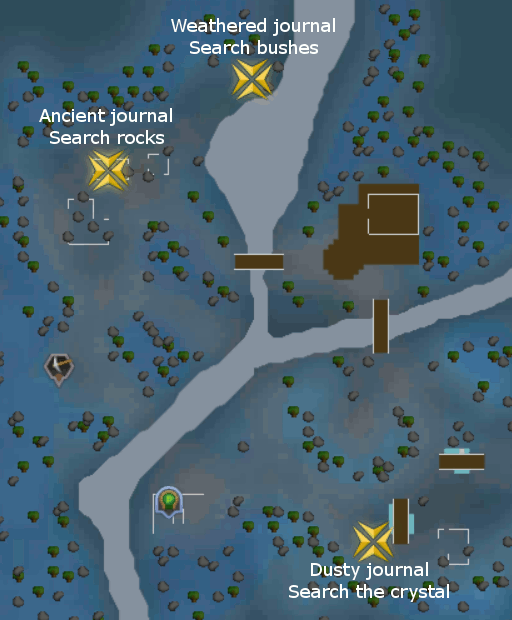
Some Old Dusty Journals – Find and read the Ancient, Dusty, and Weathered Tarddian journals.
Travel to the World Gate and visit Tardiddad. See the map below for the journal locations - Ancient Tarddian journal, Dusty Tarddian journal, and Weathered Tarddian journal. Once you have found them, read each journal to complete the requirement.
Ultimate Codex - Claim and read the Codex Ultimatus.
Following the completion of The Dig Sitet, return to the Exam Centre and talk to the Terry Balando. He will reward you with the Codex Ultimatus. This is a book that teaches you four abilities. Each new ability requires a specific level to learn: 75 Attack (Blood tendrils), 75 Ranged (Shadow tendrils), 75 Magic (Smoke tendrils), and 91 Constitution (Ice asylum). It is not required to learn all 4 abilities to complete this requirement.
You will need either 117 or 119 Dungeoneering dependending on your luck to obtain all of the following Dungeoneering Journals. You can talk to the Dungeoneering Tutor outside Daemonheim to find out how many of each of the Journals you are missing (Chronicles of Bilrach, Kal'gerion Notes, Stalker Notes, Behemoth Notes, Marmaros and Thok letters, and the Misc. Dungeoneering Journals).
Kal'gerion Notes - Find all Kal'Gerion notes.
There are five Kal'Gerion notes dropped by: To'kash the Bloodchiller, Har'Lakk the Riftsplitter, Bal'lak the Pummeller, Yk'Lagor the Thunderous, and Kal'Ger the Warmonger.
| Page | Boss | Floor Theme | Floor numbers |
| 1 | To'Kash the Bloodchiller | Frozen | 9-11 |
| 2 | Har'Lakk the Riftsplitter | Furnished | 18-29 |
| 3 | Bal'lak the Pummeller | Abandoned 2 | 33-35 |
| 4 | Yk'Lagor the Thunderous | Occult | 45; Won't be dropped on floors 46 or 47 due to a bug |
| 5 | Kal'Ger the Warmonger | Warped | 57-60 |
History of Bilrach - Find all Chronicles of Bilrach..
There are 30 Chronicles that you must obtain from Dungeoneering; each chronicle is specific to two floors. Upon completion of the floor (by killing the boss), a Mysterious Chronicle may spawn by the exit ladder. To get credit for finding these, you must loot and read through it.
| Chronicles of Bilrach | |||||
| Chronicle | Floor | Chronicle | Floor | Chronicle | Floor |
| Mysterious chronicle (part 1) | 1/2 | Mysterious chronicle (part 2) | 3/4 | Mysterious chronicle (part 3) | 5/6 |
| Mysterious chronicle (part 4) | 7/8 | Mysterious chronicle (part 5) | 9/10 | Mysterious chronicle (part 6) | 11/12 |
| Mysterious chronicle (part 7) | 13/14 | Mysterious chronicle (part 8) | 15/16 | Mysterious chronicle (part 9) | 17/18 |
| Mysterious chronicle (part 10) | 19/20 | Mysterious chronicle (part 11) | 21/22 | Mysterious chronicle (part 12) | 23/24 |
| Mysterious chronicle (part 13) | 25/26 | Mysterious chronicle (part 14) | 27/28 | Mysterious chronicle (part 15) | 29/30 |
| Mysterious chronicle (part 16) | 31/32 | Mysterious chronicle (part 17) | 33/34 | Mysterious chronicle (part 18) | 35/36 |
| Mysterious chronicle (part 19) | 37/38 | Mysterious chronicle (part 20) | 39/40 | Mysterious chronicle (part 21) | 41/42 |
| Mysterious chronicle (part 22) | 43/44 | Mysterious chronicle (part 23) | 45/46 | Mysterious chronicle (part 24) | 47/48 |
| Mysterious chronicle (part 25) | 49/50 | Mysterious chronicle (part 26) | 51/52 | Mysterious chronicle (part 27) | 53/54 |
| Mysterious chronicle (part 28) | 55/56 | Mysterious chronicle (part 29) | 57/58 | Mysterious chronicle (part 30) | 59/60 |
Stalker Notes - Find all Stalker Notes.
There are five Stalker notes in total. These are dropped by: Plane-freezer Lakhrahnaz, Night-gazer Khighorahk, Shadow-forger Ihlakhizan, Flesh-spoiler Haasghenahk, and World-gorger Shukarhazh inside Daemonheim.
| Page | Boss | Floor Theme | Floor numbers |
| 1 | Plane-freezer Lakhrahnaz | Frozen | 6-11 |
| 2 | Night-gazer Khighorahk | Furnished | 26-29 |
| 3 | Shadow-forger Ihlakhizan | Abandoned 2 | 30-35 |
| 4 | Flesh-spoiler Haasghenahk | Occult | 42-47 |
| 5 | World-gorger Shukarhazh | Warped | 54-60 |
Miscellaneous Notes - Find Misc. Dungeoneering journals 1 through 15.
These journals are dropped by the following various bosses when Dungeoneering. To obtain all of them, you will need to have unlocked a majority of the Warped floors to reach the final boss for Journal 15.
| Journal Number | Journal Name | Dropped By |
| 1 | Astea frostweb's journal | Astea Frostweb |
| 2 | Troll scrawlings | Icy Bones |
| 3 | Environmental effects (part 1) | Luminescent icefiend |
| 4 | Divine skinweaver's journal | Skeletal Horde |
| 5 | Hobgoblin scrawlings | Hobgoblin Geomancer |
| 6 | The price of betrayal | Unholy cursebearer |
| 7 | Equipment requisition receipts | Rammernaut |
| 8 | Lexicus runewright's journal | Lexicus Runewright |
| 9 | Ammunition requisition orders | Sagittare |
| 10 | Bellefleur's journal | Skeletal Trio |
| 11 | Tombstone transcription | Gravecreeper |
| 12 | Arch necrolord request | Necrolord |
| 13 | Blink's scribblings | Blink |
| 14 | Gulega missive | Warped Gulega |
| 15 | Resource requisition orders | Dreadnaut |
| 16 | Portal notes | Very rare drop from monsters on floors 48-60 (Warped) |
| 17 | Scrap of parchment | |
| 18 | Letter to an acolyte | |
| 19 | Letter from brundt | |
| 20 | Strange token |
Behemoth Notes – Find all Behemoth notes.
This is a collection of 5 pages to obtain. They are an uncommon drop received from specific bosses on specific floors.
| Page | Boss | Floor Theme | Floor numbers |
| 1 | Gluttonous behemoth | Frozen | 1-11 |
| 2 | Bulwark beast | Abandoned | 18-29 |
| 3 | Stomp | Furnished | 12-17 and 30-35 |
| 4 | Runebound behemoth | Occult | 36-47 |
| 5 | Hope devourer | Warped | 51-60 |
Marmaros and Thok Letters - Find all Marmaros and Thok letters from Daemonheim.
The Marmaros and Thok letters are written by two Fremennik named, you guessed it... Marmaros and Thok to their younger sister Bryll. These entries can be found be found by killing various monsters and bosses when Dungeoneering on every floor. Each letter is linked to a specific group of floors. These letters also have a chance to drop for the whole party from any monster in the dungeon.
- Frozen floors 1-5
- Frozen floors 6-11
- Abandoned floors 12-14
- Abandoned floors 15-17
- Furnished floors 18-22
- Furnished floors 23-29
- Occult floors 36-40
- Occult floors 42-47
- Warped floors 48-53
- Warped floors 54-60
I Can See For Miles and Miles – Unlock all beacon keepers and fully unlock the beacon map.
If you are accessing several of the beacon keepers for the first time, you may need: 4 Iron bars, 3 Jute fibres, 4 planks (any type will work), and 8 Nails. In addition to possibly needing those items, you will need 14 Macaw pouches, a Davy kebbit hat, White Tree fruit, a Raw lava eel (note you may need to cook it), and a Catspeak amulet (for talking to one of the beacon keepers). See our Beacon Network guide for information on which keeper will need what item as well as where each beacon is located. Simply use a Macaw pouche on each beacon keeper, as well as the special item if requested, and the requirement will be completed.
My Adze is Bigger than Yours - Speak to King Roald with the Inferno adze equipped.
Light all 14 beacons simultaneously to obtain a Ring of fire, Flame gloves, and the Inferno adze. Simply speak to King Roald after you have received the Adze and equpiied it. You must have 92 Firemaking to obtain this item.
Oyster Mash – Feed the giant oyster on Tutorial Island.
Speak with Wizard Myrtle outside of the Wizards' Towerr and you can return to Tutorial Island. Remember you cannot bring a follower nor have weapons equipped.
Upon reaching the ocean floor, check the Giant oyster South of you to obtain Treasure Trail based rewards. Next gather a piece of Delicious seaweed from the tasty looking seaweed patch and catch a Sea cucumber at the fishing spot nearby. Take both items and feed them to the Giant oyster to complete the requirement. This activity can be done once a month, or twice if you have a monthly reset token.

Master Bogreman - Unlock the Ogre bowman hat.
For this, you need to kill 30 Chompy birds. To achieve this, you will need Ogre Bellows (obtained from the chest inside the cave to the North of Rantz), Ogre bow (can be obtained from Rantz), and Ogre arrows. Walk South of Yanille towards one of the areas with swamp gas (shown in the guide), fill your bellows with swamp gas, use the bellows on a toad, then place Bloated toads on the ground and wait for a Chompy to arrive. This may take some time for one to show up; it is possible for none to arrive or for more than one to spawn if you have multiple toads down.
Azdaran Birthright - Complete the Azdaran document.
This document is found following the Birthright of the Dwarves inside of the Ancient Keldagrim Ruins, located just North of Keldagrim Library. You may recall this area from the quest as it is where you go to restore Hreidmar’s memory. After the quest you will notice 10 statues dotted around the room. Mining each one you will receive a large amount of mining experience (granting 250,000 total) and a fragment of the document. After mining all 10 statues, which requires Mining level 95, you are given a copy of the Azdaran document.
Work for Idol Hands - Hand in all the demon statuettes from the Lumbridge Catacombs.
A total of 6 statuettes can be found on plinths throughout the Lumbridge Catacombs. You will need to head back down to the bottom floor where you were in the quest, and then proceed down the stairs hidden in the South room. When you take each statuette, the nearby monsters will attack you, though you do not need to kill any of them. All of these statuettes need to be taken to Xenia, or Ilona, who will reward the you with a cash reward for each statuette.
Deep and Bloody Experience – Claim the XP reward after ‘Blood Runs Deep’.
Ask Chieftan Brundt about the war against the daggermouths to receive 3 rewards, each worth 150,000 experience in any Combat skill (a total of 450,000). You must have at least level 75 in that skill to gain the reward. You will need to speak to him 3 times to claim the full reward.
Last of the Summer Swine - Fully upgrade the Pig Creation machine after ‘Bringing Home the Bacon’.
You will need to use the following items with the required levels to upgrade the machine to tier 3.
- Tier 2 requires:
- 44 Construction, Crafting, and Summoning.
- 3 Oak planks, 2 Steel bars, and at least 3 Nails.
- This awards 200 Construction experience.
- Tier 3 requires:
- 84 Construction, Crafting, and Summoning.
- 3 Teak planks, 2 Mithril bars, and at least 3 Nails.
- This awards 2,000 Construction experience.
Challenge Maria – Complete Maria’s additional challenges and unlock all chests in the Gulvas mansion.
This quest can be replayed in order to complete three challenges and open all 9 of the chests. The challenges and rewards are as follows:
- Complete a replay without dying - Huge Prismatic Lamp.
- Complete a replay without dying using one or less healing items - Ghost (Rowena) Pet.
- Complete a replay under 37 minutes - Asylum surgeon’s ring.
It is suggested to complete the first two challenges at the same time and then do a separate replay for the speed run.
The 9 chests are located around the mansion ranging from tier 1 to 9. To open the tier 1 chest you need to have level 10 in each skill, for tier 2 you need level 20 in each skill, and so on. These can be opened for a total of 271,000 experience. It is suggested you find these chests on a replay where you are not attempting to complete a challenge.

Buy and Sell Some XP - Claim Thieving XP after Buyers and Cellars.
Speak with Darren Lightfinger about pickpocketing the training dummies. It can often take multiple attempts to gain the experience and requires 62 Thieving. Successfully pickpocketing the dummy gives the player 2,000 Thieving experience.
That'll Teach Bill - Claim 10,000 coins from Bill Teach after ‘Cabin Fever’.
Return to Bill Teach and talk to him to receive the money.
Goebie Relics - Find all Mazcab stone fragments and take them to the Ancient statue.
There are five Mazcab stone fragments, you must pick them up and place them on the Ancient Statue. First, Second, Third, Fourth, and Fifth must be used on Ancient Statue in any order to complete this requirement.
Claus Is Rising – Claim a reward from Claus after doing him a favor.
Talk to Claus the chef and offer to kill the Cave Wolf Matriarch again. Go into the cave system, kill the Cave Wolf Matriarch, obtain the Matriarch's skull, and return to the chef. Giving the skull to him gives players a choice of rewards.
Keeping Up with the Carnilleans - Claim all XP lamps from Philipe Carnillean.
Following quest completion, Phillipe can be found wandering Gielinor. At various quest point levels, players can receive an experience lamp from him. Note that some locations require certain quests to enter the area to find Phillipe.
| Quest Points Needed | Quest Requirement | Location | Experience Reward |
| 50 | Biohazard | In the combat training area North West of West Ardougne. | 2,000 experience in any skill that is level 30 or above |
| 100 | None | West of the entrance to the Mountain Camp. | 5,000 experience in any skill that is level 40 or above |
| 150 | Shilo Village | Inside the Paramaya Inn located in Shilo Village. On the top floor. | 5,000 experience in any skill that is level 40 or above |
| 200 | None | The Green Ghost in Port Phasmatys. | 10,000 experience in any skill that is level 55 or above |
| 250 | None | In the bottom of the Polypore Dungeon near the Ramokee skinweaver. | 10,000 experience in any skill that is level 55 or above |
| 300 | Another Slice of H.A.M. | Outside of Odlak's house inside Dorgesh-Kaan. | 10,000 experience in any skill that is level 55 or above |
| 350 | Swan Song | In the machine room of the Piscatoris Fishing Colony. | 10,000 experience in any skill that is level 55 or above |
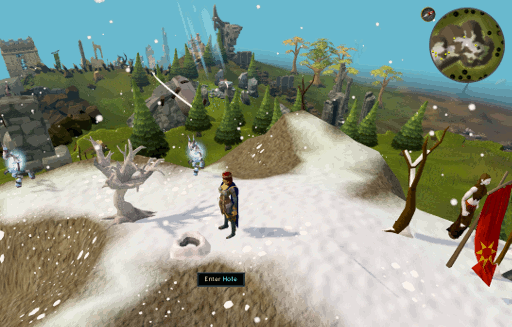
Death to the Mahjarrat – Discover all the mahjarrat deathstones on Freneskae.
Deathstone locations can be found during or after completion of Children of Mah. The guide begins locations at Step 10.
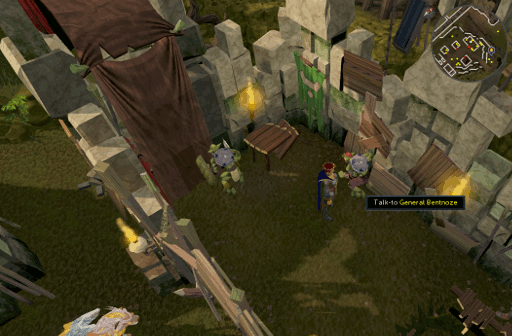
Cower Behind the Chosen Commander - Claim the goblin cower shield.
This item can be obtained by talking to one of the goblin generals in the Goblin Village, either General Wartface or General Bentnoze. This can be converted into 1,000 bonus experience in Constitution, Attack, or Defence.
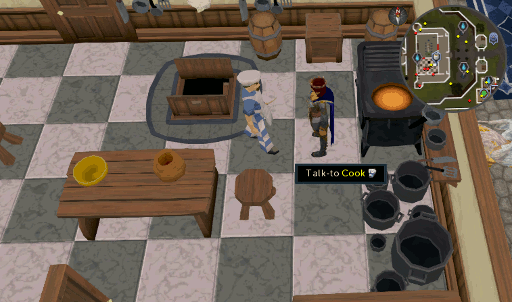
Cook's Delights - Claim the cook's extra rewards after the 'Cook's Assistant'.
Return to the Cook in Lumbridge castle and talk to him to receive extra rewards.
Under Croc and Key – Gain access to the secret treasure room from ‘Crocodile Tears’.
If you have at least 80 Constitution, you can enter Crondis’ tomb. The tomb can be found to the right of the entrance within her pyramid. You will need to swim through an underwater tunnel in order to access it. You will gain 20,000 Constitution experience the first time you enter this area and complete the requirement. Inside of the tomb you will also find the Crondis mask and Nekhakha.
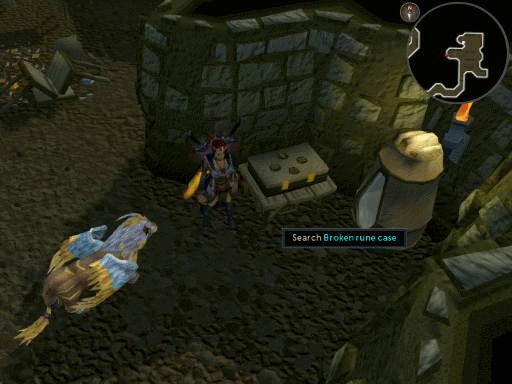
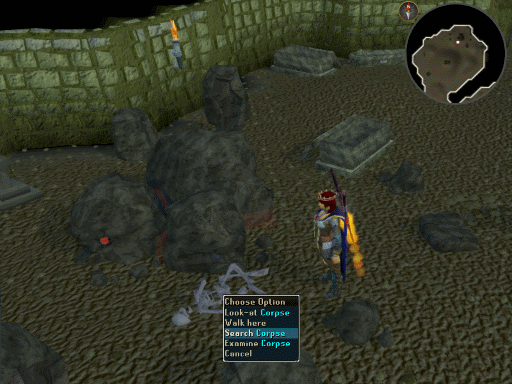
Bloodstained Treasure - Obtain hidden runes from Meiyerditch laboratory and blood altar ruins.
Return to the Meiyerditch laboratories and search the broken rune case to obtain runes.
Head South around the tunnel and follow it until you reach a large empty cavern that contains the blood altar. Search the corpse lying on the ground next to the altar to receive the runes.
Deadlier Catch - Hunt the Thalassus until it flees for good. (X/11)
Return to the fishing guild and talk to Jones to hunt the Thalassus up to 10 more times for Hunter experience. You will use the same hunting method as in the quest, but you get less mistakes before the trail resets the more times you hunt it; for example 4 mistakes on your second hunt and only 2 on your last. It is highly suggested to take a screenshot of the area and use microsoft paint in order to mark down the correct path.
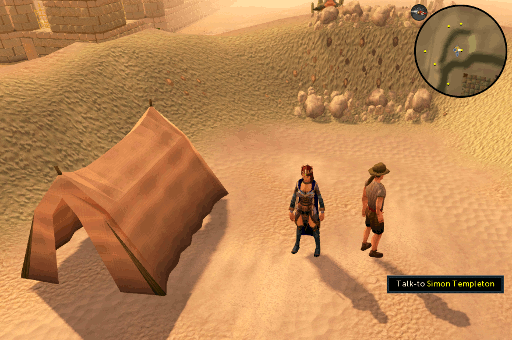
Haul Comes to Templeton - Unlock the ability to trade noted artefacts with Simon Templeton.
Speak to Simon Templeton about the job he mentioned in the quest and he will send to talk to the mummy inside Pyramid Plunder. Talk to the mummy and he will refuse to agree with Simon's idea, return to Simon and talk to him again. He will now allow you to trade noted artefacts for money.
Chivalry Is Threads - Unlock Templar and Dulcin armor after ‘Death of Chivalry’.
Following the completion of the quest, you are able to fight Dawn again by using the Skull of remembrance on her body. Fighting her rewards them with Duclin's armour. The Templar armour can be unlocked by searching the coffins inside of the Tomb of the Fallen.
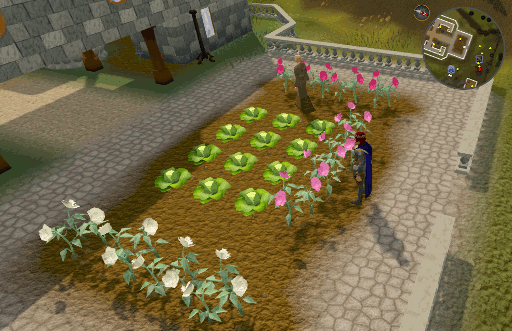
Chivalry is Fed - Restore the cabbage patch after ‘The Death of Chivalry’.
Returning to the Edgeville Monastery, you can restore the garden outside. You will need level 7 Farming or higher and 12 Cabbage seeds. Restoring the patch will grant you 250 Farming experience and completion of this requirement.
Chivalry is Dead - Claim the post-quest rewards from ‘The Death of Chivalry’.
You are able to loot the supply crate by the Black knights tents to receive 200 Water and 100 Fire runes. YOu can also claim a combat xp lamp, a prayer xp lamp, and a Gilded cabbage by searching coffins inside of the Tomb of the Fallen. The combat xp lamp requires you to have 40 Strength and 40 in the chosen combat skill, giving you 3,500 experience. The prayer lamp requires 80 Strength and 65 Prayer to give 60,000 prayer experience. The Gilded cabbage gives players 10,000 bonus experience after being kicked 30 times; this requires 60 Strength. All of these experience rewards must be claimed to complete this requirement.
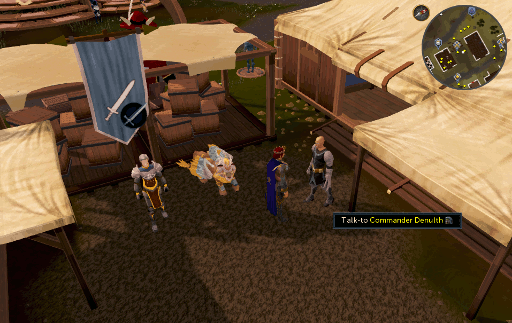
Supply and Demand - Complete 5 supply runs after ‘Death Plateau’. (X/5)
Talk to Commander Denulth in Burthorpe. He will ask you to take supplies to the Ambush Commander, who is located on top of Death Plateau. The quickest way to reach the Commander is to run past the Thrower trolls and climb the rockslide on the Eastern side of their encampment, speak with the Ambush Commander, then use your home teleport to return to Burthorpe and start again; Note this requires climbing boots or 41+ Agility and the Burthorpe lodestone unlocked. In order to complete all 5 supply runs, you will need a Combat level of 18 or higher. After handing in one supply run you will receive 3 experience lamps, each worth 180 experience; in total you will obtain 15 lamps worth 2,700 experience.
Blinded by Ramarno's Teaching - Claim Smithing XP from Ramarno after ‘Defender of Varrock’.
Return to Ramarno inside Camdozaal with a Redberry Pie. Talking to him gives you the option to give the pie and receive a reward of 1,000 Smithing experience.
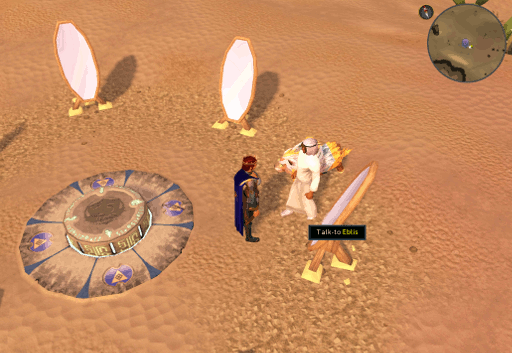
Buying Up Ancient Artefacts - Buy an ancient staff after ‘Desert Treasure’.
Talk to Eblis, who wanders near the Bandit Camp Lodestone. He will offer to sell you an Ancient Staff for 80,000 coins. Buy this to complete the requirement.
Here Was a Scabaras Mask - Gain access to the secret treasure room from ‘Diamond in the Rough’.
Head to the well North West of the Kalphite Hive. Then when inside the Kalphite Nursery, enter the tunnel on the East wall and go all the way through. You will end up inside the room where you were after the quicksand section of the quest. Mine the crack inside this room, which requires 80 Mining, to get 20,000 Mining Experience and access to the treasure room that contains aScabaras Mask and Was.
I Dig This Transportation - Unlock the Digsite pendant.
Return to Varrock Museum and clean Uncleaned finds until you receive a Clean Necklace, take this to an archaeologist and they will then teach you how to create a Digsite Pendant.
Penny for Your Life - Unlock all rewards from the ‘Dimension of Disaster’ Quest.
To complete this requirement, you will need to purchase all of the rewards and upgrades from Gypsy Aris’ Reward Shop; this will require 30 silver pennies and can take roughly 5 plays through the quest. Note that you do NOT need to purchase the Chromatic party hat, Zemouregal shortcut, or an experience lamp.
Dishonourable Gains – Claim all XP chests during or after ‘Dishonour among Thieves’.
There is a total of 3 chests that require you to have a specific level in all skills before you can open them. They are all found within Zamorak’s hideout, which can be accessed using the Communication device.
| Chest | Skill Levels | Location | Reward |
| Level 50 chest | 50 | Northern end of the East wall in the Southern section. | 7,000 experience |
| Level 70 chest | 70 | East of the central symbol, just in front of the Northern lava pool. | 50,000 experience |
| Level 90 chest | 90 | behind Zamorak’s throne. | 96,000 experience |
Dishonourable Loot – Claim all loot chests during or after ‘Dishonour among Thieves’.
There are 6 chests to open. The first one is found within Zamorak’s hideout, which can be accessed via the Communication device, while the rest are found in locations where the quest takes place.
- At the West end of the hideout.
- In the cellar behind Handelmort Mansion. (This location is inaccessible after the quest!)
- In the Ruins of Uzer, near where General Khazard is.
- At the Black Knights base in Taverley Dungeon, near Lord Daquarius.
- Inside Zemouregal's Fort, on the East side of the main floor.
- South of the Barrows, near Sliske’s lair entrance.
Are You Needing Access? - Gain access to the secret treasure room from ‘Do No Evil’.
Above the Monkey colony, there is a crack in South West wall. You will need 80 Agility to enter the tomb. Entering the exit awards 20,000 Agility exeperience as well as the ability to obtain the Apmeken Mask and Ankh.
Do No Elite - Claim the elite clue scroll using Ava's alerter from ‘Do No Evil’.
Use Ava's alerter to find a hidden clue scroll by searching through one of four areas.
In Isafdar
|
On Lunar Isle
|
In the Iceberg region
|
In Meiyerditch
|
Clue's in the Monkey Drool - Receive the medium clue scroll from a monkey in your backpack.
This requirement can be completed during or after the quest. Obtain a Monkey in your backpack from the Ardougne Zoo and travel to Brimhaven via the boat on the East side of the city. Head to the banana plantation on Karamja and pick bananas. Use each banana on the Monkey (Do not eat it!) and you will get a dialogue with him; be sure to continue this dialogue to the end, otherwise it will not count toward your progress. Eventually, he will give you the clue scroll as long as you do not have the maximum amount of medium clue scrolls already. Note that the drop rate is 1 in 256 bananas, so this requirement may take a while to complete.
Ice Ice Chimpy - Complete 25 chimp ice deliveries. (X/25)
Return to the monkey colony and obtain a Chimp ice to deliver to King Awowogei... 25 separate times. Each 5th chimp ice delivered to him melts faster. It is highly suggested to use a Chimp ice enhancer if possible. Remember to bring a Monkey greegree and runes to cast ice spells on the Chimp ice. The recommended travel method to do this efficiently is below.
- Buy Chimp ice at the monkey colony and use the magic carpet to Shantay pass.
- Continue to the Fremennik boat outside Lumbridge use it to travel to Daemonheim.
- Use the boat to travel to Taverley.
- Use the Taverly Hot air balloon and travel to Tree Gnome Stronghold. (Magic log needed)
- Run to Daero on the second floor of the Grand Tree then Waydar and travel to the Crash isle.
- Travel to Ape Atoll from the Crash isle via Lumdo.
- Run your way through the bottom half of the isle and travel through the doors.
- Walk on the Southern side of the city near the Agility course. Hide in the tall grass as you make your way around to King Awowogei.
Cran Door's Secret - Unlocked the secret door between Crandor and Karamja.
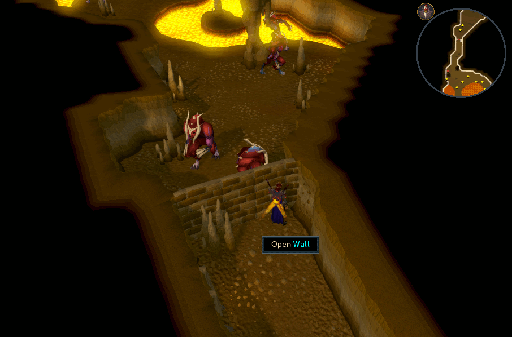
Head South of where you fought Elvarg to find a wall that you can unlock to become a secret door between Crandor and Karamja.
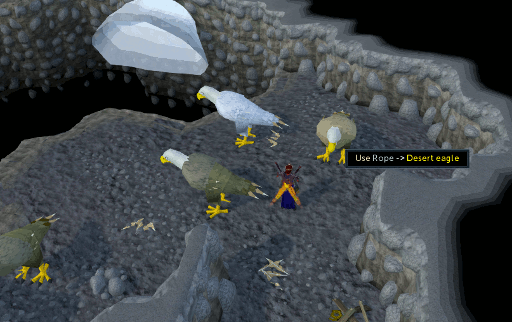
Eeeeagle! - Fully unlock all Eagle transport routes.
It is necessary to ride each of the eagles and to gain access to each of the Eyries from outside. This means that you must clear the boulder blocking the path at the Uzer (desert eagle) and grow the vine at the Feldip Hills (Jungle eagle) Eyries. See our Transportation Guide for more information.
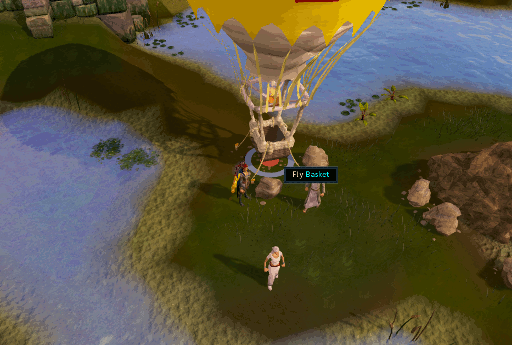
Around the World in Six Ways - Unlock all hot-air balloon travel routes
You must fly each balloon route from Entrana to unlock it. Note that each route requires a different number of specific logs as well as a minimum Firemaking level; the highest is level 60. See our Transportation Guide for the needed levels and logs, as well as how to complete the flight without crashing.
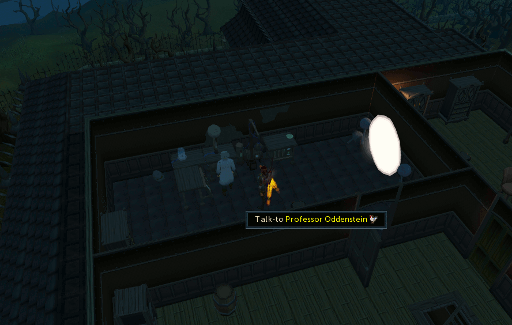
Any Odd Chicken - Claim Professor Oddenstein‘s extra rewards after ‘Ernest the Chicken’.
Return to Professor Oddenstein and talk to him. He will reward you with some items and complete this requirement.
A Fairy Tale Part III - Battle at Orks Rift
Fires Are Mostly Harmless - Light the campfire and find a haul of exotic herbs and herb seeds after 'Fairy Tale III'.
When you have 85 Firemaking, take 8 Willow logs to Fairy Ring D-I-P. There will be a campfire here which you can light.
Head to Fairy Ring A-L-P and search the nearby mushrooms to gain a haul of herbs (requires 24 free inventory slots and 85 Herblore to claim them all).
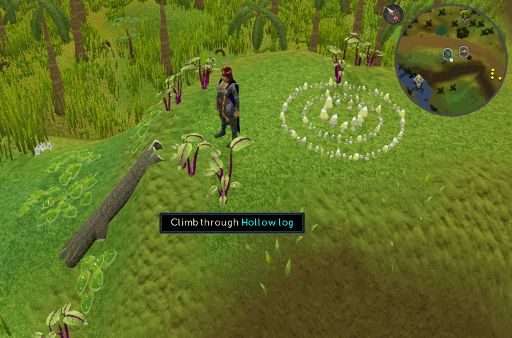
Ape A'hollow - Unblock the hollow log and tunnel shortcut after ‘Fairy Tale III’.
Travel to Fairy Ring C-L-R and unblock the log shortcut nearby. Then go to Fairy Ring A-L-P and unblock the nearby shortcut to complete this requirement.
Milky Teeth - Give the Tooth Fairy five teeth and claim a tooth creature pet.
Collect teeth from the following locations:
- Kebbit teeth - catch a Sabre-toothed kebbit (Requires 51 Hunter).
- Suqah teeth - kill a Suqah on Lunar Isle.
- Old tooth - with a specimen brush and jar in your inventory, dig at the Digsite using a trowel, leather gloves, and leather boots.
- Monkeys teeth - buy from the magical stall in Ape Atoll.
- Human child's tooth - search the bunk bed in Gertrude's house.
Take these teeth to the Tooth Fairy in the Zanaris throne room to be awarded the tooth creature pet.
Mixing in Ancient Circles - Restore the fairy ring in the Ancient Cavern.
Go to the Ancient Cavern with 5 Bittercap mushrooms. On the Western side of the dungeon is a Fairy Ring. Use the mushrooms on the fairy ring to restore it for full use.
You're Not My Real Mah – Gather elder chronicle fragments in the Elder Halls of Freneskae. (X/10)
Elder Chronicles are gathered when training Divination within the Elder Halls. These Chronicles spawn randomly during training and are similar to normal chronicles, with a grey texture. They give Hunter experience when caught and can be handed in to May Stormbrewer outside of Draynor Village or at Guthix’s Resting Place if you have completed The World Wakes. For every 10 Elder Chronicles you hand in, a small piece of lore related to the Elder Gods is unlocked. There are 10 lore entries to be unlocked, so 100 Elder Chronicles are needed. You can only store up to 30 chronicles between your inventory and bank at one time, so be careful not to grind for another if you already have 30.
Measure of Old - Use the Measure to find the four Elder Chronicles.
There are four Elder Chronicles to be found which award 50,000 Divination experience each when The Measure is placed in certain locations:
- Bik’s chronicle - On the South West coast of Entrana, by the Seaweed spawns.
- Ful’s chronicle - At the entrance to the TzHaar Cityy on Karamja volcano.
- Jas’ chronicle - At the archaeologist's camp on the plateau South East of the Agility Pyramid.
- Wen’s chronicle - Near the Oracle on Ice Mountain.
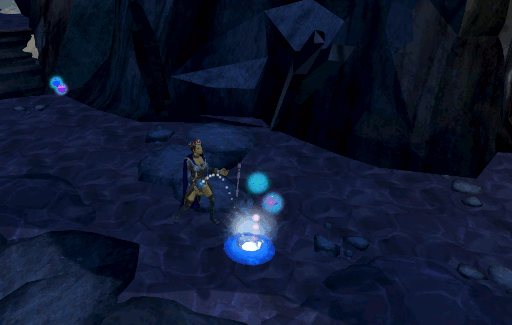
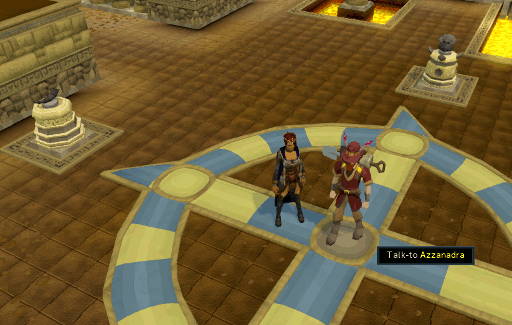
Experience the Fate of the Gods - Claim and use the ‘Fate of the Gods’ XP lamps from Azzanadra and Wahisietel.
Wahisietel (Ali the Wise) should be in Nardah, North of the lodestone in the last building before the desert opens (This requires completion of Ritual of the Mahjarrat).
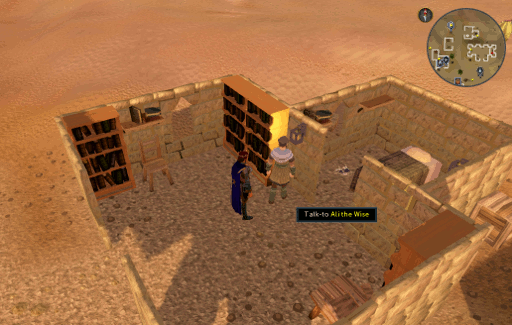
Azzanadra is located in the temple under the Digsite (after you have done The Temple at Senntisten). Visit each of these NPC's after you have completed their required quests to obtain the xp lamps.
Gift from Sliske - Unlock Sliske's gift and the Sixth-age circuit upgrade.
After completing The Shadow Sword, use your Invitation box to travel to the Empyrean Citadel, walk into the middle of the throne room then leave. At this time, Sliske will appear and grant you the permanent effect of the Ring of visibility.
Go to Guthix’s shrine and speak with the Guthixian High Druid to add a teleport to the World Gate to your Sixth-Age circuit. Note you must have claimed all other additional rewards and completed The World Wakes before your ring will be upgraded.
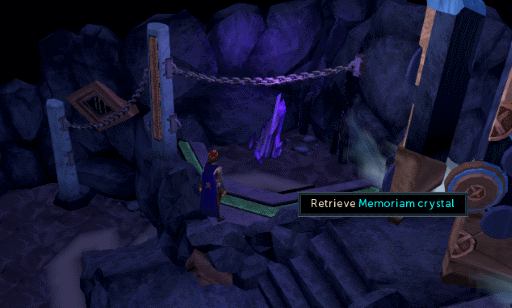
Seren Memories – Deposit Seren memoriam crystals, then search the Sanctum alcove.
Return to Freneskae to collect the 4 Seren memoriam crystals. These are all found in The Approach on a small plateau with four pillars. One of these pillars will be active at a time and can be tagged. You must tag the active pillar 80 times to obtain all four crystals. Note that as you tag more pillars, the frequency of lightning strikes will increase and you will need plenty of food to survive long enough to tag all 80.
The Crest of Seren (cosmetic override) can be found by searching the Western side of the Sanctum after depositing all four of the Seren Memoriam crystals. It is suggested to complete this requirement at the same time as the next one so that you do not need to continually return to Freneskae.
Zarosian Memories - Deposit Zarosian memoriam crystals, then search the Sanctum alcove.
Return to Freneskae to collect the remaining 12 Zaros memoriam crystals. You can use the World Gate to quickly access any of the locations within Freneskae.
Once you have all of the crystals, take them to The Sanctum and activate the Memoriam device to obtain all memories and unlock the Helm of Zaros cosmetic override. It is suggested to complete this requirement at the same time as the previous one so that you do not need to continually return to Freneskae.
Distorted Div - Claim the one-time Divination XP from a Distorted engrammeter.
In order to complete this requirement, you must take a fully charged Engrammeter into Freneskae. This will reward you with 25,000 Divination experience. To receive an engrammeter, you must fully complete the Mahjarrat Memories mini-quest.
Unlocked Char's training cave and completed a Zaros symbol.
Return to Char's cave and you will have the option to complete a training session. Begin the training session and light the fires in the shape of a Zarosian symbol shown below with a pitch can. Note that you will have to make the final fire where the character is standing.
Please note that you are able to leave early and still complete this requirement if you do not want to complete the entire session. Level 91 Firemaking is required to complete this requirement and it can only be done once a week.
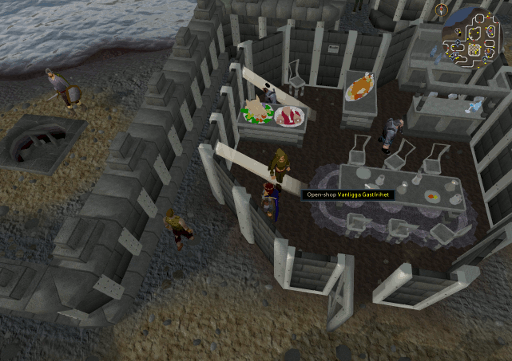
As Taxed as a Yak - Gain access to the Contraband Yak Produce shop.
During this quest players are asked to collect taxes from the citizens of Jatizso, one such citizen is Vanligga Gastfrihet. You must choose to pay her taxes for her or to force her to pay. If you paid her taxes for her, you will have access to the shop. If you forced her to pay, return to her after the quest and pay her back. She will then grant you access to the shop.
Load of Bakulla - Hear the Epic of Bukalla in the Rellekka longhall.
Inside Rellekka's longhall there will be audience sitting in front of a stage. Speak to any member of the audience and ask about Bukalla. Choose to stick around and then simply sit through the 5-minute-long cutscene to complete this requirement. It is suggested to have your audio effects turned on to get the most out of the wait.
Looting the Demon Throne - Claim the gems from the demon throne during ‘The Golem’.
During or after the completion of this quest, enter the demon throne room located in Ruins of Uzer and head over to the throne itself. Using a Chisel and Hammer you will be able to remove the gems from the throne and complete this requirement.
Brothers Gower – Claim the rewards from all three Gower brothers after ‘Gower Quest’.
Return to the Gower brothers at the altar of life. You can return here by using your Disk of Returning, and going through the Life Altar Portal. Talk to each brother and ask about rewards. Each brother will give you a lamp. Ian's lamp gives 250 experience, but needs level 10 in all free to play skills. Paul's lamp gives 1,500 experience, but needs level 30 in all free to play skills. Andrew's lamp gives 12,000 experience, but needs level 50 in all free to play skills.

Tasty Bobbles – Unlock the Tim and Crunchy pets during or after ‘Gower Quest’.
After completion of the Gower Quest, return to Behind the Scenes using the Disk of Returning and visit the South West side of the bar. Once here, ask Tim or Crunchy if they want to explore the world with you to obtain both of these pets.
Gunning for Jewellery - Engrave all of Dororan's jewelery.
For this requirement, you will need to engrave three pieces of jewelry for Dororan in Varrock. The jewelry will require 90 Crafting and will give you 32,000 Crafting experience as a reward.
Nano To Kipple, Come In Kipple - Claim the Kipple Nano pet.
Visit Ariane at the Wizards' Tower again. After going through her chat options, she will tell you the Kipple has grown attached to you and give you possession of it.
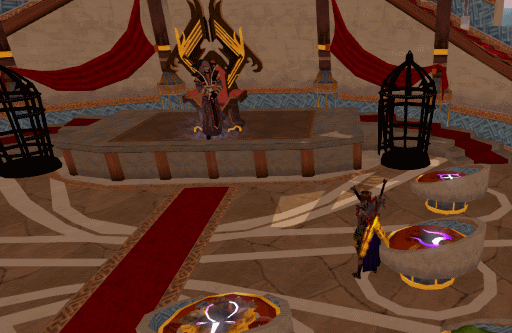
Claiming Azzanadra's Heart - Claim the medium XP lamp from Azzanadra after ‘Heart of Stone’.
Speak with Azzanadra about what you discovered concerning the Elder gods. He can be found in the temple under the Digsite after The Temple at Senntisten. This requirement also requires completion of Fate of the Gods.
Icthlarin's Little Chest - Loot the chest from the pyramid during or after ‘Icthlarin's Little Helper’.
Travel to Klenter's Pyramid in Sophanem. You will need a cat to gain entry to the pyramid.
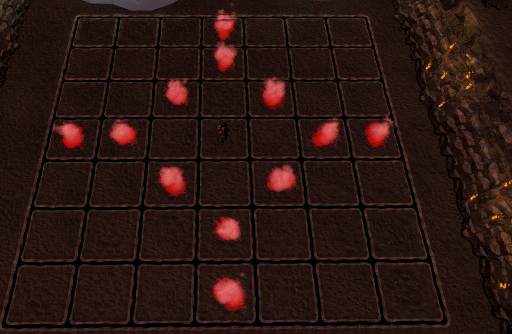
Using the path you used during the quest to traverse the pyramid, head back to just before the large pit. There will be a past to the East, with wall crushers. In order to pass the wall crushers, step diagonally in between them and once you reach the last one, ensure you are directly North of the last wall crusher (the one furthest to the East). Take three steps East, follow it with one more step diagonally to the South-East (be sure to avoid the areas with red dots in the image below!), finally walk East to the chest and loot it to then receive 50 coins.
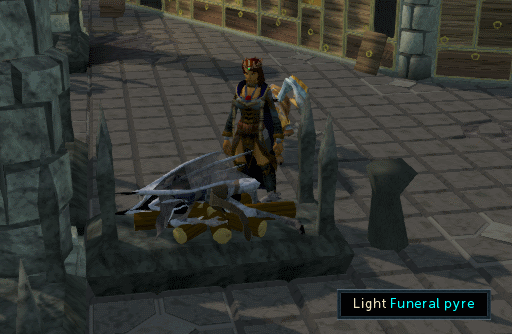
Ivan is Flailing - Unlock the full power of the Ivandis Flail.
In order to fully upgrade the Ivandis flail, you must cremate 500 vyre corpses with pyre logs. Any pyre logs will work, however, higher level logs will grant more experience. Please note that corpses consumed by the Sunspear do not count and you do not need to have the flail with you while burning.
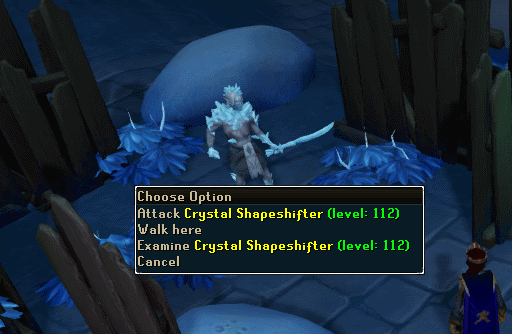
Angs off my Ring - Return the wedding ring after ‘The Light Within’.
You will need to kill Crystal shapeshifters in Tarddiad for a chance to receive the Ancient elven wedding ring; this is a very rare drop. Wearing crystal armor increases the chance of this drop, each piece increasing the likelihood of the drop; attuned crystal armor doubles that chance. Once you have obtained the ring, you will need to return it to Angof.
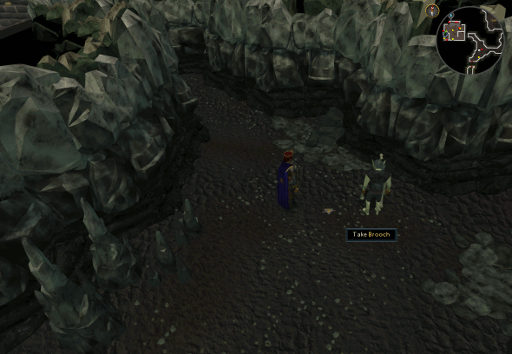
You Mistag This Brooch - Return Mistag's brooch and claim a mining helmet after ‘The Lost Tribe’.
Take the Brooch, found at the beginning of the cave underneath Lumbridge castle on the floor, to Mistag in the Doregshuun Mines, North of the Dorgesh-Kaan city entrance. Use the Brooch on him and he will give you a Mining helmett in return.
For the Love of Mabel - Return Mabel's Ring and chop down the Guard’s tree.
With Mabel's ring, return to Mabel in the barn North East of Draynor Village. She is hidden in the sack where you originally find her. She will give you a 10,000 experience lamp.
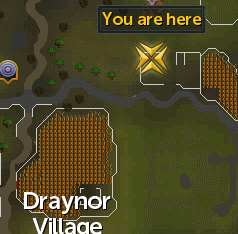
Then return to Draynor Village and talk to the guard in the tree. Offer to cut down the tree in order to help him down and he will award you 5,000 coins
Chippy Transport - Unlock the ability to chip teleport tablets to Trollheim.
Travel to Keldagrim and talk to a dwarf named Runvastr, located in the house South of the pickaxe shop.
Take his diary to the Wise Old Man in Draynor Village and he will then teach you how to chip teleport tablets to Trollheim.
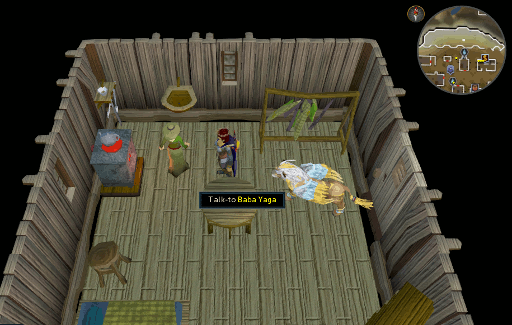
Out into the Ourania - Unlock the spell: Ourania Teleport..
Ensure you have the Lunar Spellbook enabled and return to Baba Yaga on Lunar Isle. She will then unlock the Ourania Teleport, completing the requirement.
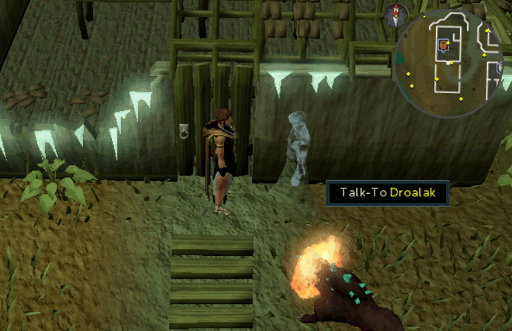
Complete History of Droalak - Free Droalak after ‘Making History’..
Travel to Port Phasmatys and head just South of the general store. Talk to Droalak and you will set his soul free, he will disappear and complete this requirement.
Squeal for Coins - Claim the coins from Yelps' cash bag after fighting him.
Return to Yu'biusk and enter the goblin encampment. Talk to Yelp if you spared him, or look inside his chest if you killed him. This will reward you with his cash bag and spin ticket. Open the cash bag to complete this requirement.
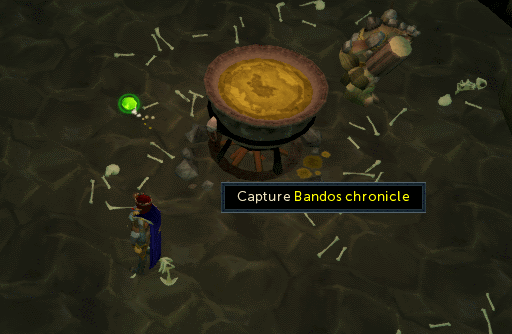
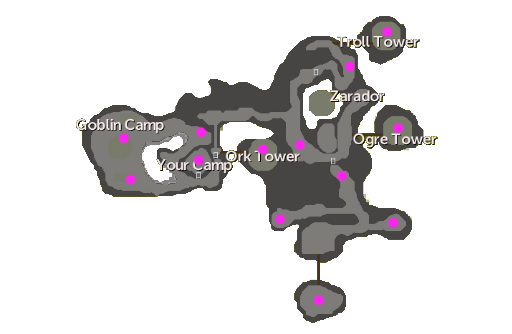
Bandos's Memories – Recover all 14 of Bandos’s memories on Yu’biusk.
Chronicle fragments can be found when exploring Yu’biusk. There are a total of 13 fragments that need to be found. The 14th is gained when you obtain the book that is created by collecting Bandos' other memories. The chronicles are green in color and can only be seen when you are near them. They are found in the following locations:
- Inside the Troll encampment which is East of the entrance.
- Located along the path that is just South of the Troll camp.
- Located along the path to Zarador.
- Located inside the Ogre camp, which is East of Zarador.
- Located up the ladder that is South of Zarador.
- Located inside Graador's camp that is South West of the ladder mentioned before.
- Located inside of Graadors "Secret Weapon" camp located to the East.
- Located on the plateau that is located South of the Cyclops Camp.
- Located inside of Bork's camp that is located East of your camp.
- Located inside your camp.
- Located under the bridge that is North of your camp.
- Located in the Southern part of the goblin camp.
- Locates in the Northern part of the goblin camp.
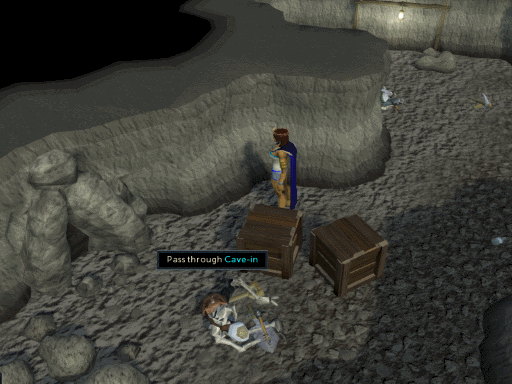
Uzer Master - Clear the shortcut path in the Uzer Mastaba.
Re-enter the Uzer Mastaba, North of Nardah, by going down the stairs.
In the room to the East, there is a tunnel running off the room. Follow the tunnel to the end and you will find a cave-in. Clear this in order to complete the requirement.
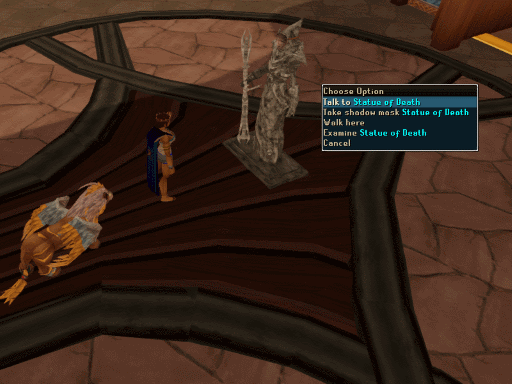
I Presume These Rewards Are Mine, Death? - Claim all rewards from the statue of Death after ‘Missing, Presumed Death’.
Return to the Empyrean Citadel via your Invitation box and talk to the statue to gain various rewards including: a Thieving experience lamp (requires 75 Thieving), a Constitution experience lamp (requires 75 Constitution), an antique lamp (requires level 75 in the skill you wish to use it on), 30 untradable Barrows amulets (requires 80 Attack to claim), and two death animations. Claiming all of these rewards completes this requirement.
Daero Take This Experience? - Claim the XP reward from Daero following Monkey Madness.
Return to Daero, located at Blurberry Bar on the second floor of the Grand Tree. Talk to him to receive some Combat experience and complete this requirement.
Caving Into the Gains - Claim the XP from cave paintings and 5,000 coins from Explorer Jack.
For this requirement, it is easiest to return and retrace your steps through the caves via the guide we've written for the quest, starting at Step 2; skip step 9 if you have already completed the quest. You will obtain 2,000 Crafting, 10,000 Agility, and 20,000 Woodcutting experience for examining all of the paintings in the caves. Once you have obtained the Woodcutting experience, teleport to Lumbridge and speak with Explorer Jack to receive the coins.
Unholy Crafting - Unlock the ability to craft unholy symbols.
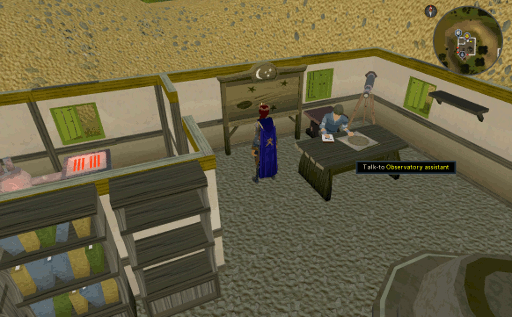
After finishing this quest, look through the telescope again. The Professor will then tell you to see his assistant. Talk to the assistant, who will thank you and give you a jug of wine. He will also talk about the book called "The Book of Astronomy" which is located on the table nearby which talks about Scorpius' grave.
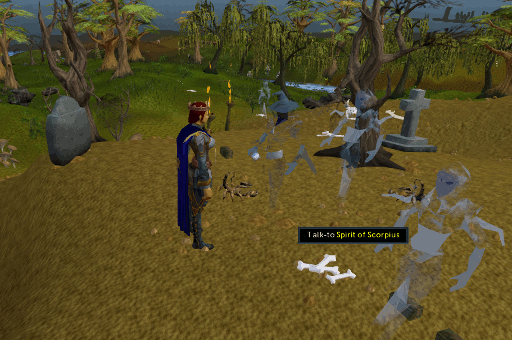
Head to the area where ghosts roam near the entrance of the Ourania runecrafting altar and you will find the Spirit of Scorpius. Talk to him and he will give you an Unholy mould. Using the mould, a Silver bar, and a Ball of wool, craft an Unholy symbol and return to Scorpius who will bless the amulet.
Mysteries of the TokHaar - Fully interact with the Mysterious Statues after ‘One of a Kind’.
To complete this requirement you will need to talk to and interact with four mysterious statues in order to turn them to face a submerged statue. Once you rotate all four, you will receive a reward of 10,000 bonus experience in a skill of your choice. They are located in the following areas:
- West of Camelot castle (Rotate to face South-East).
- South of the Fishing Guild (Rotate to face East).
- North of the Tower of Life (Rotate to face North-East).
- North of the entrance to the Brimhaven Slayer Dungeon (Rotate to face North by North-East).
Learning from Mr. Mordaut - Claim and use the Divination XP lamp from Mr. Mordaut after ‘One of a Kind’.
Speak with Mr. Mordaut in the Varrock Museum to claim a Divination lamp. If you have previously destroyed it, you can speak to him to reclaim it. Once you have the lamp, use it to claim your experience and complete the requirement.
Reliquary of Cithara - Claim XP from the Holy Cithara.
To claim the Holy Cithara you must return to the basement of the Abbey of St Elspeth Citharede. You must then meet various requirements in order to show you are holy enough to accept it. You must have 100% energy and full prayer points. You should also be on the normal prayer book and using the normal or Lunar spellbook.
You will need to equip a Ring of visibility and either a Ghostspeak amulet or Cramulet; note that these will not be necessary if you have completed the Gift of Sliske requirement (Ring of visibility) and the Hard Morytania task set (Ghostspeak amulet). You must then also equip six other equipment pieces related to Saradomin. This can include all Saradomin armor, including the Citharede robes. Saradomin arrows and pocket items also count towards this. A list of all the available items that count for the six items can be found here in the 'Notes' section. You must also not have any other items related to any other gods either worn or in your inventory.
Once you have these items equipped, you can take the Cithara. It may take multiple attempts to succeed, but providing your hit points are not reduced to 1, keep attempting. If your hit points are reduced to 1, this means that you do not meet all of the aforementioned requirements. After gaining the Cithara, you should gain 50,000 Prayer experience.
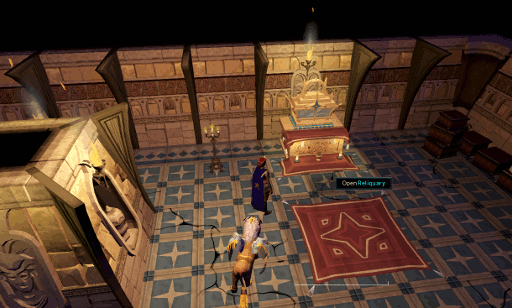
Cecilia, I'm Begging You, Please... - Tell Sister Cecilia to leave or stay after ‘One Piercing Note’.
Return to Sister Cecilia in the abbey and talk about whether she should stay or leave. Advise either option in order to complete this requirement.
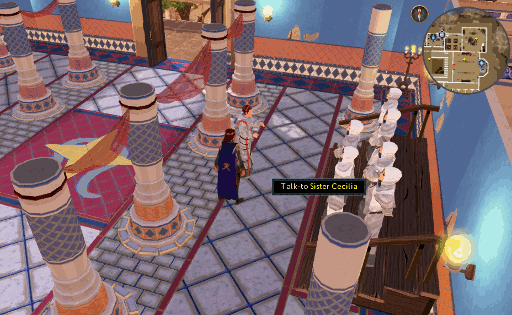
Met Het Yet? – Gain access to the secret treasure room from ‘Our Man in the North’.
If you have at least 80 Strength, you can enter Het’s tomb. The tomb can be found behind the Het statue in the center of the Duel Arena. You will gain 20,000 Strength experience the first time you enter this area and complete the requirement. Inside of the tomb you will also find the Het mask and Heka.
Roake Kal – Decipher all four murals in the sunken temple.
This can be completed when you have 85 Agility, Construction, Firemaking, and Thieving; Note that this skills can NOT be boosted. Return to Mos Le'Harmless and travel on the rowboat on the West coast; it will ask if you want to return to Ulthven Kreath, tell it yes.
Walk North West to the temple (see step 29 for a map if necessary) and pass through the shimmering barrier. Along the Western wall are 4 murals that you will need to decipher to complete the requirement. From South to North you will receive 50,000 experience in: Thieving, Agility, Firemaking, and Construction.
Be aware that you must decipher the previous mural before you can do the next one. For example, you must clear the Agility mural before you can do the Firemaking one.
I'm Forever Washing Shadows – Aid Lord Amlodd in cleansing shadow cores.
You must collect 15 of each of the following items: Truthful shadow core, Blissful shadow core, and Manifest shadow core. These can be gathered by killing shadow creatures in Prifddinas (do not let your legendary pet pick it up or it will not count), by completing the Hefin Agility course, or by Thieving them from the Almodd clan. Throw all 45 of the cores into the rift in Amlodd Sector before talking to Lord Amlodd to receive a experience lamp rewarding 50,000 Divination experience. It requires 91 Divination to convert all three types of cores.

Family Spirit Tree – Reconnect the Prifddinas spirit tree with her brethren.
After completing the Power of Three Spirits requirement, plant and grow a spirit tree in Brimhaven, Etceteria, and Port Sarim. After they are fully grown, talking to Glouron again will award you with a lamp worth 50,000 Farming experience.
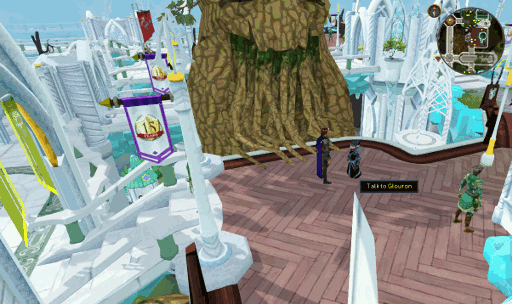
Sing for the Lady – Help Lady Ithell with crystal singing research..
Speak to Lady Ithell, in the Eastern Ithell Sector, a fully charged Crystal Staff, Crystal Wand, Crystal Orb, and Crystal Ward in exchange for 50,000 Magic experience. You can give her each of the weapons one at a time as she will give you back a reverted seed for each item.
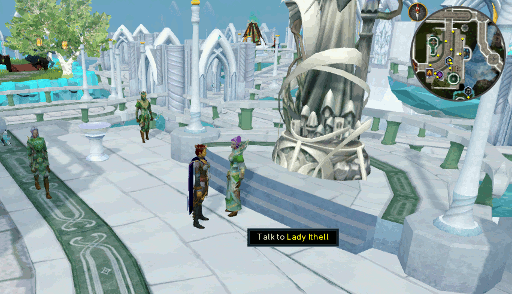
Potion for a Lady – Help Lady Meilyr to retrieve her lost potion recipes.
To complete this requirement, you will need to find an Unreadable page in Daemonheim and purchase the ability to create the Super Melee Potion from the Meilyr shop for 150,000 coins. You will then need to create the potion (requires 4-dose Super Attack, Super strength, Super defense potions, and Crystal flask) and give it to Lady Meilyr (ask her what you can do here). She will then give you an experience lamp worth either 25,000 or 50,000 experience in Strength or Attack.
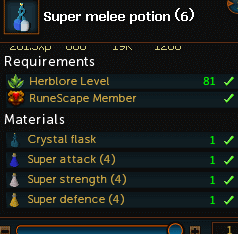
Make Them Bleed – Perform well enough in Rush of Blood to impress Morvran.
You must complete at least 20 waves of Rush of Blood on any difficulty before speaking to Morvran. This will earn his attention and gain you an experience lamp worth 50,000 Slayer experience. Note that the wave must be fully cleared not just started. This requirement can also be completed when on a regular run, you do not need to receive a reward from the activity.

Uncorrupted Ore – Aid Lady Trahaearn in removing some corruption.
This requirement can be completed by smelting 100 Corrupted ore. Once finished, simply speak to Lady TrahaearnL and she will reward you with a 50,000 Smithing experience lamp.
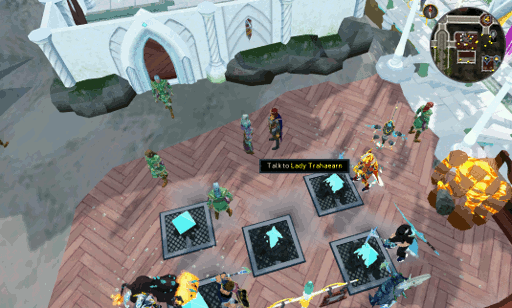
Troublesome Crystals - Find all of the memoriam crystals in Prifddinas.
You must find the 16 hidden Memoriam crystals tucked away in the nooks and crannies of Prifddinas. Reference the map and table below for their locations.
| Prifddinas Memoriam Crystal Locations | |||
| 1 | In front of the building west of Morvran in the Iorwerth Sector. | ||
| 2 | South side of the building next to the Elder tree patch in the Crwys Sector. | ||
| 3 | Next to the Trahaearn herald in the Trahaearn Sector. | ||
| 4 | Inside Haf's Staff Shop in the Cadarn Sector. | ||
| 5 | Pickpocket Arianwyn near the Cadarn herald in the Cadarn Sector. | ||
| 6 | Talk to Lord Iorwerth in the cathedral in the Iorwerth Sector and ask him about the World Gate. (Requires completion of Fate of the Gods) | ||
| 7 | Search the crate against the west wall of the building south of the Seren stones in the Trahaearn Sector. | ||
| 8 | Plant a bush in the Bush patch in the Crwys sector and check its health when it's fully grown. | ||
| 9 | Inside the Hefin Cathedral in the Hefin Sector. | ||
| 10 | Inside the Harmonium harps building in the Ithell Sector. | ||
| 11 | Inside Daffyd's house in the Amlodd Sector. | ||
| 12 | Inside the Herblore Shop in the Meilyr Sector. | ||
| 13 | Unlock an emote from the Hefin Agility Course and perform it next to the Serenity posts in the Hefin Sector. | ||
| 14 | Collect sand from the Sandpit in the Ithell Sector with 10 or more Buckets in your inventory. | ||
| 15 | Teleport to the Prifddinas Fairy Ring (D-J-S). | ||
| 16 | Harvest Harmony moss. after drinking a dose of Perfect juju farming potion with a fully grown fruit tree in the Meilyr Sector patch to be able to take the crystal next to the northeast Harmony pillar. | ||
Power of Three Spirits - Unlock the ability to grow three spirit trees at once.
Talk to Glouron in the Crwys section by the Spirit Tree. Providing you have 89 Farming, you will then be given the ability to grow three spirit trees at one time.
Aereck's Old Bones - Claim Ancient bones from Father Aereck after ‘The Restless Ghost’.
Return to Father Aereck in Lumbridge and talk to him. He will give the players 5 Ancient Bones, which can be buried for 200 Prayer experience each.
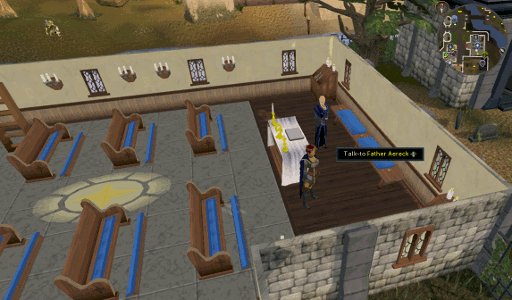
Chilling with Arrav - Put Arrav to rest after ‘Ritual of the Mahjarrat’.
Venture North of Trollwiess to the Ghorrock Fortress and speak to Arrav, wandering just South of it. He will have a short conversation with you before his soul will be at rest. You will obtain 2,000 Prayer experience for this.
Bane Tuner - Unlock the spell: Tune Bane Ore.
Head to a Fairy Ring and enter the code D-I-R followed by A-K-S to arrive in Kethsi. While you are on the island of Kethsi, after obtaining your Kethsian key go into the library. If you completed Ritual of the Mahjarrat, the library will already be unlocked and you will only need to navigate the agility course. The agility course starts on the first isle by clicking "Climb up Ramp". Search the South bookshelves for a book and the South East corner for a scroll. Reading the scroll will unlock a new lunar spell: Tune Bane Ore.
About ‘Kin Time – Help Mandrith rebuild Edgeville after ‘The Ritual of the Mahjarrat’.
You will need to help Mandrith repair the damage done by the Dragonkin to Edgeville. See our Rebuilding Edgeville mini-quest guide for assistance (COMING SOON).
Paint it Red - Uncover the secrets of haemalchemy, after ‘River of Blood’.
Return to the top of Castle Drakan and speak with Vanescula to unlock the ability to create Blood Essences. The easiest method to reach the castle is to equip a full House Drakan outfit, use the Drakan's medallion to teleport to Darkmeyer, and run to the front gate where you right click and choose to go to the roof.
Rusty Reward – Take the order to Braindeath and claim the Rusty Anchor’s bartender’s reward.
Return to The Rusty Anchor in Port Sarim and talk to the bartender. He will give you 20 coins as a reward and complete the requirement.
Azacorax's Rewards - Speak to Azacorax after ‘Rune Memories’ and gain Magic or Prayer XP.
Return to the lesser demon located on the first floor of the Wizards' Tower. Talk to him when you have level 50 Prayer and Magic, and he will ask for a drop of your blood. Giving him a drop of your blood will reward you with 10,000 Magic experience, if you do not you receive 10,000 Prayer experience instead.
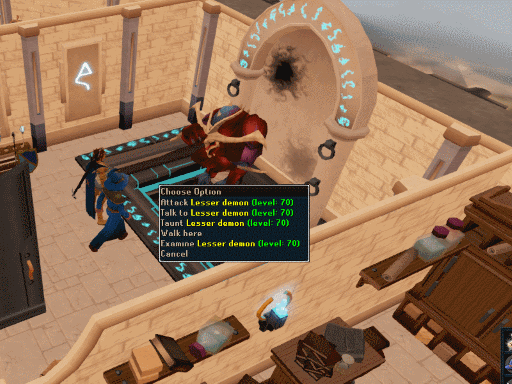
Stealing Sedridor's Stones - Fully loot Archmage Sedridor's chest.
Return to Archmage Sedridor's room on the 3rd floor and search the chest East of the balcony. Inside you are able to claim pure essence from his chest for every Runecrafting level; up to 24,750 pieces which you can choose to accept noted or unnoted. To fully loot the chest you must have 99 Runecrafting.
Many Shades of a Cure - Permanently cure Razmire and Ulsquire after ‘Shades of Mort'ton’.
To complete this requirement, you will first need to make a Serum 207 by using Clean tarromin and Ashes on a Vial of water. Use this on the rebuilt temple's sacred fire when your sanctity is above 20%. This will then create a Serum 208 which you must use on both Razmire Keelgan and Ulsquire Shauncy in Mort'ton.
Herbi's Flax - Give Herbi Flax's diary to the Varrock Apothecary.
This is simply done by going to your Player-Owned House, removing Herbi Flax's diary from your bookcase, then going toVarrock and giving it to the Apothecary in the South West corner of the city. If you have recently finished the quest and not destroyed the book, it may be found in your inventory/bank so you will be able to skip the portion about retrieving it from your house.
Shadow Hanging over Me – Claim all treasure from the chests during ‘A Shadow over Ashdale’.
If completing this requirement during the quest, see steps 8-10 in our quest guide for the chest locations. If you missed it during the quest, you can speak with Gudrik Halbaddon in Taverley to obtain the loot and complete the requirement.
Post Fume – Defeat all desert slayer dungeon bosses after ‘Smoking Kills’.
To complete this requirement, you will need to defeat the Monstrous Cave Crawler, Basilisk Boss, Mightiest Turoth, and the Kurask Overlord. These can all be found within the Pollnivneach Slayer dungeon accessed via the well in Southern Pollnivneach. Both the Turoth and the Kurask bosses will need to be fought with leaf bladed weaponry while the Basilisk Boss will need to be fought while wearing a Mirror shield or Mask of Reflection/Helm of Little Kings.
Scribbling in the Depths – Obtain the hidden rewards after the ‘Song from the Depths’ quest.
This requirement can be completed during or after the quest. Enter the caves South of Rimmington mine and swim through the acid pool (Requires 50 Constitution). Go through the only door within the room, found on the East side of the cave. Then go through each of the following doors as your progress though the caves:
- West door
- South door
- East door
- North door
Read the northern Ancient Writings for 5,000 Constitution experience then swim through the acid pool (Requires 80 Constitution) and read the second wall for 25,000 Constitution experience.
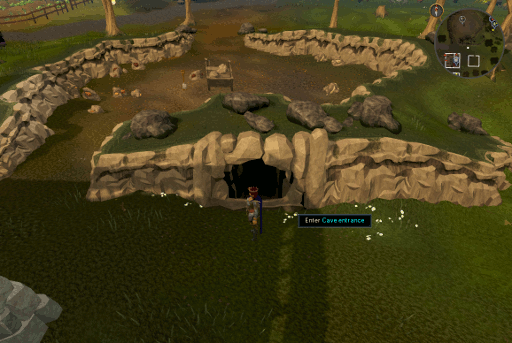
Summary Spirits - Claim the XP from all Wilderness spirit realm portals.
Return to the Wilderness with Jennica's ring and visit the following areas:
-
Summer's Farm -7,500 Farming experience (Requires 46 Farming)
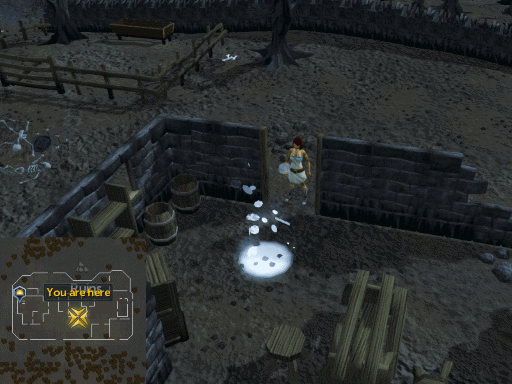
-
Chaos Temple - 7,500 Prayer experience (Requires 50 Prayer)
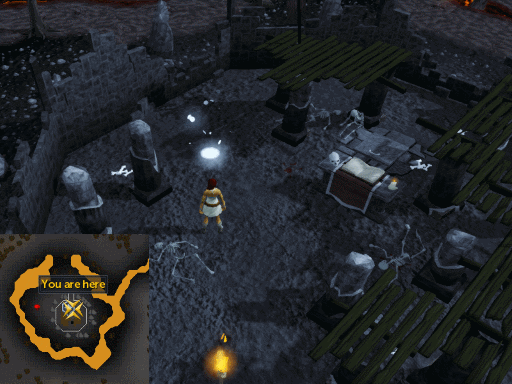
-
Dragonkin Ruins - 7,500 Smithing experience (Requires 50 Smithing)
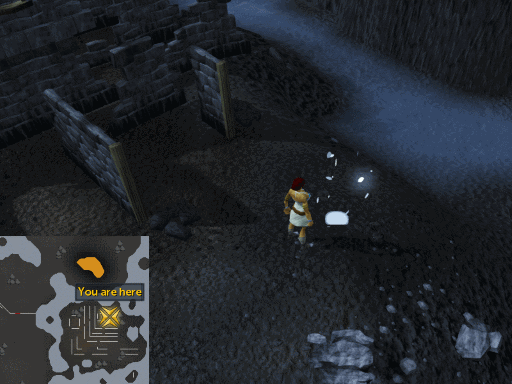
-
Rogues' Castle - 15,000 Thieving experience (Requires 60 Thieving) It is suggested to complete the next requirement while you are here.
-
Dark Warriors' Fortress - 15,000 Defence experience (Requires 80 Defence)
-
Western Ruins - 15,000 Farming experience (Requires 50 Farming)
-
Axe Hut - 12,250 Attack experience (Requires 50 Attack)
-
Forgotten Cemetery - 15,000 Prayer experience (Requires 50 Prayer)
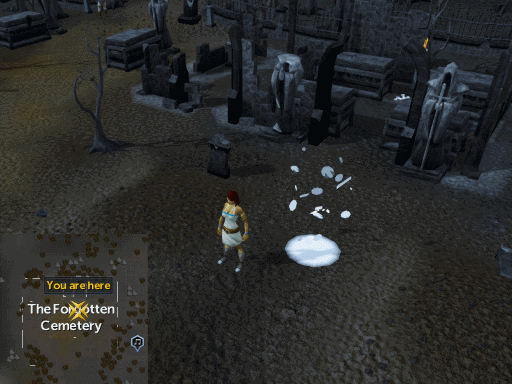
Rogue Down - Free the Wilderness portal rogue trader.
After completion of Summer's End, you must enter the Spirit Realm located at the Rogues' Castle in the wilderness by using Jennica's ring. This is easily done while claiming the xp reward at this portal.
Enter the Spirit Realm then walk inside the castle to the prison door and lock it. Make sure you aren't in the room while locking it as you will get stuck in there. Locking the door in the Spirit Realm will unlock the door in the real world. Remove the ring and speak to the Rogue. He will ask you to meet him in Varrock, behind the archery shop, where he will now buy unenchanted jewelry for a decent price and complete your requirement.
Advanced Sweeping - Fully enchant your broomstick after the ‘Swept Away’ quest..
To enchant your broomstick, you must travel around Runescape and visit NPC's. Upon visiting each of these, they will add another level of enchantment to your broomstick and give you Magic experience. You must visit the Sorceress' Apprentice in Al Kharid, Ali the Hag in Pollnivneach, the Old Crone East of the Slayer Tower, Baba Yaga on Lunar Isle, and Kardia in the Underground pass. To fully enchant the broomstick, you must have 93 Magic.
Triple Trouble - Unlock the post-quest rewards of Tamayu, Tinsay and Tiadeche.
For this, you must simply speak to each of the brothers to unlock extra rewards and tricks. The brothers (Tamayu, Tinsay, and Tiadeche) are located in the three houses on the Southern side ofTai Bwo Wannai.
Naturally Muspah - Claim the reward lamp from natural historian after ‘The Tale of the Muspah’.
Return to the hunting grounds North of Rellekka and speak to the Natural Historian. He will reward with an Antique lamp granting you 200 experience in the skill of your choice.
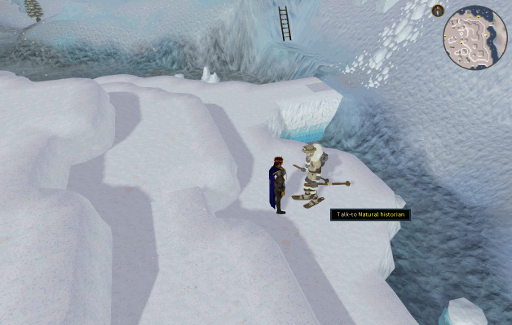
Ornate Crockery - Create the big bowl for Tears of Guthix.
After talking to Juna, use a sapphire lantern on one of the light creatures to pass across the chasm and mine one of the magic stone rocks. Craft the larger rock into an ornate bowl, return to Juna, and give it to her. This will complete the requirement and allow you to collect more tears during the Tears of Guthix distraction.
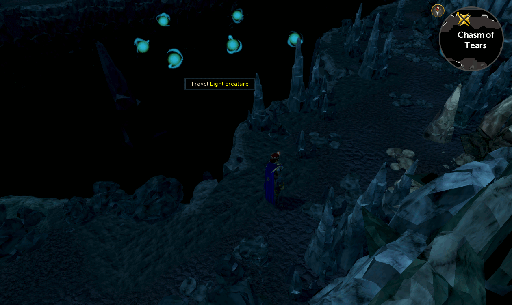
White Knight Rises - Achieve the Master White Knight rank.
The Master White Knight rank requires 1,300 Black Knight kills. These kills count both as a Member and Free-to-play. Each player begins with 100 kills at the end of Wanted!. It is suggested to kill Elite Black Knights if you have completed While Guthix Sleeps as each Elite counts for 10 Black Knight kills, thus only requiring only 120 Elite kills to complete the requirement. Note: If you kill any White Knight, it deducts one Black Knight kill from your total. You can check your rank by looking at the Wanted! entry in your quest journal.
Epi Logueque Experience – Watch the ‘While Guthix Sleeps’ epilogue and claim the XP reward.
After completion of the quest, obtain and use all four experience lamps then speak to Idra again in Falador to view the epilogue where you will learn about the Dragonkin’s return. If you have completed Ritual of the Mahjarrat and are returning to complete this requirement, you will need to talk to Silif instead. Note that Silif must be in the same room as Surok for the cutscene to occur.
One Man's Junk...Is Mine - Fully loot Movario's base..
You can return to Movario’s base underneath the Khazard Battlefield at any point after or during the quest and loot various items. Head to Khazard Battlefield as shown in the image below. You will need to climb over the crumbled wall on the South East side of the building.
After entering the trapdoor, run through the base, up and around the Northern corridor, then head down the steps. Please note, this is instanced for each player so you will only see yourself in this area.
Head through the old battered door, and you will be inside Movario’s base. From this point, you will no longer be able to teleport. Walk up the spiral staircase and enter the tunnel to the South. You will find 4 large pallets containing items. The looted items are 100 Ffire runes, 100 Death runes, 100 Coal, and 100 Magic logs. These items are not noted and must be carried out; using either Magic notepaper or a beast of burden is suggested.
Unlike during the quest, only a weight puzzle must be completed to reach the loot inside Movario’s base. For more detailed information on how to solve the weight puzzle, please visit the While Guthix Sleeps guide (see step 18). However, you can also leave the base by taking some damage without having to solve the puzzle.
If you go through the door to the East (you will have to click this three times, you will get a little cut-scene of a countdown of strikes and take less than 1/4th of your health in damage) you will be removed from the base and sent to jail. From here you can pick-lock the door and exit via the Eastern door or teleport out.
Relight my Fire - Re-kindle the Dragon Forge.
To re-kindle the Dragon forge, you need the two parts of the key you obtained during the quest: Strange key teeth & Strange key loop. If you no longer have the key parts, see the section below. If you still have the key pieces, proceed to the section following it.
Return to Movario’s base, as shown in the requirement above, and continue climbing up the second staircase. Here you will need to search Movario’s “Bed chest” by searching the bed to reveal the chest.
Please note, you MUST solve the weight puzzle to exit due to the key pieces being removed from your inventory upon exiting otherwise.
After you have obtained the key, head back down the stairs twice and search the painting. Climb over the Broken Wall and look at the thermometer. It will tell you how much you weighed upon entry. Take that number and subtract it from your current weight in the “Worn Equipment”. Take the correct number of weights from the Pile of weights and head back upstairs. Use your weights on the Statue after checking to make sure it is empty. If you have gotten the weight puzzle correct, you will appear outside Movario’s base. If not, you will be given three chances to get it correct before being thrown out of the base and you will have to restart. After you’ve exited the base, proceed to the Ancient Caverns.
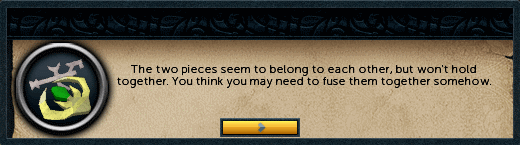
Please make sure you bring a few pieces of food, a dose of Super Antifire, and weapons/armor as you will take a bit of damage during this part.
Take your key pieces to the Ancient Caverns (most easily reached by a Games Necklace to Barbarian Assault, a Ferocious ring teleport to Kuradal, or Fairy Ring code B-J-Q if you have repaired the ring), proceed up the stairs on the East side of the cavern, and engage combat with a Mithril dragon. Use one of the key pieces in your inventory on the dragon, and it will start to forge them together. This is best done with the dragon at the top of the stairs, so you will not be attacked by another when forging your Dragonkin key. After you have forged the key together it can be used on the Mithril door directly West from the top of the stairs.
Once inside, you will find a large orb and three dragon heads.
You must cast Fire Wave on each of the dragons' heads to light the orb, thus re-kindling the Forge by filling it with lava. Please note, you do not need runes for this, just simply click each of the heads and select option "Light Dragon Head". It will look like the image below when you are successful.
After you have rekindled the forge, the requirement is complete and you can now create dragon platebody at the forge. To do so, you must obtain the dragon metal fragments (Ruined dragon armour slice, Ruined dragon armour lump, and Ruined dragon armour shard). These are obtained from Tormented Demons. To fuse the pieces together, you must either have 92 Smithing or have assistance from someone who does. A Blast fusion hammer, bought from the Blast furnace in Keldagrim, is also required. You can create these in the Ancient Caverns as well, just South of Kuradal.
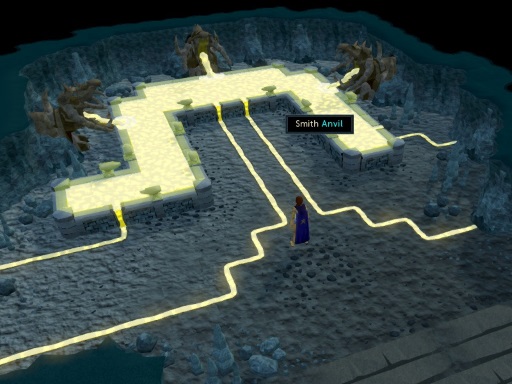
As clear as a Crystal Seed - Unlock the Temple of Light teleport after ‘Within the Light’.
Speak to Eluned in Isafdar to gain the ability to teleport to a safe area in front of the Temple of Light, in addition to its original teleports. Note that you must have a charged crystal teleport seed in their inventory when they speak to Eluned.
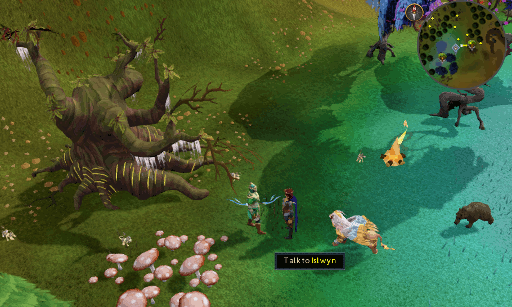
Respect the Balance - Pay respects and lit the torches in Guthix's shrine
Go back into the temple and pray at the monument, you will receive 100k Prayer experience (requires 90 Prayer).
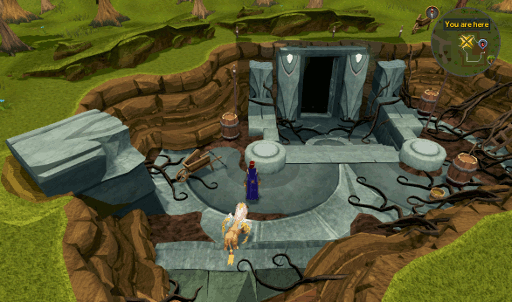
Lighting the five torches around the monument awards 10k Firemaking experience each (requires 74 Firemaking). If you need to destroy your rewards because you do not have the level, you can retrieve them from the high priest later.
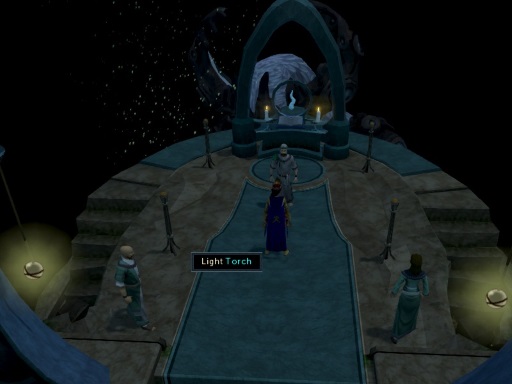
Trickster's Trinkets - Discover all the trinkets and restore the old necklace after 'You Are It'.
Collect all 5 Necklace trinkets to create the Necklace of Charos. Please see the bottom of the quest guide for trinket locations.
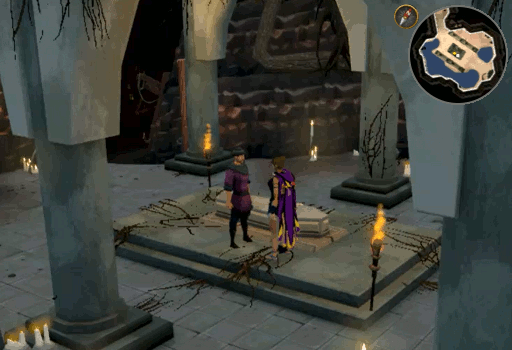
Brutal Stuffsies - Open Uglug's Stuffies store by selling him Relicym’s balm.
To open Uglug Nar's Stuffies store, you must sell him either a 3 or 4 dose Relicym's Balm. This potion is made by mixing a Clean rogue's purse and Clean snake weed into a Vial of water. He can be located wandering outside of Jiggig. After opening the store, you can buy Relicym's Balm from Uglug Nar along with various brutal arrows.
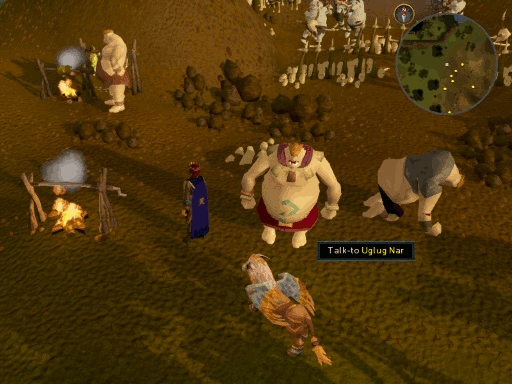
This Special Report was written by Rooskii. Thanks to ChathMurrpau, Owain121, With Faith, and Galletaa for corrections.
This Special Report was entered into the database on Tue, Jul 26, 2016, at 02:00:49 AM by Rooskii, and it was last updated on Sun, Aug 02, 2020, at 09:31:38 PM by Chath.
If anything is incorrect or missing, or if you have any new information to submit to this database, please submit it to us on our Content Submissions Forums.
If you see this guide on any other site, please report it to us so we can take legal action against anyone found stealing our content. This guide is copyrighted by RuneHQ, and its use on other sites is expressly forbidden. Do not ask if you can use our guides or images, the answer is and always will be NO!
Print this page with images - Back to the Special Report Index Page - Back to Top
