

| Pontifex Shadow Ring | Ring of Dueling | Shard of Erebus | Runes for Crystal Mask* | ||||
| Super restore | Sixth-Age Circuit |
-
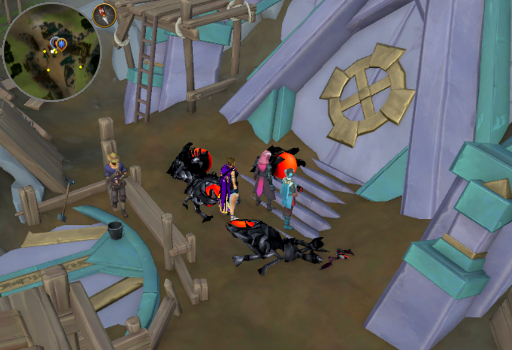
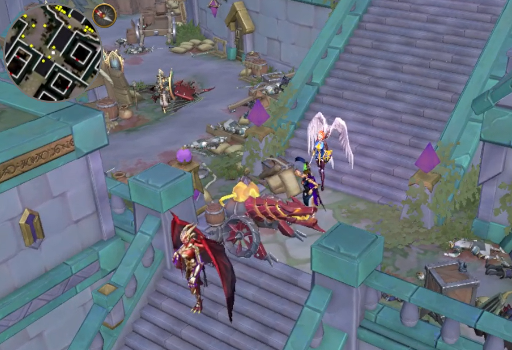
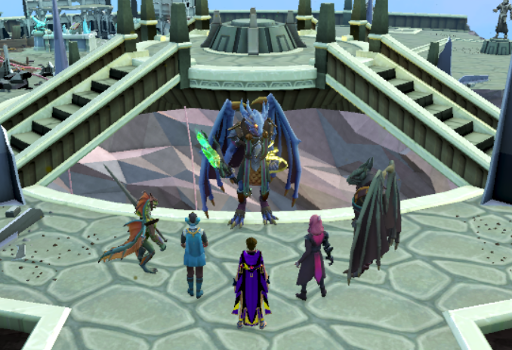
Speaking to Moia will reveal that the people who usually guard the door to Senntisten have disappeared and she killed the TzekHaar that were here when she arrived as they appear to trying to escape to the surface. Clearly your allies need a bit of help. Accept the quest. Moia will confess that while Zamorak has abandoned the alliance, she doesn't agree with this decision. She and Hebe are here to help keep the TzekHaar from reaching the surface. If you haven't already, gear up for combat.
-
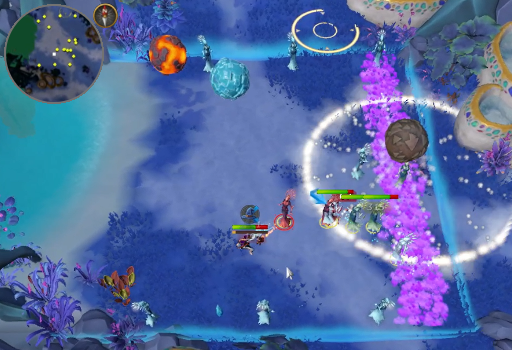
Pass through the doors behind Moia and continue the quest when prompted. You will enter a cutscene in which Seren briefly narrates the Elder God Wars. After it ends, you will find yourself at the exit lift in the TzekHaar/Ful Front. There will be 12 TzekHaar enemies for you to clear out- 4 Hur (which attack with Melee and have 10k hitpoints), 4 Mej (which attack with Magic and have 15k hitpoints), and 4 Xil (which attack with Ranged and have 12k hitpoints). None of them have weaknesses, but with some food and level 70+ gear they are easy foes so long as you avoid letting too many of them gang up on you at once. If you need to restock, there is a bank chest within the area which can be used.
-
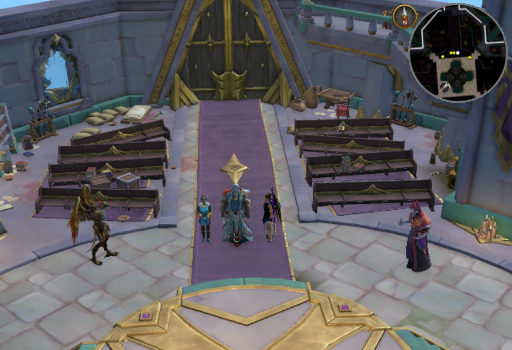
Enter the Cathedral door to the South of the TzekHaar pit. Speak to any of the NPCs present and, in the conversation, it will be made clear that Hebe is actually Saradomin's daughter, Adrasteia. Saradomin will confront Moia and you will be asked whether or not they can trust her. When prompted, you can ask about how the eggs and the fronts are faring, but this isn't necessary. Click continue and Armadyl will say that Gorvek needs help at the Croesus/Bik Front and you will volunteer to assist him while Moia assists with holding the Nodon/Jas Front.
-
Exit the Eastern cathedral door and speak to Gorvek or Hannibus. They will tell you that Croesus' fungus is growing at a rate that they cannot hold, but if you can remove it, they will be able to again. Head across the bridge to confront Croesus. Once you pass the top of the first stairway, you will enter a short cutscene showing you that Croesus has somehow moved closer to the cathedral. Fungi aren't known for walking, seems weird.
Prepare to have a slightly modified mock Croesus encounter. While you will be doing this by yourself, it will only be the gathering portion. As per normal, you will need to have access to a pickaxe, hatchet, and fishing rod to complete it, and the ones on your toolbelt will work fine. We recommend having runes for Crystal mask, the mobile perk or Shadow's Grace relic power, an off-hand melee weapon for bladed dive, and Super restores for this encounter. Unlike a normal Croesus encounter, you do not need any free inventory space for this as your skilling will gather no items and there won't be any sticky fungus to burn through.
-
If you have never defeated Croesus, be sure to read this entire step before doing it or check out our Croesus guide GWD3 - Croesus Front. If you have defeated Croesus, you can skip to the section specific to this fight. Note that RuneHQ has a Croesus event every Friday at 19:00 game time. If you want to learn firsthand how to fight her, feel free to join us!
Unlike typical boss fights, your hitpoints are not a concern here; your skill levels for Fishing, Hunter, Mining, and Woodcutting are. When you are hit by one of Croesus' attacks, it will drain those skill levels. There will be a purple bar above your head that indicates how drained your stats are. Should the bar completely empty, you fail the encounter and have to start over. This is not considered death; you won't lose any items.
Croesus will only use three different attacks listed below. Whenever one is coming, Croesus hunches down and tenses. If you move when you see this happen, you can avoid most of the attacks. In addition, the Crystal Mask spell will block any stat drain from a Croesus attack, but be consumed in the process. As such, you will need to recast it whenever you get hit. The attacks she will use are as follows:-
Spore bombs: A large ball of spores will erupt from Croesus and land where you are standing. You have a short window to move before the cloud it leaves behind it starts draining your stats. The cloud's color will indicate which skill level it drains: Green for Fishing, Blue for Hunter, Yellow for Mining, and Red for Woodcutting. The cloud dissipates after about 10 seconds.
-
Hard Fungus Fall: A purple and white fungus will fly from Croesus and land where you were standing when she threw it. If this hits you, it will cause you to be stunned. If you are still stunned a short period after it lands, it will drain the stats of all 4 relevant skills. Use Anticipate to not be stunned, move from your current location when she throws, or use Freedom if you are hit.
- Slime Mould: An orange and yellow slime mould will land near you and run after you. It can be blocked by terrain, but also is able to hit you diagonally through terrain, so keep your distance. If it reaches you, it will drain the stats of all 4 relevant skills. Once it drains your stats, or after about 6 seconds, it will dissolve.
If you have defeated Croesus before, read from here to the end of the step before continuing.
Once you pass the barricades, Croesus will start attacking you. Each attack (listed above) will land about 13 seconds after the previous one: Green spore bomb, Blue spore bomb, Slime mould, Red spore bomb, Yellow spore bomb, Hard fungus fall, repeat from the start. To complete the encounter, you ONLY need to deplete the mutated fungi skilling nodes found within the area around Croesus. You will not gain any items for this, so inventory space isn't an important consideration. Should you deplete one of the nodes and then fail the encounter, it will remain depleted; you will not have to deplete it again. Note that she does not have an enrage bar, so you will only fail if your purple bar empties.
When all the nodes are depleted, Gorvek will thank you and tell you to ask Saradomin where you should help next.
-
Spore bombs: A large ball of spores will erupt from Croesus and land where you are standing. You have a short window to move before the cloud it leaves behind it starts draining your stats. The cloud's color will indicate which skill level it drains: Green for Fishing, Blue for Hunter, Yellow for Mining, and Red for Woodcutting. The cloud dissipates after about 10 seconds.
-
Gear up for an Arch-Glacor kill and then return to the cathedral, choosing to continue Extinction when prompted at the door to the dungeon. Speak with Saradomin and he will tell you that Azzanadra needs help with the Glacor/Wen front. Head South from the cathedral to the Glacor/Wen Front. You can kill the Glacytes along the way (the Shard of Erebus won't prevent them from attacking you), but it's generally a waste of time as the portals in the center of the area will spawn more. Continue South, pass through the barrier, and speak with Azzanadra.
-
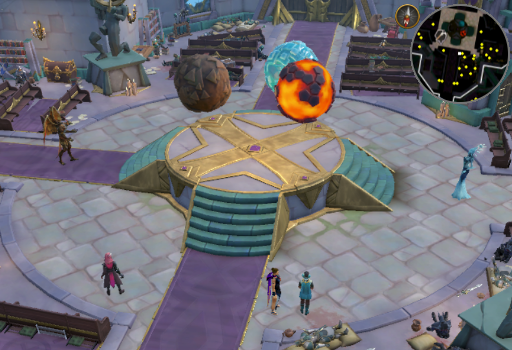
Azzanadra is alone and can handle the Arch-Glacor, but only if you can deal with his minions. In this fight, the Arch-Glacor will be untargetable and will use the following attacks: Pillars of Ice (3 pillars, which spawn on the pillars you will be melting), permanent Normal mode Flurry, and Glacytes (only 2, both Melee type).
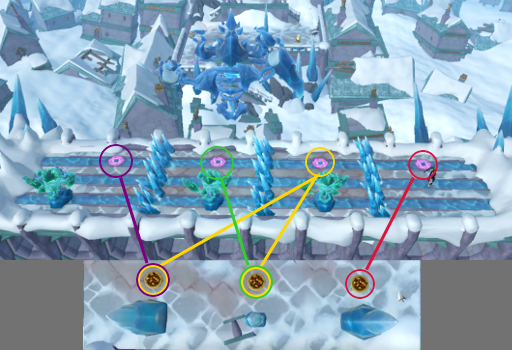
When certain combinations of braziers are lit, the portal near the Arch-Glacor will turn purple and teleport you to the Arch-Glacor's usual arena. Unlike normal, the aqueduct will be divided by 3 walls of ice into 4 sections, each containing a Generating Glacor. To bring this Front down to a manageable size for Azzanadra, you will need to clear out all 4 Generating Glacor. Within each section, the Generating Glacor will spawn glacytes every 5 seconds. Once you arrive they will start spawning Enduring, Sapping, and Unstable glacytes instead, at a slightly slower rate. Because of the close quarters and the way the glacytes impact the Generating Glacor, always kill these when they spawn before returning to fighting the Generating Glacor. Once you have defeated the Generating Glacor in your quarter, take the portal back to Arch-Glacor's main area and adjust the braziers to the next combination. If the portal is red, you will be unable to teleport to the aqueduct and must adjust which brazier(s) you have lit.Generating Glacor Location Lit Braziers Far East East Middle East Middle and West Middle West Middle Far West West
Once you've cleared out the Generating Glacors, Azzanadra will thank you and suggest you return to the cathedral to see where else you can help.
-
At the cathedral, speak with Saradomin again to learn from a cutscene that the Nodon Dragonkin have deployed many siege engines that are becoming a problem for the defending forces.
-
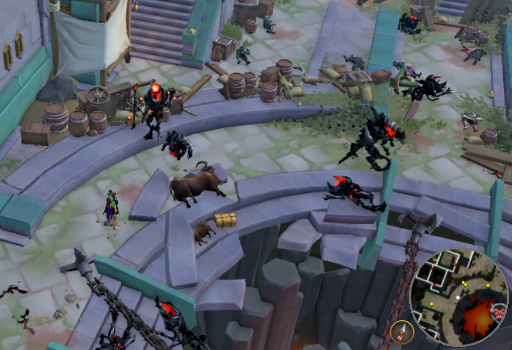
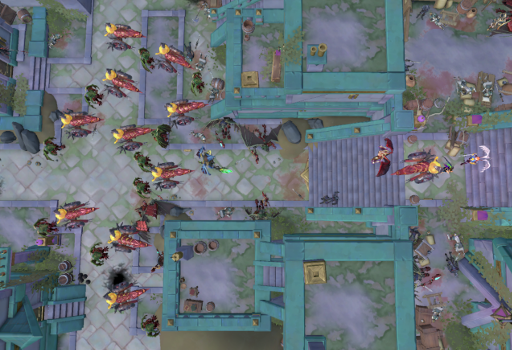
Go through the West cathedral doors and descend the steps to the Abandoned siege engine, located on the landing before the bottom flight of stairs. Click the siege engine to take command of it and then click to attack the enemy siege engines. If you cannot click on one of the siege engines, then click where it is stationed and yours will fire to the clicked location and destroy it anyway. Once all of the enemy siege engines are destroyed, Kerapac will appear and call forth another group of them after a short conversation.
-
Take command of the siege engine again and destroy the enemy machines. This song and dance will repeat 4 times before Kerapac gets sick of it and destroys your siege engine. Head down the stairs and finish off the remaining siege engines the old-fashioned way. Unlike the siege engines in this dungeon under normal circumstances, these ones attack with ranged and do mild damage. Protect/Deflect range makes their attacks negligible.
-
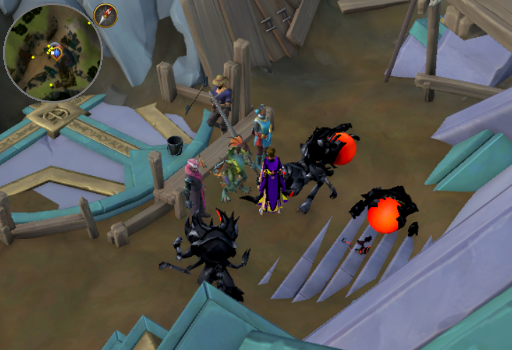
After destroying the last siege engine, TzekHaar-Zuk will climb from the crater in the TzekHaar/Ful Front and you will be called back to the cathedral to deal with him. Return to the cathedral and speak with Saradomin. He will decide that they cannot wait any longer and must destroy the eggs, but Seren will intervene and teleport away with them. Saradomin will task you with hunting them down and, when the dialog ends, you will be placed outside the entrance to the dungeon with Adrasteia, Hannibus, and Moia.

-
Speak to one of them and you will be given a few options as suggestions, but none of them matter until you find the eggs, so "continue." Moia and Adrasteia will search Gielinor and Hannibus suggests talking to Vicendithas to see if he knows a way to track the excess anima given off by the eggs. Before you part ways, Moia will give you a Communication device (Extinction).
-
If you have completed Fate of the Gods, you will need The Measure for this step. If you didn't bring it, you can make a quick trip through the World Gate to the Elder Halls of Freneskae to retrieve it or wait til it is mentioned and grab it from Mr. Mordaut at the Anachronia Base Camp.
Make your way over to the Effigy Incubator on Anachronia and continue Extinction when prompted at the door. Go down the stairs and talk to Vicendithas. Depending if you brought The Measure or not will direct exactly how the conversation proceeds. Regardless of this, you will point out that Zaros stole The Locator, and Vicendithas will accept The Measure as an alternative. Retrieve it if you have not yet done so then talk to him again to give him The Measure. Vicendithas will step over to a workbench and begin to fiddle around with things. At this point you will need to talk with Hannibus a few times while Vicendithas finishes his device. When he finishes, he will say that Gielinor appears to be normal, so the eggs must be elsewhere.

-
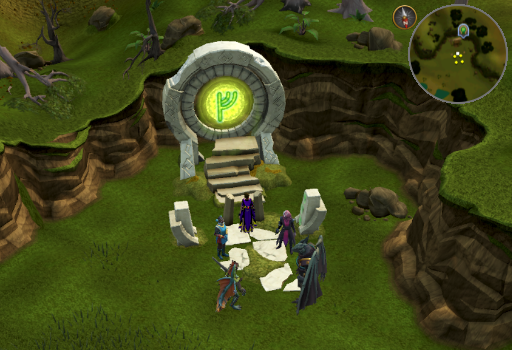
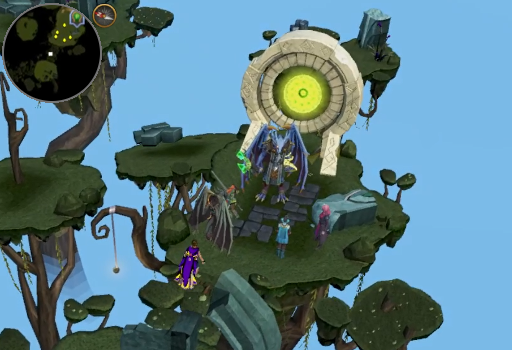
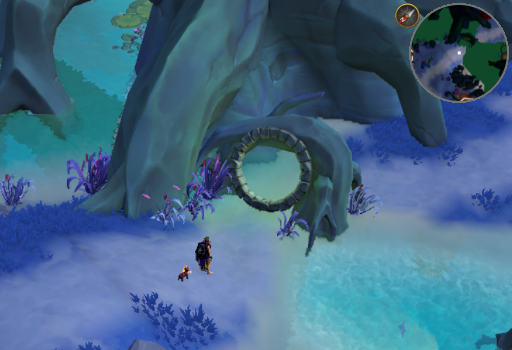
Activate the Communication device (Extinction) to fill in Adrasteia and Moia. You will instruct them to meet you at the World Gate. Talk to Hannibus and "continue" when prompted, then make your way to the World Gate. The fastest way to get there is by using the Sixth-age circuit's World Gate teleport or you can run South from the Eagle's Peak Lodestone. Talk with any of the gathered allies to enter the quest instance, then talk with them again to converse. After some introductions, you will be asked where to search: Infernus, Hallow, Teragard, or Tarddiad. Pick Tarddiad, as it's where Seren first met the elves. The World Gate will automatically be set to connect with Tarddiad, so enter the World Gate.
-
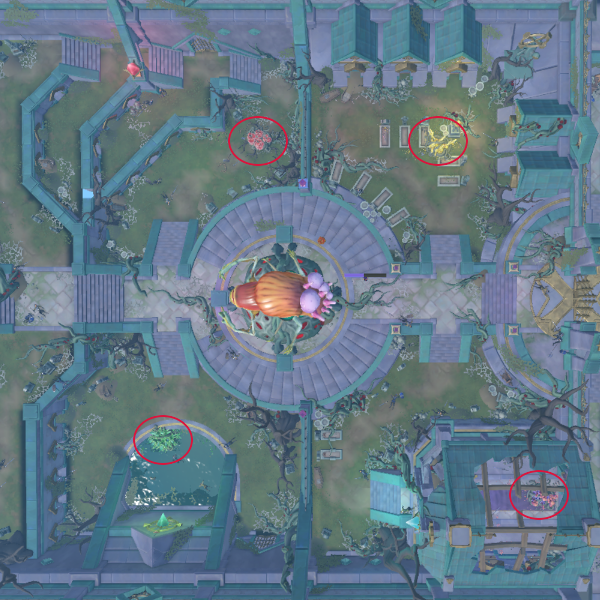
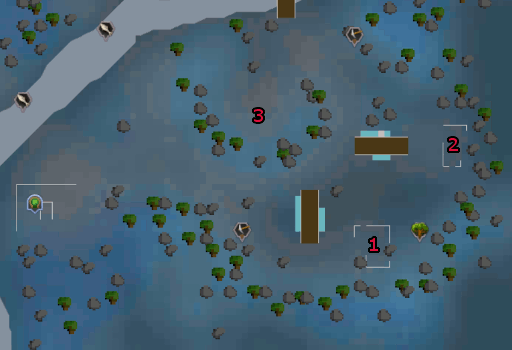
Talk with any member of the group in Tarddiad and Vicendithas will tell you he needs to take readings from a few places to be sure whether or not the eggs have been here. Head East from the World Gate and investigate the resonating crystals in the buildings where your allies have gathered (points 1 and 2 on the map below). Once you have investigated both, your allies will move to the resonating crystal in the center of the settlement (point 3 on the map below). Investigate it and endure an argument between Hannibus and Vicendithas. It will end with Vicendithas concluding that these crystal are not giving him any useful information so they should find a local to talk to.
-
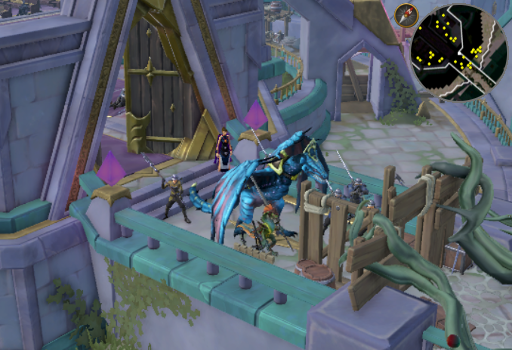
Cross the bridge to the North and talk to Angof. After some discussion, Kerapac will appear, triggering a cutscene. Kerapac will prepare to attack, but Angof will call the Crystal Shapeshifters to hold him off while you run for the World Gate. When the cutscene ends, you will find yourself in Gielinor by the World Gate once more.
-
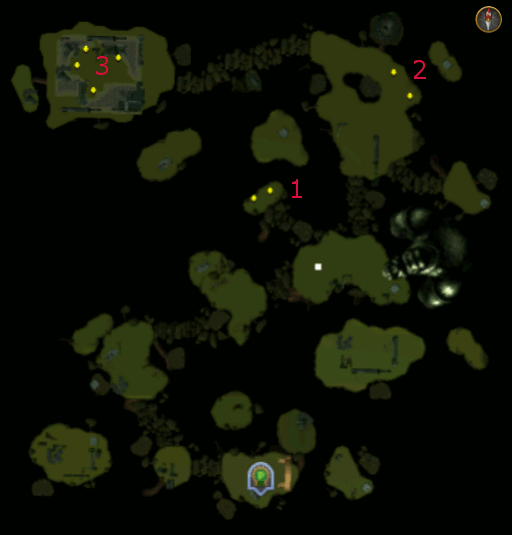
Talk with any of your companions and Adrasteia will suggest looking for Seren on Naragun. The World Gate will automatically connect with Naragun, so simply enter it. Talk with any of your allies and some bickering will occur again before they all start searching. Head North and talk to each group (points 1 and 2) until the dialog is exhausted and they will reconvene in the far North West corner (point 3). Talk to any of them again and the group will agree Seren isn't on Naragun, so they should look elsewhere.
-
Walk South back to the World Gate and you will enter a cutscene in which Kerapac, the cockroach he is, turns up to harass your group some more. When the conversation ends, you will pass through the gate and return to Gielinor. Talk with anyone in the group and Adrasteia will suggest checking Kethsi. The Gate will automatically connect to Kethsi, simply pass through it.
-
Entering Kethsi will trigger a cutscene where Kerapac corners you. You will twice be given the choices of either chastising him or reasoning with him. Your choices make no difference in the outcome of the conversation, so thank him, or don't, and you will be back at the World Gate in Gielinor.
-
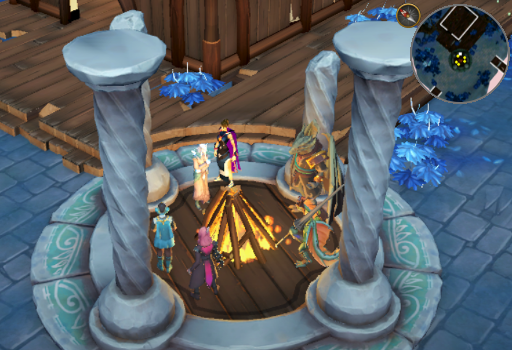
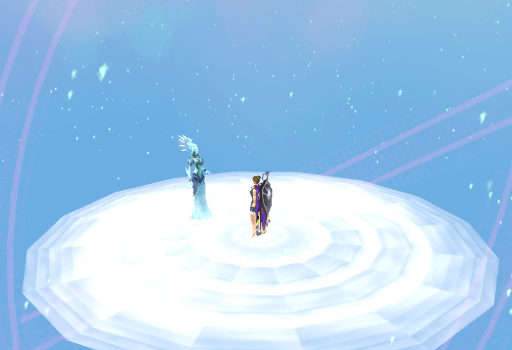
Talk to the group again and Vicendithas will suggest Freneskae. The World Gate will once more connect to your destination, merely pass through it. Talk to anyone after arriving in Freneskae and Vicendithas will tell you that you've finally found the right world. After some additional chatter, Moia will offer to take you to top of the mountain that houses the Elder Halls (AKA, The Cradle). Accept her teleport and talk to the group once you arrive, then descend the ledge into the Elder Halls, choosing to continue the quest when prompted.
-
Talk to anyone in the room. Seren will tell you to leave, which you will refuse. After a brief explanation, a sound outside will indicate that you are not safe here. Vicendithas will suggest Kerapac has found you. Exit the rock face on the West wall to return to The Cradle, choosing to continue the quest when prompted.
-
In Cradle you will not find Kerapac, but a Dark Portal. Approach it (left click) and Vicendithas will tell you to stay back because the place is flooding with shadow anima. Descend the ledge back into The Elder Halls, continuing the quest when prompted.
-
Speak to anyone in the room to start up a conversation. Seren will say that the portal shouldn't be there and assume Zaros is responsible. The Shadow Breach on Gielinor was closed by Azzanadra, but the one on Freneskae is wild and active, likely searching for the eggs. Vicendithas will then note that Kerapac has arrived. Finish the dialog and exit the cliff face on the West wall again, continuing the quest when prompted.
-
Kerapac has arrived with The Needle. Talk to him and you will learn that he is doing what little he can to delay Jas, but you need a plan. You will be given a bunch of bad ones and the option to "continue". Continue to indicate you don't yet have a plan and, after a few more lines of dialog, a cutscene will occur in which Jas arrives. Thankfully, Kerapac uses The Needle to defy her, buying you a few minutes.
-
After some chatter, Kerapac suggests you go into the Dark Portal to Erebus and find something that can be used to fight Jas. Make sure you have at least 6 empty inventory slots and hop in.
-
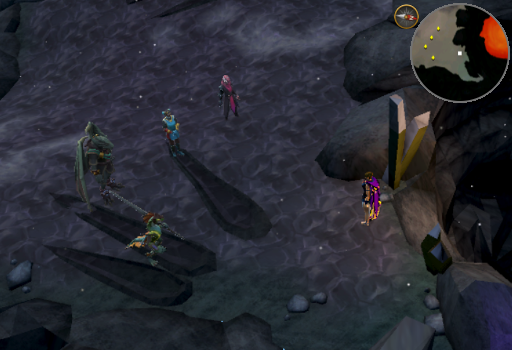
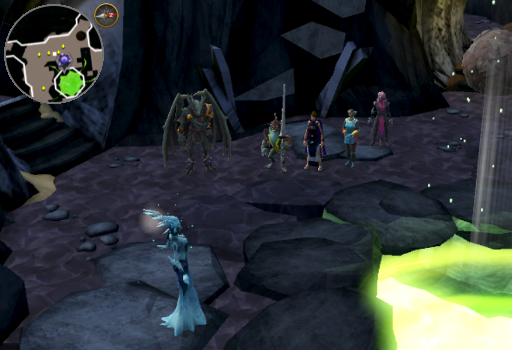
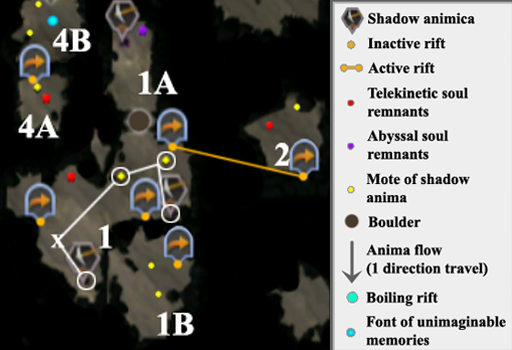
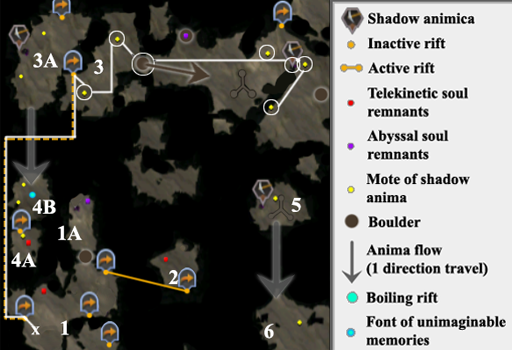
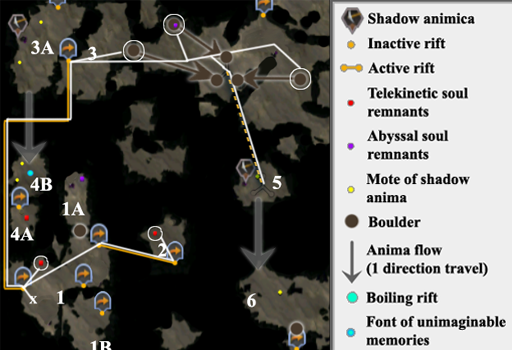
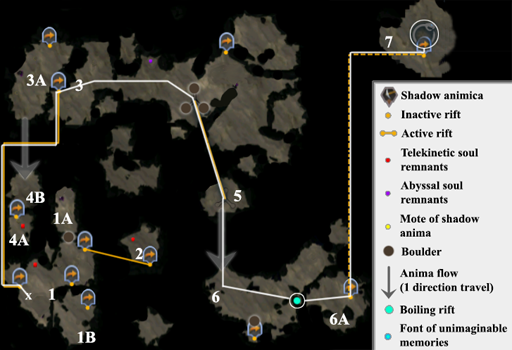
Passing through the Dark Portal you will arrive in Erebus. You will be greeted by chatter with the dark voice in your head. Once the dialog box closes and you move, your 1 minute timer will start. Your goal is to attain 100% attunement with the plane of Erebus by absorbing shadow anima and crushing Shadow animica, but this WILL take multiple attempts. Every time you leave, any items gained while in Erebus will remain in your inventory, as well as retaining any attunement you gained, saving you the effort of getting them on the next attempt. However, any changes you have made to the area, like levitating the boulder, will revert. You will gain a special action button that will eject you from Erebus before the timer expires. While in Erebus, you cannot use surge, escape, bladed dive, or barge. Also note that while at 0% attunement, you will not be able to run, but as you attune to the plane you will gain additional benefits, each accompanied by a conversation with the Light and Shadow Voices.
In Erebus you will find several things to interact with in order to gain attunement and interact with the landscape.Attunement % Benefit 20 Slightly increased movement speed 40 +15 seconds to the timer 60 Regain the ability to run 80 +15 seconds to the timer 100 You can attune with the idol at the final location -
Motes of shadow anima: Interact with these to gain 4% attunement. Note that they do not respawn.
-
Shadow animica rock: Mined to gain Shadow animica. They tend to only give a single ore and do not replenish when you leave. The ore can be crushed to gain 4% attunement.
-
Abyssal soul remnants: Collected in order to activate an inactive rift by clicking on it. Rifts that you activate will deactivate when you leave Erebus and only ONE remnant can be carried at a time.
-
Telekinetic soul remnants: Collected in order to move boulders within the area. Once collected, they are renamed to Enduring soul remnant in your inventory. These can be used by touching a boulder with the "Levitate boulder" option on it. You will walk to the boulder and, once you are within a few paces of it, the Enduring soul remnant will disappear and you will receive a pop-up stating that "The soul unleashes its frustration on the boulder. Select where to move it" after which you can click anywhere to move the boulder to. Once you have used a Telekinetic soul remnant, the boulder you used it on can be repositioned as many times as you like by clicking on it and then where you want it to go. However, the boulder will return to its original position after you leave Erebus and you will need to use another Telekinetic soul remnant to move it again after you return. Note that you can only hold ONE Enduring soul remnant at a time.
-
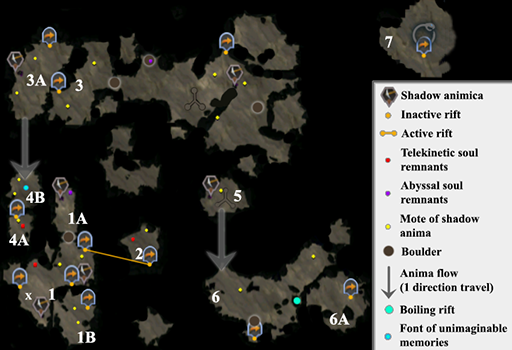
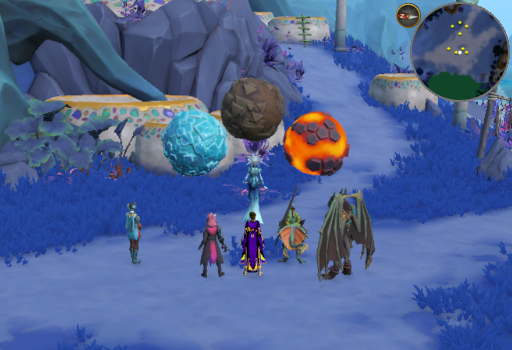
Mine Shadow animica rocks and catch the motes of shadow anima on island 1, crushing the Shadow animica once you have collected everything. This can take any number of attempts, it doesn't matter.
-
Catch the Telekinetic soul remnant and use it to move the boulder South East, out of the path. Go through the pass to section 1A, mine the Shadow animica, capture the Abyssal soul remnant, and crush the Shadow animica. With this done, you should have 20% attunement.

-
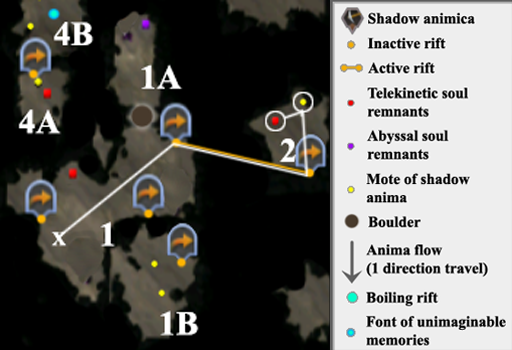
Enter the open rift on island 1 to reach island 2. Capture the motes of shadow anima and the Telekinetic soul remnant.
-
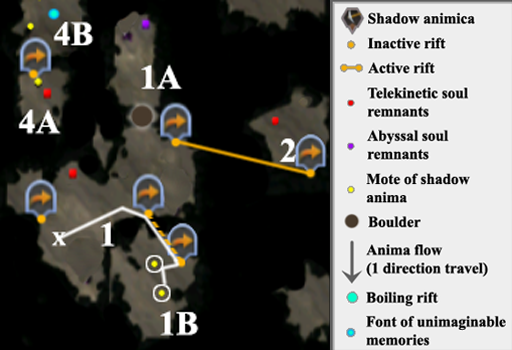
Using the Abyssal soul remnant, activate the inactive rift immediately South of the active one. Pass through the rift to 1B and collect the motes of shadow anima there.
-
Move the rock to access section 1A and capture the Abyssal soul remnant. Then return South to island 1 proper and collect a new telekinetic soul remnant from there.
-
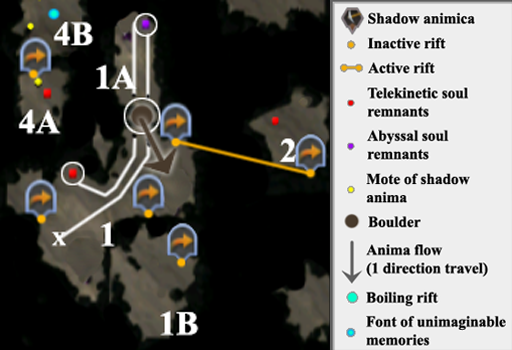
Activate the West inactive rift using the Abyssal soul remnant to access island 3. Gather the motes of shadow anima and then move the boulder aside. Go West past the symbol on the ground, collecting motes of shadow anima and mine the Shadow animica; be sure to crush the anima after you leave Erebus. With this done you should have 56% attunement.
-
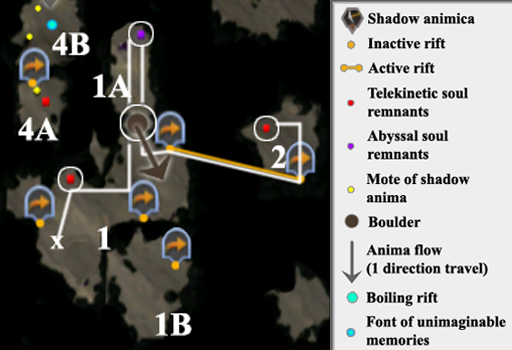
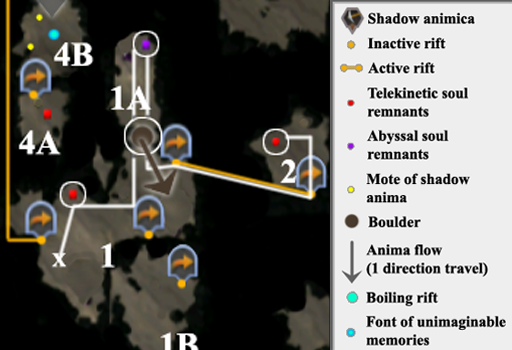
Collect the telekinetic soul remnant on island 1, move the boulder to access section 1A, and capture the Abyssal soul remnant. Pass through the active rift to island 2 and capture a new Telekinetic soul remnant.
-
Activate the inactive rift to go to island 3 and move the boulder aside. Return to island 1 through the rift to obtain another Telekinetic soul remnant. Pass through the rift back to island 3 and move the second boulder (North East of where the one you moved was initially) aside to obtain the Abyssal soul remnant beneath it. Head North East past the symbol on the ground and activate the inactive rift to access island 4 section A and obtain the mote of shadow anima there. With this done you should have 60% attunement.
-
Collect the telekinetic soul remnant on island 1, move the boulder to access section 1A, and capture the Abyssal soul remnant. Pass through the active rift to island 2 and capture a new Telekinetic soul remnant.
-
Note: This is arguably the hardest part of the puzzle.
Pass through the inactive rift to island 3. Move the first boulder in the way onto the symbol on the ground, then return through the rift to island 1. Grab the Telekinetic soul remnant from island 1 and return to island 3. Move the second boulder onto the symbol on the ground, then pass through the rift back to island 1. Take the rift to island 2 and grab the Telekinetic soul remnant, then return to island 1. Pass through the rift to island 3 and move the boulder on the far East side onto the symbol on the ground. Step into the symbol. Doing this will place you on island 5 and add a Relic of the titans to your inventory.
While carrying the Relic of the titans, the Southern inactive rift on island 1 will remain active, and when you are on island 3, the three boulders will be automatically dragged into their places on the lodestone. This just became a lot easier.
-
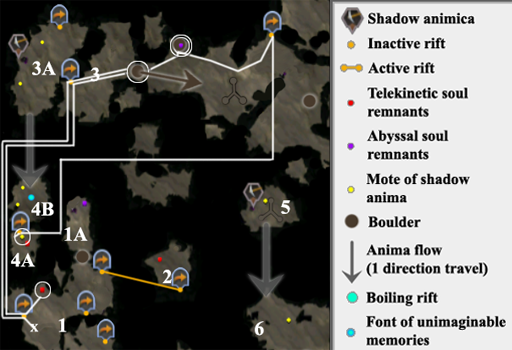
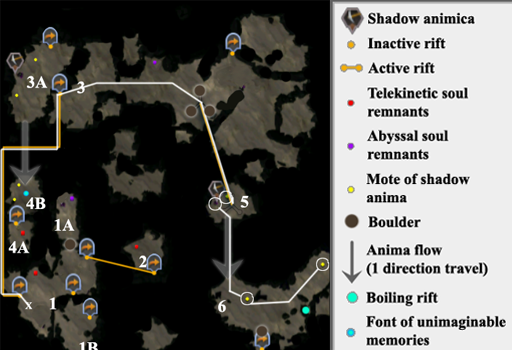
Collect the telekinetic soul remnant on island 1, move the boulder to access section 1A, and capture the Abyssal soul remnant. Pass through the active rift to island 2 and capture a new Telekinetic soul remnant.
-
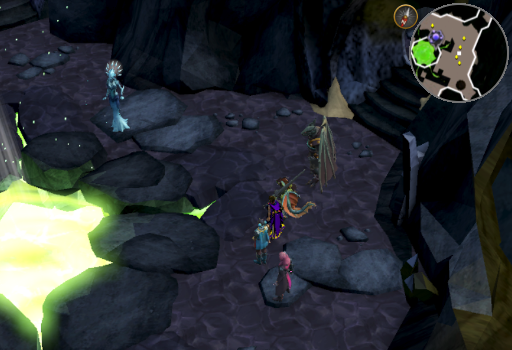
Pass through the rift to island 3 and go through the lodestone to island 5. Mine the Shadow animica there and catch the mote of shadow anima. Step as far as you can to the South of that island and the anima flow will propel you to island 6. Collect the motes of shadow anima on island 6 and crush the previously collected anima. As the anima flow only works in one direction, you will need to leave Erebus to access anything on islands 1 or 3 after using it.
-
Pass through the rift to island 3 and go through the lodestone to island 5. Use the anima flow to reach island 6. Move the boulder on the South side of the island aside, then activate the inactive rift there to access island section 3A. Collect the motes of shadow anima and mine the Shadow animica. Run as far South on 3A as you can to use the second anima flow and reach island section 4B. Collect the motes of shadow anima there, harvest from the Font of unimaginable memories to obtain an Unimaginable memory, and crush the anima. With this done you should have 100% attunement.
-
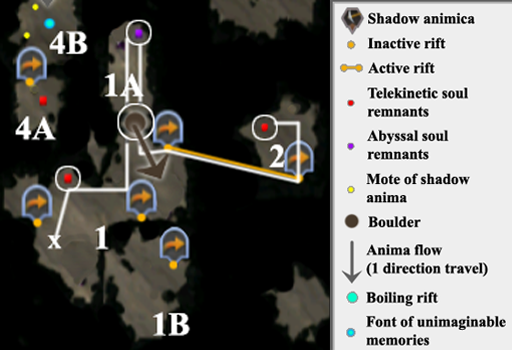
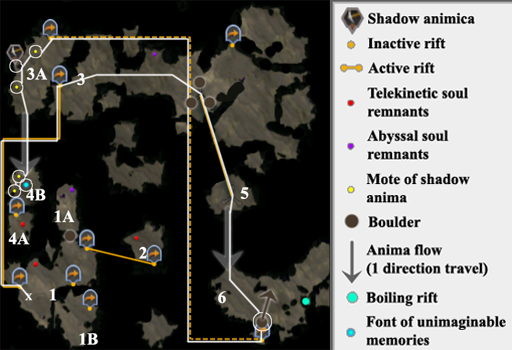
Pass through the rift to island 3 and go through the lodestone to island 5. Use the anima flow to reach island 6. Offer the Unimaginable memory to the boiling rift there to create a soul geyser. Use the soul geyser to reach section 6A, then activate the unstable rift to access island 7. Activate the Idol of the Leviathan. When the dialog finishes, you will have returned to The Cradle.
-
Motes of shadow anima: Interact with these to gain 4% attunement. Note that they do not respawn.
-
Finish the dialog with Kerapac and enjoy the cutscene in which Jas gets dragged into the shadow breach along with Kerapac as the Needle breaks. When it ends, collect the 5 Needle shard from the ground and talk to someone in the group. After some shock, an Echo of Kerapac will appear by the remains of The Needle. Some emotional baggage unpacking later, he will disappear.
-
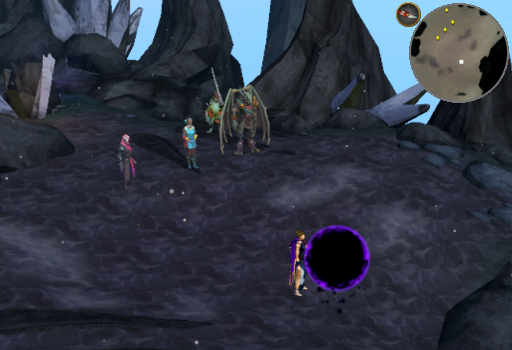
Descend the ledge back into The Elder Halls, continuing the quest when prompted. Talk to anyone in the room. You will have the options of telling them what happened, or not telling them, but your choice is irrelevant. After some additional deliberation, you will be asked if you should hatch the eggs here, destroy them, or permanently drain their anima. Like before, your choice is unimportant. After some arguing, Hannibus will suggest taking the eggs to Iaia to die with Seren watching over them. Seren will refuse the offer, teleporting out with the eggs, leaving a portal behind.

-
Pass through the portal and you will arrive on Iaia. Talk to anyone in the group. Seren intends to hatch the eggs there and the group cannot get her to listen to reason. Hannibus will agree to take you to the Elder.
-
Travel a short distance South to catch up with the group, who are meeting with Vindicta and the Elder Chahoua. Talk to anyone in the group and, after some chatter, Vindicta will suggest evacuation of anyone who doesn't want to stay behind.
-
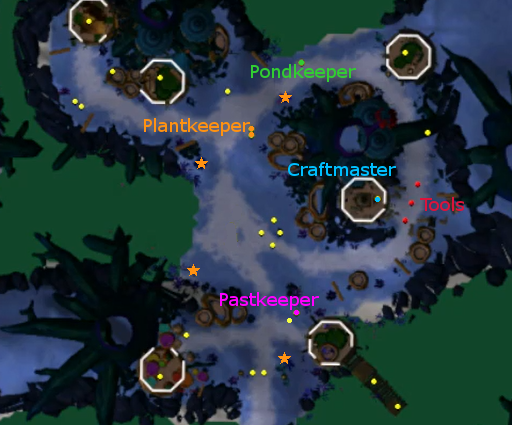
There are four natives you must speak to/help. Since the order doesn't matter, we will cover them alphabetically.
-
Craftmaster: Take the path North East from the group, just West of the Ilujankan tools. He will refuse to leave without his tools. Pick up the chisel, mould, and needle from the ground and talk to him again and he will agree to evacuate.
-
Pastkeeper: Found with Hannibus slightly North of the rest of the group. Speak with the Pastkeeper and he will refuse to evacuate. However, he will give you a Pastkeeper amulet and ask that you give it to Sharrigan.
-
Plantkeeper: Make your way North a short distance from Seren to find her and her sister. Talk to either of them and Plantkeeper will refuse to leave, but her sister is willing. She wants to have seeds from four plants around the village before leaving, so she will give you a Seed bag (Extinction). The plants, listed below, are marked by the orange star on the map.
- Flowering marsh plant: North East of the Plantkeeper and her sister
- Roundleaf marsh plant: Immediately to the West of them
- Marsh-fire plant: By the water West, and slightly South, of Seren
-
Longleaf marsh plant: East of your entourage near the elder
-
Pondkeeper: Found North East past Plantkeeper and her sister. Talk to them and they will say they are planning to evacuate, but they need to take the fish with them. At this point you will receive a Fish bucket and a Small fishing net (Extinction). Catch fish from the fishing spot immediately North of Pondkeeper until you have 4 different species of fish in the bucket. Once you have caught then all, talk to Pondkeeper again.
-
Craftmaster: Take the path North East from the group, just West of the Ilujankan tools. He will refuse to leave without his tools. Pick up the chisel, mould, and needle from the ground and talk to him again and he will agree to evacuate.
-
Note: Before you begin this step, prepare for combat. You will need to bring the Needle shards with you as well as a free inventory slot. Should you die in this battle, it is not a safe death.
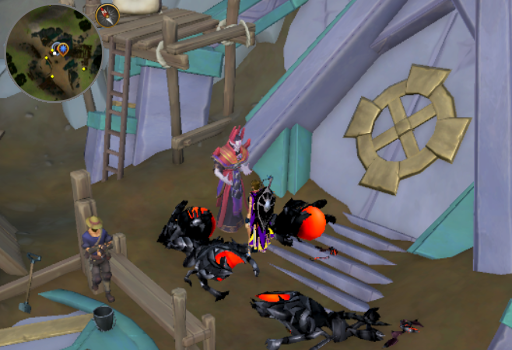
At the path to the Iaia world gate, speak with one of your allies. After the dialog ends, head North and speak with Seren. She is calling the Elder gods to Iaia. When done chatting with her, return to your group and speak to one of them. Vicendithas will suggest slowing Seren down to help complete the evacuation by using the Needle shards. He will highlight where to place the shards and the rest of the group will finish the evacuation. Move to one of the places marked on the map, place a Needle shard with a left click option, move into one of the other marked spots and ready yourself for combat: as soon as you place the second shard, your fight will begin and you will be boxed in away from the places the shards need to be placed.
Fight Details: The First Phase
You will be fighting several level 120 Shadows with 500 hitpoints, a level 175 Dark lord with 10,000 hitpoints, and a level 175 Light lord with 10,000 hitpoints. The Shadows attack with melee and the two lords attack using Magic. You will not be able to damage either of the lords directly.
Focus on killing the Shadows. Each time one is killed, you will receive a Light core (Extinction). Once you have it, you can attack the Light lord. This will consume a Light core and deal 1,000 damage to it. Not long after you kill the Shadows, the Light lord will summon 2 more: rinse and repeat this process to collect and use 10 Light cores on the Light lord to kill him.
Once the Light lord is dead, 2 Unstable rifts will appear. You will be able to move these like the boulders in Erebus. Left click them and then left click close to the Dark lord and they will slam into him, dealing 2,500 damage. You will need to do this 4 times to finish him off. Once it's gone, you can teleport out to regear before the next phase. Continue the quest by going to the World Gate, talking to an ally, and then walking through the gate. If you choose to not leave and regear, simply speak to Seren to progress.
Fight Details: The Second Phase
Place another Needle shard to start phase 2. Seren will summon a Vestige of Mah, a Mah wisp, and 3 Muspah at a time: one Bladed, one Force, one Throwing. Your goals are to avoid attacks from the Vestige of mah and destroy the Mah wisp (60,000 hitpoints), but it is only vulnerable while no Muspah are present. When all the muspah are dead, you will have roughly 7.5 seconds of time to hurt it before more muspah show up. Note however that this timer doesn't start until you actually damage the wisp! The muspah initially spawn as level 120 with 20,000 hitpoints, but each time more appear, they get stronger and stronger, gaining 50 levels and 5,000 hitpoints. Using AOE to hit as many Muspah at at time is advised.
The Vestige of Mah is mostly something you can ignore with the right positioning. It has three attacks detailed below. It does not perform its attacks quickly, so you will likely see no more than 4 attacks in each wave of muspah.
If you find that you do not have enough adrenaline between fighting the Muspah and the Mah Wisp, it is suggested to bring Combat training dummies or Combat dummy MKIIs with you to build adrenaline. Using Natural Instinct at 100% adrenaline to increase your adrenaline gain followed by Berserk, Death's Swiftness, or Sunshine (depending on your combat style) makes it easy to unload a few threshhold abilities while under the affects of your ability's buff. Adrenaline potions and the Limitless ability can be used to further optimize this.Attack GIF Fire Slam: The Vestige of Mah slams one of its arms to the ground. Doing so causes a wave of fire to erupt from the ground on one half of the arena, North or South, depending on which arm it uses. Should you be standing close to the fire at any point it will deal magic damage equal to roughly 10% of your hitpoints. To avoid this, simply stand close to in line with the Mah wisp so that you can easily move to the North or South half of the field without much effort. 
Lava Spew: The Vestige of Mah opens its mouth and spits forth small flaming projectiles. These attacks deal typeless damage equal to roughly 20% of your maximum hitpoints. However, the projectiles do not appear to land in any particular pattern, hit the ground one at a time, burst shortly after landing, and do not seem to hit the same square twice. By standing still when this attack happens, you significantly reduce the odds of getting hit by it multiple times. 
Lightning Strike: The Vestige of Mah calls down Lightning. It always strikes fairly random, like the Lava Spew, but it does have animations that make it possible to dodge if you are fast enough. Simply use surge, or move away, if you see yourself in the area it's about to strike. 
Once the Mah Wisp is destroyed, you have reached a checkpoint and can teleport out to regear for the final phase if necessary. Continue the quest by going to the World Gate, talking to an ally, and then walking through the gate. If you choose to not leave and regear, simply speak to Seren to progress.
Fight Details: The Third (and Final) Phase
For the last phase, it's highly recommended to use melee with dual wield weaponry, or with Laceration boots for this phase, as Bladed Dive and a shield significantly increases your chance of surviving. In addition, your damage output is a minor consideration at best. You should focus more on your mobility and how much food you have at your disposal.
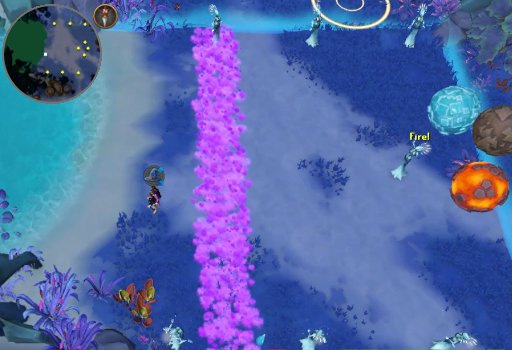
Place another Needle shard to start the last phase (interestingly, you won't successfully plant this one). Your goal in this phase is to survive for 2 minutes.
Seren will summon remnants of herself on the North and South sides of the arena. Every few seconds, Seren will say, "Fire!" and whichever remnant you are in line with will create a line of purple fire going the full North-South length of the room, about 3 squares in width. Standing in the fire will deal roughly 2,700 magic damage to you regardless of most defensive abilities. The easiest way to handle this is by standing in line with one of the remnants and moving into line with another every time she tells them to fire.
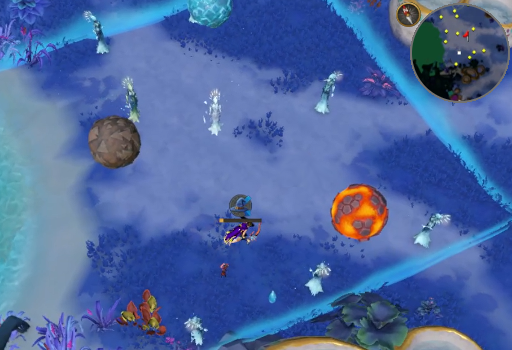
After this has gone on for about 20 seconds, Seren will stop having the remnants fire and instead move the Elder God Eggs into the arena. They will move about somewhat randomly, creating shockwaves around them every few seconds. These shockwaves do about 3,000 magic damage, but that damage can be used to heal using the Resonance ability or blocked entirely using the Devotion ability while Protect/Deflect magic is active.

Once the eggs have been moving about for awhile, they will start to summon aspects that attack you with magic. They have 1,500 hitpoints and can mostly be ignored in favor of avoiding the eggs, but they also present you with a few extra ways to avoid the eggs: by using Barge on one of them, you have an additional movement ability and if you kill one of them with Bladed Dive, the cooldown on Bladed Dive is reset. Focus on avoiding the eggs by Bladed Diving into the aspects. This will keep the amount of them to a manageable number and help keep you away from the eggs.
After the aspects have been present for a little while, Seren will have her remnants start firing again. This doesn't change your strategy much, you just will have fewer places that you can stand and you won't be able to stand still as long. Once 2 minutes have passed, Seren will announce that the Elder gods are here and stop bothering you.
-
Adrasteia will urge you to get through the gate, but Moia will shut it down before you can, gloating that Zamorak will be pleased with your downfall. Try to activate the gate and you will despair when it doesn't work. As your dialog finishes, a cutscene will occur.
-
When the cutscene ends, you will be in your mindscape with Seren. Talk to her and she will inform you that the voices in your head are not a result of Sliske's designs, but she doesn't know what they are. You can choose to trust Seren to look after the eggs and keep them on the remains of Iaia, but your choice is, once more, irrelevant. Finish the dialog and you will return to the Gielinorian World Gate. When you arrive, Moia will be trying to convince the others that you were slain, but you will appear and accuse her of the assassination attempt. The group will call her out on it and she will teleport away. You will tell Hannibus of Iaia's fate.
-
Head back to the entrance of the Senntisten, enter, and continue the quest when prompted. Make your way to the cathedral, open its doors, and talk to anyone present. You will learn that with the eggs gone, most of the enemy forces stopped attacking, allowing the gods to deal with the major threats. Zuk, Croesus, and the Arch-Glacor were all dealt with accordingly (don't worry, you can still fight them when the quest is completed). Saradomin and Adrasteia will teleport to Falador and Armadyl will vanish to Prifddinas in a flash of lightning.
-
Talk to Azzanadra and then head to outside Senntisten. Speak to Azzanadra again and "continue" when prompted to receive some well earned gratitude and complete the quest.
Congratulations, Quest Complete!
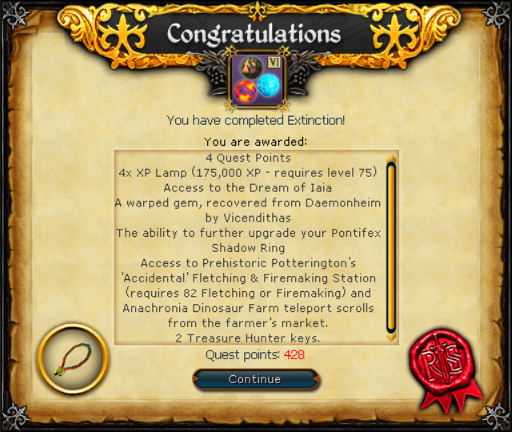
Talk to Vicendithas in the Effigy Incubator while carrying the final shard(s) of The Needle. He will take the shard(s) and get to work using them for an experiment. Talk to Hannibus and continue when the option presents itself, then touch the Shard of the needle when given the option. Finally, enjoy the touching dialog to unlock access to the Dream of Iaia.
After unlocking the Dream of Iaia, get your Pastkeeper amulet and use the Hibernation pod on the West side of the Effigy Incubator chamber to access the dream. Talk to Pastkeeper Sharrigan to give her the Pastkeeper amulet and complete the "Out of the Past" achievement.
After you have visited the Dream of Iaia, talk to Vicendithas in the Effigy Incubator and ask if he has any other Extinction rewards for you to receive a Warped gem. While carrying it and a Ring of vigour, use the Warped gem's combine option. The ring and the gem will both vanish, but now you have the benefit of the Ring of vigour at all times.
Use the "Imbue" option on the Pontifex shadow ring to turn it into an Enriched pontifex shadow ring. The Enriched ring has a +3 prayer bonus instead of +2, +3% Divination experiences instead of +1%, Tier 3 Luck bonus instead of Tier 2, a +2% increase to the chances of obtaining a unique drop in the Elder God Wars Dungeon, a Teleport option to the Dream of Iaia that works while outside the hibernation pod, an increase to the time sprite active duration buff, and an increase to the rockertunity and chronicle fragment spawn rates buff.
This Quest Guide was written by 3ter 1 and ChathMurrpau.
This Quest Guide was entered into the database on Sun, May 22, 2022, at 03:25:15 PM by Chath, and it was last updated on Tue, Feb 21, 2023, at 05:16:21 AM by KsbSingle.
If anything is incorrect or missing, or if you have any new information to submit to this database, please submit it to us on our Content Submissions Forums.
If you see this guide on any other site, please report it to us so we can take legal action against anyone found stealing our content. This guide is copyrighted by RuneHQ, and its use on other sites is expressly forbidden. Do not ask if you can use our guides or images, the answer is and always will be NO!
Print this page with images - Back to the Quest Guide Index Page - Back to Top
