

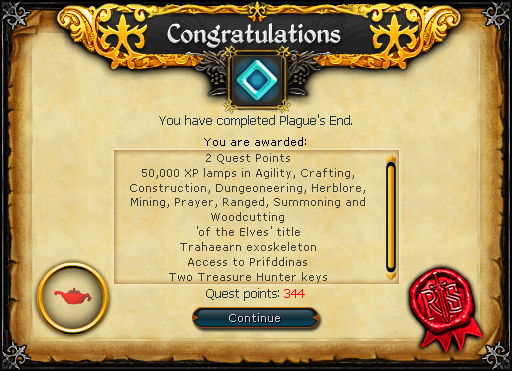
75 Crafting
75 Construction
75 Dungeoneering
75 Herblore
75 Mining
75 Prayer
75 Ranged
75 Summoning
75 Woodcutting
-
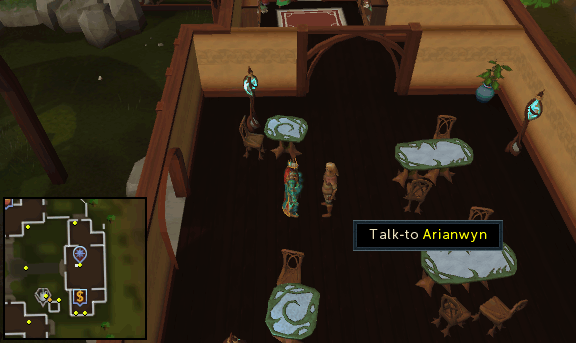
Equip your Mourner gear and speak to Arianwyn in the main hall of Lletya and he will let you know that the dwarves have cleared the rock-slide blocking the way to the undercity of Prifddinas and needs your help to investigate. Agree to help and he'll ask if you're ready, say yes and he'll teleport you to the under-city.
Please Note: For the first half of this quest, you are only required to wear your Mourner disguise. The other items can remain in your bank.
-
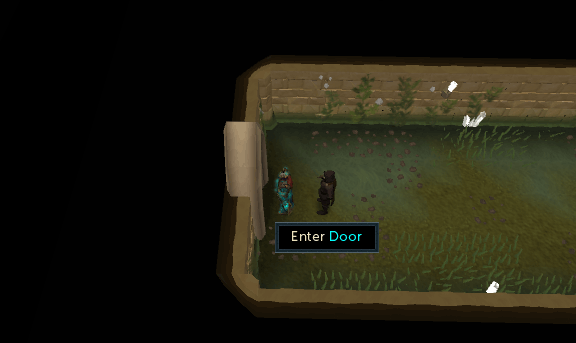
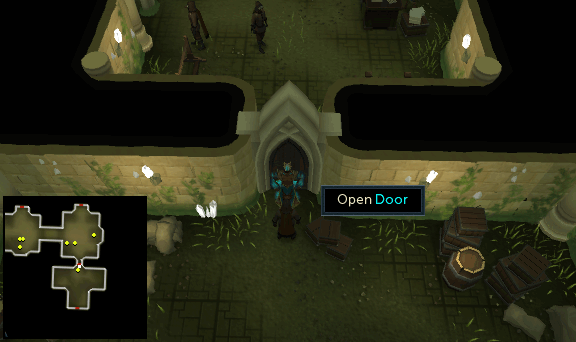
Once in the now cleared corridor, enter the newly-cleared doorway to the west and you'll find yourself in a storeroom. Open the door to the north and you'll be stopped by the Deathguard Captain.
-
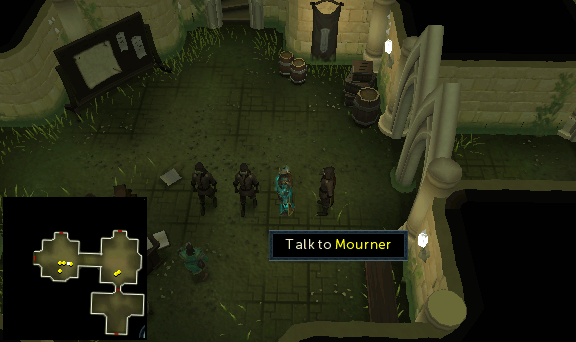
Tell the Captain that you thought you saw a mouse and explain that thought it would eat the supplies and that you wanted to handle it because you knew the Captain was busy. When the Captain is convinced you are not a threat, you will be asked to relieve the guards in the next room.
-
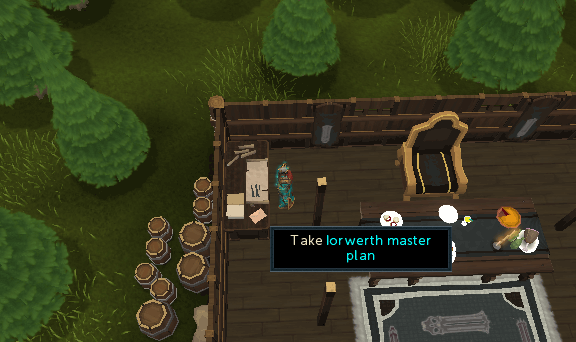
Continue west into the next room and speak to one of the guards and you will take their place. Next, speak to Iestin Edern and tell him the Captain wants him to hurry. Iestin will complain that he can't hurry if he doesn't know the master plan and asks you to take his progress report to the Mayor of Prifddinas.
-
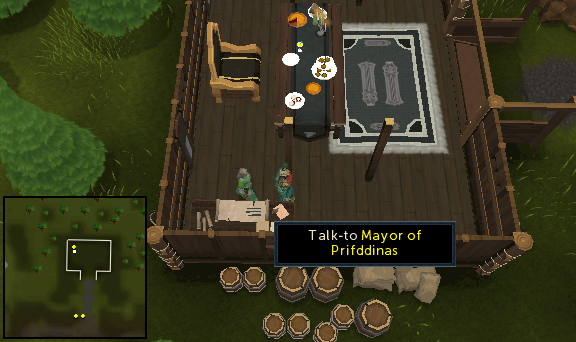
Climb up the stairs on the north side of the room and you'll find yourself at a run-down camp inside Prifddinas. Head north-west through the camp and enter the Mayor's building at the end. Speak to the Mayor and give her Iestin's report. During the conversation you'll learn that she possesses the Iorwerth master plan, although she personally finds it boring and she'll ask you to find out where her shipment of gnome food is as she refuses to eat the same food as the commoners.
-
Head to the south side of the camp and you'll see a gnomecopter with the food shipment and a group of starving elves being held back by a Mourner. Talk to the Mourner and tell him that the Mayor wants the food distributed between the elves and he'll happily do so.
-
Now head back to the Mayor and inform her that the food is being shared amongst all of the elves. Outraged, she will ask you to guard the Iorwerth master plan and run off to stop everyone from eating her lunch. Steal the Master plan and return to Iestin in the under-city.
- After delivering the plan to Iestin, he reveals that Lord Iowerth intends to kill everyone in West Ardougne and harness the power of this mass death to summon the Dark Lord. Arianwyn asks you to save West Ardougne by starting a revolution against the Mourners. To accomplish this you'll need to get the support of Councillor Halgrive in East Ardougne and Bravek in West Ardougne.
-
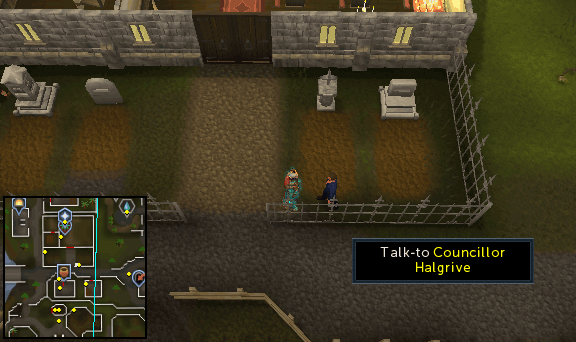
Use your home teleport to Ardougne and find Councillor Halgrive wandering south of the Church in East Ardougne. Show him the Master plan and ask for his support. He'll then give you a Proclamation to control the East Ardougne army, but tells you that you must gain control of West Ardougne first.
-
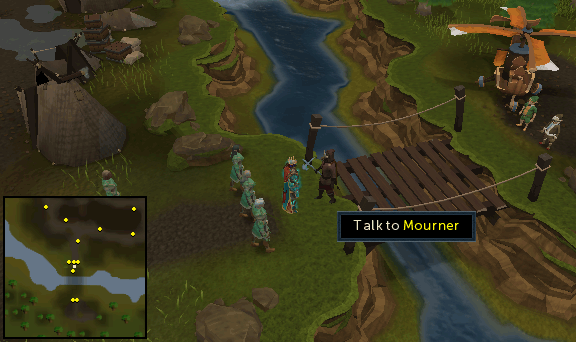
Head into West Ardougne and speak to Bravek upstairs in the Civic Office in the middle of the city. He'll tell you that he always suspected the plague was a hoax, but did nothing as he feared the Mourners would take him away and kill him. He'll then give you a List of influential people from Ardougne who would be willing to start an uprising if asked.
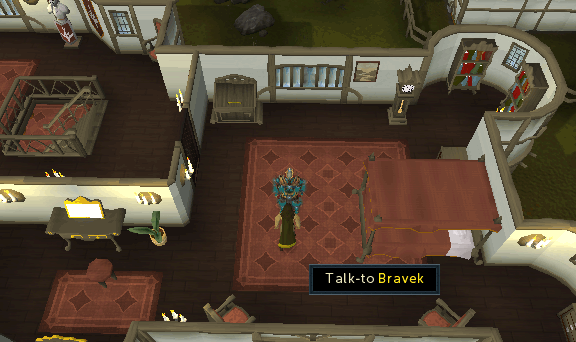
Note: Make sure you are not wearing your Mourner outfit as the citizens of West Ardougne will not co-operate if you are wearing it. You will also need to withdraw a weapon and some food for a fight with the Mourners, preferably a staff or wand with runes for your best Fire spell. -
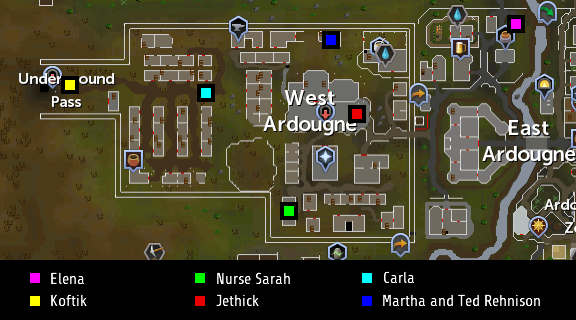
The people you'll need to speak to are:
- Elena: West of the log Agility shortcut in East Ardougne
- Koftik: Outside the entrance to the Underground Pass
- Martha and Ted Rehnison: North of the Civic Office
- Nurse Sarah: Southwest of the West Ardougne Church
- Jethick: Town Square near the Civic Building
- Carla: Northwest of the graveyard
-
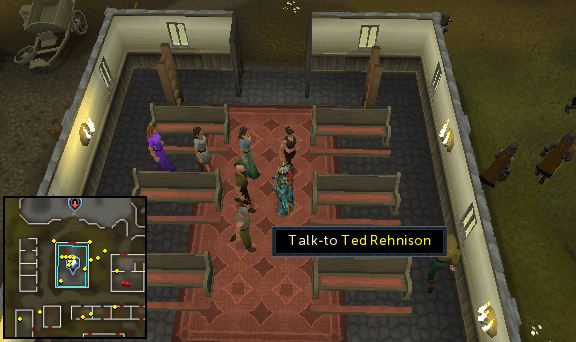
Once they have all gathered in West Ardougne Church, speak to any of them and go through all the options to start the revolution. Head off to Mourner HQ and kick down the door. Once you do, you'll engage in combat with some Mourners (level 33). Kill all the mourners then go down the trapdoor in the northwest room and kill the Mourners (level 85) down here as well. Once they have been dispatched, enter the office of the Head Mourner (level 100) and attack him. Once his health is down to 0, you can question him to learn more about Iowerth's plans for the city and then decide whether to spare his life or kill him.
-
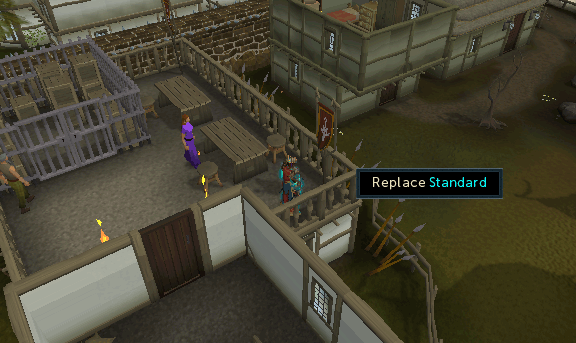
When you have taken over Mourner HQ, speak to Elena to get an Ardougne revolutionary flag to signal your victory. Climb up the stairs all the way to the top, and replace the current standards with the new one.
-
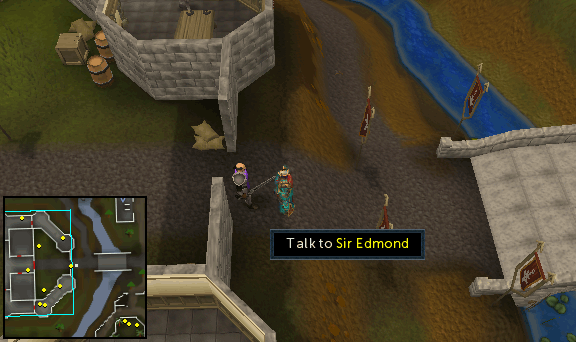
Two knights will appear and ask you to stop. They will then see the Councillor's proclamation and go back to the King to seek advice. Follow them to the East Ardougne castle and talk to Sir Edmond, who will let you know that the two armed forces are fighting each other. Proceed inside and up the stairs to the King's chambers.
-
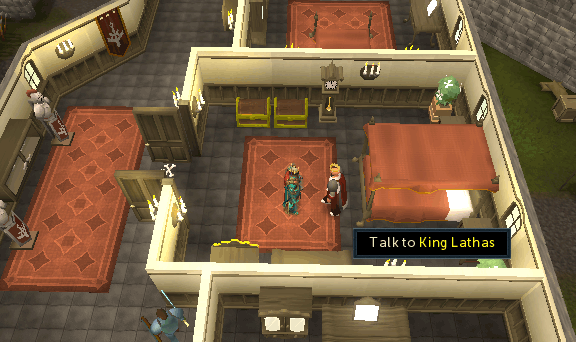
Talk to King Lathas and he will get his bodyguard Sir Hugo (level 107) to defend him. Kill Sir Hugo, and confront King Lathas again. Choose to either spare his life or kill him. Once you have made your decision, Sir Edmond will greet you and say that the city is under their control.
-
Equip your Mourner outfit again and journey to the undercity to inform Arianwyn of the good news. Talk to Iestin and they will plan to regrow Prifddinas as it used to be. To do this, Arianwyn will need you to find the leaders of the Elven Clans so that their power can be used to restore the city. Accept his teleport back to Lletya.
Note: The easiest way back to the undercity is to use a Teleport crystal to Lletya then get Arianwyn to teleport you back. -
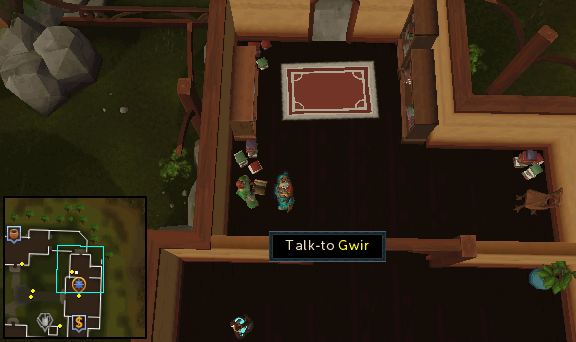
Speak to Gwir, the scribe of Lletya. Ask her about the Clan Lords and she'll direct you to the bookshelf. Take the book titled "The Lost Elders" and read it for the clues to their locations. When finished, speak to Gwir again for further clues, an Amlodd charm and a Meilyr potion recipe.
-
Please Note: If you wish, and for the sake of brevity, you can combine Step 21 with this step - as on your way to the cave, you'll come across a Summoning Obelisk. However, it's totally up to you and not necessary.
Lady Trahaearn journeyed south from the well.
Take out your Rune bar, along with combat equipment and food, and exit Lletya. Go west past the trip wire and into the dense forest. Head north, jump the leaves, and then go east to the Underground Pass.
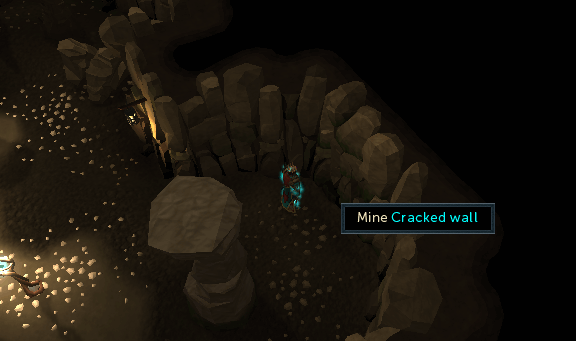
Enter the cave and walk to the well. South of the well there is a crack in the wall. Mine the wall and enter the tunnel. You will have to fight three Trahaearn automatons (level 70) which use different combat styles.
Once they have been defeated, approach Lady Trahaearn and you will notice that her exoskeleton has broken over time. Repair it with your Rune bar and she will wake. Tell her that it's time to regrow Prifddinas to complete this section. -
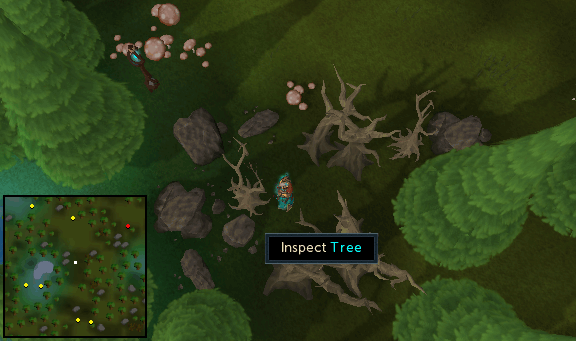
Lord Crwys's brothers call to him when they are wounded.
Take out your Plant cure (or runes to cast Cure Plant) and exit Lletya. Start cutting the nearest tree, and you'll see a yellow orb of light fly out in the direction of Lord Crwys. Follow it west until you find a dying tree amongst dense forest. Inspect the tree and cure it to save Lord Crwys. Tell him that it's time to regrow Prifddinas to complete this section.
-
Lady Ithell put her soul into her greatest work.
Take out your 10 Magic logs and stay within Lletya. Walk around the buildings to find 5 blue symbols that need to be activated:- Inside the bank
- Inside the southernmost building
- Inside the archery shop
- Upstairs, above the clothing shop
- Upstairs, outside the church
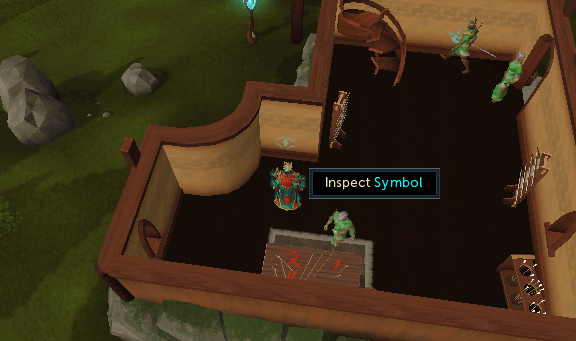
Once they have all been activated, a construction hotspot will appear in the middle of Lletya. Use your 10 Magic logs to build the statue, and an elf will call out to you. Go upstairs and speak to Kelyn, who holds the memories of Lady Ithell. Tell her that it's time to regrow Prifddinas to complete this section. -
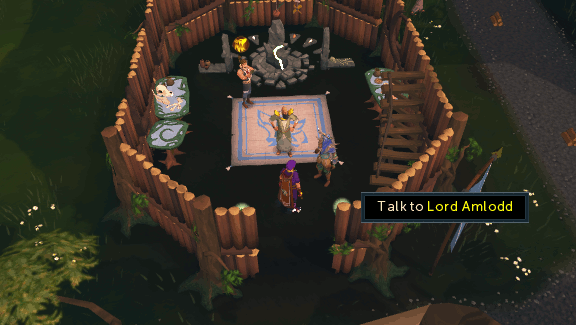
Lord Amlodd sleeps the sleep of the uncalled.
Take out your Pouch, 200 Spirit shards, Crimson charm, Green charm, Gold charm, and Blue charm. Together with the Amlodd charm that Gwir gives you, you will need to make a pouch to summon Lord Amlodd.
Teleport to the most convenient Summoning obelisk (Taverley is a close option) to infuse the pouch and summon him. Tell him that it's time to regrow Prifddinas to complete this section.
-
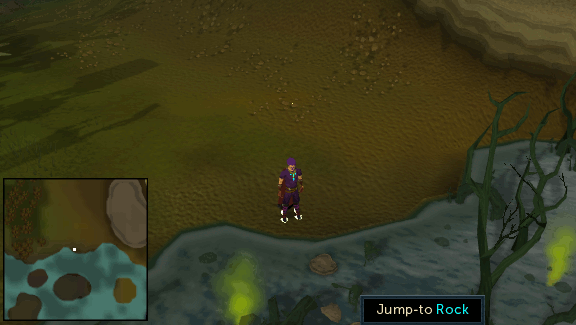
Lady Hefin walked westward on the water.
Exit Lletya and head south past the Magic trees to the poison waste. You will need to jump across a lot of rocks and cross the poison waste to the west. See the map below for the path.
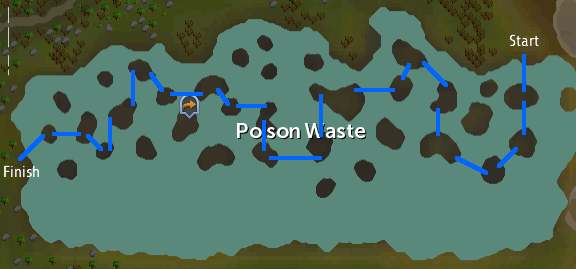
When you reach the other side you will find an Elf hermit. Ask about Seren and you will need to pass her test. Answer as follows:- Seren's faithfulness to the elves.
- The symmetry of crystals.
- I don't know.
-
Lady Meilyr brewed a map in the dungeon of the kin.
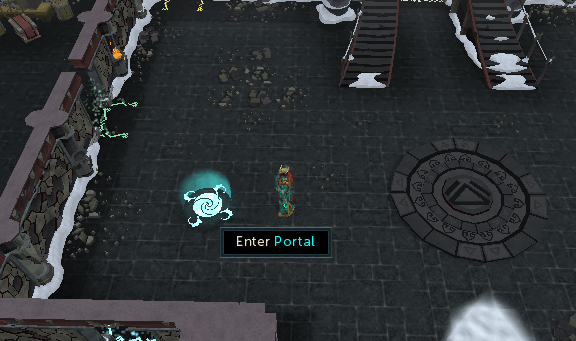
Return back to Gwir, and ask her for help on finding Lady Meilyr. She'll then give you an old recipe for making the potion. Read the recipe, take out your Super defence potion (3), and exit Lletya. Pick a red mushroom from this patch, and then head west past the trip wire. Go south to the lodestone and you will find blue mushrooms to pick. Grind the red and blue mushrooms and add them to the potion to create the Meilyr potion.
Make your way to Daemonheim and walk past the banker to the lobby area. Drink the Meilyr potion and a portal will appear on the west side. Enter it to find Lady Meilyr. Tell her that it's time to regrow Prifddinas to complete this section.
-
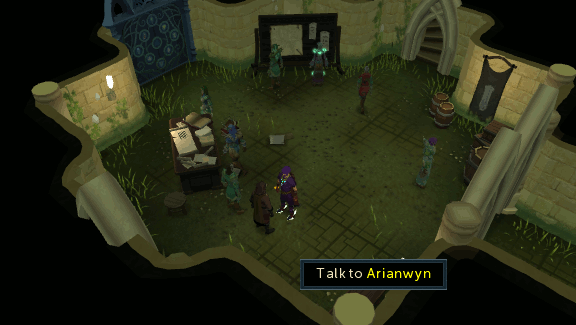
Once all of the Clan Lords have been sent to the undercity, speak with Arianwyn to teleport there and join them. Speak to Arianwyn once you arrive, Iestin will inform you that he cannot keep you concealed in the undercity while he also regrows the elf city. You will need a distraction.
-
Head to Tyras Camp and speak with General Hining, tell him it's time to face the darkness. He'll agree to help you by attacking the Deathguards to cause a distraction.
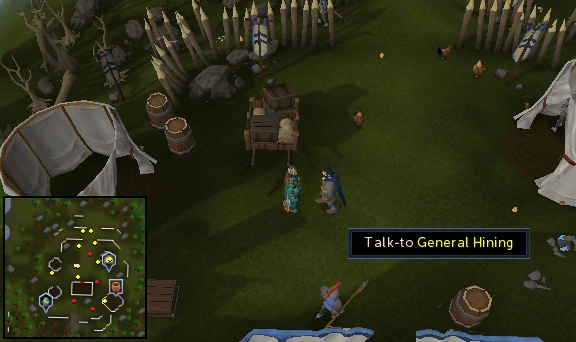
Note: Before you head back to the Undercity, make sure you have your combat gear and a lot of food for the final fight. We suggest you use magic for the fight, using your best fire spell. -
Note: Read this whole step before you continue.
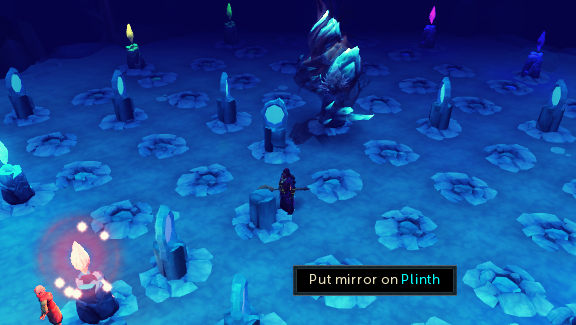
Go back to the under-city and go into the Grand library through the door to the west. You will be faced with the first of eight mirror puzzles, like the ones in Mourning's Ends Part II. In these light puzzles you must place mirrors on plinths to direct the light from one seal to the Seren seal in the middle.
After you complete the first puzzle you will be attacked by Shadows (level 98), however they only have 100Lp and can be killed easily.
After the second puzzle you will also be attacked by Greater shadows (level 105) and these are much more powerful than the level 98s and it's recommended to use Protect From/Deflect Magic to reduce damage.
After the third puzzle (and all subsequent puzzles) the Dark Lord (level 107), a fragment of Seren's psyche and the physical manifestation of her fascination with death, will appear in the middle of the library and after a conversation after each puzzle about its history, will attack you with a basic Magic attack and a special ability in the form of purple smoke which surrounds you and hits 10% of your total life points every 2 seconds until you move. You must get the Dark Lord's health down to 0 each time to make it transparent and allow the light beam to reach the crystal.
If you leave the puzzle area for any reason then you will have to kill the monsters from your previously completed puzzle again.
-
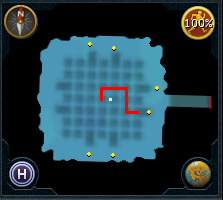
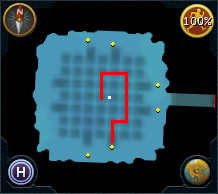
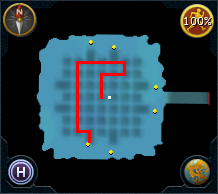
Place a mirror at each corner of the line on the maps below, making sure the mirrors are turned to make the beam go the same direction as the line. Once you've placed all the mirrors active the seal mentioned to produce the beam.
-
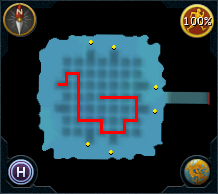
Puzzle 1: Cadarn beam to the Seal of Seren.
-
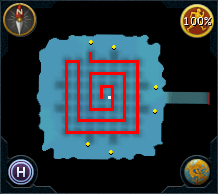
Puzzle 2: Trahaearn beam to the Seal of Seren.
-
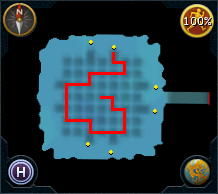
Puzzle 3: Iorwerth beam to the Seal of Seren.
-
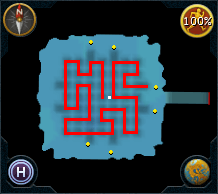
Puzzle 4: Ithell beam to the Seal of Seren.

-
Puzzle 5: Amlodd beam to the Seal of Seren.
-
Puzzle 6: Hefin beam to the Seal of Seren.
-
Puzzle 7: Meilyr beam to the Seal of Seren.
-
Puzzle 8: Crwys beam to the Seal of Seren.
-
Puzzle 1: Cadarn beam to the Seal of Seren.
-
Now that Lord Iorwerth is dead and the Dark Lord has been vanquished, the elven civil war can be finally brought to an end and Arianwyn will tell you that the clan lords have agreed to open up Prifddinas to all races.
Congratulations! Quest complete!
This Quest Guide was written by Darkblitz and Amoa. Thanks to Rednar, Deimos XD, McSwindler, Mt1, 4everAWES0ME, Javezz, Maks, and DarkPyroNinja for corrections.
This Quest Guide was entered into the database on Sat, Aug 30, 2014, at 08:38:53 AM by Darkblitz, and it was last updated on Tue, Dec 22, 2015, at 11:08:12 PM by Jarkur.
If anything is incorrect or missing, or if you have any new information to submit to this database, please submit it to us on our Content Submissions Forums.
If you see this guide on any other site, please report it to us so we can take legal action against anyone found stealing our content. This guide is copyrighted by RuneHQ, and its use on other sites is expressly forbidden. Do not ask if you can use our guides or images, the answer is and always will be NO!
Print this page with images - Back to the Quest Guide Index Page - Back to Top
