

-
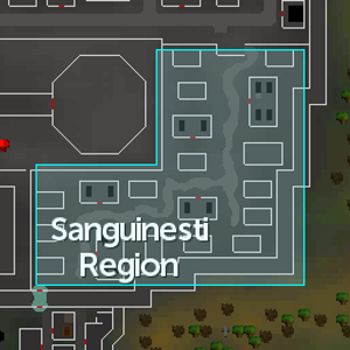
Speak to Veliaf Hurtz underneath the pub in Burgh de Rott. He will inform you that Vanstrom Klause has been spotted and the Vyrewatch have been attacking citizens. He will ask for your help to investigate the caves just south of the bank, which is where the silhouette of Vanstrom Klause was last spotted.
Note: It is recommended that players enable the map locations at the start of the quest, especially when traveling through Meiyerditch!

-
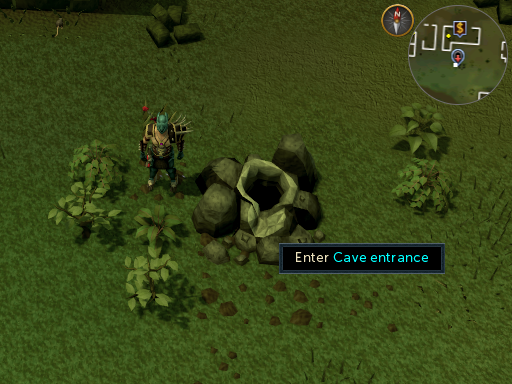
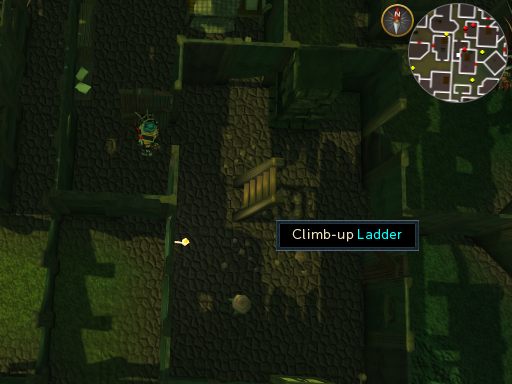
Head outside and enter the caves just south of the bank.
-
Once inside the tunnel, pick up the nearby Letter and read it. Then head east and read the two pages from the decaying tome lying on the floor. When you've read everything, head over to the coffin and search it to find a Mysterious medallion with 10 charges. Later on, if you need to recharge it, dip it into the pool of blood on the northern wall.

-
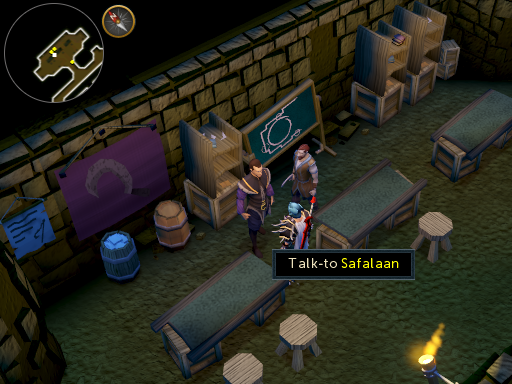
Head back to Veliaf Hurtz and report your findings. He will suggest heading to Meiyerditch and speaking to Safalaan Hallow, as he will be able to work out who the letter belongs to. Veliaf will offer you a free teleport to their base; accept it and speak to Safalaan.
-
Safalaan believes this may be a trap to capture him, so he suggests you meet up with the writer of the letter with two Myreque members, Vertida Sefalatis and Mekritus A'hara, as backup. He will give you directions to get to the location stated in the letter, and will enchant your Medallion which will allow you to teleport back to the base.
-
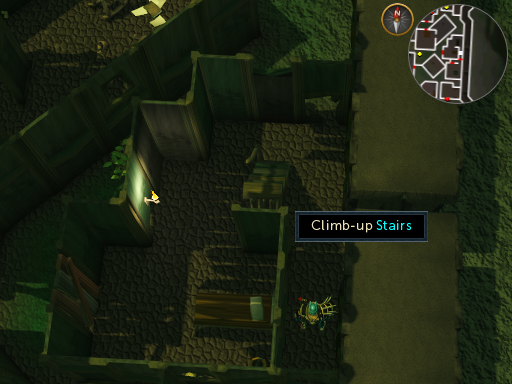
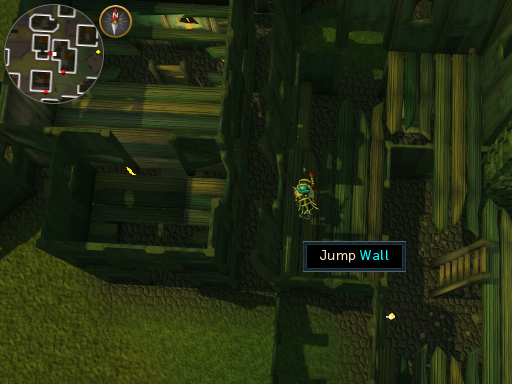
Leave the base, push through the false wall, and climb up the stairs. Jump the floorboards to the west and climb down the ladder.
-
Head through the door to the north, and head west into the next available house and climb the ladder, triggering a small cutscene.
-
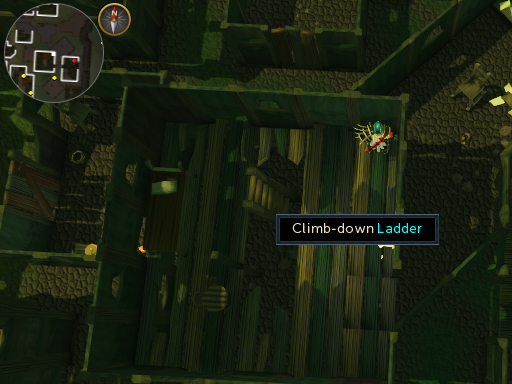
Jump the wall to the west, head down the ladder, and leave the building.
-
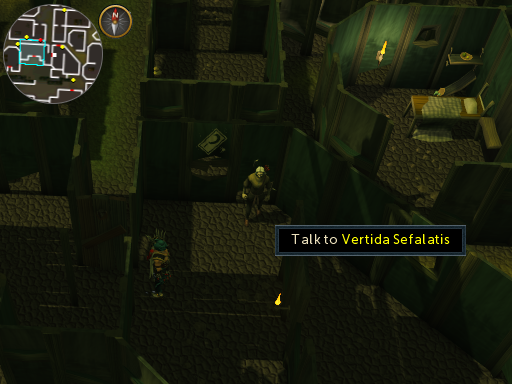
Run west to a building that has a sickle marked on the northern wall where you will meet your first Myreque backup.
-
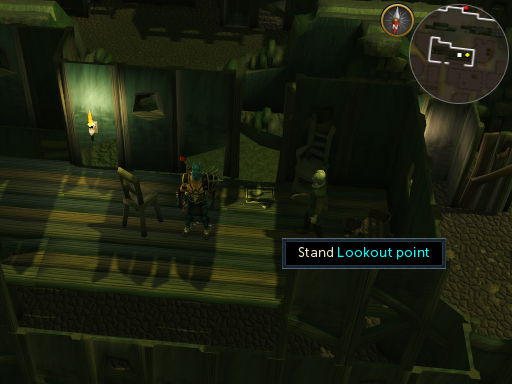
Climb up the wall and speak to your second Myreque backup, who will ask you to stand on the sickle marked on the floor. This will trigger the cutscene where you lookout for Vanstrom Klause.
-
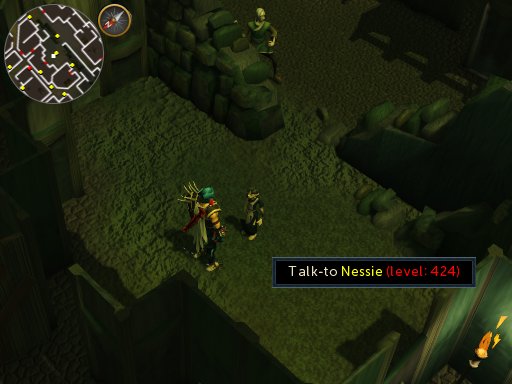
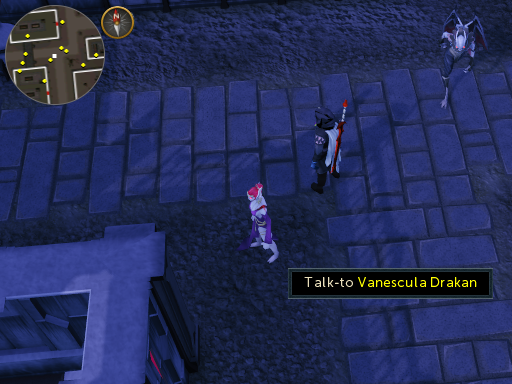
During the cutscene a small girl named Nessie will appear from a house crying, so go and help her. Climb back down the wall and speak to her.
-
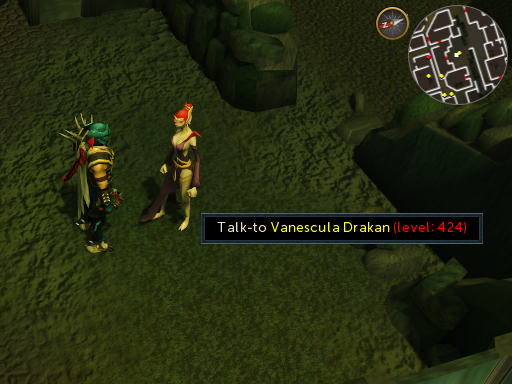
She will reveal herself to be Vanescula Drakan, who is Lord Drakan's sister. Choose to attack her, and Vertida and Mekritus will be teleported away. Speak to Vanescula to find out what she'ss doing here. Go through as many options as you can, and she will tell you she shares your belief of getting rid of Drakan. She will also tell you that your Ivandis flail will not work. Fortunately though, she will tell you about a weapon that can be made from the Blisterwood tree in Darkmeyer to harm the Vampyres. To help you further, she will also stop the Vyrewatch from attacking you in Meiyerditch and provide you with an Offer to take to Safalaan.
-
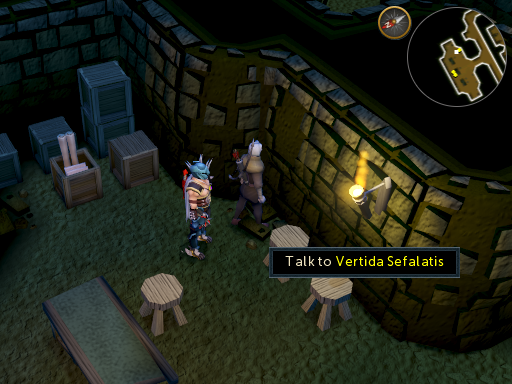
Either use the Medallion to teleport to the base in Meiyerditch, or retrace your steps from earlier to get back to Safalaan. Give him Vanescula's offer, and he recommends you speak to Vertida about making your way to Darkmeyer.
-
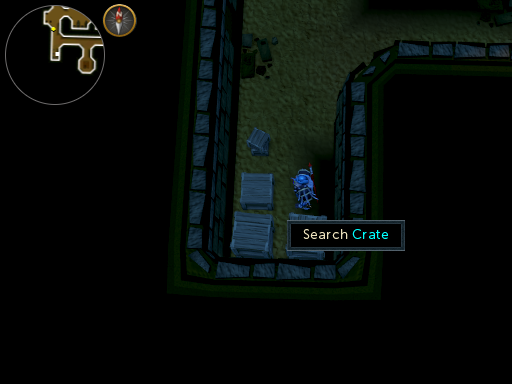
Take some Smoke bombs from a crate west of the exit ladder, and bring a hatchet, so you can find seeds to help the Myreque to plant their own Blisterwood tree.
-
To get to Darkmeyer, leave the base and climb up the stairs. Jump to the next building, and climb down the ladder. Head out through the northern building and carry on north until you reach the northern wall. Climb through the grate in the wall and speak to Vanescula. She will tell you that her protection no longer applies here. She suggests you find the Blisterwood Tree and tells you how to get a disguise to get past the Vyrewatch. If you do not have any, she will give you a Needle and a Thread to complete your disguise.

-
To find a disguise, you must travel through the area using your Smoke bombs to avoid detection. If you are detected, however, the only punishment is being teleported back to Vanescula. The different pieces of the disguise are hidden in chests inside various buildings in the area: These buildings are distinguishable by their black rectangle markings on the mini map. There are two chests in each house, so be sure to check them both. There are four pieces to collect in total and they must be repaired with your Needle and Thread.
-
Once repaired, wear your disguise and head back to Vanescula. Fortunately, you no longer require the Smoke bombs to move around anymore. She will inform you that the Vampyres do not trust you and you must socialize with them to improve your status. She will also mark you with her blood so the Vampyres do not recognize you as a human. A bar will appear on your screen showing your reputation with the Vyres. It will fill as you do actions to help them.
Note: Keep your disguise on at all times. If you take off a single piece while in view of a vyre, they will attack you. Even if you put it back on, you aren't completely safe. The only way to fix this is to teleport away from the area and wear your full disguise again, or kill all of the vampyres who are attacking you.

-
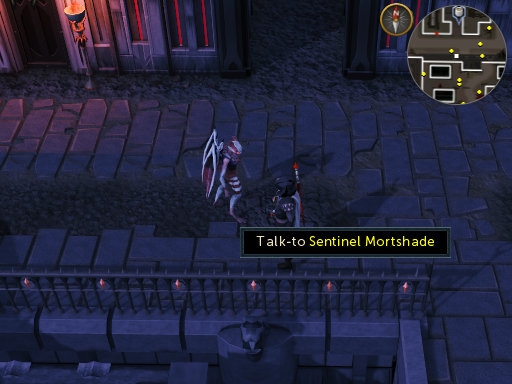
Head northeast and enter the middle tier society. Speak to Sentinel Mortshade in the area, who will ask you to select a name. Create any name of your choice from the options.
Note: After the quest you can change your name again by speaking to Vanescula Drakan outside the bank.
-
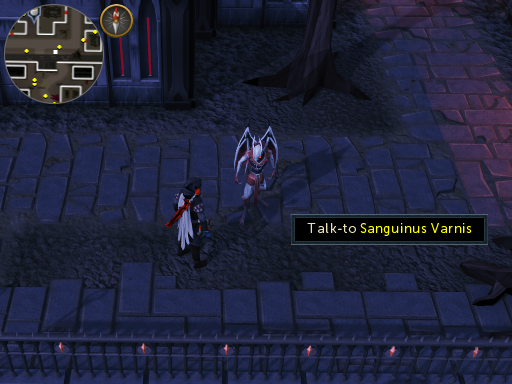
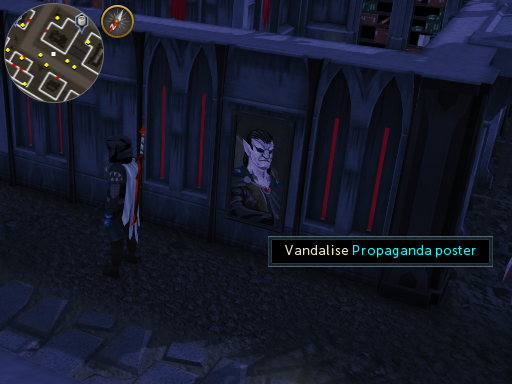
Next speak to Sanguinus Varnis who will ask you to help out by vandalizing propaganda posters (by drawing nice pictures) of the nobility from the higher tier. Agree to do so and run around looking for the posters to vandalize - there are four in total. Once vandalized, return to whoever set you the task to gain an increase in favor.
-
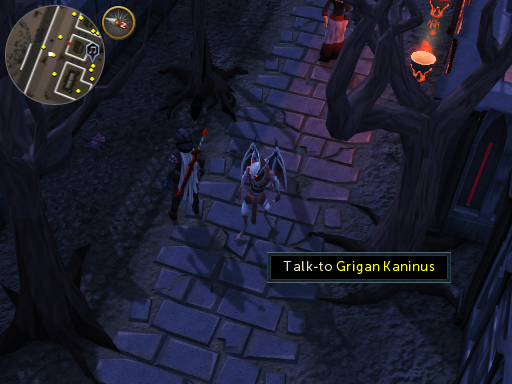
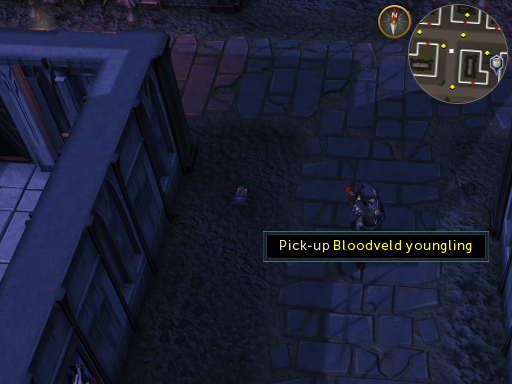
Head west and speak to Grigan Kaninis who has lost some Bloodveld younglings he was meant to be looking after. Offer to find them all for him - there are six in total. They spawn randomly all over the lower and middle tiers of Darkmeyer and disappear if not found in a few minutes, so keep searching! Return back to him when you've located them all.
-
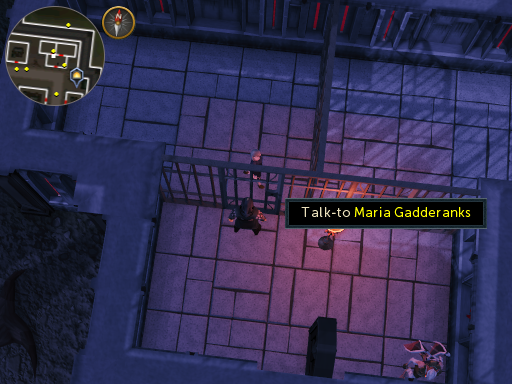
Next, head over to the prison located in the northeast corner and threaten the prisoner, Maria Gadderanks, to gain more favor. You can also use emotes such as Trick to scare her to gain favor as well.
Note: Later, after you've reached Vyrelord/lady status, you can free Maria, but ONLY if you didn't taunt her too much. The max taunts, if you want to free her, is two. Close the door and kill the guard, then force open the prison door. It is not a necessary part of the quest but if you want to free her, the option is there.
-
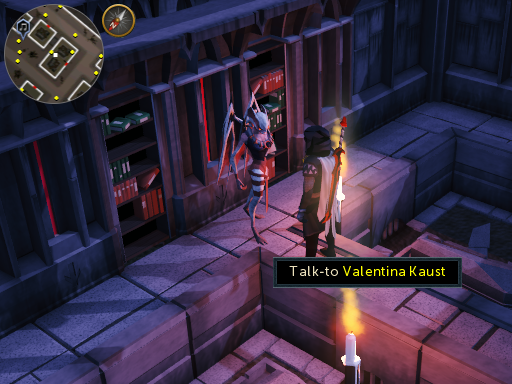
Finally, head west and speak to Valentina Kaust to drink some blood wine to receive enough favor to be allowed to enter the higher tier. When prompted, say that you're used to a higher quality of blood.
Warning: When you drink the blood you will be hit for up to half your Life points.
-
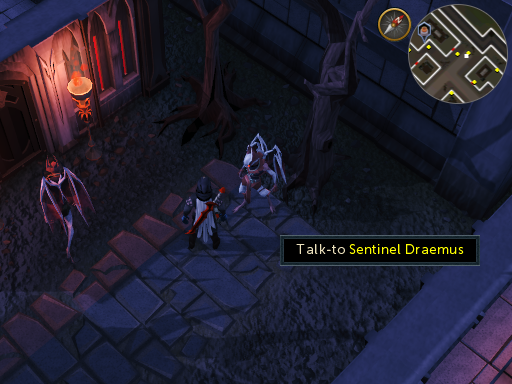
If you still need favor, you can go through a few conversations with Sentinel Draemus to increase it.
-
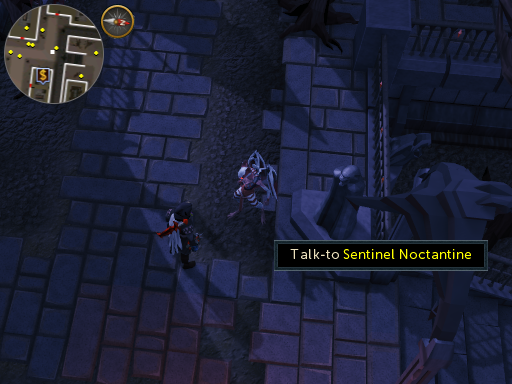
Head west and go up the stairs to the south to enter the higher tier. You can use the bank and altar here. Speak to Sentinel Noctantine who will ask you for your opinion of Lord Drakan. Select the options that show you do not agree with Drakan's plans or his leadership in order to gain favor.
-
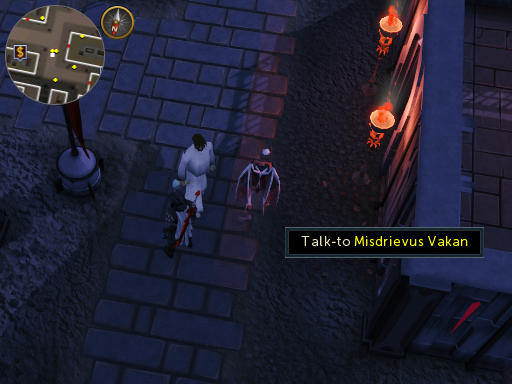
Head south and speak to Misdrievus Vakan who will tell you he is bored and wants you to entertain him.
-
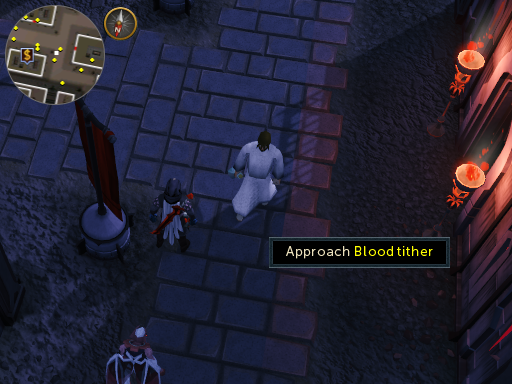
Head over to the mortal, a Blood tither, walking around and approach him. You have two options here. The player can either choose to actually punch him or convince him to fall and he will pretend that he has been punched. Either way the blood tither will break his vial containing his sample of blood.
Tell Vakan what you have done and he tells you to enter the building to the west. A cutscene will show you how the mortal will be punished by the Tithe master because his vial of blood sample was broken. Ultimately it is up to the player to decide what his punishment will be in order to gain more favor.
-
Head south and speak to Vanescula who will help you gain favor if you follow her.
A cutscene will occur, then follow her instructions to gain favor by showing your alliance towards Lord Drakan.
-
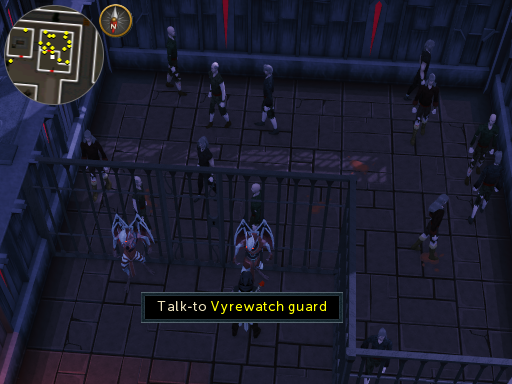
Head further south and enter a prison with two Vyrewatch guards. Speak to the guards and they will ask you to kill the Captured Meiyerditch citizens to gain favor. You can either kill 10 or more, or refuse. If you refuse, the guard will ask you to get him some blood from the Darkmeyer blood trader. (Remember the blood types the guard asks for.) The trader will initially refuse as you don't have any money and will ask you to recover money for him from a Werewolf. You can find a werewolf on the lowest tier of Darkmeyer; she is the Canifis settler. Use a Wolfbane dagger on her to persuade her to give you Darkmeyer notes (the local currency). Then, trade with the Darkmeyer Blood trader and get the blood types the Vyrewatch guard requested.
Return and speak to the Guard to gain status for either choice. Both methods can be repeated for more status; however, once you kill a Captured Meiyerditch citizens, you cannot gain favor by trading Notes with the Blood trader.
-
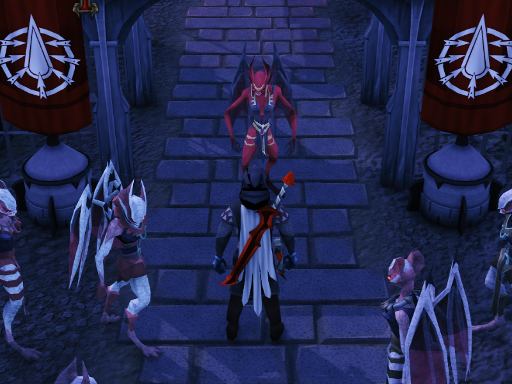
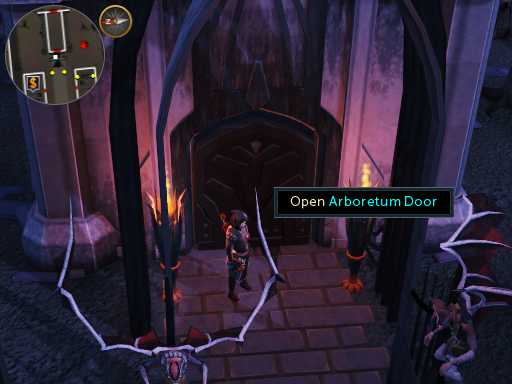
You should now have enough favor to move on, so head northeast to the Arboretum. When you approach the door, Ranis Drakan will appear and ask you for your alliance before he lets you into the Arboretum.
-
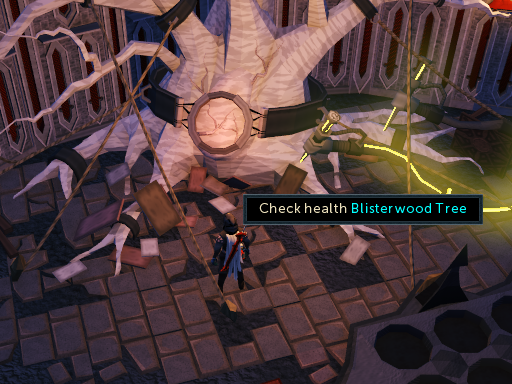
Continue into the next room and check the health of the Blisterwood tree. The tree requires Water (Blue), Light (Yellow), and Nutrition (Green) energy, in that order.
-
Head north to the big puzzle and pull the lever.
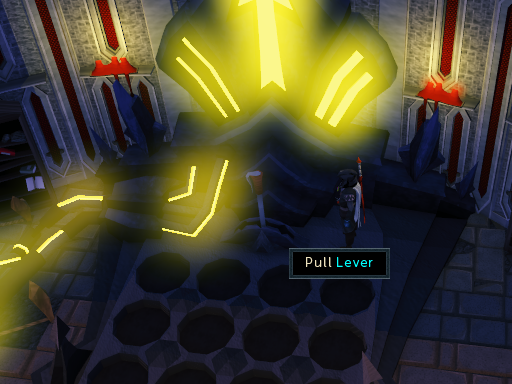
A puzzle will appear in which you must match up the rows to the order in which the tree must be kept healthy. Click on the orbs to rotate four of them at a time, clicking the lower left one to rotate that group.

Once you have them matched up, pull the lever and check the health of the tree. This time you will have a combination of four.

This time when completed you will receive a riddle-like challenge for the puzzle. Check the tree again for another puzzle and go back to the lever to solve it.
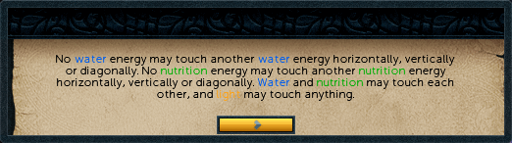
Riddle: No water energy may touch another water energy horizontally, vertically or diagonally.
No nutrition energy may touch another nutrition energy horizontally, vertically or diagonally.
Water and nutrition may touch each other, and light may touch anything.

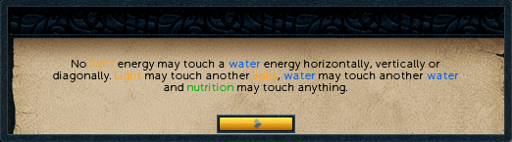
Riddle: No light energy may touch a water energy horizontally, vertically or diagonally.
Light may touch another light, water may touch another water.
Nutrition may touch anything.

-
A cutscene should occur once completed showing the tree being restored to full health and available for chopping. Chop the tree for 3 Logs before causing another cutscene to occur.
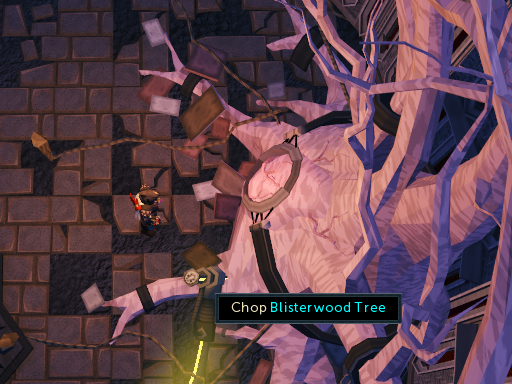
It shows Ranis Drakan coming to find you and Vanescula Drakan creating an argument with him. Open the door and speak to her to find out what to do next. She tells you to head back to Safalaan Hallow and co. and warn them about everything that has happened. She will also restore your Medallion to its full potential allowing you to return here later. Before leaving, cut an additional 4th log from the tree.
-
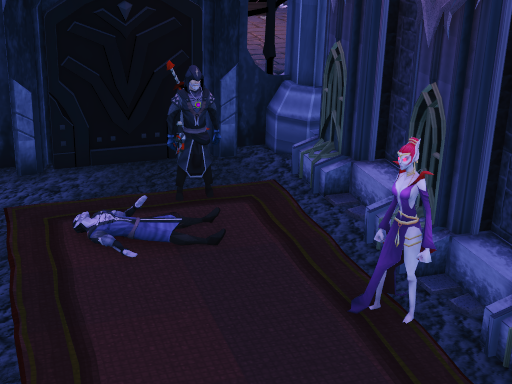
Head back to the Myreque base and you will discover that Safalaan has disappeared. Tell the rest of the crew what has happened and they will ask you to kill Vanstrom Klause. Speak to Vertida Sefalatis who will suggest you use the Blisterwood logs to create Blisterwood weapons for each combat style to fight Vanstrom Klause. He will give you a Knife to fletch the weapons. Vertida will also give the player a Bottle of holy water, which is needed for the boss fights. Speak to Kael Forshaw to obtain two Silver Sickles.
Now make a Blisterwood polearm, Blisterwood staff, Blisterwood stake and Off-hand blisterwood stake. If you try to enter Vanstrom's home and get the message "this looks too dangerous", then you haven't made one of these weapons.

-
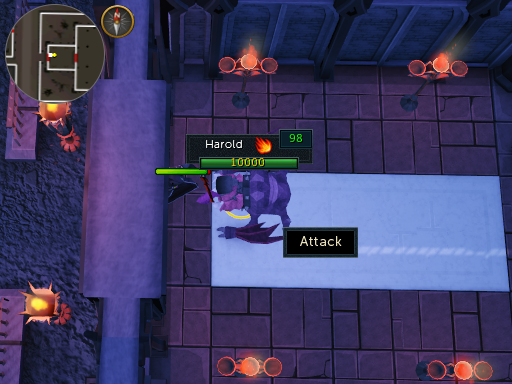
It is time to prepare for a difficult boss fight. When you are ready, teleport back to Darkmeyer and bank there to get all of your items ready for your fight. It is recommended you use good food with a Beast of Burden familiar. Having your armor in your inventory, wear your Darkmeyer disguise and head south to the big house. Once entered, switch to your armor and kill Harold, a level 98 bloodveld, in the first room. To defeat him, you must throw Vertida's bottle of holy water over him, or finish him off with poison.
Note: If you decide to delay the fight you have to destroy the Bottle of holy water as you can't bank it. When you do want to fight, you have to go to the Meyerditch dungeon (use your medallion) to get a new one. You can top off your supplies after defeating Harold, if necessary, as you only have to fight him once.
-
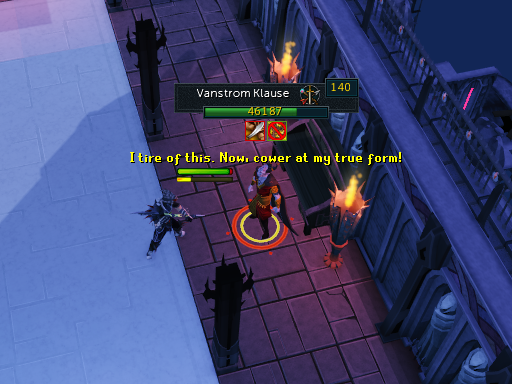
The Battle with Vanstrom Klause
Please read through this whole step before initiating the battle, there are some valuable tips in here that you'll need to know!
Vanstrom's basic attacks are both melee and magic. Protection prayers do not completely block his attacks, but will negate some of the damage. It is advised to use protect from melee while wearing high anti-magic gear. Good options would be black dragonhide chaps, black dragonhide body, with a helm of Neitiznot, snakeskin boots, and highest quality "Recipe for Disaster" gloves or Black spiky vambraces.
He has four special abilities: Darkness, Blood, Flight, and Heal.
Darkness:
"Stare in to the darkness." The screen will turn black for a few seconds. Make sure to face both your character and camera away from him.
Blood:
You are teleported into the middle of the room and a small patch of blood appears underneath you. Run away from it as quickly as possible to avoid damage.
Flight:
He will fly in to the air and start attacking you with magic. This is the perfect time to use your Blisterwood stakes against him if you have them.
Heal:
Two Bloodveld leechers (level 35) will spawn to heal him. Take them out quickly before they get the chance.
When Vanstrom's health drops below 25%, he will transform in to a ball of mist. If you come into contact with it, it will damage you. This is the time to use Vertida's bottle of holy water and lure him on to the puddles to damage him.
Warning: Before he dies, he will cast an attack that will take out most of your Life points, so it is advised to heal as close to your maximum as possible; otherwise, you will have to restart the battle.
-
A cutscene will occur where Vanstrom Klause almost kills you but Vanescula Drakan comes to your aid. Using Vanescula, she will defeat eight Bloodveld guardians (level 140) that Vanstrom Klause spawns, and a final cutscene will occur.
-
You will now be back at the Myreque base in Meiyerditch. Speak to Vertida and explain what happened. He will suggest you go back to Veliaf Hurtz. Use your Medallion to teleport to Burgh de Rott and speak to Veliaf in the pub.
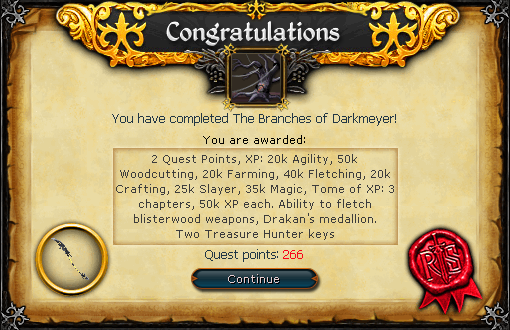
CONGRATULATIONS, QUEST COMPLETE!
This Quest Guide was written by Heavens Soul. Thanks to Greg, Vane, Javezz, DarkBlitz, Ikki_Fenixs, Parsonsda, Cookies, Kitori Ayami, QueenSteffie, Clamball, F1R3FLYY, kilvehk, Mosame123, Jarkur, Frethya, and GeraltRivia2. for corrections.
This Quest Guide was entered into the database on Fri, Sep 02, 2011, at 03:42:54 AM by DarkBlitz, and it was last updated on Sun, Sep 29, 2019, at 01:02:06 PM by Alfawarlord.
If anything is incorrect or missing, or if you have any new information to submit to this database, please submit it to us on our Content Submissions Forums.
If you see this guide on any other site, please report it to us so we can take legal action against anyone found stealing our content. This guide is copyrighted by RuneHQ, and its use on other sites is expressly forbidden. Do not ask if you can use our guides or images, the answer is and always will be NO!
Print this page with images - Back to the Quest Guide Index Page - Back to Top
