

70 Prayer
66 Mining
65 Hunter
60 Construction
Must have completed the Camelot Training Room
Must have fully completed the Soul Wars tutorial
Note: You must have the normal Prayer book activated until Step 17 for the use of Piety, after which you can switch to Ancient Curses for the fight with Nomad if you wish.
-
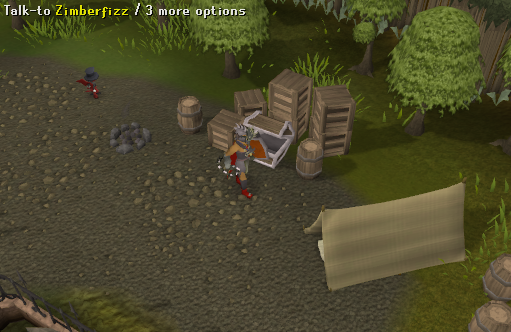
Speak to Zimberfizz at the starting area of Soul Wars. He will inform you that "his highness" has been acting "funny like" and that it's his opinion that Nomad is up to something evil. Nomad will then chip in and say he's leaving for a while.
-
Investigate Nomad's tent. You will see a trap door under the bedding and will see a cut scene with Nomad fighting Dark Elites.
Note: Use the cut scene of Nomad fighting the Dark Elite mage, warrior, and ranger to get hints for the final battle. In the temple under Nomad’s tent there are many high level spectral warriors in multi-attack areas. Once killed, they will not respawn, unless you log out or leave the temple, so protect from melee, food, prayer potions, a weapon and armor are recommended.

-
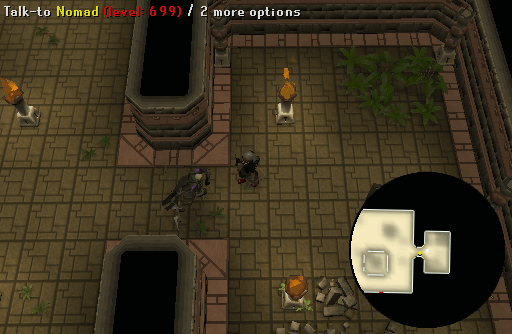
At the end of the cut-scene Nomad will appear. Speak to him. He takes you for an assassin at first, and will advise you to leave the area and not come back, and then he will teleport out.
-
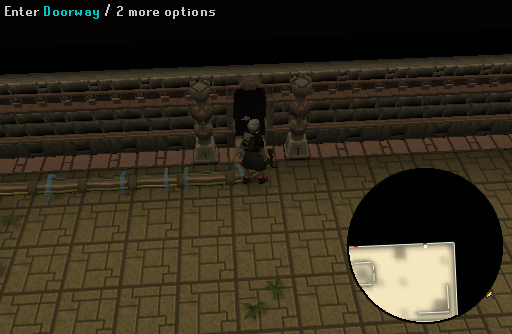
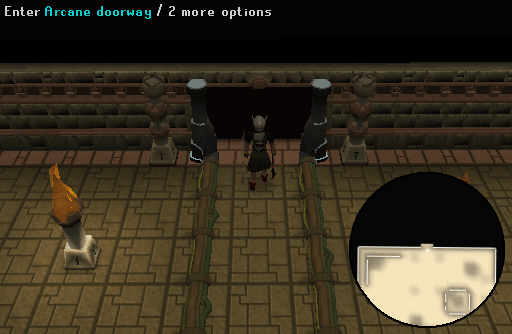
Continue west into the temple and you will come to an arcane doorway to the north and two doorways to the south. A barrier prevents you from entering the northern doorway.
-
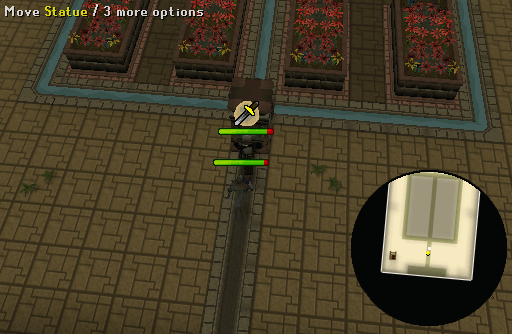
Go through the south western doorway. Head to the south of the room and climb up the ladder, then go north and climb up the next ladder. There is a water source in this room; you'll notice that the water is trying to make its way to the north. Click the two statues to move them so the water can flow from south to north and flow to the room below.
-
Go back down to the previous level, In this room are 2 levers, operate both of them so the water will flow from north to south.
-
Go down another level, to the room with eight statues in it. Your goal in this room is to destroy the machine by making three channels of water flow under the machine. Each statue has a different way of changing the flow of the water. On top of each statue is an indication of how it will affect the flow of the water. Once you succeed, the machine will be broken. Move the statues by clicking on them until sufficient water flows under the machine to break it.
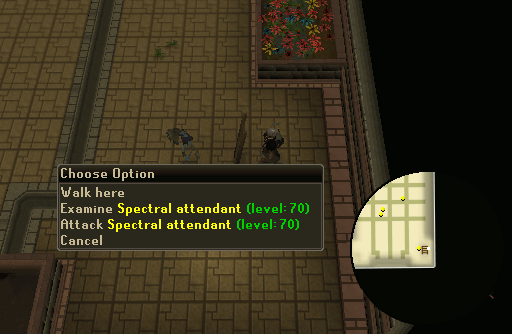
Note: Killing the spectral attendants before you begin will allow you to concentrate on the puzzle without interruption. An easy way to kill all Spectral attendants is to run around until all 6 of them are following you. You can then trap them behind a statue and you can safely attack them with Ranged, Magic or a halberd. There are many different answers to the puzzle; this one here is an example of one correct solution.
-
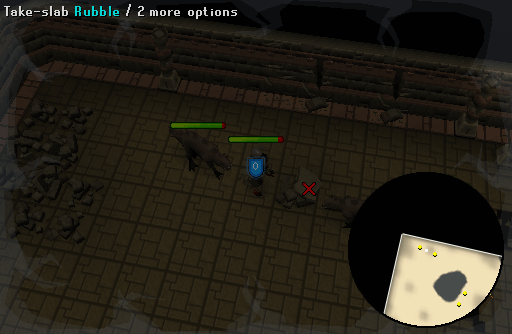
Make your way back up the ladder in this room to the second floor and pull the southern lever so the water flows from north to east this time. You'll notice that there's a pile of rubble in the way. Use the pickaxe you've collected earlier to mine the rubble to allow the water to flow.
Note: You may also use pickaxe in your tool belt to mine the rubble.
-
Go back down the ladder and go to the main room, you'll see that the Arcane Doorway is only powered by one conductor now. To break this one, go through the south-eastern doorway.
-
In this room there are two Spectral attendants putting fuel in the machine to the east, kill them. They will drop fuel cells, pick them up and pick some more up from one of the tables north-east or south-east. If you drop a fuel cell, a creature will jump out of the machine to eat the fuel.
-
Mining the rubble in step 9 created a waterfall at the western wall of this room. You need to make a path of fuel cells around the walls to lure the creature from the machine to the waterfall, but the creature will only eat three to four fuel cells before it'll jump back into the machine. Place the fuel cells here repeatedly until the machine is broken.
-
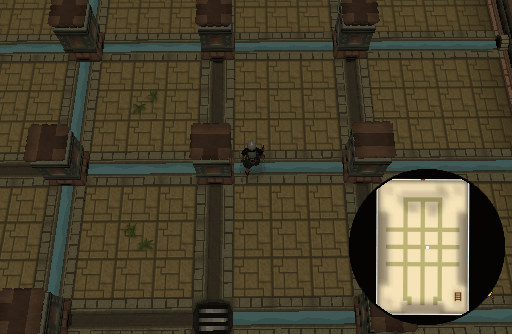
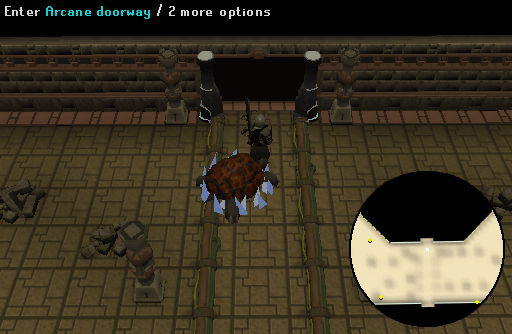
Make your way back to the Arcane door, you'll see that it's unlocked. Enter it and you'll end up in a large round room. Make your way to the west wall and enter the doorway.
-
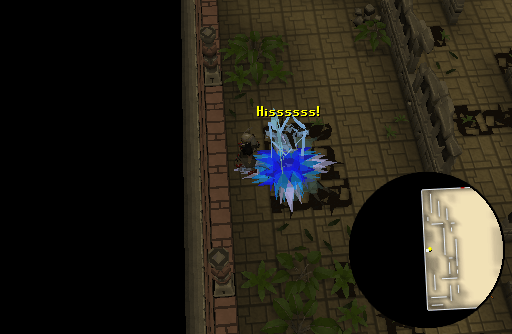
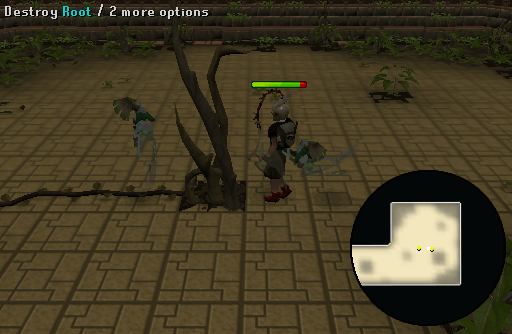
Run west and you'll come along a machine that's protected by vines. There's no way to destroy these vines, so go further west until the path splits to the north and south. Go to the south-western corner and attack the vine; it will retreat into the ground. There are three vines left which you'll need to attack. They are located southeast, northwest and northeast in the room.
-
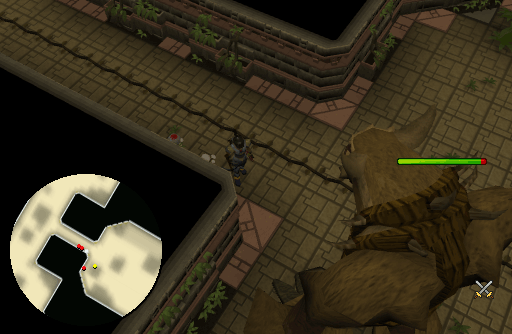
After getting rid of the four vines, you'll get a message that you hear a loud roar. Read the following before going back to the room with the machine! The machine is protected by a level 98 Decaying avatar which can hit over 400 damage per hit. You'll need to kill him in order to destroy the machine; using Protection from Melee is advised, since he'll deal a lot of damage otherwise. When the Avatar reaches about 75% of his health bar he will try healing himself by eating a vine that popped out of the floor. You can interrupt this by destroying the vine before he reaches it. The vine will be located northwest in the machine room.
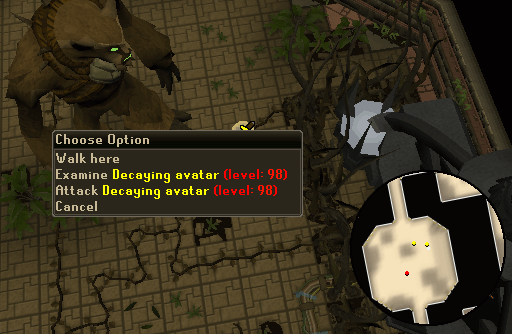
At 50% of the Avatar's health, a vine will appear south-east in the room and at 25% one will appear northeast. After this, he won't be able to heal himself any more and you can finally finish killing him. There are several safe spots so using ranged or a dragon halberd is usefull.
-
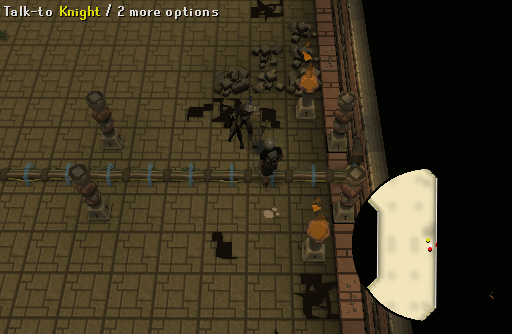
Go east through the doorway so you'll end up in the big round room again, only this time go to the eastern wall. There will be a knight lying on the floor, talk to him. He will mention "only the pious will survive" and "waves and waves of fire". He means the Piety prayer and a fire wave spell.
-
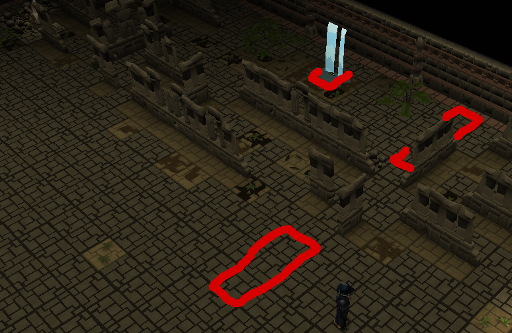
Go in the room and activate your Piety prayer. When you run east to the water, you'll notice an unfinished path of slabs. You need to finish the path over the water to get to the machine on the other side. The slabs are scattered around the room; collect them.
-
After collecting the slabs, place them in the water so you can get to the other side. Once there, you'll see a few barrels of explosives near the machine. Cast a Fire wave spell on the barrels. The explosives and the machine will explode.
-
Now make your way back to the Soul Wars bank and get ready to kill Nomad.
In the past, Saradomin brews in combination with Super restores were the food of choice for this battle and some people may still find thse effective, however since the Evolution of Combat it is quite viable to use normal food if your Constitution level is suffient (80+ for at least Sharks). Using a Beast of Burden familiar (e.g. Terrorbird or War tortoise) filled with food is highly recommended, if not essential.
It may also be beneficial to bring a set of Super or Extreme potions to make the fight slightly easier. In addition to a BoB, you may also wish to bring a Spirit kyatt pouch and Ambush scrolls (around 100) for use towards the end of the fight as the Kyatt's special is capable of dealing large amounts of damage in a short time.
Ranged is possibly the most effective combat style to use during the fight. A combination of Ruby bolts (e) and Diamond bolts (e) have been found to make the fight significantly easier due to the high damage special effect of ruby and Ranged defence-draining effect of diamond. However, it should be noted that using Ruby bolts does takes 10% of your Life points, but this can be countered by ensuring that you have at least 4,000 life points at all times.
Furthermore, you should bring a shield with you to equip in order to activate the Barricade or Resonance abilities and block Nomad's more powerful special attacks (see Step 20). A shield will also increase your life points and chance of survival. However, dual-wielding is very effective as it increases your damage output, but a shield should still be in your inventory to equip when necessary.
Finally, Protection Prayers have little to no effect on Nomad's attacks, but using stat-boosting prayers or stat-draining curses can greatly aid you during the fight. If you have access to Soul Split and Turmoil/Anguish/Torment, then use of these will make it significantly easier to kill Nomad. Just remember that you will need to substitute some food for Prayer potions as this is a long battle and you will need to replenish your Prayer points.
After preparing for the fight, go back into the tent and through the first Arcane door, then straight north to the next Arcane door. The fight will take place in this next room.
-
Nomad uses a number of attacks in a cycle that deal damage varying from several hundred life points to several thousand and these are:
- Standard Attack: Nomad's standard attack is a typeless damage mage attack that is unaffected by Protection Prayers, but is affected by armor with a high magic defence. This attack is easily capable of hitting between 500 and 700.
- Mines: Nomad's first special attack is to lay a group of mines in a pattern around you. If you move and step on one of these, it can hit well over 1,000. The mines will disappear on their own shortly after he uses the next special attack. If you're using melee, it is vital that you turn off Auto-retaliate to prevent yourself from running into the mines by trying to attack Nomad.
- Magic Blast: Nomad will teleport you to his throne and shouts "You cannot hide from my wrath!". You now have a few seconds to run behind a nearby pillar or either the Barricade or Resonance abilities, all of which will completely block the attack which hits 3,000.
- Clones: Nomad will create three clones of himself which will attack you. Attacking a clone will cause it to disappear and attacking the real Nomad (who can easily be identified by his remaining health as the clones have 45,000 life points) will cause all three to disappear. Alternatively, you can hide behind a pillar for a minute, after which the clones disappear and Nomad resumes attacking you.
This time can be useful for preparing for the remainder of the fight by simply taking a breather, healing or sorting out potions, food and your familiar.
- Disintegrate: Nomad's final and potentially battle-ending attack starts by him teleporting you to the center of the room, where you are frozen. He will then charge up an attack for around 15 seconds which when unleashed will hit you for all but 1 of your maximum life points e.g. if your maximum is 7500, it will hit 7499.
As soon as Nomad teleports and freezes you, it is highly advised to count to 12 and then activate Resonance to completely block the attack. You can also wait for him to start lowering his raised arm when it begins shaking, as this signifies he is about to use the attack, then use Resonance to ensure that it hits you within the 6 seconds that the ability is active.
Furthermore, it is vital that you are at full health before he does use the attack, as if you miss-time using Resonance, it will kill you in one hit if you're not at maximum.
There are also a number of other combat mechanics you must bear in mind during the fight and these are:
- Face me!: Nomad must always be able to attack you (other than when he's using his clones) otherwise he will shout "Face me!". If you continue to hide for several seconds after this, he will then shout "Coward!" and fully heal, forcing you to start the fight from the start. However, if you have used most of your supplies, you can teleport out as he is unaggressive afterwards.
- Healing: When you first get Nomad down to 25% health, he will heal himself back to half health to "even things up".
- Berserk: The second time you get Nomad down to 25% health, he will enter his berserk phase. When berserk, he will switch to using his staff to rapidly attack you with melee, frequently hitting 500+. Protect from melee may have a small effect on the damage, but mostly you will need to just try and go all out on him, use thresholds and ultimate abilities to finish him off quickly if possible and make sure you keep your health up.
If you're running low on food, you may want to attempt a hit and run method by attacking him, hiding behind a pillar, attack him, hide and repeat. Just be careful not to reset the fight by hiding for too long.
- Standard Attack: Nomad's standard attack is a typeless damage mage attack that is unaffected by Protection Prayers, but is affected by armor with a high magic defence. This attack is easily capable of hitting between 500 and 700.
-
When you've defeated Nomad, you will be teleported to the Soul Wars lobby. Speak to Zimberfizz, and a cutscene will occur.
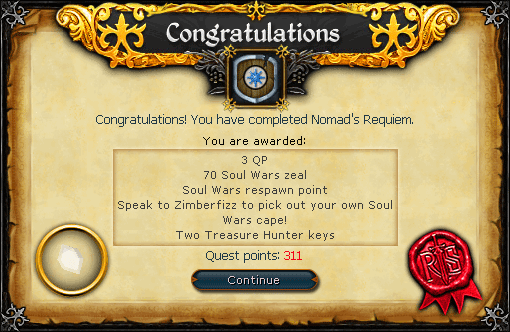
Congratulations, Quest Complete!
This Quest Guide was written by lanka, Rowan, and Heavens_Vibe. Thanks to DarkAlice, Ludo, Crablogger, Egekalaycan, Teh_Admiral, Salvette, Scott, Byzantine279 , Rowan, Clamball, Im4eversmart, Sytheus, Javezz, Sumurai8, Fiona, and Amoa for corrections.
This Quest Guide was entered into the database on Sat, Jan 16, 2010, at 08:22:17 AM by Scott, and it was last updated on Fri, Dec 29, 2017, at 12:36:24 AM by Numerous One.
If anything is incorrect or missing, or if you have any new information to submit to this database, please submit it to us on our Content Submissions Forums.
If you see this guide on any other site, please report it to us so we can take legal action against anyone found stealing our content. This guide is copyrighted by RuneHQ, and its use on other sites is expressly forbidden. Do not ask if you can use our guides or images, the answer is and always will be NO!
Print this page with images - Back to the Quest Guide Index Page - Back to Top
