

65 Slayer
75 Strength
All tasks (Easy, Medium, and Hard) of the Fremennik Province Achievement Diary
-
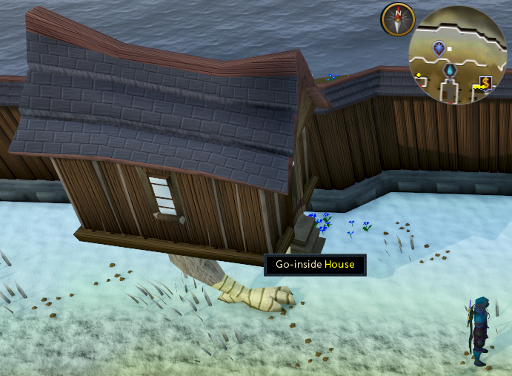
Head to the north side of the town on Lunar Isle, to the house with chicken legs, and head inside.
-
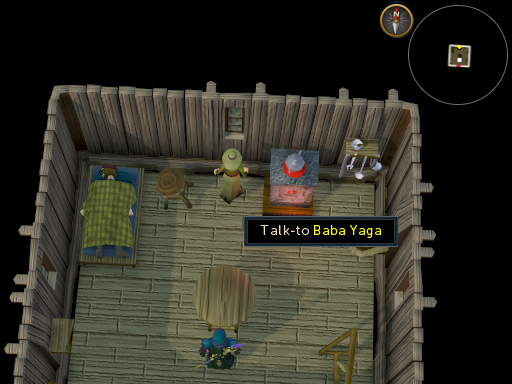
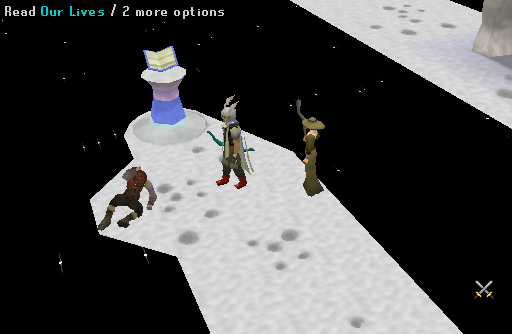
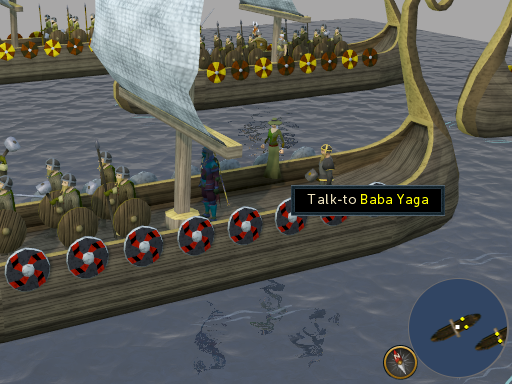
Speak to Baba Yaga inside the house with legs. She will tell you about the man who is asleep in her bed. He seems to have washed up on the shore. Baba Yaga suggests you enter his Dreamworld and find the root of his problem. She suggests you bank and prepare yourself and meet her back at her house when you are ready to go.
Note:The easiest way to get to Lunar Isle is via the home teleport or using the daily teleport option on the Seal of passage.
- Head over to the bank and withdraw armor, weapon, and food. Speak to Baba Yaga again and you will be transported to the man's dreamworld. You will discover that the man is actually Silas, the man that went missing in the Horror From The Deep quest. She suggests you search the room for clues.
-
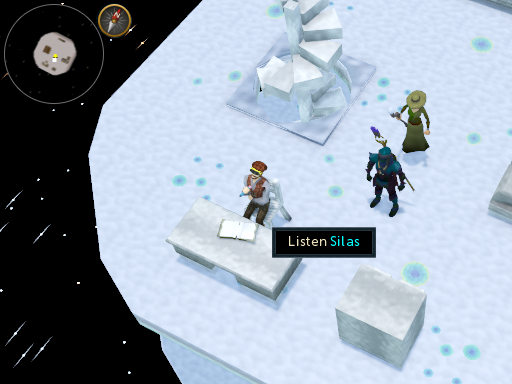
Listen to Silas. You will discover he is obsessed with Dagannoths. Select any option and search the bookcase for a Prophecy Tablet (lighthouse). Read the tablet and climb up the stairs.
-
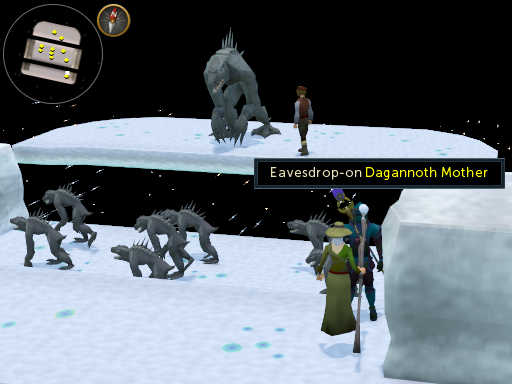
When you head upstairs, you will see Silas meeting with the Dagannoth Mother. They seem to be planning a Dagannoth army and have captured King Vargas. Continue into the next tunnel.
-
Here you will find Silas very weakened. Speak to him and Baba Yaga will suggest you read the lectern to leave. Attempt to read the lectern and she will tell you she cannot get it to work properly. Suddenly several Dagannoths and Wallasalkis will come and attack you. Baba Yaga will heal you when required but use food when you need to. After a while, Baba Yaga will succeed in repairing the lectern and teleport you both out to her house.
- Speak to Baba Yaga again. She will tell you that no change has been seen on the "Sick Man." During this, the Oneiromancer will enter Baba Yaga's house. The two will talk. Ask what is happening and they will tell you a message has arrived from Rellekka. The message says that Rellekka is under siege from monsters known as "Daggermouths" to the locals. You must go and aid their defenses.
-
Head back to the bank and restock on food. Head back to Baba Yaga who will take your Seal of passage from you, and kick you off the island to Rellekka.
Note: If you have a Dwarf Multicannon, it may make killing the Dagannoths a lot easier. -
Once at Rellekka, you will witness an army of Dagannoths attacking the people. Attack and kill the Dagannoths until they retreat.
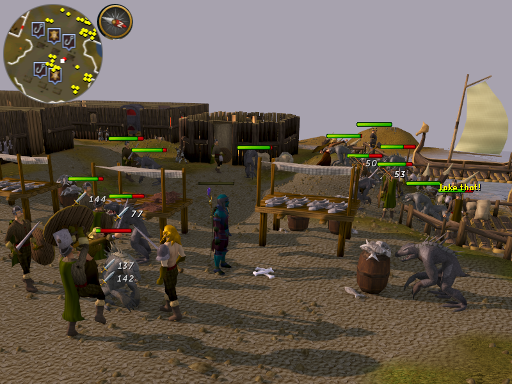
-
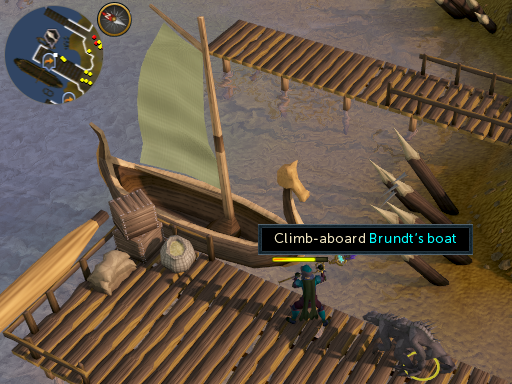
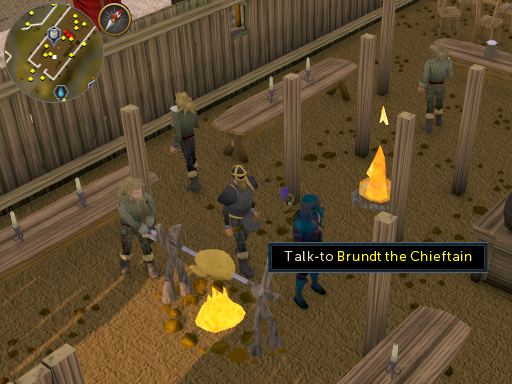
After 25 kills, Brundt the Chieftain will tell you to continue with the defence. After 50 kills, an arrow will appear on your mini-map leading you to Brundt's Boat. Board this boat to leave Rellekka.
-
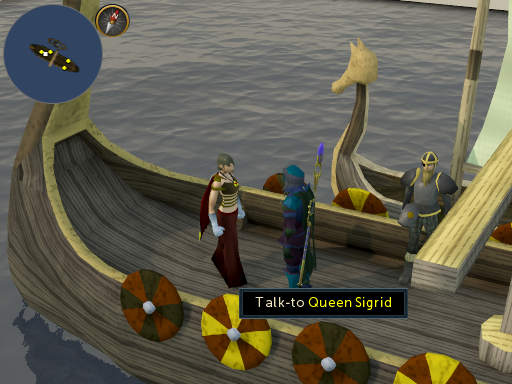
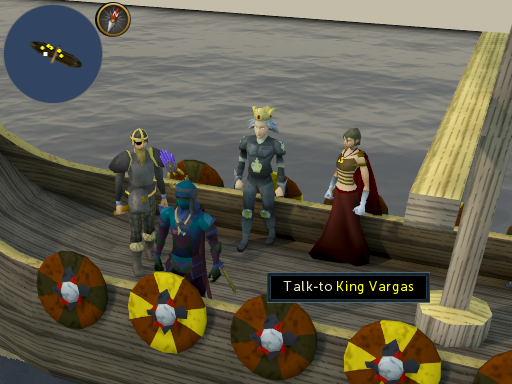
Speak to Queen Sigrid and she will tell you that King Vargas has gone missing just before their wedding. Offer your congratulations and Queen Sigrid will give you an axe called Balmung to use. Speak to Brundt the Chieftain, and he will offer to teleport you back to Rellekka, or to the bank in Etceteria, and recommends that you use Fremennik sea boots and an enchanted lyre to teleport to Waterbirth island. Re-claim your lost Seal of passage at this time.
Note: If you lost the Balmung, talk to Brundt the Chieftain to receive another one.
-
Talk to Jarvald to head to Waterbirth Island.
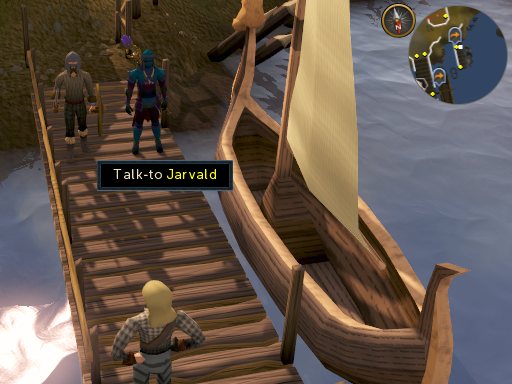
-
Once there, head south to the entrance to the Waterbirth dungeons. Speak to Bardur. He will tell you that he is hearing ghostly voices. You ask him if it could be an old man stuck inside the hole that he has discovered. He will then offer you a piece of Rope to aid you.
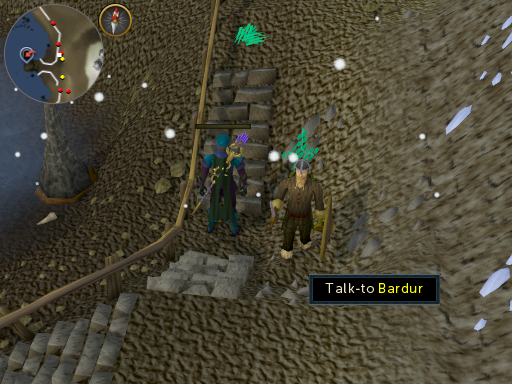
-
Head west from Bardur until you find a small hole. Tie the Rope to the hole and climb down.
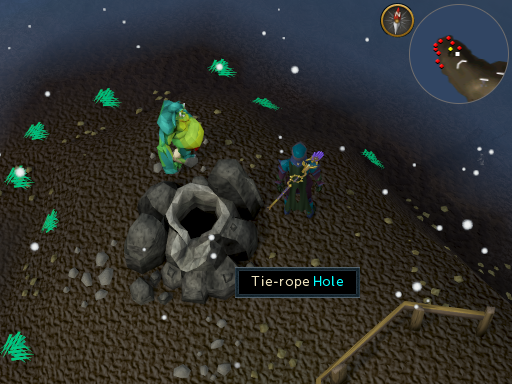
-
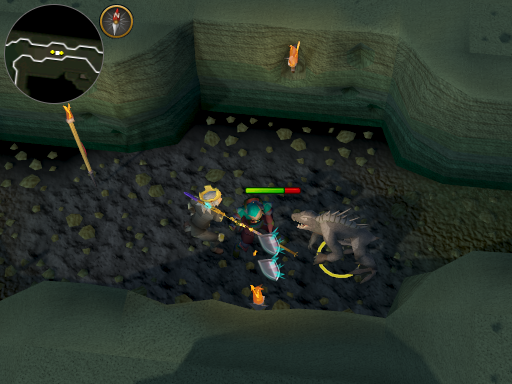
Inside you will find a very weak King Vargas. Talk to him and offer to get him out of the cave. Bardur will then tell you that Dagannoths are swarming the caves and you must find another way out. You will now find yourself in Waterbirth Island. Follow the path and head down the ladder.
Note: Do NOT run too far ahead or King Vargas will get recaptured. The strategy is to use protect from melee, turn off auto-retaliate, and walk slowly to and down the ladder.

-
The second level contains Rock lobsters. Protect from melee is advised and walk slowly. Follow the path through the dungeon. When you arrive at the stairs leading downwards, ignore them and continue onwards until you climb up onto the 3rd level. Here is where it gets a bit harder as King Vargas will be under attack. Heal him with your cooked fish and continue up. On the final level, you will see some stairs. Climb up to the second and then the first level and escort King Vargas past the rock lobsters. Again use protect from melee and turn auto retaliate off, King Vargas will not be attacked. As you climb the last stairs a cutscene will occur where there is a cave-in. You will arrive in some unknown area with a Longhall.
Note: Wearing black dragon hide will give you good protection from the mage attacks from the wallasalkis. When you climb to the third level King Vargas will be attacked by the dagannoths unless you attack them first. Try to keep King Vargas in the cove by the stairs and let the dagannoths come to you, turn on auto-retaliate at this stage.
-
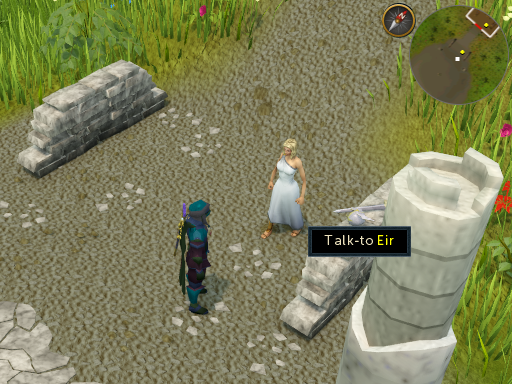
Speak to Eir. She will explain that she has been expecting you and will answer any questions you have for her. She also explains that she will send you back, but needs a little time to prepare. At this point, Nial Swiftfling and Aslief Hamalsdotter will arrive. Speak to them and they will tell you that you have arrived in a place where past Fremennik warriors are gathered.
-
Speak to Eir again and you will be taken back to Brundt the Chieftain's boat. King Vargas will thank you and give you the Prophecy Tablet (hatchery). Speak to Queen Sigrid for a message of thanks and a last quick task. She and King Vargas will ask you to be the one who makes them Man and Wife. Select relevant bits to use during the ceremony and watch the King and Queen have their wedding.
-
Now depending on if you are male or female, you will be asked to marry either Princess Astrid or Prince Brand. Once completed, speak to Brundt the Chieftain to teleport back to Rellekka for the final assault. You can choose to restock in Etceteria on Miscellania if you are short on supplies. Speak to Brundt the Chieftain in the Longhall and choose to wage war on the "Daggermouths." A cut-scene will occur showing the armies of the Fremmenik travelling to Waterbirth Island.
-
Speak to Baba Yaga and she will ask you for the two prophecies you obtained before. She will combine them with the other two prophecies she possesses and asks you to work out the order of the tablets. Pick whichever answers you like; if you choose the incorrect answer, Baba Yaga will correct you. After some conversation, you will be asked if you are ready for the war.
-
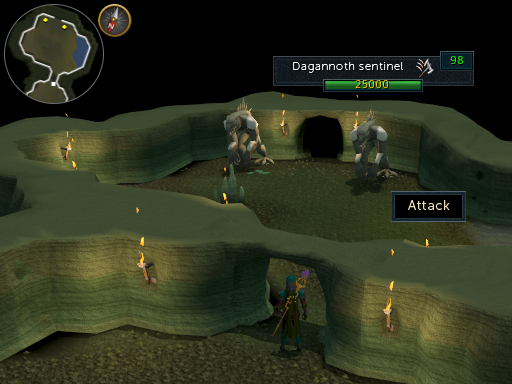
You will arrive on Waterbirth Island, outside the hole from earlier. Climb down and your party will be waiting for you. Head through the next passage. Accept the offer of leaving someone as a lookout and continue through the caves. You will then discover the Dagannoth Kings have entered the fray and your helpers will attack them while you focus on finding the Dagannoth Mother. Continue through the cave and you will come across two Dagannoth Sentinels. The Sentinels will heal each other if their health bars differ too much. After they are dead, restock if needed. You won't need to kill the Dagannoth Sentinels again. Then enter the next cave.
Note: With the current EOC tagging this fight is very difficult, since one Sentinel will heal to full if ignored for too long. There are two ways to get around this problem:
1. Bring Balmung and good melee armour and power through the healing ability of the Sentinels, killing one and then the other.
2. Stand directly under one Sentinel and attack the other with either Ranged or Magic. The Sentinels won't heal since both of them are actively trying to attack you.
-
Refer to this map to get through the tunnels after the Sentinels:
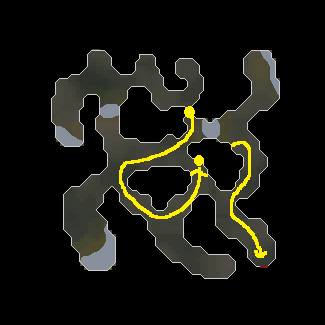
-
Once in the next cave, run east until you find an obstruction.
-
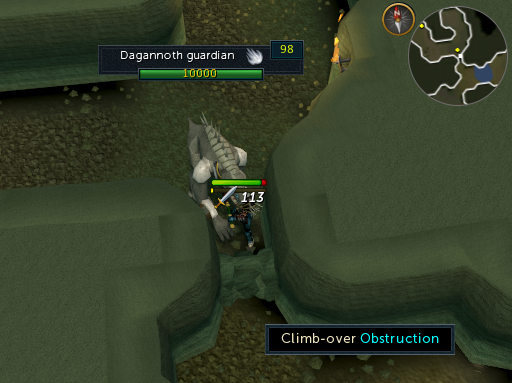
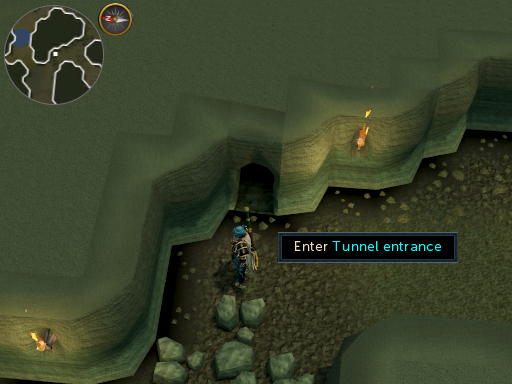
Go a little south and then go in a counter-clockwise direction through the tunnel until you end up a little south of the obstruction again, but at the other side of a rock fall. The tunnel entrance will be in the rock to east. It is not marked on the mini-map. There are level 98 Dagannoth guardians in this tunnel system, but run past them. Enter this and you will arrive across the river. Run until you find a cave entrance towards the south side and enter.
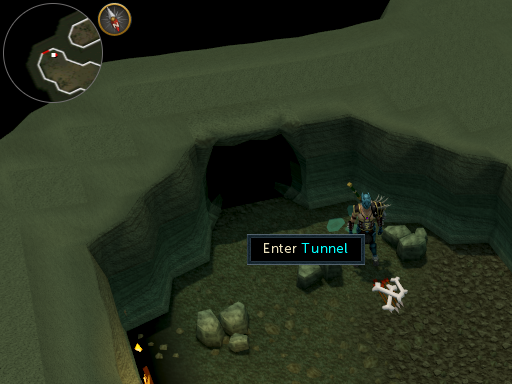
-
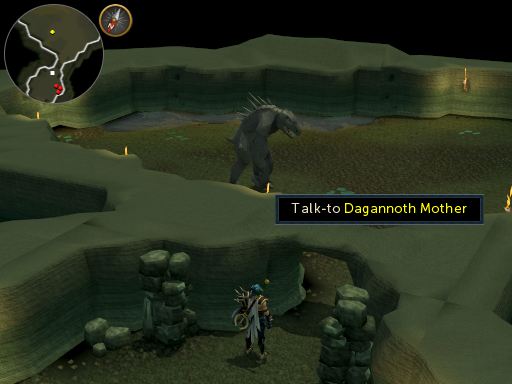
You will arrive in a room with a Bronze pickaxe, Tinderbox, and a Plank. Wait until after you kill the Dagannoth Mother to pick them up so you don't waste inventory spaces. Enter the tunnel and you will find the Dagannoth Mother. Speak to her and start the fight scene.
-
She will always start using melee, so you may want to turn on your protect from melee prayer in advance. She will only start to change colors after you attack her with the Balmung. After that, she will occasionally switch her combat style and attack you either with Range or Magic. A good technique to kill her is staying away from her a few steps, then switch between magic/ranged prayers and combat styles.
NOTE: Since the EoC it has been noted that there is a bug where the Dagannoth Mother may never change colours from her normal colour, allowing players to easily defeat her using any combat style.
Do not approach her unless she has turned orange. Step away as soon as she changes her color. This technique will help you to avoid her melee attack, which can hit really hard.
You will notice that she changes colors (you will get a message everytime she does so if you are unsure of the color, simply look at the message) and will need to use the correct type of attack in order to kill her, depending the color.
- White: Air Spells
- Blue: Water Spells
- Brown: Earth Spells
- Red: Fire Spells
- Orange: Melee attacks
- Green: Ranged attacks
-
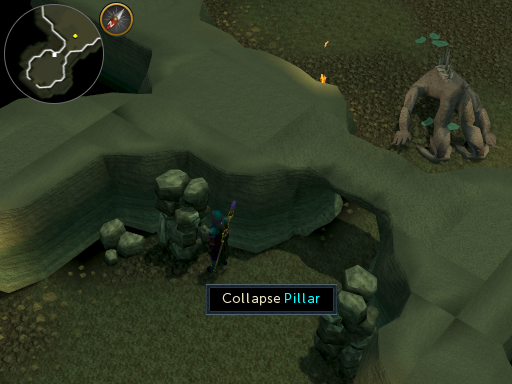
Once defeated, leave the chamber and with a bronze pickaxe, plank, and tinderbox in your inventory, choose the option 'Collapse pillar' at the entrance to the dagannoth mother cave to trap her inside. Disaster will strike and another cave in will occur leading you back to the land of past Fremennik warriors. Speak to Eir who will congratulate you and return you back to your group.
-
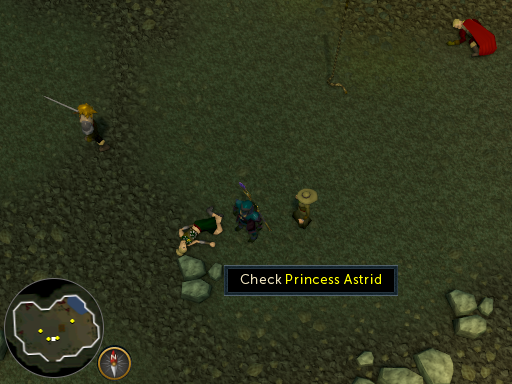
Here you will find that Princess Astrid and Prince Brand have been killed while defending you against the Dagannoth Kings. Climb up the rope and speak to Brundt the Chieftain. A cut-scene will occur of a pyre ship being made for the Prince and Princess.
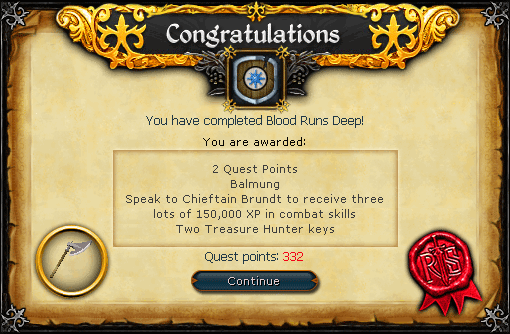
Congratulations, Quest Complete!
This Quest Guide was written by Heavens Vibe. Thanks to Ralkal, busycaz, DaMobz, Egekalaycan, typhusfever, Crablogger, Squiggeh, Ladi, Im4eversmart, Cobus469, Bunny Man, ChathMurrpau, and GeraltRivia2. for corrections.
This Quest Guide was entered into the database on Wed, Dec 16, 2009, at 04:09:08 AM by Scott, and it was last updated on Fri, Sep 01, 2017, at 04:35:39 PM by L1ttleR3d.
If anything is incorrect or missing, or if you have any new information to submit to this database, please submit it to us on our Content Submissions Forums.
If you see this guide on any other site, please report it to us so we can take legal action against anyone found stealing our content. This guide is copyrighted by RuneHQ, and its use on other sites is expressly forbidden. Do not ask if you can use our guides or images, the answer is and always will be NO!
Print this page with images - Back to the Quest Guide Index Page - Back to Top
