

Nature Spirit, The
In Search of the Myreque
In Aid of the Myreque
Darkness of Hallowvale (to play Burgh de Rott Ramble)
Legacy of Seergaze (to unlock the Vyrewatch event)
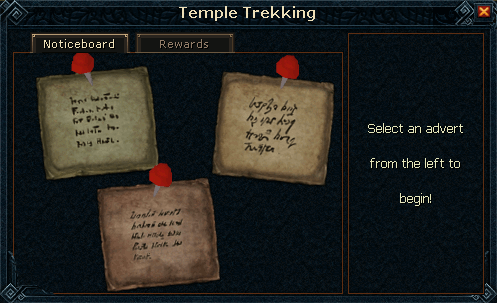
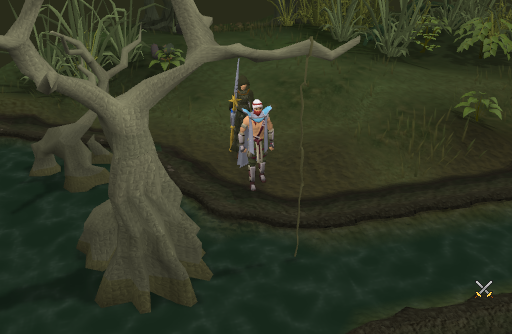
Burgh de Rott Ramble: Outside of Paterdomus temple on the west of Canifis. Read the nearby noticeboard.
To successfully play this activity, it is advised to have completed the Darkness of Hallowvale quest, as it will make this game so much easier. Trekking works the same way no matter what starting point you use. The only difference will be the characters available to be used. Remember this activity isn't safe, if you happen to die you WILL lose your items, so before you start your trek, you must equip yourself with the appropriate items. Head over to Canifis or Burgh de Rott bank and withdraw the following items.
Recommended Gear:
Most monsters are weak to magic, so bring the best staff/wand with the best spell you have. As the combat triangle is much more important now, you should bring a melee weapon for snails and a ranged weapon for snakes too.
Vampyres and Vampyre Juvinates can only be harmed by relatively weak silver weapons, or the strong Blisterwood weapons.
- Head: Ganodermic visor > Batwing hood
- Body: Ganodermic poncho > Batwing torso
- Legs: Ganodermic leggings > Batwing legs
- Boots: Ganodermic boots > Batwing boots
- Gloves: Ganodermic gloves > Batwing gloves
- Amulet: Salve amulet (e)
- Cape: Completionist's cape > Max Cape > Fire Cape > Skillcape (t) > Skillcape > Obsidian cape > Legends's cape > Other capes.
- Main-hand Weapon: Wand of treachery > Bat wand
- Off-hand Weapon: Grifolic orb > Bat book
- Special Weapon: Ivandis Flail or Blisterwood weaponery. Either will allow you to defeat Vyrewatches.
- Secondary weapon: Rod of Ivandis, Wolfbane, Silver sickle (b), Darklight, Blessed axe, or Blisterwood weaponery. All of these will allow you to defeat Juvinates. A crossbow with silver bolts can also be used, but it is not recommended. The Ivandis Flail can also be used to defeat Juvinates, and cast the bloom saving inventory space.
Recommended Inventory:
- Food: 5-10 Monkfish or better.
- Snelm: Highly recommended against the Giant snails range attacks as it greatly reduces the damage taken.
- Ring of Life: In case you desire to try for a hard route and are unsure of the outcome.> Imbued ring.
- 1-2 Prayer potions: These also come in handy if you use the Cast-bloom option on your Silver sickle (b) or Flail of Ivandis during the events.
- 20+ Druid pouches: These will allow you to kill Ghasts, or the Ouroboros pouch.
- Gadderhammer: It is efficient against Shadows.
- Summoning familiar: Using a healer familiar such as a Bunyip or an Unicorn Stallion is a good idea to keep yourself alive during your treks. However, using a Beast of Burden familiar such as the Spirit terrorbird or the Pack Yak is even better, as not only you will be able to carry some extra bits of food, but they will allow you to hold valuable drops that you might find such as Snake skin.
- Drakan's medallion: It will provide you with a quick teleport to Burgh de Rott, if you happen to be left in the middle of the swamp. A charge will NOT be used if used within Canifis. The medallion is not recommended for emergency teleports.
- Enchanced Excalibur: For those critical moments that you might find yourself in, it's always good to have a back-up!
Playing the game:
Head over to the Noticeboard near Hilylik Myna and pick the adventurer of your choice.
Before you start the trek, you can spare some food to your selected adventurer by trading him(this food will be kept until its eaten, no matter how many treks it takes), this is strongly recommended for the dangerous treks (For more information, please refer to the Travelers and Food for the Traveler sections). Then just speak to your NPC to start the trek. Now, you will have to chose a route.
There are three different types:
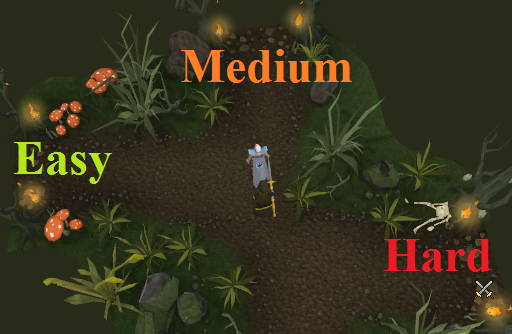
- West route - the easy route - Monsters in this route will be low leveled (3 monsters per event), taking this route will contribute to earning a blue reward token.
- North route - the medium route - Monsters in this route will be medium leveled (3-5 monsters per event), taking this route will contribute to earning a yellow reward token.
- East route - the hard route - Monsters in this route will be high leveled (3-5 monsters per event), taking this route will contribute to earning a red reward token.
You will be given the difficulty choice before every possible event during your trek, so if you find that one level is too much for you to handle, after you complete it you will be able to switch to a lower one anytime.
When an event takes place, you will have the choice of Complete, Evade or Escaping the event. In order to Complete the event, you will have to either kill all monsters or solve the puzzle you are facing depending the type of event you get. When you have done that, look for a few squares of light green leaf-like rocks on the ground opposite of where you entered and choose Continue-Trek. If you feel that the event you're facing is too difficult and won't be able to complete it, you have the alternatives of either Evading it or Escaping it.
Evade:
Evade can only be chosen during events of encountered in either the Easy or Medium route and only when you bump into monsters. However, its not that simple! You will need to defeat at least 50% of the monsters before you're able to evade the event. If you have three monsters then you have to kill two. If you have five monsters then kill three. Note that during the hard route, no event can be evaded, so think twice before you venture on that path, never the less you will still be able to escape. When you Evade, you simply skip the event, and move to the next path choice to continue the trek. You will find the Evade exit on the left hand side of the "entrance".
Escaping:
Escaping an event can be done during any event, at any time, no matter the route level. However if you decide to Escape you will no longer be able to finish the trek. Instead you end up in the relevant area of Morytania and have to start over.You will find the Escape exit on the right hand side of the "entrance".
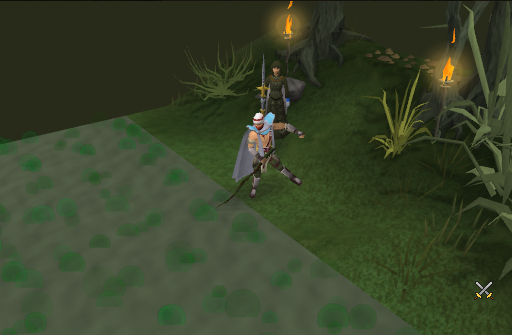
In order to successfully end a monster event, make sure they have set their eyes on you first and not the traveler. Then all you have to do is make sure YOU do not die. However, during easy (and maybe medium) events if your adventurer is combat-competent (i.e. Pazuzu or Dean Vellio), it is a good idea to let them tank the monsters for you, this is particularly effective to raise their combat levels. Once you have finished the trek, you will be handed a token from the person you escorted according to the average level of the route(s) taken during the trek and your adventurer's difficulty. In order to cash it in, simply click it and select the reward of your choice (for some information, see Rewards). You can also keep your tokens in your bank (they will stack - taking a max of three bank spaces), if you wish to cash them later in bulk.
Note: Make sure you have at least one inventory space available. Otherwise, your token will be dropped on the ground.
| Token Level | Image |
| Blue token (easy) |
 |
| Yellow token (medium) |
 |
| Red token (hard) |
 |
There are three types of travelers, each with their own difficulty level. Their difficulty can be easily spotted in the noticeboard at the start point of each trek. The green note will be always an easy level adventurer, the yellow a medium one, and the red a hard one. If you are just starting to trek, picking an easy adventurer is the wisest choice, until you get the grip of the activity.
- A hard traveler causes 3 monsters to attack during an Event.
- A medium traveler causes 4 monsters to attack during an Event.
- An easy traveler causes 5 monsters to attack during an Event.
Adventurers (Paterdomus):
| Name | Image | Description | Difficulty | Levels and Unlockables |
| Pazuzu |  |
She is a powerful mage capable of defending herself with ease, which should make your treks easier, but it will be less likely to get a high level reward token. | Easy |
|
| Zachory Bragg |  |
Zachory is not yet a great wizard, he still needs to extend his arcane knowledge, and it will be upon you to help him achieve that . | Medium |
|
| Rolayne Twickit | 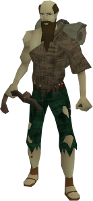 |
Rolayne is in a trek to attempt to bring peace to his fellow villagers a, however even if his intentions are strong, due to his state he is not. So you will find out that he is way far from being an acceptable fighter, but has what it takes to help with other tasks that involve Woodcutting and Firemaking. | Hard |
|
Villagers (Burgh de Rott):
| Name | Image | Description | Difficulty | Levels and Unlockables |
| Dean Vellio | 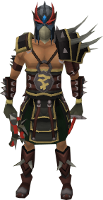 |
If Dean was a player he surely would be able to do treks himself since he is a very strong fighter; however, his orientation skills are not that great. Therefore, he will need your assistance to reach the other side of the swamp! Treks with Dean not being much of a challenge will make high level reward tokens less likely to earn. | Easy |
|
| Jayene Kliyn |  |
Jayene is a villager who happens to have a keen eye. Don't let her fool you, she is not as weak as she might apparent to be, as you progress you will discover her potential. | Medium |
|
| Smiddi Ryak |  |
Smiddi Ryak is like that expensive ceramic vase you don't want to break. Fragile and powerless, she won't be much help against monsters and you will have to watch over her constantly, but she will lead you to greater rewards. | Hard |
|
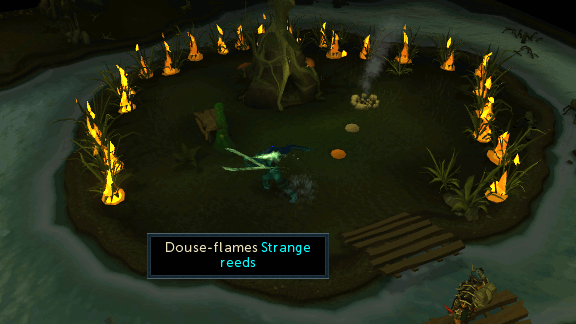
Nature spirit's grotto:
Ghasts are taking action against the Nature spirit by setting on fire neaby vegetation in the hope his grotto will be burnt to ashes soon. The spirit is too scared to react, it will be up to you to help him save his grotto! Right-click the spirit and select "Water-power", then the Nature spirit will grant you the control of the water element for a short period of time. Use your new ability to extinguish all the surrounding fires and save the grotto.
Bog:
In order to cross the bog you need to feel your way through. Use a knife or Silver sickle on a spiky bush to get spiny sticks. Cut off as many as you can. Next you need to Use the stick on the bog and keep an eye on the messages that appear in the chat menu. If it says "Erk, this ground feels quite soft." then you cannot walk on it. If you do, you'll be sucked into the bog and will have to start over. You need to find the firm areas and walk on those. Try to remember where you have walked because sometimes the firm path leads to a dead end. It is also possible that your stick will get sucked into the bog. You will not keep the sticks after you complete the event.
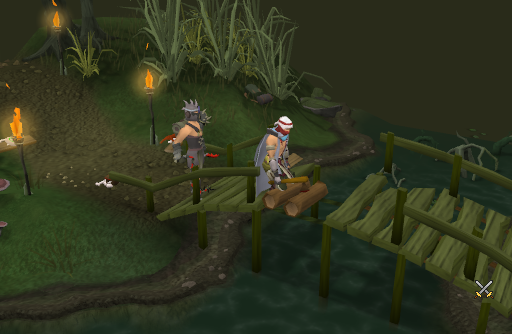
Broken Bridge:
The Broken Bridge comes in three different versions: The 'Tree event', the 'Undead Lumberjack' and the 'Mixed event'. In the Tree event, cut down the three trees nearby. If you do not have an axe with you, kill the Zombie to get a bronze axe. Wield the axe (not required if you have a hammer) and use each log on the gap of the bridge.
If you have the Undead Lumberjack event, kill them when they come out of the river. Although the droprate is not 100%, you might get a piece of Lumberjack clothing. Wield your axe (not required if you have a hammer) and use the planks on the gap of the bridge. If you do not have an axe with you, kill the Zombie to get a bronze axe. You may keep any additional planks that you get.
River:
In order to cross the river, you need something you can swing across with. If you do not have a knife with you, search the backpack on the ground. Then use the knife on the nearby tree to cut off a short vine. Do this three times, and then use the short vine on one of the others to get a long vine. Use it on the branch of the larger tree, and choose swing across.
Birth of Ghasts:
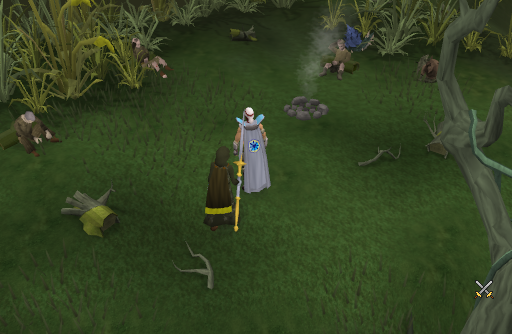
This is a tricky one. You need to feed the sick people before they turn into Ghasts. There are five stages: Sick, Sick!, Very Sick, Ghastly, and lastly they become Ghasts. The best option is to give them some of the food from your inventory. (You could use cheap stackable food such as pineapple rings.) If you didn't bring any, you need to kill snails and cook them on a fire and feed the people. There is a tinderbox on the ground and a tree to get a log from. The people will be at different sickness stages at the start of the event, so make sure you feed the most sick ones first. This is, however, a slow procedure and one or more people are guaranteed to transform on the harder routes.
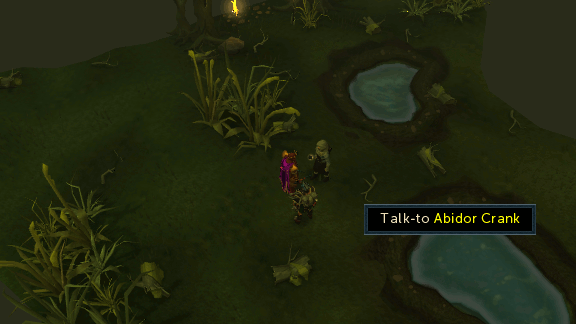
Abidor Crank:
Sometimes you will bump into Abidor Crank. He looks suspicious, but all he wants to do is help. He will raise you and your companions' hitpoints and defence levels, even above your maximum level, and turn any rotten food into stew.
The levels of the monsters you may encounter not only depend on the difficulty of a route, but also on your combat level. There may be lower levels to encounter. The higher levels were encountered by several 100+ players.
| Name | Image | Combat Level | Route | Info |
| Skeleton |  |
15, 75 | All routes | All the skeletons can be killed in two hits by unleashing the power of the coffin, which has only two charges. Your follower will not help you kill these skeletons. You can lure all the skeletons by running around the graveyard, and then running to the coffin killing most of them, if not all. |
| Ghast |  |
79, 109, 139 | All routes | The only difference with the Ghasts are their combat levels, which increase depending on the route you choose. You need Druid pouches to defeat these (One pouch per Ghast). Then kill them with the weapon of your choice. |
| Giant snail |  |
79, 80, 109, 139 | All routes | The only difference with the snails are their combat levels, which increase depending on the route you choose. These are tough, even on the easy route. It is HIGHLY recommended that you wear a snelm when you fight these on the easier route combinations. It will save you some prayer potions. But when you get to the harder choices (Route Two and "red" traveler or Route Three), then you should have the prayer potions ready. When you have killed it, collect the shell. You will get 600gp for a normal shell, and 600gp plus 500 crafting experience for Perfect shell from Barlak in Dorgesh-Kaan when you trade with him. |
| Juvinate | 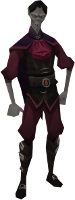 |
59, 89, 90, 119 | All routes | All Juvinates look the same and behave the same. Defeat it with either Ivandis flail, Rod of Ivandis, Silver sickle, Silver sickle (b), Wolbane, Darklight, Blessed axe, or the Blisterwood weapons. On the harder routes, do not use crossbow with silver bolts as it’s a total waste of time and bolts. |
| Nail beast | 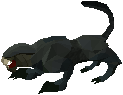 |
69, 98, 141 | All routes | This can be quite the opponent. When you get attacked, you will get hit three consecutive times. Make sure you bring food! The Nail beast drops Nail beast nails and Talon beast charms. |
| Shade | 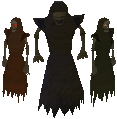 |
80, 110, 140 | All routes | There are three types of shades – Riyl (easy route), Asyn (medium route) and Fiyr (hard route). Gadderhammer is said to be a good choice to dispose of these threats, though Abyssal whip workes best. You have to make sure they all target you because they will easily dispose of your companion if you do not. Three shades will be always found trying to take down the doors of three houses in the center of Mort'ton to murder the villager inside of each house, quickly distract the shades from their labor and kill them. After you're done with the shades, speak to each villager you managed to save to be rewarded with either a lifepoints restore, prayer points restore, or a combat skills boost (the rewards can repeat themselves between the 3 villagers). |
| Swamp snake |  |
79, 80, 109, 139 | All routes | The only difference with the snakes are their combat levels, which increase depending on the route you choose. When you have killed it, use your knife on the snakes to get Snake hide. You get 2 to 5 hides per snake. |
| Tentacle monster | 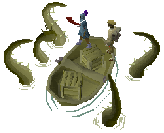 |
99, 140 | Route 3 | The Tentacle monster only appears on the hard route while you’re floating on the stream. Its head is level 140 and its four tentacles are level 99 each. You need to make sure the Tentacles are targeting you because they will do lots of damage to the traveler. Kill those first, and then go after the head. If you kill the head before you have defeated the tentacles, it will regenerate. Despite being level 140, the head does not do a whole lot of damage. |
| Undead Lumberjack | 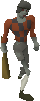 |
30, 35, 40, 45, 60, 70 | All routes | An easy monster to kill. It drops planks to be used in one of the Broken Bridge events. One of them will drop a piece of Lumberjack clothing which could be worth saving. They do not drop clothing, if you encounter them when there are trees nearby. |
| Vyrewatch | 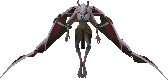 |
85, 109, 130 | All routes | These monsters can only be killed or damaged with either an Ivandis Flail or Blisterwood weaponery. Using the Ivandis Flail special attack will temporarily freeze them. You may also use a Guthix Balance potion on them. They drop the Vyre corpse, used in the Vyrewatch Corpse Burning activity. |
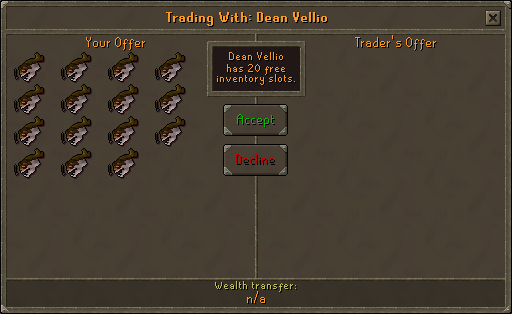
At the beginning of each trek (and all along the trek), you have the choice of trading with your adventurer to spare some of your food to ensure its safety. Your NPC will take any kind of food you offer; however, you will not be able to get it back nor switch it for better or worse types, once the trade is complete. This is not necessary for the easy route, but recommended for the other two routes. Food will allow them to heal themselves when they are low on lifepoints. If you are in the middle of a combat event and you need to give some food to your NPC, use the food on the traveler. You will be notified that your adventurer succesfully received it as your NPC says 'Thanks!'. Each NPC can hold up to a maximum of 28 pieces of food. If the traveler has any food remaining at the end of a trek, it will be stored for future treks. The food will remain even if you log out.
After successfully completing a route, the traveler will give a Reward token, which can be blue, yellow, or red depending on the chosen route. The amount of a certain item received when cashing in tokens depends on which person you escorted, what route you chose and how well you did during all events. All rewards except for seeds and tomes are noted. Tokens can be exchanged at the start point, respectively Hiylik Myna outside of the Paterdomus or Burgh de Rott's bank. Reward tokens can be claimed at any time by simply clicking on them. You then get the choice for which reward you receive. Quantity, however, will vary.
| Items | Amount per token | ||
| Blue token | Yellow token | Red token | |
| Bow strings | 30-90 | 70-210 | 100-300 |
| Ores | 7-21 (Iron), 14-42 (Coal) | 10-30 (Iron), 20-60 (Coal) | 20-60 (Iron), 40-120 (Coal) |
| Grimy herbs | 10-30 (Guam to Harralander) | 3-11 (Ranarr to Kwuarm) | 2-7 (Snapdragon to Torstol) |
| Raw sharks | 8-24 | 10-30 | 18-54 |
| Pure essence | 50-150 | 70-210 | 100-300 |
| Silver bars | 55-165 | 75-225 | 120-360 |
| Watermelon seeds | 2-8 | 4-12 | 5-15 |
Tomes:
On occasion you will receive a tome. This will grant you experience in a chosen skill. There are seven different tomes dedicated to Agility, Firemaking, Fishing, Mining, Slayer, Thieving and Woodcutting.

Experience gained: 1100 - 1650 XP

Experience gained: 2035 - 3025 XP

Experience gained: 4015 - 5005 XP
Additional rewards:
Several dangerous events will drop a certain item when you have successfully dealt with them.
| Name | Image | Info | Obtained |
| Riyl remains |  |
Can be burned using Willow pyre logs or better | Saving Mort'ton challenge - easy route |
| Asyn remains |  |
Can be burned using Yew pyre logs or better | Saving Mort'ton challenge - medium route |
| Fiyr remains |  |
Can only be burned using Magic pyre logs | Saving Mort'ton challenge - hard route |
| Perfect snail shell |  |
Trade with Barlak in Dorgesh-Kaan to receive 500 crafting XP and 600gp | Giant Snail challenge |
| Snail shell |  |
Trade with Barlak in Dorgesh-Kaan for 600gp | Giant Snail challenge |
| Snake hide |  |
Tan these for 20gp (not 15gp like normal snake hide). These can be used to make snake hide armor |
Swamp Snake challenge |
| Nail beast nails |  |
Second ingredient in the Sanfew serum cure all potion | Nail beast challenge |
| Talon beast charm |  |
This is a secondary ingredient for the Talon beast pouch, used in Summoning. | Nail beast challenge |
| Lumberjack outfit |  |
Gives a 5% experience boost when woodcutting | Cross the river challenge |
| Construction outfit |  |
Gives a 5% experience boost when training Construction | Bought from signposts when certain levels are acheived |
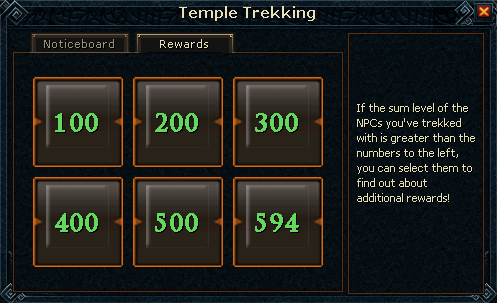
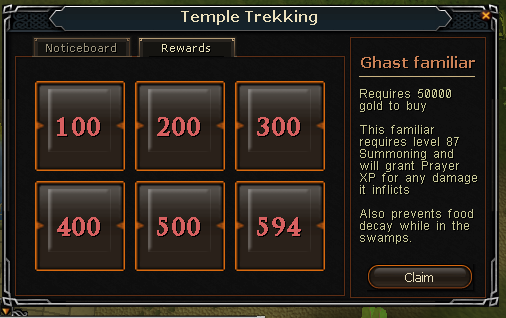
| Ghast Familiar | Costs 50k, requires 87 summoning to summon | Bought from signposts when you have 594 total character levels |
Each time you get your traveller's combined combat levels to a multiple of 100 (up to 500), you will recieve a piece of kit from the Constructor's Outfit or another unlockable. The full kit gives a 5% bonus:
| Combined Combat Level | Piece of Kit/Unlockable |
| 100 | Shortcut option from the swamp gates to the Nature spirit's grotto |
| 200 | Constructor's hat |
| 300 | Constructor's trousers |
| 400 | Constructor's garb |
| 500 | Option to teleport to Temple Trekking/Burgh de Rott added to Games Necklace |
Once all your traveller's combat levels are maxed, you can gain another reward too:
This Minigame Guide was written by carduel. Thanks to Andro_Girl, Clawsork_31, Cuine100, Killmouski, aaron_bloom, Korndezee, Suferkid, Sccrluk9, Jordan23140, Maonzhi, JoeC, Flyingzamboni, Sc0tty, Plxda, Egekalaycan, Crypto416, Voiges, Mufus, Kitty Hawk, Noble_K, Parsonsda, a2_304, Ralkal, and Avoricofgol for corrections.
This Minigame Guide was entered into the database on Sun, May 21, 2006, at 10:42:56 AM by Oblivion590, and it was last updated on Mon, Mar 30, 2015, at 08:53:12 AM by Jarkur.
If anything is incorrect or missing, or if you have any new information to submit to this database, please submit it to us on our Content Submissions Forums.
If you see this guide on any other site, please report it to us so we can take legal action against anyone found stealing our content. This guide is copyrighted by RuneHQ, and its use on other sites is expressly forbidden. Do not ask if you can use our guides or images, the answer is and always will be NO!
Print this page with images - Back to the Minigame Guide Index Page - Back to Top
