

90+ Constitution
43+ Prayer (Having Soul Split is advised)
67+ Summoning (Pack Yak is advised)
96+ Herblore
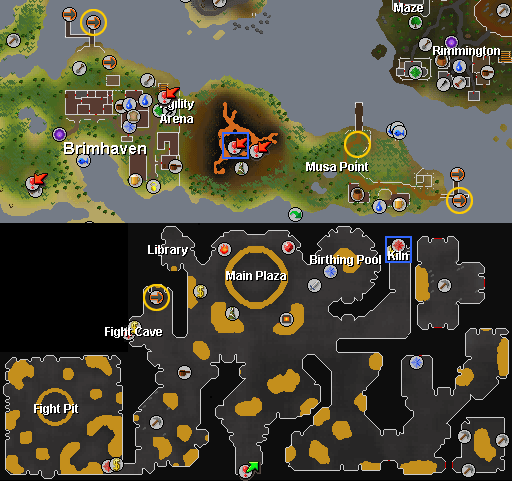
How To Get there:
Make your way to the top of the Musa Point Volcano on Karamja and walk through the middle to the entrance of TzHaar City. The Fight Kiln itself can be found towards the north eastern area of the the city. There are various ways to reach the TzHaar City:
- A Tokkul-Zo can teleport you directly to the entrance of the kiln.
- The Fairy code BLP will take you to straight to the TzHaar City.
- Take the boat from Port Sarim to Musa Point and walk west from there into the volcano.
- Use an Amulet of glory to teleport to Karmaja and walk west from there into the volcano.
- Charter a boat from one of the various harbors to Brimhaven or home teleport to the Karamja lodestone and walk southeast from there into the volcano.
Recommended Setup:
The best method of completing the Fight Kiln is through Mage, as many of the monsters can be caught behind obstacles which allow easy targets. This section is based for that setup.
Recommended Gear:
- Helmet: Obsidian mage helm > Sea singer's hood/Virtus mask > Ganodermic visor > Hood of subjugation/Ahrim's hood
- Amulet: Arcane stream necklace > Saradomin's hiss > Amulet of fury > Dragon Rider amulet > Amulet of glory
- Body: Obsidian platebody > Sea singer's robe top > Virtus robe top > Ganodermic poncho > Garb of subjugation/Ahrim's robe top
- Legs: Obsidian platelegs > Sea singer's robe bottom > Virtus robe legs > Ganodermic leggings > Gown of subjugation/Ahrim's robe skirt
- Gloves: Obsidian gloves > Static gloves > Spellcaster gloves > Virtus gloves > Ganodermic gloves > Gloves of subjugation
- Boots: Obsidian boots > Ragefire boots > Virtus boots > Ganodermic boots > Boots of subjugation
- Cape: Completionist cape > TokHaar-Kal-Mej > God cape > Skillcape > Soul Wars cape > Ardougne cloak 3/4
- Ring: Tokkul-Zo > Seers' ring (i) > Sixth-age circuit > Seers' ring
- Weapon: Seismic wand/Noxious staff > Chaotic staff/Virtus wand > Armadyl battlestaff > Polypore staff > Staff of light/Ahrim's wand/Wand of treachery > Master wand
- Off-hand (if not using a staff): Obsidian kiteshield > Seismic singularity > Farseer kiteshield > Virtus book > Ahrim's book of magic > Ward of subjugation
- Pocket: Sign of life
Inventory:
- Runes (using either Ice burst/barrage or Storm of Armadyl is highly recommended).
- 3-4 Prayer renewal flasks
- 2-3 Super restore flasks
- 3-4 Overload flask or Extreme magic flasks or Super magic flasks
- A Rune/Dragon pickaxe or 100+ Dreadnips (a toolbelt pickaxe will also break TokHaar-Ket-Dill's armor; Dreadnips are a very effective way to kill Dills without needing to break the armor as they can hit through it)
- An extra War tortoise or Pack yak pouch (in addition to having one summoned at the start filled with food)
- A Drygore mace or Chaotic maul or the best crush weapon you can afford.
- 12-15 Rocktails/Rocktail soup
Note: It is recommended to leave at least two free inventory spaces for picking up Constitution and Restoration crystals (see See Lava crystals section below for more information).
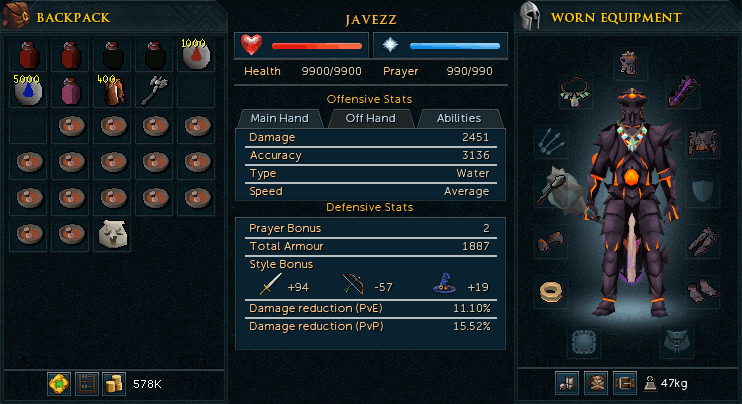
Example Setup and Inventory:
Fire Cape Sacrifice:
To be able to start this minigame, you must first sacrifice a Fire cape to TokHaar-Hok by allowing him to tear it apart. This is a one-time sacrifice and will grant you permanent access to the kiln.
TokHaar Monsters:
There are 10 different TokHaar of varying difficulty which you will face during the 37 waves of the kiln, ranging from the level 100 TokHaar-Hur to the level 800 Har-Aken.
| Image | Name | Combat Level | Life points | Attack Style | Weakness | Notes |
 |
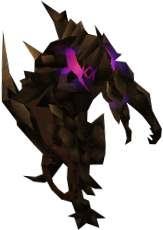
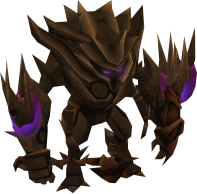
TokHaar-Hur | 100 | 4,000 | Melee | Water spells | These are the easiest monster to kill in the kiln, but can still deal a good amount of damage over time. However, they are easily trapped on the rock obstacles and can be maged over them. |
 |
TokHaar-Xil | 140 | 7,000 | Ranged | Crush | Their attacks are fairly inaccurate and they generally pose little threat to you. |
 |
TokHaar-Tok-Xil | 200 | 7,500 | Ranged and Melee | Crush | Their ranged attack is very accurate and can deal a large amount of damage in a short time, especially on the waves with multiple Tok-Xil. These should therefore be killed before anything else |
 |
TokHaar-Mej | 160 | 6,000 | Magic and Melee | Bolts | These use a surprisingly accurate melee attack up close and so should be attacked from a distance. Despite having a bolt weakness, magic still kills them effectively. |
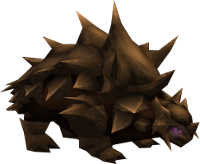 |
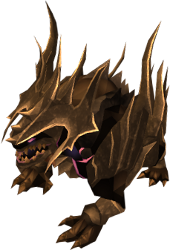
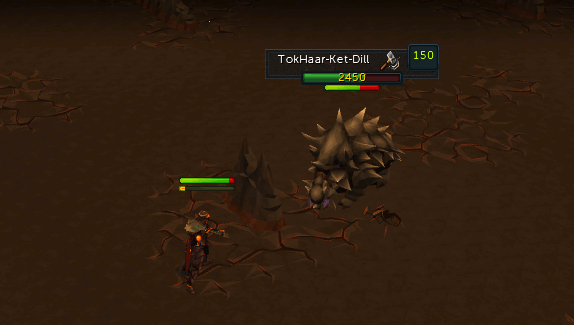
TokHaar-Ket-Dill | 120 | 6,000 | Melee | Crush | Before you can damage these, you must first break their armor with a pickaxe. These are possibly the most dangerous monster in the kiln (TokHaar-Jad can kill you in a single hit, but this threat is negated with protection prayers), especially on Wave 28 when several spawn at once.
Their main attack frequently hits 500+ with type-less damage that can't be reduced with protection prayers or an Invulnerability crystal and they also occasionally use a special attack that can hit over 1200. Therefore, it is highly recommended to get the Dill stuck on a rock obstacle and use Dreadnips to safely kill them as they can hit through the Dill's armor. |
 |
TokHaar-Ket-Zek | 400 | 15,000 | Magic and Melee | Bolts | These use a very accurate and long-range magic attack, but are generally not a problem as they will often get trapped behind the rock obstacles due to their huge size and can be dealt with last. Despite having a bolt weakness, magic still kills them effectively. |
 |
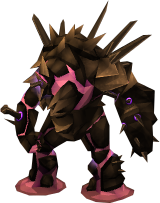
TokHaar-Yt-MejKot | 300 | 9,000 | Melee | Water spells | These are generally very easy to kill as they are very large and can be easily trapped on the rock obstacles and maged over them. Unlike their TzHaar cousins, they are not able to heal themselves or other TokHaar. |
 |
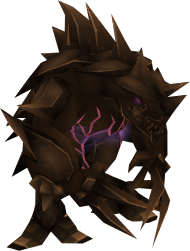
TokHaar-Ket | 180 | 8,000 | Melee | Water spells | Not a very dangerous monster, but should be killed fairly quickly. |
 |
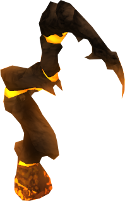
TokHaar-Jad | 780 | 40,000 | Melee, Range, Mage | None. | See TokHaar-Jad Battle section. |
 |
Magic Tentacle | 800 | 7,000 | Magic | None. | See Har-Aken Battle section. |
 |
Ranged Tentacle | 800 | 7,000 | Ranged | None. | See TokHaar-Jad Battle section. |
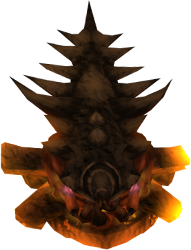 |
Har-Aken | 800 | 48,000 | Melee, Ranged and Magic | None. | See Har-Aken Battle section. |
Wave Breakdown:
| Wave | Monsters |
| 1 | 2 Xil, 1 Tok-Xil, 2 Hur |
| 2 | 2 Xil, 2 Tok-Xil, 1 Hur |
| 3 | 1 Xil, 3 Tok-Xil, 1 Hur |
| 4 | 3 Tok-Xil, 1 Mej |
| 5 | 1 Xil, 3 Tok-Xil, 1 Ket-Dill |
| 6 | 1 Xil, 3 Tok-Xil, 2 Mej |
| 7 | 1 Xil, 4 Tok-Xil, 1 Mej |
| 8 | 2 Xil, 1 Ket-Zek |
| 9 | 6 Xil |
| 10 | 1 Jad, 1 Tok-Xil |
| 11 | 4 Mej |
| 12 | 2 Mej, 2 Tok-Xil |
| 13 | 2 Mej, 1 Ket-Zek |
| 14 | 2 Mej, 2 Ket-Zek |
| 15 | 2 Ket-Zek, 1 Tok-Xil |
| 16 | 2 Ket-Zek, 2 Mej, 1 Tok-Xil |
| 17 | 2 Ket-Zek, 1 Mej, 1 Tok-Xil, 1 Yt-MejKot |
| 18 | 2 Ket-Zek, 1 Mej, 2 Tok-Xil, 1 Yt-MejKot |
| 19 | 8 Mej, 1 Ket-Dill |
| 20 | 1 Jad, 1 Ket-Zek |
| 21 | 12 Hur |
| 22 | 1 Yt-MejKot, 2 Ket, 2 Hur |
| 23 | 2 Yt-MejKot, 1 Ket, 2 Hur |
| 24 | 4 Yt-MejKot, 1 Tok-Xil |
| 25 | 1 Ket-Zek, 2 Yt-MejKot, 2 Tok-Xil |
| 26 | 2 Ket-Zek, 2 Yt-MejKot, 1 Tok-Xil |
| 27 | 1 Ket-Zek, 2 Yt-MejKot, 1 Tok-Xil, 2 Ket |
| 28 | 1 Ket-Zek, 6, Ket-Dill |
| 29 | 6 Yt-MejKot |
| 30 | 1 Jad, 3 Yt-MejKot |
| 31 | 4 Tok-Xil |
| 32 | 4 Yt-MejKot |
| 33 | 4 Ket-Zek |
| 34 | 1 Jad, 1 Yt-MejKot, 1 Tok-Xil |
| 35 | 1 Jad, 1 Ket-Zek, 1 Yt-MejKot, 1 Tok-Xil |
| 36 | 2 Jad |
| 37 | Har-Aken and Tentacles |
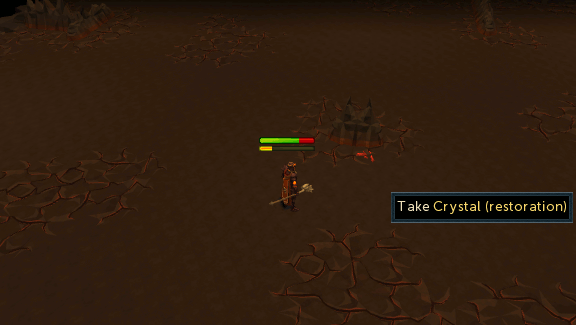
After completing certain waves, a special lava crystal will spawn in next to the middle rock. These crystals act as power-ups in the kiln and can make the later waves much easier to complete. It is recommended to only pick up the Constitution, Restoration and Invulnerability crystals as the Ranged, Strength and Magic crystals are of little use and can be detrimental as they halve your Defence. Note that only one crystal can be activated at a time.
| Image | Lava Crystal | Crystal Effect | Waves |
 |
Constitution | Boosts your Life points to a constant 15,000 for 3.5 minutes. | 11, 23, 35 |
 |
Invulnerability | Reduces all damage taken to 1 for 30 seconds (excludes the damage from a TokHaar-Ket-Dill). | 1, 13, 25 |
 |
Magic | Boosts your Magic level by 150% while reducing your Defence, Ranged and Strength levels by 50% for 3.5 minutes | 5, 17, 29 |
 |
Ranged | Boosts your Ranged level by 150% while reducing your Defence, Strength and Magic levels by 50% for 3.5 minutes | 7, 19, 31 |
 |
Restoration | Fully restores Life points and Prayer points. | 3, 15, 27 |
 |
Strength | Boosts your Strength level by 150% while reducing your Defence, Ranged and Magic levels by 50% for 3.5 minutes | 9, 21, 33 |
General Strategies:
Part 1: Wave 1-10
Wave 1 - 4
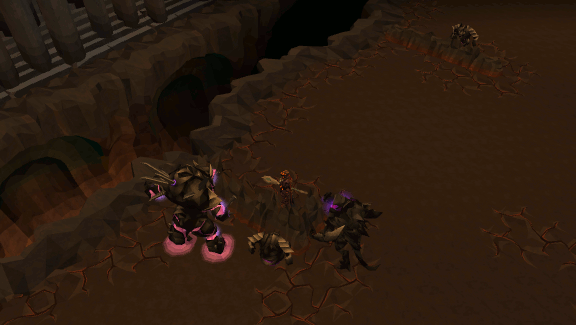
For these waves you want to position yourself in the curve of the L rock on the south side of the arena at the start of every wave (see image). When the wave starts, wait for the monsters to be lured towards you and they will all get trapped on the L-rock and another rock obstacle to the west, allowing you to deal with them one by one rather than being attacked all at once.
Wave 5
Wave 5 introduces the TokHaar-Ket-Dill and this is where you must be cautious. When the wave starts, stand at the L-rock and kill the other TokHaar. Once done, head north and look for the Ket-Dill which should be wandering around. If you have dreadnips, lure it towards the middle rock and stand on the opposite side to trap it and then spawn a dreadnip and start maging the dill (you won't deal any damage, but if you don't attack it, your dreadnip will disappear). Now just keep using dreadnips until the Dill is dead.
If you are using a pickaxe, DO NOT use protection prayers as they are ineffective and will cause the dill to constantly use a powerful special attack. It can take anywhere from 10-30 hits with your pick to break the armor, but after that it should be easy to finish it off. Just watch your health as they deal frequent heavy damage. You may want to try using a hit and run method to reduce the damage taken.
Wave 6-9
Return to the L-rock and kill the monsters in these waves as necessary.
Wave 10
As soon as you have cleared all monsters in Wave 9, position at the northeast corner of the rock in the middle of the area and wait for TokHaar-Jad and a TokHaar-Tok-Xil to spawn. They'll be lured towards you and get trapped on the rock, allowing you to step out and kill them individually. See below for more information on TokHaar-Jad.
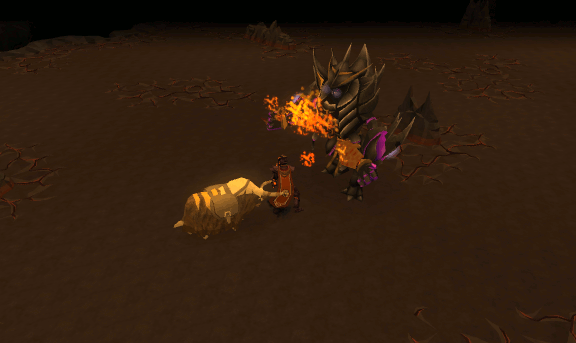
Much like his counter part TzTok-Jad in the TzHaar Fight Caves, TokHaar-Jad also uses the full power of the combat triangle and is capable of killing you with a single hit. However, they can actually be much easier to defeat as there is no TokHaar equivalent of TzTok-Jad's healers, Yt-Hurkot and they have significantly less health.
The key to killing the TokHaar-Jads lies with the rock in the middle of the arena. With the exception of wave 35, the TokHaar-Jads spawn in either the southwest or southeast corner of the arena and with you stood on the northeast corner of the rock, they will be lured towards you and get stuck due to their size and they cannot attack you over it. From here, you can either kill Jad first or kill any other monsters and then Jad, but either way you won't have to worry about being attacked by other TokHaar while fighting Jad and just need to make sure you prayer switch correctly.
Since you must have killed TzTok-Jad in the Fight Cave to access the kiln, you should be familar with Jad's attack animations, but here is a recap. His movements will indicate whether he is going to range or mage and you must react EXTREMELY QUICKLY by switching to the correct protection Prayer before the attack launches:
Mage Attack: TokHaar-Jad stands on his hind legs for a few seconds and he looks like he is actually forming a fireballs to shoot you with it you gotta protect from magic before the ball is sent on your way.
Range attack: TokHaar-Jad stands on his hind legs and stomps down on his front legs, an actual effect looks more like a shockwave coming out of his front legs which once they show you should switch to range protect in order to not get hit by his ranged attack.
TokHaar-Jad Spawns:
Here are the locations Where TokHaar-Jad will spawn for each wave:
- Wave 10 - Jad will spawn on the south west corner
- Wave 20 - Jad will spawn on the south west corner
- Wave 30 - Jad will spawn on the south west corner
- Wave 34 - Jad will spawn on the south east corner
- Wave 35 - Jad will spawn on the north east corner
- Wave 36 - Both Jad's will spawn on the south corners
Part 2: Wave 11-20
Wave 11:
4 TokHaar-Mej will spawn this wave protect from mage and start killing them one by one, using some Dreadnips will speed up the process of this wave.
Wave 12:
2 TokHaar-Me and 2 TokHaar-Xil will spawn in this wave. Make sure you're standing at the L-shaped rock safe spot to the south of the arena and activate Protect from Missile prayer. Kill the Rangers first and then start killing the Mages after switching your prayer. You must avoid tanking all the Mages at once.
Wave 13-14:
These are easy and safe waves by protecting from mage during this waves you will be able to finish them easily as long as you avoid getting into Melee range.
Wave 15:
Stand north-east and protect from range a TakHaar-Xil will spawn north kill it then switch to mage protect and start killing the TokHaar-Ket-Zets that are standing south of you but always avoid melee distance from those.
Wave 16:
Stand North-East of the Safe Spot 1 TokHaar-Xil and 1 TokHaar-Mej will spawn north kill the TokHaar-Xil first while protecting from range then switch to magic protection and start killing the TokHaar-Mej. The other monsters should get stuck south of the Safe Spot, follow the same stratagy, kill the TokHaar-Xil while protecting from range, and tanking the mage hits.
Wave 17:
2 TokHaar-Ket-Zek, 1 TokHaar-Mej, 1 TokHaar-Tok-Xil and 1 TokHaar-Yt-MejKot stand north-east of the platform before they spawn tank the Melee (Tokhaar-Yt-MejKot) and protect from range to kill the TokHaar-Tok-Xil after killing it switch to melee protect and kill the TokHaar-Yt-MejKot then protect from mage and focus on the ones left south. Start killing the TokHaar-KetZek that has the TokHaar-Mej on its side to avoid the range hits, then after killing this keep mage prayer and kill the ranger quickly to avoid high damages then start killing the rest which will be safe with mage protections.
Wave 18:
Protect from mage and kill the Tokhaar-Tok-Xil that will spawn north then start killing the TokHaar-Ket-Zek after finishing the ones in north the process goes the same as wave 17 for the ones left south.
Wave 19:
Stand North-East of the Safe Spot 8 TokHaar-Mej will spawn around the map one of them is north east which will have the TokHaar-Ket-Dil stuck behind it kill everything else then kill the TokHaar-Mej that has the TokHaar-Ket-Dil stuck, then lure it to a safe spot to use your Dreadnips and end it.
Wave 20:
Repeat the same process as wave 10.
Part 3: Wave 21-29
Wave 21-23:
After completing Wave 20, the lava surrounding the arena will have risen to the point that it starts to close in and you will have lost the outer rock obstacles. However, there are still one or two which can be of use, especially the one in the northeast. These waves are fairly easy, just turn on protect from melee and kill the TokHaar that spawn.
Wave 24:
Stand north-east of the Safe Spot and protect from range start killing the TokHaar-Tok-Xil then quickly switch to melee protect and kill the rest.
Wave 25:
Stand North-East of the Safe Spot and protect from range start killing the TokHaar-Tok-Xi then protect from melee kill the other monster that spawns north the TokHaar-Yt-MejKot then switch back to range protect and kill the TokHaar-Xil in south by keeping your distance from the melee ones. after killing it you can use soulsplit to heal from the melee ones and kill them.
Wave 26:
Stand North-East of the Safe Spot and protect from range kill the TokHaar-Tok-Xil then switch to melee and kill the TokHaar-Yt-MejKot then switch to magic protect and kill both of the TokHaar-Ket-Zek thats in south then use soulsplit to heal from the rest or simply finish them off.
Wave 27:
Stand North-East of the Safe Spot and protect from magic kill the TokHaar-Tok-Xil while tanking the hits you receive of it then kill the TokHaar-Ket-Zek then simply the rest are traped behind the Safe Spot start killing them and get ready for wave 28.
Wave 28: {Hard wave}
Stand north-East of the Safe Spot and once the TokHaar-Ket-Dill gets closer trap them behind them TokHaar-Ket-Zek and kill the TokHaar-Ket-Zek after finishing it of if you are using the dreadnips method start luring the TokHaar-Ket-Dill one by one to safe spots and send your Dreadnips to kill them, use your pickaxe using the hit and run method to break their armor.
Wave 29:
Put your melee protect on and kill them this should be done quickly.
Wave 30:
Stand north-East of the Safe Spot and protect from melee kill the monsters spawns north and pot-up/heal to face the 3rd TokHaar-Jad then simply follow the same step listed on Wave 10.
Part 4:
Wave 31-33
After Wave 30, the surrounding lava closes in further and you will just have a small square with the middle rock left.
Wave 31 Use protect from Range and kill all of the monsters, they all use ranged based attacks.
Wave 32 Use protect from Melee and kill all of the monsters, they all use melee based attacks.
Wave 33 Use protect from Magic and kill all of the monsters, they all use mage based attacks.
Wave 34:
Stand north-East of the Safe Spot and protect from range. Kill the TokHaar-Tok-Xil and pot-up again and get ready to fight TokHaar-Jad and simply repeat same instruction on wave 10.
Wave 35:
Start this wave by standing on the west side of the arena, lined up with the middle rock and wait for Jad to spawn on the northeast side and get stuck on the rock. Run south and kill the Tok-Xil and Yt-MejKot, then run back north and line up with the middle rock and run towards it. Kill the Ket-Zek and then finally kill Jad.
Wave 36: (Double Jads)
Stand North-East again of the Safe Spot they should be trapped behind the Safe Spot, Pick them off one at a time using the same method as wave 10.
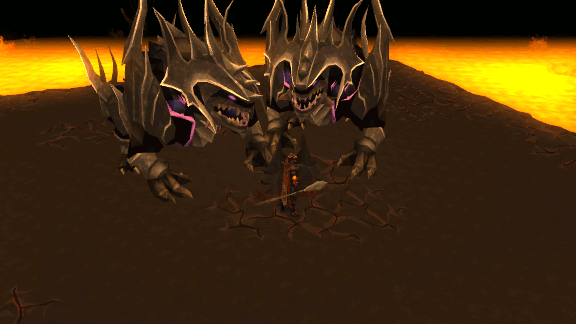
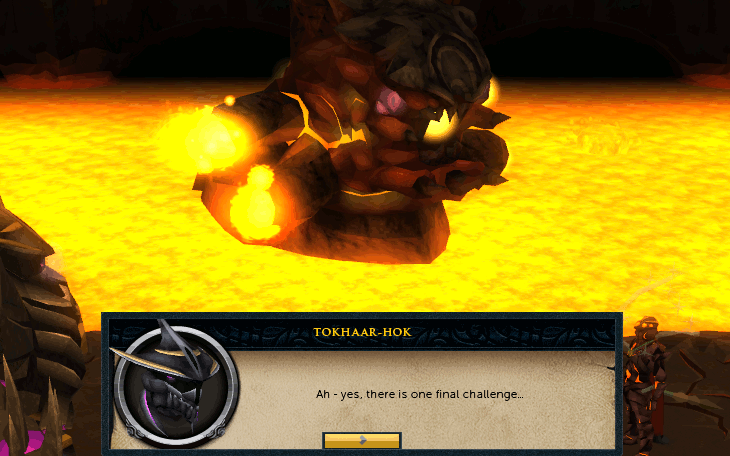
Wave 37: The final challenge
This is the final fight, Keep a clear head and follow the stratagy listed below and you will have your very own TokHaar-kal soon enough.
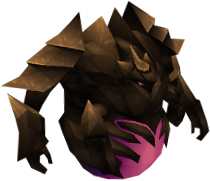
After completing wave 36, a cutscene will play in which TokHaar congratulates you on getting this far and then lets you know that there is one final challenge, defeating Har-Aken.
To kill Har-Aken, you must defeat the head which emerges from the lava for 27 seconds every 72 seconds. During the time that the head is submerged, it will attack you with its tentacles which use either Ranged or Mage from a distance or Melee up close.
If you have picked up and saved the Constitution crystals, then this fight will be significantly easier. When the wave starts, you can use one of these crystals to boost your Life points to a constant 15,000 meaning that you won't have to worry about taking damage or healing at all. The fight should take no longer than 10 minutes, so the three crystals should last more than long enough to kill Har-Aken.
As soon as the fight starts, you should run to the south side of the arena and watch for the head to emerge. It never appears on the north side so you can ignore that completely and watch the south, east and west. Build up your adrenaline on the Ranged and Magic tentacles while waiting for the head and once it appears, use a threshold or ultimate ability on it and then attack with as many basic abilities as you can before it submerges. Simply repeat this until the head is dead and a final cutscene will play, after which you can claim your reward.
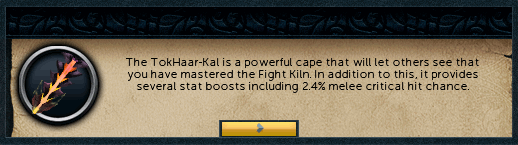
After defeating Har-Aken, TokHaar-Hok will offer you the choice of an Uncut Onyx, or depending on which combat style you dealt the most damage with, a TokHaar-Kal-Mej (Magic), TokHaar-Kal-Ket (Melee), or TokHaar-Kal-Xil (Ranged).
The TokHaar-Kal capes are the second best capes in each combat class after the Completionist cape and so it is highly recommended to claim this the first time you complete the kiln and then the onyx after subsequent completions.
This Minigame Guide was written by Arien, Sarooooo, Chaos Cool8, and Javezz. Thanks to Tabion360, Darkblitz, TintinOO7, Call Me Dawg, Jarkur, All Over, and Telle for corrections.
This Minigame Guide was entered into the database on Fri, Feb 24, 2012, at 11:23:55 PM by Darkblitz, and it was last updated on Mon, May 15, 2017, at 10:25:33 PM by ChathMurrpau.
If anything is incorrect or missing, or if you have any new information to submit to this database, please submit it to us on our Content Submissions Forums.
If you see this guide on any other site, please report it to us so we can take legal action against anyone found stealing our content. This guide is copyrighted by RuneHQ, and its use on other sites is expressly forbidden. Do not ask if you can use our guides or images, the answer is and always will be NO!
Print this page with images - Back to the Minigame Guide Index Page - Back to Top
