

Table of Contents:
- Daemonheim
- Dungeoneering Parties
- Inside the Dungeon
- Binding Items
- Prestige Running
- Rewards
- Fremennik Sagas
- Dungeoneering Journals
- Sinkholes
- Gorajo Cards
- Resource Dungeons
- Elite Dungeons
- Capes of Accomplishment
How to get there
Daemonheim is located near level 16 Wilderness. The peninsula can be reached through the following options:
- Take the ferry from either North West of the Al Kharid bank or South West of the Taverley bank. You will arrive at the port on the Eastern side of the peninsula.
- Walk through the wilderness. This method is risky, as you can be attacked by other players. The entrance is at level 11 wilderness. Once past the border guards, you are safe.
- Teleport using the Ring of Kinship's "Teleport to Daemonheim" option. This is only available after you have acquired the ring from the Dungeoneering tutor. See below for more about this item and where to acquire it.
- Teleport using a Scroll of Daemonheim.
- Step through the Dungeoneering portal located in the North East corner of the Prifddinas Tower of Voices.
The Dungeoneering Tutor
The Dungeoneering tutor is found outside of Daemonheim, just East of the bank. When speaking to him without owning a Ring of Kinship, he will immediately give you one. He can also give you a short tutorial on Dungeoneering and show you any journals you have found.
The Ring of Kinship
The Ring of kinship has several options.
- Open party interface - opens a new interface used to create parties, view your prestige, and set your floor and complexity level.
- Wear - equips the ring.
- Teleport to Daemonheim - teleports you to the peninsula; near the Rewards trader, South of the bank.
- Use - use the ring on another item - currently no known effect.
- Customise - upgrades Ring of kinship into a class ring of your choice; must be done within a dungeon.
- Destroy - destroys your Ring of kinship after a warning message. Can be reclaimed from the Dungeoneering tutor.
Once you have reached the island, there are two ways to train Dungeoneering: Solo or with a Team.
- Solo Dungeoneering: For this method you will simply complete floors by yourself. To solo, start a party with your Ring of Kinship and go down one of the two dungeon stairs.
- Team Dungeoneering: This way you will play with a team of 2 to 5 players. This option can be started by creating your own party, being invited to someone else's party, or by joining an auto-grouped party. See below for how to do these things.
Creating A Party
A party, which can contain up to 5 players, can be created by selecting the "Form Party" option on the Ring of Kinship. You are then allocated the position of "Party Leader".
Now, you will need to get players to join your party. This can be done either by right clicking a player and selecting "Invite" or by selecting the "Invite player" button, marked with green, and entering their name.
To invite people to your party, they must be on the same world and in the castle or on its grounds. Those players will then have the option to accept or decline your invitation. When a party has been formed, you may proceed to the next step.
Joining A Party
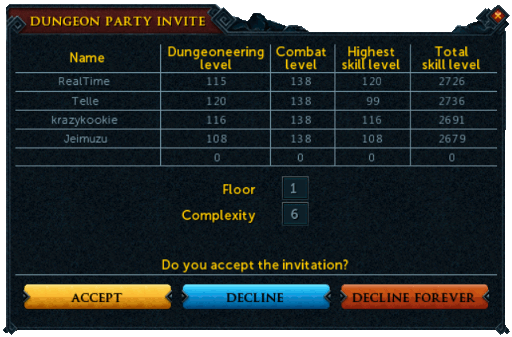
To join a party, you will have to be invited by a party leader. Once you get an invitation, click it and you will see the following menu. You will be able to see the stats of each person in that party and will be given 3 options. If you want to join the party, click the 'Accept' button, marked with green. If you do not want to join the party, click the 'Decline' button, marked with yellow. If you do not want to receive another invite from that player, you can select the 'Decline forever' button marked in red.
Auto-Grouped Parties
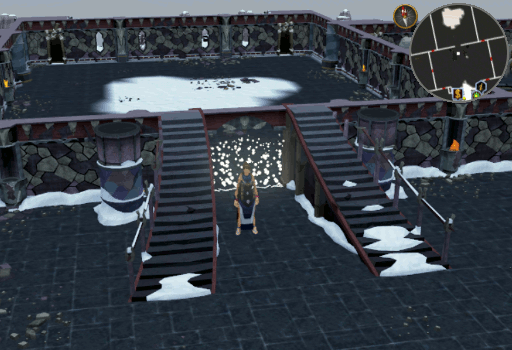
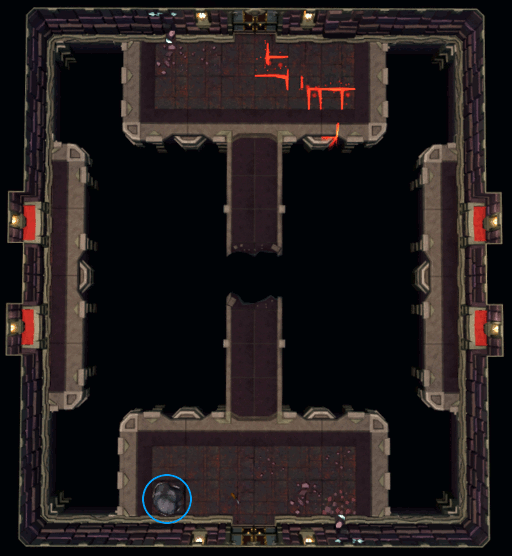
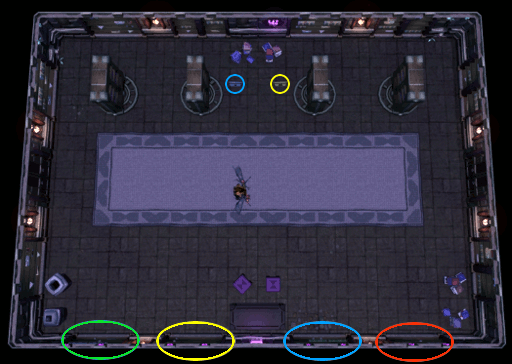
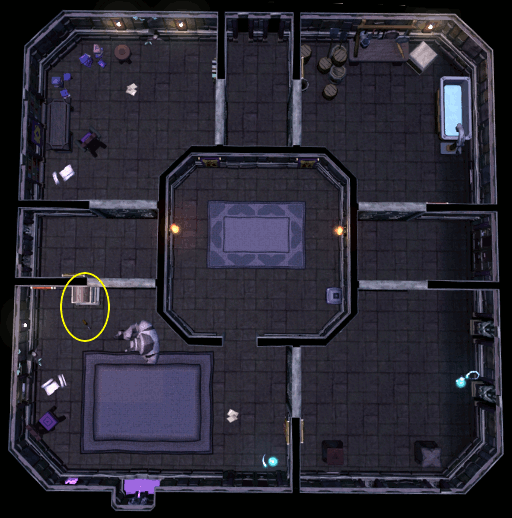
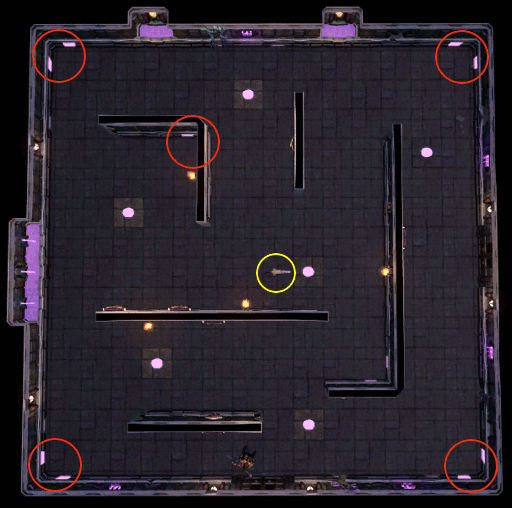
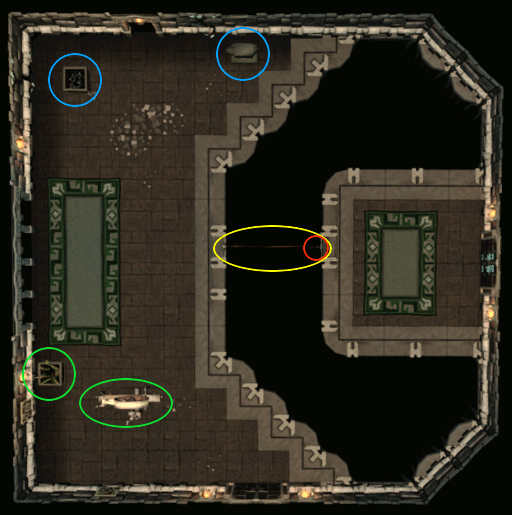
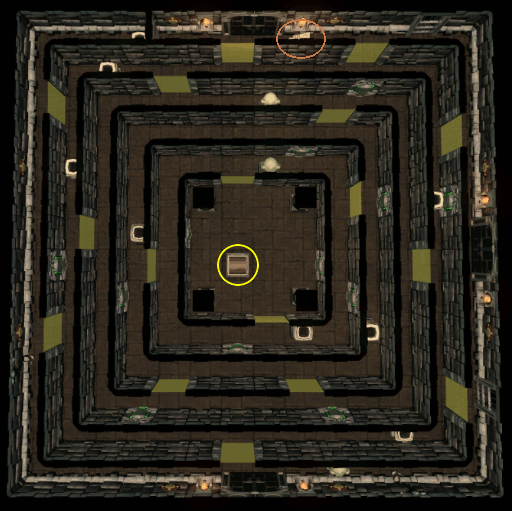
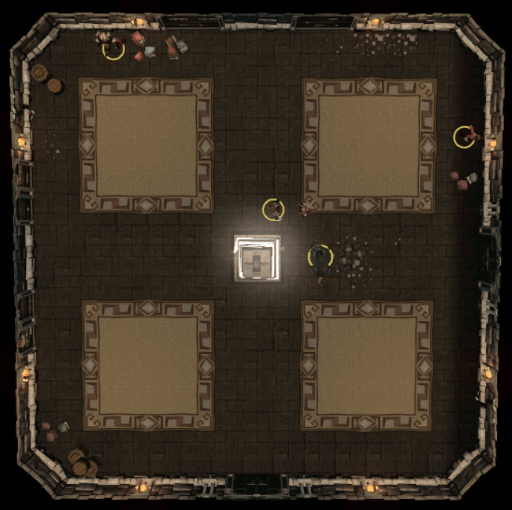
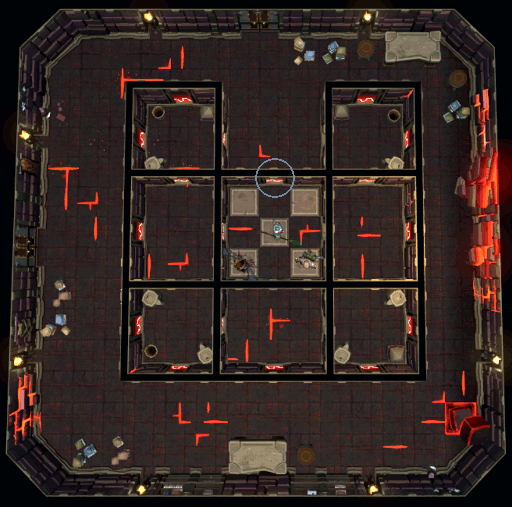
A second way to start team Dungeoneering is by joining an auto-grouped party. This is a party that is randomly created and will give you no influence on who you play with, your complexity, or what floor. To enter an auto-grouped party, you must enter one of the two types of grouping rooms. The first type has no Dungeoneering floor requirements and can be found between the stairs North of the Daemonheim castle entrance (see image). The second type has floor requirements as you will enter the themed rooms located around the main plaza of the Daemonheim castle.
Groups are formed every 30 seconds. If there are a lot of players waiting, groups are made according to skill level and the amount of rooms that players have access to. If there are very few people in a waiting room however, you are grouped regardless of skill level or the number of rooms you have access to.
The floor and complexity of a dungeon has to be unlocked by all players in a party. Therefore, the deepest floor and complexity available is determined by the least experienced player in the party. A disadvantage of this method is that the dungeon will always be set for a lesser number of players than you have, which will decrease the experience received. For example: if you have 5 people in your party, it will be set to only need 3 people.
Leaving A Party Or Dungeon
If you wish to leave your current party, open the Party interface and click the "Leave party" button, marked in red. If at any time you need to leave a dungeon, you can do this or climb up the dungeon exit ladder in the starting room. Before you climb up, a message will appear stating that you will not be able to rejoin the party. If you continue, you will be placed in a waiting room. To return to the ground floor of the castle, you need to jump off the ledge. If you have left your dungeon before finishing it, you will receive the experience earned so far in that dungeon when you jump down.
Kicking A Player
If needed, a party leader may remove a player from the party. However, to able to kick a player a majority vote will need to be taken to check if the rest of the team agrees with the decision. To start a vote, click on the Ring of Kinship and right-click the player's name. Select the "Kick" option and all the members of the party will receive a message asking whether they want the player to be kicked. If the majority agrees, the player will be kicked from the party.
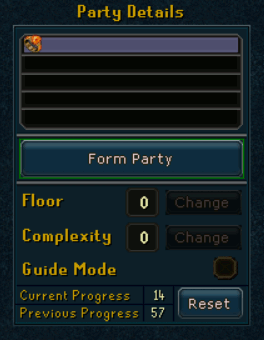
Now we will explore the Party interface. Once a single-player party or a manually created party has been created, the party leader will want to adjust several settings depending on what is desired for the group. This is not necessary for auto-created parties, as it is automatically decided for you. Should the leader not adjust these, it will default to their lowest unexplored floor and whichever complexity was last used. These options, from top to bottom, include: Shared Experience(yellow), Floor(red), Complexity(green), and Guide Mode(cyan).
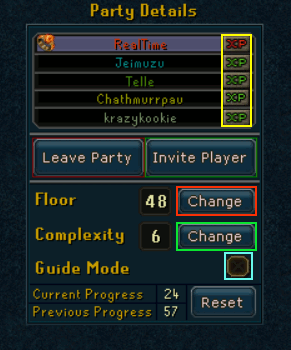
Shared Experience
The button next to each player's name, circled in Yellow on the above image, displays if they have turned this feature on or not. Red indicates that it is off while green indicates that it is turned on.
When turned on, that player will receive a share of the experience whenever a party member performs an action. The person who does the action will gain a larger share of the experience.
When it is toggled off, they will not gain experience from the actions of other members in the party. This is recommended for pures that wish to keep certain skills at a low level as you have no choice in which skills you will gain experience in beyond those set by the complexity.
Choosing A Floor
The just below the "Leave Party" and "Invite Player" buttons, marked in Red, is a button which allows you to open a new window where you can choose the floor level your party will explore. The deeper the floor you choose, the more dangerous it will become. Providing you with stronger monsters and bosses to defeat.
A floor can only be accessed if the floor above it has been beaten at least once and the player's Dungeoneering level is at least double the floor level. So, to access floor 25 for example, one must have beaten a floor 24 at least once and have level 51 Dungeoneering or higher. The deepest floor that can be attempted by a group is defined by the least experienced party member. Floors that have been explored by each player for their current prestige are marked by a check mark. Those that have not yet been explored will be a solid color. It is suggested to choose a floor that a majority of the group has not yet explored as you will each gain more experience.
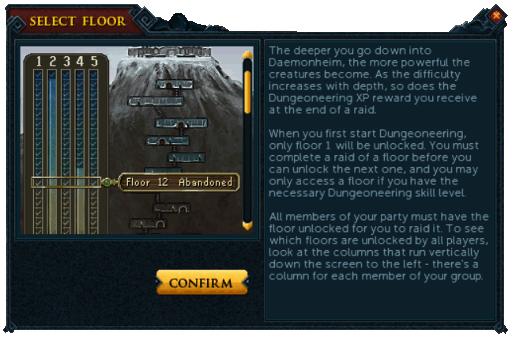
While exploring these floors, you will notice that the rooms are decorated in one of several different themes. For example, the first 11 floors have the "Ice" theme. Certain rewards(such as journals), monsters, and bosses can only be found within specific themed floors. The various themes that you will encounter, and how deep they are, can be seen in the table below.
| Theme | Floors |
| Frozen | 1-11 |
| Abandoned 1 | 12-17 |
| Furnished | 18-29 |
| Abandoned 2 | 30-35 |
| Occult | 36-47 |
| Warped | 48-60 |
Complexity Level
The button below the floor choice, this one marked in Green, opens the complexity menu. The complexity of a dungeon defines what skills will be tested while completing the dungeon. Complexity 1, for example tests, only basic combat skills and is very straightforward to beat. Higher complexities require more skills, thus making the floors more complicated to beat.
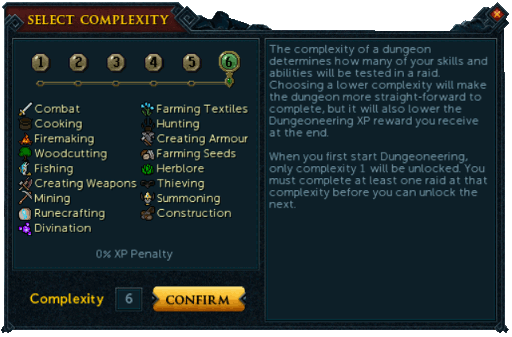
However, while the lower complexity floors are less complicated and can thus be completed more rapidly, they have the negative side effect of a hefty experience penalty. For example, complexity 1 carries a penalty of 50% which means that you will earn only 50% of the total experience possible after completing a floor. Below is a complete list of complexity levels, the skills that will be used, and the experience penalties.
| Complexity Level | Skills Needed | Experience Penalty |
| Complexity 1 | Combat only (Monster fighting) | -50% |
| Complexity 2 | Same as above + Cooking + Firemaking + Woodcutting + Fishing | -45% |
| Complexity 3 | Same as above + Creating weapons + Mining + Runecrafting | -40% |
| Complexity 4 | Same as above + Farming textiles + Hunting + Creating armor | -35% |
| Complexity 5 | Same as above + Farming seeds + Herblore + Thieving + Summoning + Construction | -30% |
| Complexity 6 | Same as above + Divination | 0% |
Guide Mode
Near the bottom of the Party Details interface, marked in cyan, is the Guide mode option which can be turned off or on.
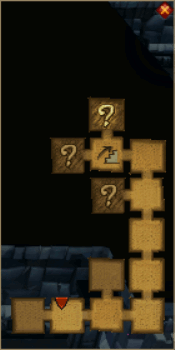
Turning this option on will cause the safest and quickest path through the dungeon to appear on your dungeon map as a highlighted route, shown below. Choosing to use this perk will also enact a 5% experience penalty for completion of the floor.
Choosing to have this perk off will make it so that you will need to explore the floor and find the boss room without hints to its location.
Progress and Reset
At the very bottom of the interface you will see your current floor progress (the number of floors currently completed), your previous progress (the number of floors last completed), and the "Reset" button. These are related to prestige and will be discussed farther below.
Now that the party has been created and set up as desired, the party leader must go through one of the 2 dungeon entrances. When they do, a window will appear where they can choose several floor settings:
- Hard Mode floor - only available if you have the Elite Daemonheim Achievements completed and the Daemonheim aura 4 obtained.
- Party size - up to the number of those present in the group. You do have the option to play a dungeon designed for fewer people, but it will come at the cost of an experience penalty. For example, you could have a party of 2 play in a dungeon meant for 1 person, but will suffer an experience penalty of 7%.
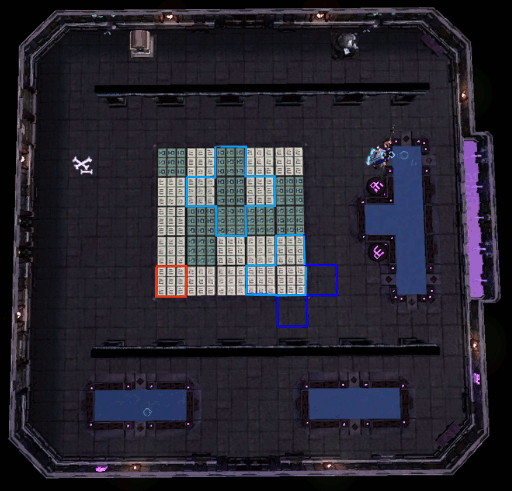
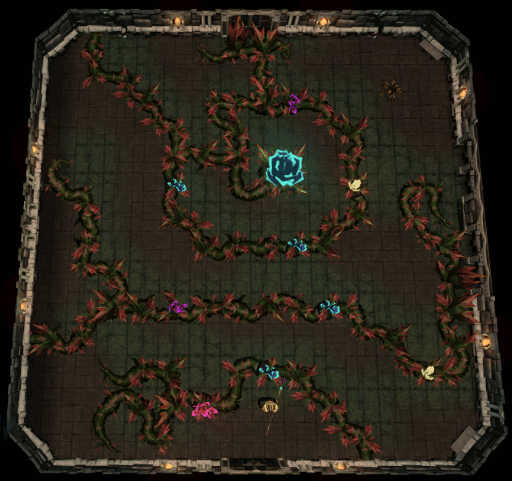
- Dungeon size - Small (Yellow), Medium (Red), or Large (Blue), see image below. Note: you can only create a Large dungeon with a party of 2 or more.

Once these options have been selected, you will be placed in the Starting Room where you can begin Dungeoneering. Alternatively, if you have and are wearing the Daemonheim aura 1 or better, you will be given the option to choose which boss you will face once per day. Your choice of which you will face depends upon your Dungeoneering level as well as which floor theme you will be accessing.
Be aware that most items in the game are not permitted within dungeons. As such, if anyone is wearing or holding contraband, or has a pet of some sort out, you (and anyone you may be with on a team) will not be allowed into a dungeon. ONLY the following items are permitted when Dungeoneering:
- Advanced pulse core
- Christmas pudding amulet
- Daemonheim aura (1, 2, 3, 4)
- Enlightenment aura
- Festive aura
- Gorajo cards
- Hellion aura
- Illumination aura
- Mad necklace
- Orb of oculus
- Pendants of skill and Prismatic pendants
- Pumpkin amulet
- Ring of Kinship
- Support monkey trinket
- Valentine necklaces
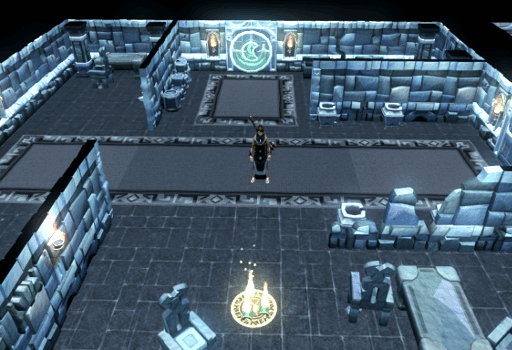
Starting Room
When beginning any dungeon, be it on your own or in a team, the first room you will appear in is the starting room. This is a safe room without any enemies where you can prepare yourself before entering other rooms or retreat to and restock with items if you are struggling in the dungeon. Furthermore, this room is where you appear when casting the Dungeon Home Teleport spell and where you will respawn if you die. For each new floor, the only thing that will not change is the lay out of the Starting room.
On one side of the room, you will see the exit ladder used to leave the dungeon. This will take you outside, after a warning message confirms that you wish to do so.
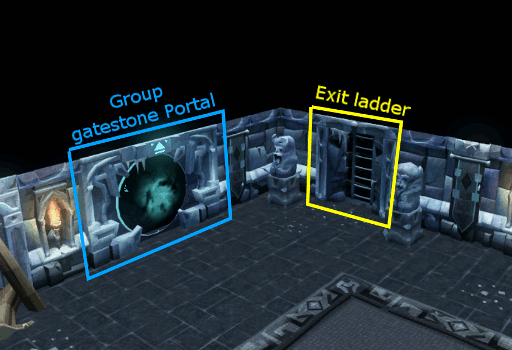
Often near this ladder you will find the group gatestone portal. This is related to the Group gatestone that the leader will find in their inventory at the beginning of a floor. By stepping through the group gatestone portal or using the group gatestone teleport spell, you will be able to teleport to the location of the gatestone. Be it in a player's inventory or on the ground. Once dropped on the ground, all team members will be able to see and pick it up. The gatestone allows you to travel to rooms far away from the starting room with little effort. The portal can be removed and replaced by a number of other features, requiring a certain Construction level to be built.
In one of the other corners, you will find a furnace and a number of anvils, marked in green and red respectively. Here, you will be able to smelt any ores obtained into bars and turn those into armor or weapons. The water trough next to the anvils will allow you fill any empty vials to create potions.
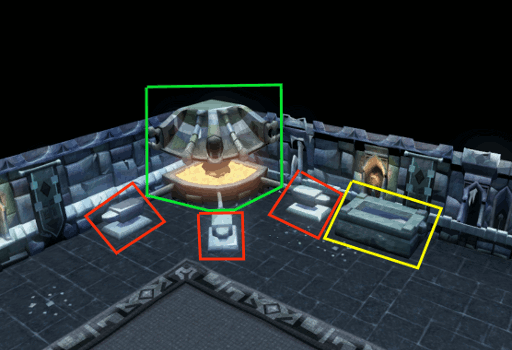
On one side of the room you will find an energy rift that can be used to create portents. Nearby is a Summoning Obelisk, marked in yellow, that can be used to infuse pouches. These pouches require a wide variety of items, ranging from hides to torn bags, in order to create them. Farther over is the Runecrafting altar, marked in green, which can be used to create runes and enchant staffs if you have the appropriate level to do so. And, lastly, next to the Runecrafting altar and marked by purple, is the Spinning wheel. Here you can use various plants, harvested or purchased, to create cloth; the resulting cloth can then be used with a needle and thread to craft magic armor.
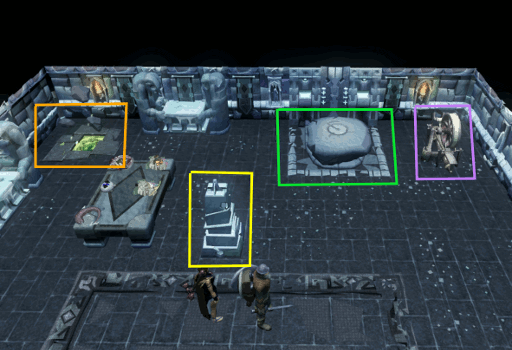
Near this area in the starting room, you will find a supply of armor, weapons, and food on the resource tables. You will also find several items in your inventory that are based on the complexity level you are playing. In complexity levels 1 and 2, you will have combat equipment of every type in your inventory. At higher complexity levels, you will receive less starting supplies. Complexity 3 will only give you armor in your inventory, while a small selection of weapons is available from the resource tables. Finally, at complexities 4 and above, you will start off with a small selection of weapons and armor on the resource tables, but with no supplies in your inventory. An exception to this is items that have been bound in previous rounds are available in your inventory on all complexities. For more information on about bound items, see the Binding Items section.
Items
Dungeoneering armor, weapons, and food are divided up into different tiers, which indicates the effectiveness. A tier 5 item will be more effective than a tier 3 item for example. Tiers range from 1 to 11; Free players can only create items up to tier 6, but can still find and use tier 7 items. Tier 11 items are members items and only obtainable as a reward for defeating a dungeon boss. Examining an item will show what tier it belongs to.
| Tier | Skill Level | Melee Gear | Magic Robes | Staffs | Ranged Armor | Bows |
| 1 | 1 | Novite | Salve | Water | Protoleather | Tangle Gum |
| 2 | 10 | Bathus | Wildercress | Earth | Subleather | Seeping Elm |
| 3 | 20 | Marmaros | Blightleaf | Fire | Paraleather | Blood Spindle |
| 4 | 30 | Kratonite | Roseblood | Air | Archleather | Utuku |
| 5 | 40 | Fractite | Bryll | Catalytic | Dromoleather | Spinebeam |
| 6 | 50 | Zephyrium | Duskweed | Empowered Water | Spinoleather | Bovistangler |
| 7 | 60 | Argonite | Soulbell | Empowered Earth | Gallileather | Thigat |
| 8 | 70 | Katagon | Ecto | Empowered Fire | Stegoleather | Corpsethorn |
| 9 | 80 | Gorgonite | Runic | Empowered Air | Megaleather | Entgallow |
| 10 | 90 | Promethium | Spiritbloom | Empowered Catalytic | Tyrannoleather | Gravecreeper |
| 11 | 99 | Primal | Celestial | Celestial Catalytic | Sagittarian | Sagittarian |
The Smuggler
Regardless of the complexity level, there will always be one person in the starting room: The Smuggler. He is there for several reasons:
- Identify and give hints about items found in the dungeon. This can be done using an item on him.
- Smuggling. When completing a dungeon, you are rewarded with several tokens which are smuggled out of the dungeon by him. This happens automatically and no action has to be taken by you. These tokens can then be traded for rewards at the Rewards trader.
- Trades items for Rusty coins. The higher the complexity level you are playing in, the more skill-related items will be available. Please see below for how to make money inside Daemonheim and see the Smuggler's information page for items he sells.
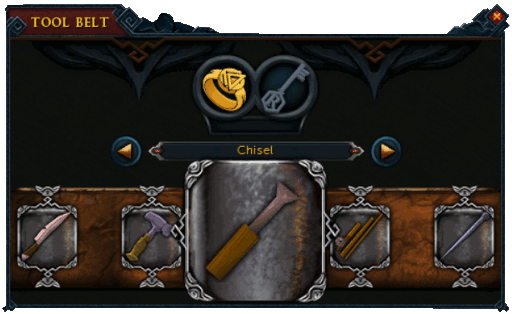
When entering a dungeon, you will automatically have certain tools with you on your toolbelt. These include:
The hatchet and pickaxe on the toolbelt are originally Novite quality, but can be upgraded by using "adding-to-toolbelt" on any other type of hatchet and pickaxe. If you add a higher level pickaxe or hatchet than you can use, it will act as one that you do have the level to use. For example, if you have a Gorgonite pickaxe bound, but your mining level is only 45, it will act as a Fractite pickaxe until you can use a Zephyrium pickaxe and so on until it reaches Gorgonite quality. The only things not on the toolbelt that you may need are feathers and vials. Thankfully, these can easily be bought from the Smuggler when necessary.
Some of the best teams include people that are willing to participate in all activities of the dungeon; they aren't afraid to skill and kill monsters. In some cases, however, people may not be well suited to the skilling or killing aspect of Dungeoneering due to lower levels on purpose (pures) or just being newer to RuneScape. There may even be instances where you complete dungeons with leechers in tow. Leechers are people who do nothing (short of puzzles that require their participation, such as levers and emotes) during the dungeon. If you intend to leech a floor, always remember to ask the team first.
Because it is possible to complete floors in a team, it is important to remember that communication is a very important skill to have. There will be several abbreviations that can be used within a team dungeon that an inexperienced person may not understand. These abbreviations are as follows:
Creating Groups:
| Abbreviation | Meaning |
| Frozen / Fr / Frz / Frzn | Frozen floors |
| Ab1 / Abd1 / Abdn1 / A1 | Abandoned 1 Floors |
| Furn | Furnished floors |
| Ab2 / Abd2 / Abdn2 / A2 / A | Abandoned 2 floors |
| O / Occ | Occult floors |
| Warp / W | Warped floors |
| High Warp / HW | Deeper level warped floors (often floor 57+) |
| C1 / Rush | Complexity 1 Dungeon where the intent is to get through them as fast as possible. |
| S / Sm | Small sized dungeon |
| M / Med | Medium sized dungeon |
| L / Lg | Large Floor (L may be also used for "leech"). This is the assumed size if one is not given. |
| F1, F2, F3, etc. / F15-20 | Floor numbers. |
| F##+1/2/3/4 or Ab1+1/2/3/4 | Number of people still needed to start a floor. Examples: F42/43 + 2 (2 more people needed for floors 42 & 43) or O/Warp+3 (3 more people needed for Occult and/or Warped floors) |
Common Phrases:
| Abbreviation | Meaning | Abbreviation | Meaning | |
| b / boss | "Boss" Usually called when found, often the Boss name is also said. |
bgt / buying / buy | "Buying group teleport/gatestone" Used to request that whomever has the group gatestone drops it so the caller can move it to another location. |
|
| bh / bht | "Boss Home" Boss is located just off Starting room. |
cgt | "Carry Group Teleport [gatestone]" Usually said by the host asking someone to carry the Group Gatestone along a specific path. |
|
| crit / critical / main / vital / vit path | "Critical path" Determined by experience gained from skill doors; 460-505 experience often means it is along the way to the Boss room. |
de | "Dead end" Can go no farther along said path. |
|
| denk | "Dead end no key" No key found at the end. |
dewk | "Dead end with key" Key found. May be followed by which key if someone has gated the door. |
|
| g1 / g2 | Personal gates 1 and 2 Used to identify which gate has been used. |
g2 [X] / gate 2 [X] OR [X] g2 / [X] gate 2 | Personal gates 1 and 2 left in a specific location Used to identify which gate has been used for a specific door missing a key. pur sh g1 OR g2 gr tri (see next table for door abbreviations) |
|
| gd | "Guardian door" Door requires all monsters in the room killed before it will open. |
gdm | "Guardian door marked" If possible, make your way to said room and help kill monsters. |
|
| gh x | "got herb x type" Usually used when the team is trying to make a specific potions. |
gt [lvl skill] / ggs [lvl skill] | "Teleport to the group gatestone and open the skill door mentioned" Example: ggs 99 Agil. Usually called out by lower leveled players who cannot open high leveled doors. Level and Skill should be announced or teammates can assess if they can help. |
|
| gt /ggs | "Group teleport" or "group gatestone" If used with no other abbreviations, they are for anyone not busy to teleport to it. |
gtb | "Group Teleport Boss" Gatestone has been dropped either inside or directly outside the Boss room. |
|
| gtc | "Group teleport clear" Anyone not busy should teleport to the group gatestone to clear help the room (ex. kill all monsters). Less common than gt or gtgd. |
gtd [X] / g8d [X] /gs [X] / gated [X] | "Personal gatestone dropped at X location" Typically a key door, though it may be a skill door that needs to have the gatestone moved to. |
|
| gte | "Group teleport end" Floor has been cleared to satisfaction, teleport to the gatestone so it can be finished. |
gtgd / ggsgd (and other variants) | "Group teleport, guardian door" Requesting available people to teleport to the group gatestone and help clear a guardian door room. |
|
| hgt | "Hold group teleport/gatestone" Asking someone else to carry the gatestone, may be temporary or long term. |
hgte | "Hold group teleport for end" Whomever has the end door gated should hold the group gatestone and be ready to move it to the end when asked. |
|
| ht / base | "Home Teleport" Instructing someone to go to the start room or used to direct them to a location using the home/base as a reference point. |
me | "I've got it" Used to indicate they have/will place a personal gatestone in the nearby location. Often done when 2+ people enter a room with 1 or more key doors. |
|
| mgt [destination] or mgt [player] | "Move group teleport" Requesting someone to move the gatestone to a specific location. They will need to drop their own gatestone, teleport to the group one and pick it up, then teleport back to their personal gatestone. |
mgtb / sgtb | "Move group teleport to boss" Request that someone at or near the Boss room move the gatestone so others can join. Superseded by "mgte" if it is already dead. |
|
| mgte / sgte | "Move group teleport to end" Used to request that someone at or near the Boss room move the gatestone so the floor can be ended. Note the Boss should already be dead. |
nh | "no herb" Someone does not have an herb to make a potion. |
|
| path [door] | "Follow this path" Open the door mentioned and follow it until it ends. |
pgt | "Personal Gatestone Teleport" or "Path Group Teleport [Gatestone]" Referring to going back to your gatestone or instructing all team members to go to a specific path. |
|
| sgt / selling / sell | "Selling group teleport/gatestone" Requesting that someone moves the group gatestone. If nothing about a specific location is mentioned with it, the person with the most nearby doors should move the gatestone. |
skipping / melting | "Clearing a door, no potion/portent needed" Used when someone in the party is using the Gorajan trailblazer outfit or a Lock melter to skip/melt a puzzle/guardian room. |
About Keys & Their Doors:
| Colors | Shapes | |||
|---|---|---|---|---|
| Abbreviation | Meaning | Abbreviation | Meaning | |
| b / bl | Blue | co / crn / corn | Corner | |
| c / cr / crim | Crimson | cr / cres | Crescent | |
| go | Gold | d / di / dia | Diamond | |
| gr / grn | Green | p / pent | Pentagon | |
| o / or | Orange | r / re / rec | Rectangle | |
| p / pu / purp | Purple | s / sh | Shield | |
| s / si / sil / silv | Silver | t / tr / tri | Triangle | |
| y / yell | Yellow | w / we | Wedge | |
Note that these are just some of the more common abbreviations used within Dungeoneering. If you are ever not sure what someone means, simply ask.
When Dungeoneering, you will not able to take any items from Gielinor with you. Similar to the world outside of the dungeons, you can use the skills you have trained to obtain raw materials and then use them to produce armor, weapons, food, and others items. For more information on how each skill will aid you in Dungeoneering, refer to our skill guides:
- Construction
- Cooking
- Crafting
- Divination
- Farming
- Firemaking
- Fishing
- Fletching
- Herblore
- Hunter
- Magic
- Mining
- Runecrafting
- Slayer
- Smithing: Smelting and Creating
- Summoning
- Thieving
- Woodcutting
Money Making Inside Daemonheim
The main use for money within Daemonheim is to buy items from the Smuggler. Luckily, there are several different tricks that can be used to help get you a good supply of Rusty coins.
- ALWAYS alch anything you want to trade for money, don't sell it to the smuggler. Alching items will give you double the money selling to the smuggler would.
- Don't just sell or alch raw materials, always process them first. Some examples include:
- If you have logs, fletch them into a bow or a staff. If you can, turn your staff into an enchanted staff for even more money.
- Turn ores into bars, then weapons or armor.
- Turn charms into a summoning pouch - the highest bloodragers can give a lot of money.
- If you're selling food, make it a potato version rather than just the fish/crab.
- Open all chests you find. Some chests don't give any money at all, while others can relinquish 150k. Even if they don't give you money outright, they quite often give charms and herbs that can speed up your dungeon (making potions without having to grow herbs) or give you money (alching the charms).
Within a dungeon, your main goal is to open as many rooms as you can. For some of these you will be lucky enough that they will just open. Other doors may require you to kill all monsters in the room before it will open ( "Guardian door" ) or to collect a specific key, use a certain skill, or even complete a challenge. Below will explain how to unlock these various types of doors.
A number of doors involve the use of Dungeoneering "keys". There is a total of 48 different keys that can be found in any dungeon, though the max you will come across in any one dungeon is around 20-30. Keys can be found in any room excluding the boss room and will match up to a door found in the dungeon. When you pick up a key it goes into a storage that you can see in the top left corner of your screen. Any player in your party can access this and, therefore, any player can open a key door once the party has the key. Simply click "unlock" on a key door to use the key and unlock the door.
Within the dungeon there are also doors that require the use of one of your skills. The specific doors that you may encounter depend upon the complexity level you have chosen. Note that it is possible to fail any one of the doors and take high damage (up to in excess of 5,000), so be sure to have an extra supply of food just in case. Thankfully, the damage can be reduced by certain skiller class rings.
The level requirements and experience rewards you get for each door will vary. Sometimes you might not have the necessary levels to get past them. For example, some doors might require you to have a level of 102 in a particular skill. You can however use potions to temporarily boost your level, a Beguiling smoke devil card, a Portent of passage, Lock melter in order to open the door. Alternatively, you can consume a dose of Perfect juju dungeoneering potion before going Dungeoneering.
| Required Skill | Door Image | Potion Used to Boost | How to Make |
| Agility | 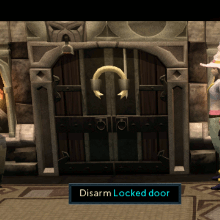 |
Survivalist | Firebreath whiskey and... |
| Construction | 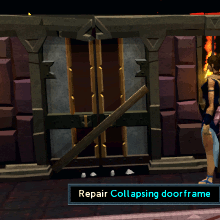 |
Artisan | Red moss and... |
| Crafting | 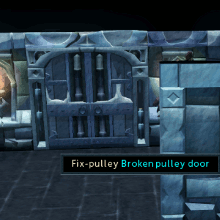 |
Artisan | Red moss and... |
| Divination | 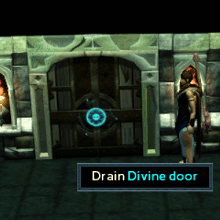 |
Gatherer | Red moss and... |
| Farming | 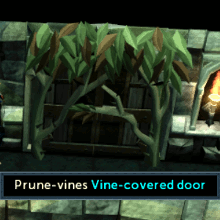 |
Naturalist | Misshapen claw and... |
| Firemaking | 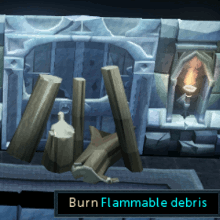 |
Artisan | Red moss and... |
| Herblore | 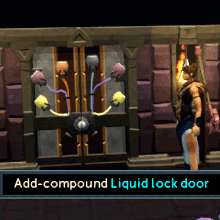 |
Naturalist | Misshapen claw and... |
| Magic |  |
Magic | Void dust and... |
| Mining | 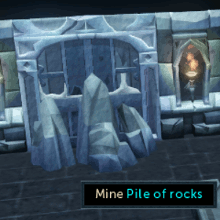 |
Gatherer | Red moss and... |
| Prayer |  |
N/A | No potion will boost your Prayer level. You must unlock using a method listed above. |
| Runecrafting | 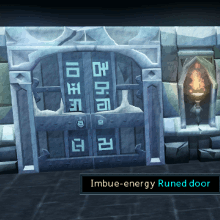 |
Naturalist | Misshapen claw and... |
| Smithing | 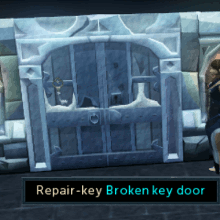 |
Artisan | Red moss and... |
| Strength | 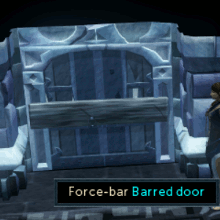 |
Melee | Misshapen claw and... |
| Summoning | 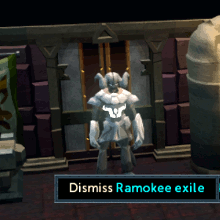 |
N/A | No potion will boost your Summoning level. You must unlock using a method listed above. |
| Thieving | 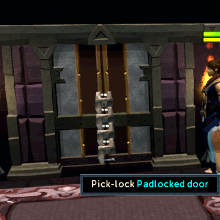 |
Survivalist | Firebreath whiskey and... |
| Woodcutting |  |
Gatherer | Red moss and... |
In order to pass a door challenge, a skill requirement is always involved; the specific requirement and the experience reward will vary. Note that sometimes you might not have the necessary levels to solve the puzzles. For example, some may require you to have a level of 102 in a particular skill to complete. In order to attain this level and complete the challenge, you will need to use a potion. But fear not, a room that is necessary to reach the final boss can always be completed by someone in the team. Therefore, it is always possible to finish a dungeon. Below you will find how to solve all the challenge room puzzles that you may face and how to solve them.
Agility room
- This room requires a specific Agility level which will vary from room to room.
- If your level is not high enough, you will need to create a Survivalist potion to complete it.
- Free players can face, but not complete, this challenge room.
- There are 2 different layouts for this challenge room, but the obstacles remain the same. You will need to:
- Step over grooves.
- Jump under a blade.
- Pass large spinning blades - these will hit for around 500-600 damage, but can be avoided by walking along the wall farthest from the blades.
- Jump over a swinging pendulum.
Barrel room
- This room requires specific Strength and Construction levels which will vary from room to room.
- If your levels are not high enough, you will need to create a Melee and/or Artisan potion to complete it.
- Free players can face, but not complete, this challenge room.
- When you enter the room, you will need to push past the first few barrels to enter the main area of the room (orange path). Pushing barrels can be done by clicking them; right-click to use the pull option. Now in the main section of the room, you will need to choose which side you want to enter the back area by (red or yellow paths). One of the chests in the back section will contain loot while the other will have a banana. You will have a 50/50 chance of accessing the loot chest. Once you have decided which side you wish to go through, push/pull the first barrel to the side, then push the second barrel back. This will grant you access to the opposite side's chest and the barrel piece which you must now use on the broken barrel in the main section of the room.
Once you have fixed the broken barrel, you will need to push and pull it to align with the water-flow along the wall (circled in blue). Follow the stream as it moves until the barrel is full. Then you will need to move it onto the pressure pad just beyond the water to unlock the doors.
Complete the Bridge challenge rooms:
Keystone bridge
- This room requires specific Mining, Crafting, and Construction levels which will vary from room to room.
- If your levels are not high enough, you will need to create a Gatherer and/or Artisan potion to complete it.
- Free players can face, but not complete, this challenge room.
- When entering this room, you will see a chisel on the floor and a mining block near the door (circled in blue). Mine to receive a piece of stone and then carve it into a keystone. Use this keystone on the gap in the bridge to complete it and you will be able to cross.
Plank bridge
- This room requires specific Agility and Construction levels which will vary from room to room.
- If your levels are not high enough, you will need to create a Survivalist and/or Artisan potion to complete it.
- Free players can face, but not complete, this challenge room.
- Jump over the missing part of the bridge. Then take 5 planks out of a nearby crate and use these to fix the bridge. This will make it easier to cross for you later or for your party.
Statue bridge
- This room requires specific Mining, Construction, and Strength levels which will vary from room to room.
- If your levels are not high enough, you will need to create a Gatherers, Artisan, and/or Melee potion to complete it.
- Free players can face, but not complete, this challenge room.
- Mine a block from the mining rock (circled in red) and use it to fix the broken statue near the gap (circled in blue). Once fixed, you can push it onto the pressure pad next to it (yellow X). A bridge will then slide out, allowing you to cross.
Winch bridge
- This room requires specific Crafting, Smithing, Ranged, and Strength levels which will vary from room to room.
- If your levels are not high enough, you will need to create an Artisan, Ranged, and/or Melee potion to complete it.
- Free players can face, and complete, this challenge room.
- Grab a broken grapple and some meatcorn from the crates in the room. Use the anvil to repair the grapple (both circled in blue) and the spinning wheel to spin the meatcorn (both circled in green) into rope. Use the rope and grapple on each other, then click the other ledge to throw the grapple across the gap (circled in red). Then use the winch (circled in yellow) to pull the bridge back across so you can cross.
Books room
- This room does not require any specific levels.
- As such, it can be completed by anyone.
- This is a Members only challenge room that only appears on Occult floors.
- Watch for the books flying between the book cases. The goal is to match up the colored books to their same colored bookcases. To do this, turn the small bookshelves around. When they are facing each other, the books will swap between them. Once you have the correct book in the case across from its shelves, face them towards the bookcases in the wall to have the books fly into them. The books will not come back out if they are in the correct bookcase.
Collapsing room
- This room requires specific Mining and Construction levels which will vary from room to room.
- If your levels are not high enough, you will need to create a Gatherers and/or Artisan potion to complete it.
- Free players can face, and complete, this challenge room.
- This room is shaped like a cross and down each corridor you will find several piles of rocks. You will need to mine through them to reach the desired side(s) of the room. Next to the smaller rocks you will find support beams (circled in red) that you will want to repair. Doing so will stop more rocks falling down on this spot, potentially damaging you, but is not necessary to complete the room.

Complete the Statues challenge rooms:
Multiple statues
- This room requires specific Mining and Crafting levels which will vary from room to room.
- If your levels are not high enough, you will need to create a Gatherers and/or Artisan potion to complete it.
- Free players can face, and complete, this challenge room.
- There are three, four, or five statues in this room that do not have any weapons. You must equip them with weapons to defeat the statues that stand opposite them. Mine rocks from along the wall then grab the chisel and use it to craft weapons; if you are having issues finding the rocks, look at your minimap. The location will be a red line along the wall, much like doors are. If the statue is facing a statue wielding...
- a sword, craft a staff for it
- a staff, craft a bow for it
- a bow, craft a sword for it
Three statues
- This room requires specific Mining and Crafting levels which will vary from room to room.
- If your levels are not high enough, you will need to create a Gatherers and/or Artisan potion to complete it.
- Free players can face, and complete, this challenge room.
- One of the three statues in the room will be missing their weapon; you must make and equip it on them. Mine rocks from along the wall then grab the chisel and use it to craft weapons; if you are having issues finding the rocks, look at your minimap. The location will be a red line along the wall, much like doors are.
- if the mage is the one missing the weapon, craft a staff for it
- if the ranger is the one missing the weapon, craft a bow for it
- if the warrior is the one missing the weapon, craft a sword for it
Crystal Lodestone room
- This room requires a specific Magic level which will vary from room to room.
- If your level is not high enough, you will need to create a Magic potion to complete it.
- Free players can face, and complete, this challenge room.
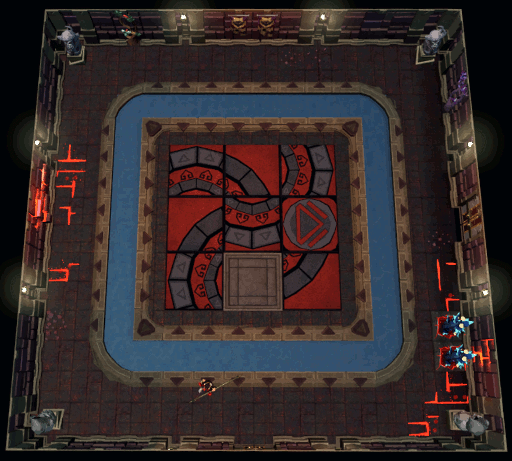
- Make sure all 4 lodestones in the corner of the room are turned on; this is indicated by them illuminating 1 of 4 colors and a matching light traveling to the center of the room repeatedly. You need to make these 4 lights reach the center stone at the same time. To do this, you step on or walk across the pressure plates (marked with an X for each color) to stop a light from moving, when you step off it will resume its trip to the middle. Use this method to match up the four lights so they reach the center stone together.
Damaged construct room
- This room requires specific Crafting, Runecrafting, and Magic levels which will vary from room to room.
- If your levels are not high enough, you will need to create an Artisan, Naturalist, and/or Magic potion to complete it.
- Free players can face, and complete, this challenge room.
- Pick up the chisel then grab a rock from the chest next to it (circled in yellow). Look at the damaged construct next to it to discover what it is missing: an arm, a head, or a leg. Then use the chisel on the rock to create whichever piece is missing. Enchant the piece and attach it to the construct. Use magic to bring the construct back to life and he will walk around the room, opening the walls and giving you access to the doors.
Emote room
- This room does not require any specific levels.
- As such, it can be completed by anyone.
- Free players can face, and complete, this challenge room.
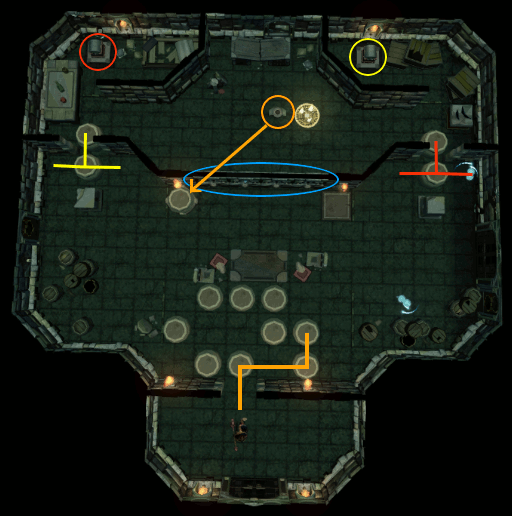
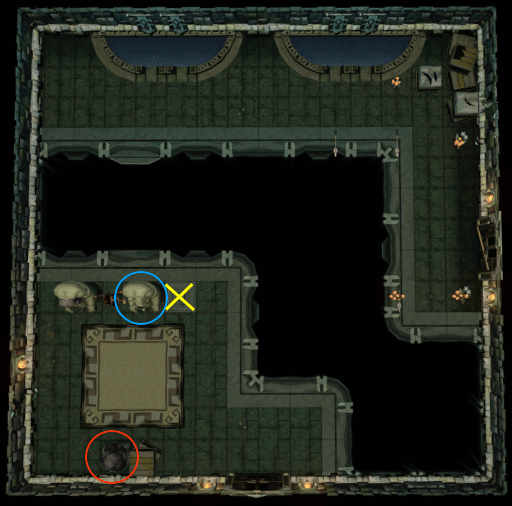
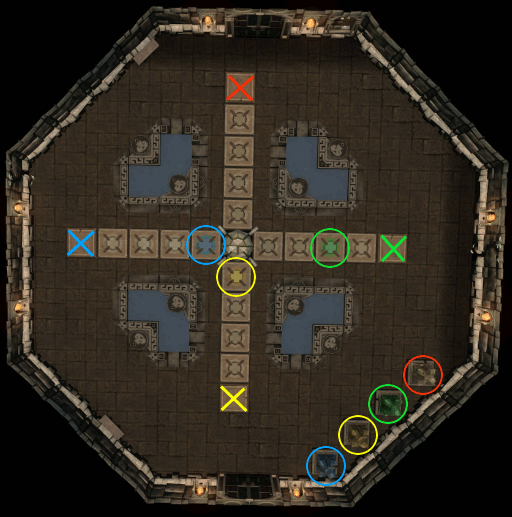
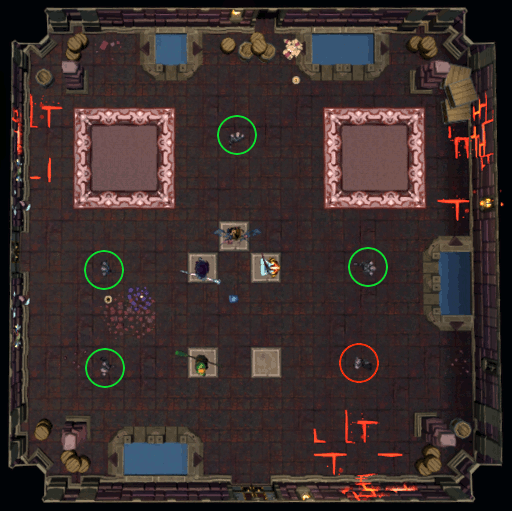
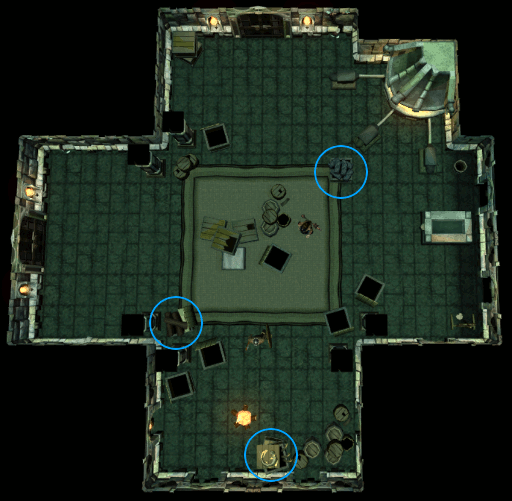
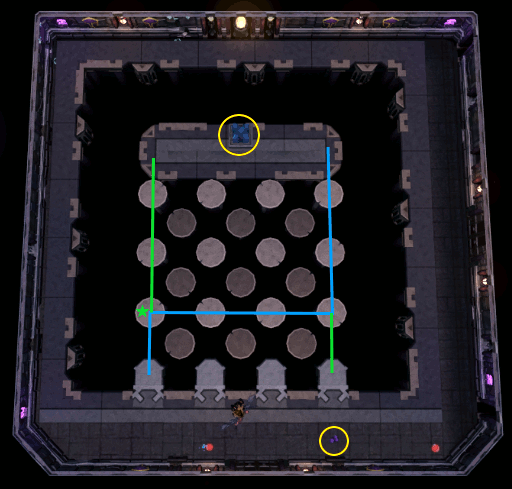
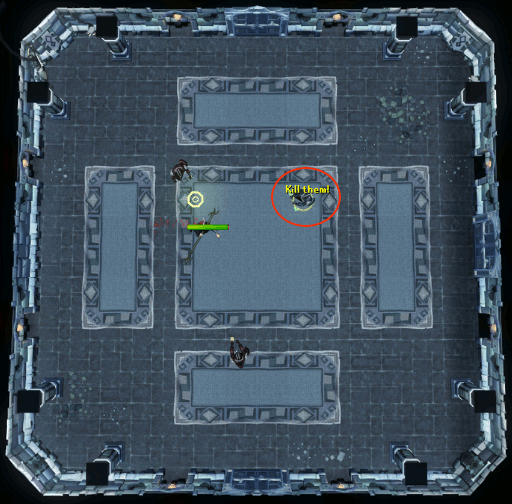
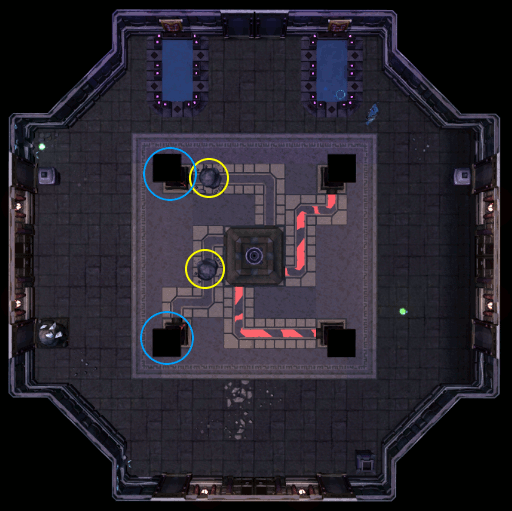
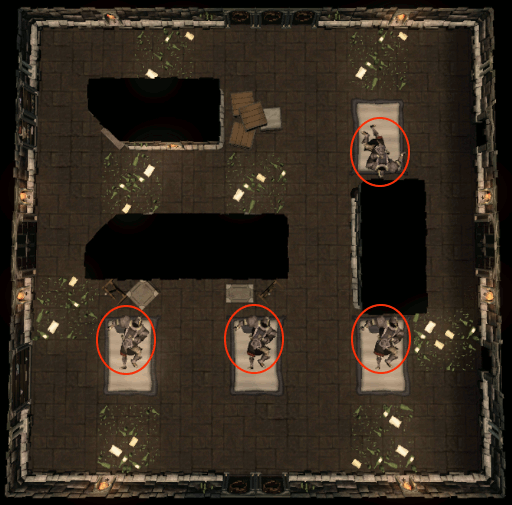
- There will be up to five statues, each facing a pressure pad. The number of statues depends on the number of players the dungeon is set to; any unused statues will be broken. In the image below, the floor is set for a 4-man group; the broken statue is circled in red. Each player must stand opposite a working statue and copy the emote that it uses, three times. You will have a short amount of time to see and copy the emote. If you take too long or do the wrong emote, the statues will attack everyone in the party. You can avoid this damage by stepping off the pressure pad. Once you have successfully performed all 3 emotes, wait for the statues to say you may pass before stepping off your pad. Moving too early will make it so you must once again perform 3 emotes.
Ferret challenge rooms:
Color coded ferrets
- This room does not require any specific levels.
- As such, it can be completed by anyone.
- Free players can face, and complete, this challenge room.
- In this room there will be several colored tiles on the floor and similarly colored ferrets running around. Your goal is to match the ferret to the tile. The ferrets will run away from you when you are 2 steps or less away from them, even diagonally. Therefore, you can herd them towards their tile fairly easily. If they get stuck, you can "scare" them which will cause them to run in a random direction. Only scare the ferret if they are stuck, as it makes them difficult to control. It is always a good idea to step back and plan where you are herding them to before doing anything.
Fishing maze ferret
- This room requires specific Fishing, Cooking and Ranged levels which will vary from room to room.
- If your levels are not high enough, you will need to create a Gatherers, Naturalist, and/or Ranged potion to complete it.
- Free players can face, and complete, this challenge room.
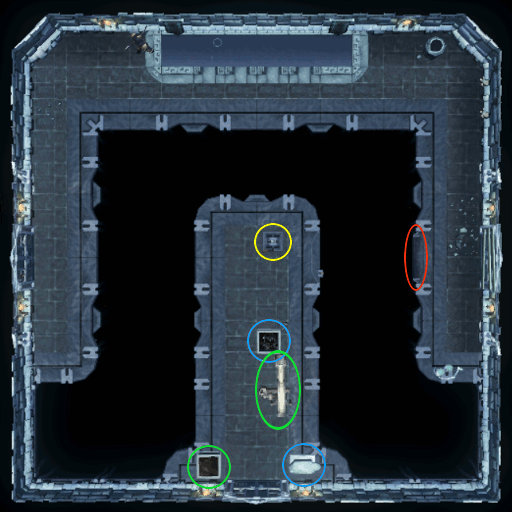
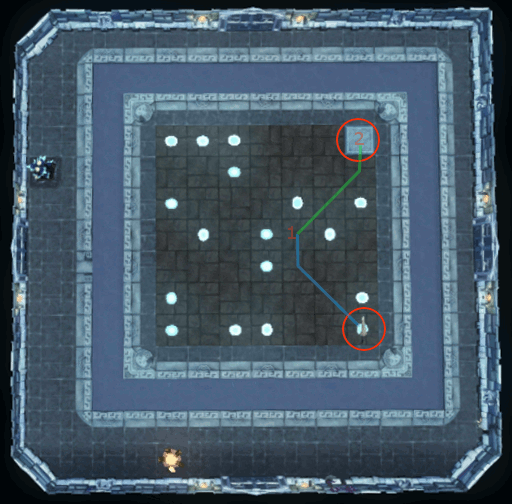
- The goal of this room is to throw cooked vile fish to guide the ferret onto the pressure plate in one corner. Start by looking at the map to plan how to get it there. The ferret will always run diagonally then straight, to get to where you throw the fish. You can usually do this puzzle with 2 or 3 vile fish; An example on how you could solve this puzzle is included in the image below. The first fish is thrown to spot 1 and the ferret will travel the blue path. Then the second fish is thrown on the pressure pad and the ferret will follow the green path. Note that if the ferret walks on to one of the small portals, it will be transported to a random location on the map.
Once you have decided on the best path to take, go to the nearby fishing spot and catch how ever many vile fish you need, plus 1 or 2 extra in case you burn them. Go to the fire pit and cook the vile fish. Then throw them on the maze to guide the ferret, remember to avoid the portals, onto the pressure plate. Once he is on it, the pressure will unlock the doors.
Hunting ferret
Regardless of the method used, Free players can face, but may not be able to complete, this challenge room. The ferret in this room will always run away from players and your goal is to catch him. The portals on the floor are locations where the ferret can appear after escaping through a portal located in each of the corners and one in the middle of the room (circled in red).
- Method 1
- This room requires a specific Hunter level which will vary from room to room.
- If your level is not high enough, you will need to create a Naturalist potion to complete it.
- This way requires at least 2, preferably 3 players. The best way is to trap him between 2 players and then one or both players can click on him to "catch" him. Be sure to use the walls to attempt to sneak up on him and make it easier to trap him between you. If you are successful, you will catch him and break the gem around his neck, opening the doors. If you are unsuccessful he will bite and stun you.
- Method 2
- This room requires a specific Hunter level which will vary from room to room.
- If your level is not high enough, you will need to create a Naturalist potion to complete it.
- This way requires 4 or 5 players. All but 1 of the players will stand in a corner while the last one will "chase" the ferret, attempting both to catch it as well as ushering it toward the other teammates to also try and grab. If you are successful, you will catch him and break the gem around his neck, opening the doors. If you are unsuccessful he will bite and stun you.
- Method 3
- This room requires specific Woodcutting, Fletching, and Hunter levels which will vary from room to room.
- If your levels are not high enough, you will need to create a Gatherers, Artisan, and/or Naturalist potion to complete it.
- Look on the wall for a tree and cut it to receive "dry sticks". You can then fletch these into a simple trap and set it up the escapes that the ferret will use. Scare him towards your trap(s) and hopefully he will get caught in it. Although this technically slower, it can be quicker if the ferret is hard to catch by hand or keeps stunning players. The best method is probably for a couple people to try and catch him while another makes and sets traps.
- Method 1
Flip Tile room
- This room requires a specific Runecrafting level which will vary from room to room.
- If your level is not high enough, you will need to create a Naturalist potion to complete it.
- Free players can face, and complete, this challenge room.
- The goal of this room is to make all tiles on the board appear 1 color, either yellow or green. To achieve this you must flip the tiles. You can either "Imbue" a group of 5 tiles (outlined in blue) or you can "Force" a single tile to flip (outlined in red). Note that if you "Force" a tile, you will be damaged; the amount of damage can be reduced with the Artisan or Gatherer Ring Customization.
You can choose to either Imbue/Force based on where the shape fits, and hope that you have little to no tiles to Force. Or you can choose to "chase" the tiles, resulting in no need to Force. To do this, choose a direction to be your top. From here, Imbue tiles in the second row to make the top row 1 color. Move down to the next row and repeat. When you get to the bottom you should have a few tiles left that are the wrong color. Depending on which tiles are a different color, you will want to Imbue specific tile(s) on the top row and then repeat the chasing of colors from the second row down.
In the images below: Purple represents the color you are aiming for (green or yellow), Light blue represents the opposite color (yellow or green, respectively), and the Dark blue is the tile that you want to IMBUE based upon the pattern of your bottom row.Remaining Wrong Color (Light blue) Image Imbue To Finish (Dark blue) N/A 
N/A B5 C5 E5 
A1 A5 B5 C5 
B1 A5 B5 D5 E5 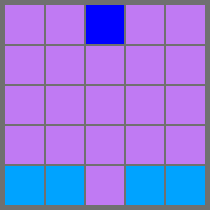
C1 C5 D5 E5 
D1 A5 C5 D5 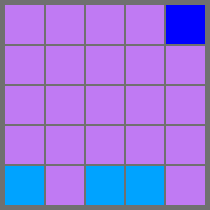
E1 A5 E5 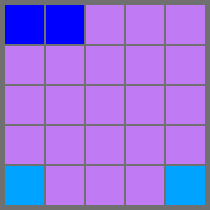
A1 B1 B5 D5 
A1 D1
Fremennik room
- This room requires specific Cooking, Fletching, and Smithing levels which will vary from room to room.
- If your levels are not high enough, you will need to create an Artisan and/or Naturalist potion to complete it.
- Free players can face, but not complete, this challenge room.
- You must help the barbarian in the room for him to unlock the doors. You will need to fletch the logs in one crate into bows, smith the bars into weapons next to the furnace, and cook the eels he has next to a fire. After doing these three tasks, the doors will be unlocked.
Ghosts room
- This room does not require any specific levels, general combat will suffice.
- As such, it can be completed by anyone.
- Free players can face, and complete, this challenge room.
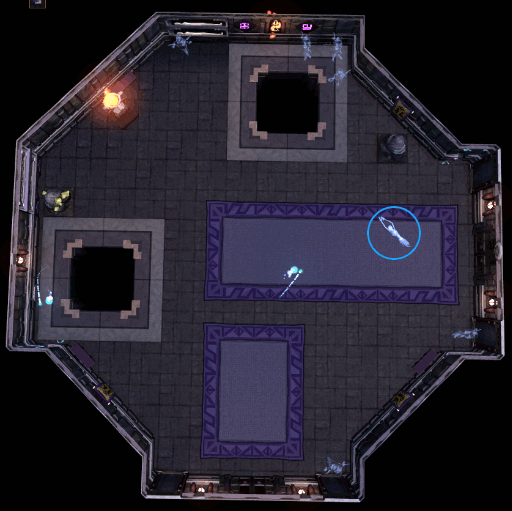
- In this room, you need to kill all of the ghosts to proceed. When you enter the room, wait a few seconds to see a small spirit fly between the ghosts (circled in blue). Whichever ghost this is inside will be vulnerable to attacks. The other ghosts can be killed without the spirit being inside of it, but it is very difficult to do. Once the ghost it was inside is killed, the spirit will move to the nearest ghost. While any style of attack will work, because the spirit can change bodies before the ghost has been killed, this room is most easily completed by using ranged or mage attacks.
Grapple rope room
- This room requires specific Crafting, Smithing, Ranged, and Agility levels which will vary from room to room.
- If your levels are not high enough, you will need to create an Artisan, Survivalist, and/or Ranged potion to complete it.
- Free players can face, but not complete, this challenge room.
- This room is very similar to the winch bridge puzzle, but does not have the bridge. You must take meatcorn and a broken grapple out of the crates, then spin the meatcorn into rope on the spinning wheel (both circled in green) and repair the grapple on the anvil (both circled in blue). Combine these items to make a grapple. Throw the grapple across the gap by clicking the far ledge to make a tightrope (circled in red). Cross the tightrope (circled in yellow) and everyone in your party will be able to cross, even if they didn't have the agility level.
Grooves room
- This room requires a specific Thieving level which will vary from room to room.
- If your level is not high enough, you will need to create a Survivalist potion to complete it.
- Free players can face, and complete, this challenge room.
- In this room, you will notice 3 rows of suspicious grooves across the floor. In each row there is only 1 safe path; see the 1st row for an example. There are two ways to complete this room.
First is the painful way, trial and error. Simply try walking over one of the sections, if it is safe you will just walk over it; if the tile has a trap in it, you will take 150-250 damage and need to check another in that row. The Barricade ability can help you use this method and not lose a lot of health while searching.
Second is the safer, though longer, route past the grooves. Right-click and "inspect" them. A 5 second animation will take place as your character tries to discover whether the grooves have a trap in it or not. If there is a trap, you will set it off and remain unharmed. If there is not a trap or if you are unsure, you will see no difference in the grooves, but will have a message in your chat box. If you are unsure if there is a trap in that location, just inspect it again.
Once the first person has made it past the traps, all who come through the room later can simply click on the far side of the grooves to automatically walk the safest route. Be aware that any traps which have not been set off will still be active and can be deliberately walked upon to cause damage.

Icy pressure pad
- This room does not require any specific levels.
- As such, it can be completed by anyone.
- Free players can face, and complete, this challenge room which can only be found on Frozen theme floors (1-11).
- You must maneuver across the ice, attempting to stand on the four pressure pads to unlock the door. This often takes diagonal movement. It is suggested to attempt coming up against the few items in the floor, since they are here to help you access the pressure pads. As there are no "official" patterns for this puzzle, you will need to asses each room you come to.
Note: If you have one of the full Gorajan trailblazer outfits in your bank, you will be able to walk across the ice as if it was a normal floor.
Lodestone Power crystal room
- This room does not require any specific levels.
- As such, it can be completed by anyone.
- Free players can face, and complete, this challenge room.
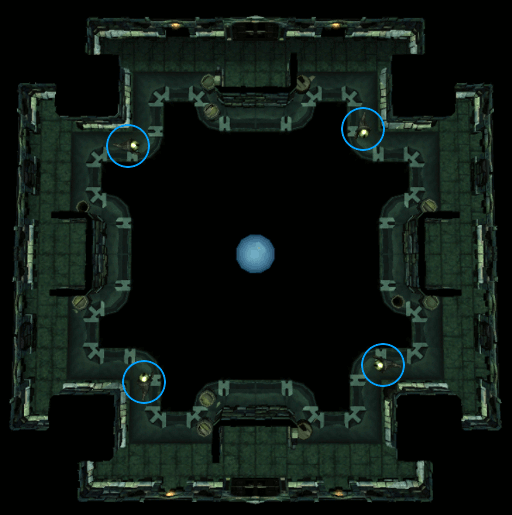
- In the center of the chasm you will see a small platform with a large crystal on it. You will need to grab the small crystal from the edge of the room and take it to this platform without getting hit by the orb that will form as soon as you step on a pillar. If more than 1 player is on the pillars, another orb will appear for each person. Getting caught by the orb will deal a pretty hefty bit of damage and return you to the "starting" position of the room.
Green path - The simplest method across the platform is to create a personal gatestone (or use the group gatestone, though this means someone can interrupt and summon a second light creature), jump onto either the farthest left or farthest right pillar and drop it (green star). Jump back to the main walkway of the room and walk to the far opposite side of the pillars. Jump onto the first pillar there, then teleport to your gatestone and continue to the platform. Repeat this process to get back to the main side unless you can teleport away using another gatestone (such as the group leader waiting by the now unlocked door) or you decide to just take the damage from the orb.
Blue path - Alternatively, you can jump up one pillar on the far left or right side, then jump all the way across to the other side before continuing up to the platform.
Levers
- This room does not require any specific levels.
- As such, it can be completed by anyone.
- Free players can face, and complete, this challenge room.
- In this room it is best for all the players that the dungeon has been set up for to be present as the timer on the levers depends on this. If it is designed for one person, you will have enough time to run around the whole room, pulling all 5 levers on your own. If the dungeon is set up for 5 people, it is best if all 5 are present. It is possible to do it with fewer than the required people by 1 or 2 pulling multiple levers, typically those closest to each other, but it won't be easy. Each person should stand at their lever with one person calling out when everyone should pull it. A common way to do this is for the dungeon leader to call "1, 2, 3" and everyone pulls their lever on 3, or for everyone to pull on 3 without a count; be sure to specify so there is no confusion in your group. If the levers are not all pulled in time, gas will be expelled from them, hitting everyone near the levers. A way to escape the gas is to run into the middle of the room as soon as you have pulled your lever.
Maze room
- This room does not require any specific levels.
- As such, it can be completed by anyone.
- Free players can face, and complete, this challenge room.
- The aim here is to make it to the center of the maze to open the chest (circled in yellow). At the entrance is a lever (circled in orange) that when you pull it, will start a countdown. At the end of the countdown, toxin will start to fill the chamber, hitting you for low damage very often. It is best to look at the maze before pulling the lever, deciding which route would be best as there are several obstacles around the maze that you cannot pass; using the freecam feature can be a great help to seeing the full maze, however, doing this in a team is difficult because when your team teleports or changes rooms, you will be kicked out of freecam view. If you do this, and figure out the correct path before starting, you will always get to the middle before the timer runs out.
Alternatively, if there is no key in the center of the room, you can opt to simply exit through the other door(s). Keep in mind that anytime you pass through this room later, you will take damage as the poison will continue to leak; the obstacles will also still be in place to hinder your passage. As such, be sure to have teleportation methods on either side of the room to help avoid the damage.
Mercenary leader
- This room does not require any specific levels, general combat will suffice.
- As such, it can be completed by anyone.
- Free players can face, and complete, this challenge room.
- The mercenary leader is a powerful mage who can summon other mages, rangers, and warriors to help protect him. There is no point in fighting the other NPCs who appear, as they will teleport away after a short duration. This can be a difficult room to beat, as you could get piled by around 10 enemies at any one time. The only thing you can do is protect/deflect mage and attack the mercenary leader. As soon as he is dead the other NPCs will teleport away after a short while, and then you can get through the doors. It is also possible to exit the room after killing the leader to just wait for the others to leave.
Monolith
- This room does not require any specific levels, general combat will suffice.
- As such, it can be completed by anyone.
- Free players can face, but not complete, this challenge room.
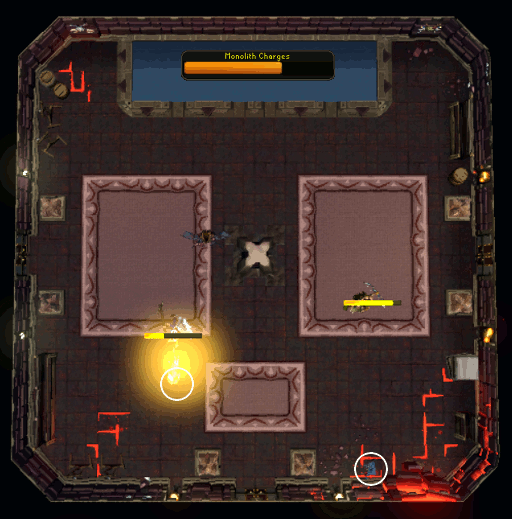
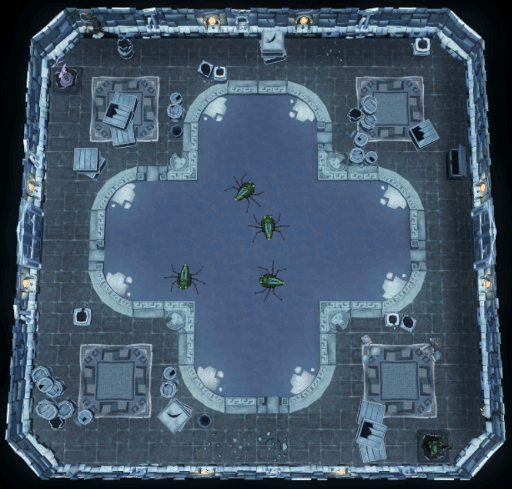
- This room requires you to protect the center monolith from shades that appear randomly while it is charging. This room often requires most, if not all, of your team to complete. Start off by charging the monolith, then wait for the mysterious shades to appear. They can vary from very low levels to the highest level, using both ranged and magic attacks. You must attack all shades that appear, ensuring they attack you and not the monolith while it is charging. If they attack the monolith, they drain its charges, making it take longer. Keep an eye on your minimap when waiting for them to appear as you will see their yellow dot before they appear. Once the monolith is fully charged, the monolith will open the doors, and any remaining shades will die.
Moving colored blocks
- This room requires a specific Strength level which will vary from room to room.
- If your level is not high enough, you will need to create a Melee potion to complete it.
- Free players can face, but not complete, this challenge room.
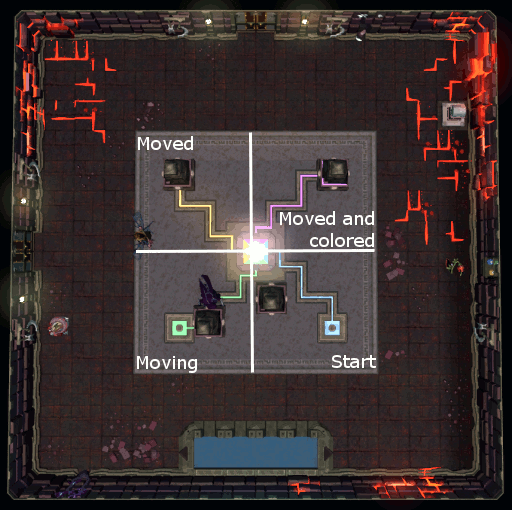
- When you enter the room, you will notice 4 colored streams that end in squares and 4 blocks near the center. Start by moving the blocks to cover the squares then look along the walls to find shelves; if you are having issues finding the shelves, look at your minimap. The location will be a red line along the wall, much like doors are. Take a bottle of each color and use them to appropriately color the blocks to match the color of the stream they cover. For example, the block on the yellow tile needs to be colored yellow. If you get one wrong, you can recolor it by using a different colored vial on it. Once all four blocks are colored correctly the doors will open.
The quadrants around the center show the different stages of solving this puzzle. The Top Right corner is how you want all 4 to appear.
Poltergeist room
- This room requires specific Herblore, Prayer, Firemaking, and Thieving level which will vary from room to room.
- If your levels are not high enough, you will need to create a Naturalist, Artisan, and/or Survivalist potion to complete it. Note that Prayer cannot be boosted.
- Free players can face, but not complete, this challenge room.
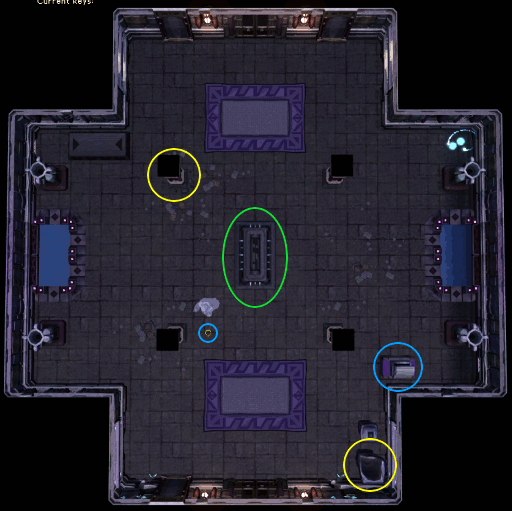
- First read the sarcophagus (circled in blue) to see which herb you need to pick. Then go to the farming patch (circled in green) and pick four of the correct herb. If you try pick an incorrect herb you will take damage. Once all four herbs are picked, clean them, then use them on the four censers (circled in yellow) around the sarcophagus and light them. Finally, open the sarcophagus for the ghost to disappear and the doors to unlock.

Pondskaters room
- This room requires a specific Fishing level which will vary from room to room.
- If your level is not high enough, you will need to create a Gatherer potion to complete it.
- Free players can face, and complete, this challenge room.
- Watch the Pondskaters as they gather in the middle: one of them will open its mouth to reveal a key. This is the Pondskaters you want to catch, however, it must next to one of the four fishing spots for you to catch it. If you try to fish the wrong Pondskaters, they will bite you, dealing moderate damage. Be careful, as the Pondskaters will often overlap and you have no way of knowing which one holds the key. The best way to counter this is to click on the Pondskaters when it shows the key and your character will run after it and attempt to fish it.
Ramokee room
- This room does not require any specific levels, general combat will suffice.
- As such, it can be completed by anyone.
- Free players can face, and complete, this challenge room.
- The Ramokee room is possibly one of the most dangerous rooms you can find in a dungeon and thus the one you are most likely to die in. The four Ramokee - Bloodrager, Deathslinger, Strombringer, and Skinweaver - work as a team to bring you down and you will need your team to be able to defeat them. It is advised to go in protecting/deflecting mage, as there are the two mages, the Skinweaver and Stormbringer. The Skinweaver will heal her allies as long as she is alive, so you should always kill her first. Then it is your choice who to kill next; the Stormbringer is usual, but this can change if you have a lot of mages in the room as well because you would still have to protect/deflect mage even if you killed her. The Bloodrager is normally left till last, as you can run away from him and bind him or trap him behind the summoning obelisk or another monster.
Repair fountain
- This room requires specific Mining and Construction levels which will vary from room to room.
- If your levels are not high enough, you will need to create a Gatherer and/or Artisan potion to complete it.
- Free players can face, but not complete, this challenge room.
- You need to return the flow of blood from the pillars to the fountain by repairing the pillars (circled in blue) and mining away the rocks (circled in yellow) that block the way. When all four streams of blood reach the fountain, it will start running again and the doors will be unlocked.
Riddle room
- This room requires specific Summoning and Thieving levels which will vary from room to room.
- If your Thieving level is not high enough, you will need to create a Survivalist potion to complete it. Note that Summoning cannot be boosted.
- Free players can face, but not complete, this challenge room.
- The Enigmatic hoardstalker (circled in red) will give you a riddle. There is one answer for every riddle and the answer involves an item which can be found behind the doors in the room. The items given to the hoardstalker do not have to be found in this room. For example: if the answer is coins, you can give him coins from your inventory. The list of answers to the riddles can be found below:
Riddle Answer Found in Room 1 Born through fire, I'm lost in winds and muddied in water. Ashes Sticks and stones may break me, exercise may ache me. Bones Though my friends fly high, I was always destined to protect. Novite kiteshield Found in Room 2 Remove my yellow skin, and dine on me within. Banana I am water that brings fire to your heart. Firebreath whiskey While many call me mould, some call me savoury. Mushroom Without me you cannot survive (OR) Without me you would perish,
but fill a room with me and you would surely die.Vial of water The slowest of assassins, I'm at home on your blade or in your drink. Weapon poison A serpent am I, yet on land I would die. Dusk eel
Short-finned eel
Salve eel
Cave moray
Found in Room 3 From your veins I flow, from essence did I grow. Blood rune Without me, a deathslinger is merely a gorajo with a stick. Bow string I can get you almost anything you want, but with no one to accept me, I am worthless. Rusty coins Though I'm light, I can not illuminate the dark. Feather I pluck the denizens of the sea, to serve a salty sailor's tea. Fly fishing rod The blunt force I provide is surprisingly constructive. Hammer Completed I can make you dead, but currently I have no head. Headless arrow I am cursed with but one eye. And from Haystacks I will spy. Needle I demonstrate faith in a dark god. Unholy symbol Sleeping brutes room
- This room does not require any specific levels, though good Combat and Thieving levels will be helpful.
- As such, it can be completed by anyone.
- Free players can face, and complete, this challenge room that only appears on Furnished floors.
- In this room you need to retrieve the correct key from the sleeping Brutes, but only one will have the correct key for each door. This can be done 2 ways:
- Thieving - You must walk within the room to avoid combat. Walking across the broken glass will keep you from waking the sleeping Brutes. Pickpocket each of the Brutes to obtain their key. Sometimes you may trip on some glass and wake them up anyway, but if you run across the glass you will definitely wake them and you will need to use the Combat method below.
- Combat - Run into the room and kill all 4 of the Brutes. Each will drop their own key and you must discover the correct one.
Sliding tiles
- This room does not require any specific levels.
- As such, it can be completed by anyone.
- Free players can face, and complete, this challenge room.
- In the center of the room you will find a jumbled image that you must unscramble. To do this, click one tile at a time to slid it in the open direction. This process will usually just take a few moves. When the image is correct the door will unlock. If you attempt to move the wrong tile, or if a player moves your tile before you, you will take damage.
Sliding statues
- This room does not require any specific levels.
- As such, it can be completed by anyone.
- Free players can face, and complete, this challenge room.
- In this room, you must slide the statues that are on the South side of the room to be in exactly the same position as the statues on the North side. You can push or pull the statues into place. If there are monsters in the room, it is easier to pull as you cannot push it onto one.

Seeker sentinel
- This room does not require any specific levels.
- As such, it can be completed by anyone.
- Free players can face, and complete, this challenge room.
- The goal here is to avoid being detected on your way to the other door. You will need to remain unseen by both by the Seeker sentinel, in the center of the room, and by the Sentinel spawns, patrolling the walkways. To avoid the Seeker sentinel, you must wait until he is not looking your direction - his gaze goes around in a clockwise direction - before you can run out. To avoid detection by the Sentinel spawn, you must run out behind them and left-click to subdue them. You will knock them out and can then run past them to the next safe point. If you are detected by any monster in this room, you will be teleported to a random safe point and be dealt a moderate amount of damage.
Unhappy ghost room
- This room requires specific Construction, Thieving, and Prayer levels which will vary from room to room.
- If your levels are not high enough, you will need to create an Artisan and/or Survivalist potion to complete it. Note that Prayer cannot be boosted.
- Free players can face, but not complete, this challenge room.
- Upon entering you will see a ring on the floor. Pick this up and put it back in the open chest found in the room (both circled in blue). Then, fix a pillar near the sarcophagus and the pot near one of the walls (both circled in yellow). Use your thieving to unlock the coffin (circled in green) and bless the remains inside. The Unhappy ghosts will do a dance, disappear, and unlock the doors.
Vines and Flower room
- This room requires specific Woodcutting and Farming levels which will vary from room to room.
- If your levels are not high enough, you will need to create a Gatherer and/or Naturalist potion to complete it.
- Free players can face, but not complete, this challenge room.
- Within this room you will find a giant flower surrounded by vines with small flowers along them. To unlock the door, you will need to uproot the large flower. To reach it, you will need to clear the small flowers and walk through the vines. In order to cut these small flowers the color of the large flower must match the one you are cutting down. If you are too fast, too slow, or get the color wrong, you will get hit for up to 250 damage. When you reach the giant flower, you can click to uproot it and the rest of the flowers will die off, allowing you through.
Warped maze
- This room does not require any specific levels.
- As such, it can be completed by anyone.
- This is a Members only challenge room that only appears on Warped floors.
- In this puzzle, be prepared to take damage because when you are inside the warped maze, you will take low damage every second. All members of the party need to reach the middle of the maze and there is no way to teleport in or out. You must choose a doorway and run in, trying different portals until you find the one that leads you to the middle. Once everyone is in the middle, they should stand on a pressure plate so the doors will unlock. To get out safely, use the portal that looks straight out (circled in gray) - it is the one portal that will go where you expect it to!
Once the first person has reached the center, it is possible for them to direct their teammates along the same path to the center.
In order to completely finish a dungeon, you must always defeat a final boss. The boss you will have to face varies based on the theme of the floor you are on and your Dungeoneering level. If you have and are wearing the Daemonheim aura 1 or better, you will be given the option to choose which boss you will face once per day. Your choice is still dependent upon your Dungeoneering level as well as which floor theme you will be accessing. The bosses are always more difficult than the average monster in a dungeon and will require a certain strategy in order to defeat. Below is a list of the bosses and their drops. For specific information on how to face one of the bosses below, click on their name to be taken to the Dungeoneering Bosses guide.
General Fighting Tips:
- Once you have entered a boss room, you cannot leave it through the door until the boss is killed. It is therefore advised to place a (group) gatestone right outside of the room and teleport to it when you are about to die. It is also recommended to leave resources needed for the fight near the gatestone. This will allow you to restock easily if are running out of resources or when you are about to die.
-
To prevent yourself from running out of Prayer points during the boss fight, you can use various potions or pray at an altar to replenish them. If the dungeon does not contain an altar, you can convert the Group gatestone portal into an Altar.
- To do this you will need: 75 Construction as well as 5 Bovistrangler branches and 5 Zephyrium bars (worth about 151K Rusty coins if bought from the Smuggler).
- Familiars can come in handy when fighting a boss. Some of the best familiars you can use are Bloodragers and Skinweavers. A Bloodrager is a simple Melee combat familiar, but its special attack scroll greatly lowers stats of an enemy, which makes it great for boss fights. Skinweavers are great to use because not only do they heal you with their scrolls, they also make food heal more (up to 30 extra Life points per food).
| Floor Theme | Floors | Boss | Level Required |
Members Only |
Drops |
| Frozen | 1-11 | Gluttonous Behemoth | 1 |  |
Boots |
| 1-11 | Astea Frostweb | 1 | |
Shoes and Wands | |
| 1-11 | Icy Bones | 1 | |
Knives and Vambraces | |
| 3-11 | Luminescent Icefiend | 5 | |
Daggers and Off-hand daggers | |
| 6-11 | Plane-freezer Lakhrahnaz | 11 | |
Gauntlets | |
| 9-11 | To'Kash the Bloodchiller | 17 | |
Mage gloves | |
| Abandoned | 12-17 30-35 |
Skeletal Horde | 23 | |
Helmets |
| 12-17 30-35 |
Hobgoblin Geomancer | 23 | |
Leather boots | |
| 12-17 30-35 |
Bulwark Beast | 23 | |
Hatchets and Pickaxes | |
| 15-17 30-35 |
Unholy Cursebearer | 29 | |
Staffs | |
| 30-35 | Shadow-forger Ihlakhizan | 59 | |
Kiteshields | |
| 33-35 | Bal'lak the Pummeller | 65 | |
Warhammers and Off-hand warhammers | |
| Furnished | 18-29 | Rammernaut | 35 | |
Mauls |
| 18-29 | Stomp | 35 | |
Coifs and Ranged shields | |
| 18-29 | Har'Lakk the Riftsplitter | 35 | |
Rapiers and off-hand rapiers | |
| 20-29 | Lexicus Runewright | 39 | |
Hoods and orbs | |
| 23-29 | Sagittare | 45 | |
Longbows and arrows | |
| 26-29 | Night-gazer Khighorahk | 51 | |
Plateskirts | |
| Occult | 36-47 | Skeletal Trio | 71 |  |
Shortbows and Arrows |
| 36-47 | Runebound Behemoth | 71 | |
Robe bottoms and Mage shields | |
| 36-47 | Gravecreeper | 71 | |
Chainbodies | |
| 39-47 | Necrolord | 77 | |
Chaps and Off-hand knives | |
| 42-47 | Flesh-spoiler Haasghenahk | 83 | |
Platelegs | |
| 45-47 | Yk'Lagor the Thunderous | 89 | |
Battleaxes and Off-hand battleaxes | |
| Warped | 48-60 | Blink | 95 | |
Longswords and Off-hand longswords |
| 48-60 | Warped Gulega | 95 | |
Robe tops | |
| 48-60 | Dreadnaut | 95 | |
Platebodies | |
| 51-60 | Hope Devourer | 101 | |
Leather bodies | |
| 54-60 | World-Gorger Shukarhazh | 107 | |
Spears | |
| 57-60 | Kal'Ger the Warmonger | 113 | |
2h swords |
Now that you have killed the Boss, you will receive any loot from it and see a ladder appear along one of the walls. Click it to complete your dungeon. A pop-up will appear asking if you are sure you wish to end the dungeon; choose yes and a timer will start, depending on how many are present in the dungeon. If it is a 5-person dungeon, you will see a message in your chatbox that reads "4 minutes until dungeon end." for example. Each additional person to indicate they wish to complete the dungeon counts as 1 minute on the timer. If you are in a dungeon solo, the next window will automatically appear after you confirm you wish to continue.
This window fills in step by step, taking approximately 30 seconds to fully appear. If you wish to have it show all at once, you will need to click the arrows in the top right corner of this window after each dungeon; it will be where the numbers are in the image below. Once it appears, you will notice that it gives you a breakdown of your dungeon efficiency and experience rewards. This is also the time that you will see an announcement in your chatbox if you have completed a Daily Challenge or obtained the Dungeoneering pet, Gordie.
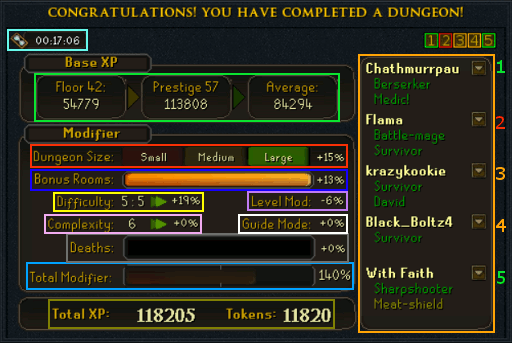
- Cyan - Amount of time it took to complete the dungeon floor.
- Green - Basic and prestige experiences you would receive for the floor. To the right of these is the average experience of the floor and is the experience you will actually receive.
- Orange - Names of the players who participated in the dungeon, along with their individual titles based on their performance (See the table below); clicking the arrow next to their name will display all titles earned by them for that floor.
- If you click the number in the top right corner that is associated with your name, you will indicate that you are ready to continue to the next floor - your number will turn green and the party will be able to continue sooner.
- Alternatively, if you wish to leave, you can right-click and choose "leave" - this will turn your number red and remove you from the dungeon.
- Red - Dungeon size. The larger the dungeon you play in, the greater amount of experience bonus you will get.
- Blue - Bonus room multiplier. The more rooms that you unlock and complete, the higher the experience bonus.
- Yellow - Difficulty ratio. If you are playing in a dungeon with multiple people when it is only designed for one person, you will receive an experience penalty.
- White - Level modifier. This number is based on how many monsters that you leave alive in the dungeon. Killing every single monster in a floor will grant you a nice bonus.
- Pink - Complexity modifier. If you select a dungeon that has a complexity level lower than 6, you will receive an experience penalty.
- Purple - Guide mode modifier. If the guide is turned on, you will receive an experience penalty.
- Gray - Death modifier. Every time you die, you will receive a -13% penalty.
- Light Blue - Total modifier. It will add up all the above modifiers and calculate the total experience and tokens you will receive.
- Gold - Total experience and tokens earned.
The Mathematical formula for experience gained is as follows:
Base = Completed floor experience + Prestige experience / 2
Adjusted = Base (1 - Penalty percent)
Final Experience = Adjusted (1 + Bonus experience percent)
Below is a list of possible titles that can be earned while Dungeoneering as well as how to obtain them.
| Title | Description | Notes |
| "A" For Effort | Attempted a number of skill tasks, but didn't complete a single one. | Attempt at least 10 skill tasks, and fail to do them. This title cannot be obtained while soloing if a required skill door is on the path to the boss. |
| Against All Odds | Killing a Boss with fewer than 10 life points left. | Deal the killing blow to a boss while on less than 10 life points. This title is most easily attained when fighting the Luminescent Icefiend. |
| Balanced! | You adopted Mod_Reece's stubborn nature by killing a Boss while close to death, but with plenty of food left. | Kill the boss while being as close to death as possible and having lots of food with you at the same time. The chance of obtaining this title is also likely high while fighting the Luminescent Icefiend and Warped Gulega. |
| Battle-mage | Most magic damage dealt. | Deal more magic damage than anyone else on your team. Dealing any magic damage in solo raiding automatically gains this title. Damage dealt while fighting bosses does not count. |
| Beast Mode | You displayed Mod_Mark's persistence by exhausting every resource on the critical path. | Deplete all resources that are in rooms necessary to reach the boss. |
| Berserker | Most melee damage dealt. | Deal more melee damage than anyone else on your team. Dealing any melee damage in solo raiding automatically gains this title. Damage dealt while fighting bosses does not count. |
| Clever Girl | Death by Bovimastyx. They never attack the same place twice; they remember... | Losing a fight against Bovimastyx. Be aware that this could take some time to attain. |
| Cliffhanger | You held on to your last string of life and completed the dungeon with an incredibly low amount of health. | Complete the floor with less than 10 Life points remaining. |
| Crafting Calamity | Attempting to fix a pulley and failing, killing the player. | Attempt and fail to fix a pulley while you have less than 10% of your Life points. |
| Crafting Catastrophe | Got killed trying to craft something with a chisel. | Attempt and fail to craft something while you have less than 10% of your Life points. |
| Culinary Disaster | Most food burned. | Attempt fail to cook lots of high level food on low level logs. |
| D.I.Y. Disaster | Victim of an unfortunate construction disaster. | Attempt and fail to fix a construction door or repair a collapsing support in the mining rocks room while you have less than 10% of your Life points. |
| David | Vanquished a superior foe. | Deliver the final blow to an enemy who has a combat level twice yours. Requires at least 2 players in the party. |
| Double K.O. | Kill a boss with Retribution. | Get boss to very low health, then activate Retribution prayer and let it kill you. Easiest to attain against the Luminescent Icefiend or Gravecreeper. Wrath or any other methods of double knockout such as poison will not work for this title. |
| Fishing Folly | Lost a fight with a fishing rod. | Attempt and fail to catch a vile fish while you have less than 10% of your Life points. |
| Gatherer | Gathered the most resources. | Gather more ores, logs, raw fish, etc. than any other player in your party. Requires at least 2 players in the party. |
| Glutton | Wasted the most food by over-eating. | Gather or cook plenty of food, and eat it with full Life points. Requires at least 2 players in the party. |
| Goliath | Fell victim to a vastly inferior foe. | Isolate an enemy that is less than half of your combat level and die to it; do NOT let anyone else help. Easiest to get against Lexicus Runewright, as his Tomes hit extremely hard for their level. |
| Ha-Trick! | You matched Mod_Trick's epic performance by getting 'Nothing Special' three times in a row. | Attain the 'Nothing Special' title three times in a row with the same team. Requires at least 2 players in the party. |
| I Can Has Heim Crab? | Like a true pro, you only ate heim crabs in the dungeon. | Eat at least 10 Heim crabs and ONLY Heim crabs. Eating with full Life points or after the boss is dead won't count. You may use healing prayers such as Soul Split when fighting boss. |
| I Choose You! | You developed Mod_Liono's passion for enslaving small creatures. | Summon 6 or more different familiars. You will need to dismiss each one before Summoning the next. |
| It's a Trap! | You teleported to the Group Gatestone, but died shortly after. | The player must teleport to the Group Gatestone and die shortly after. Note that you are not limited to dying within that room, you can leave that area. This can be easily attained at the Skeletal Horde boss if several skeletons are out and the player is the only one left in the room with low Life points. |
| It's Too Easy! | You equaled Mod_Benny's love of carnage by doing plenty of damage with melee, ranged, and magic. | Attained if you get the Berserker, Sharpshooter, and Battle-Mage titles at once. |
| Jack-of-all-trades | Completed the greatest variety of tasks. | Complete more skill challenges, kill more monsters, make more supplies, and open more doors than any other player in the party. Requires at least 2 players in the party. |
| Kill Stealer | Stole the most killing blows. | Steal more monster kills than anyone else in your team. Easy to get if you only attack when the monster is on low health or arrive late in a fight and use fast or high damaging weapons. Requires at least 2 players in the party. |
| Knuckle Sandwich | Dealt out damage, but never with weapons or spells. | Use your fists to attack monsters. Destroying the Bulwark Beast's shield with a pickaxe does not negate this title, as long as no damage is dealt with the pickaxe afterwards. Best completed in a larger team to minimize the amount of fighting you need to do. |
| Least Harmful | Dealt the least damage. | Deal less damage than anyone else on your team. The damage done must be below a certain threshold. Requires at least 2 players in the party. |
| Least I Ain't Chicken | Entered a Boss room while the rest of your party were in the start room. | When in a team, solo the boss while everyone else is in the starting room. Requires at least 2 players in the party. |
| Leecher | Did not contribute at all. | You must end the dungeon without earning any experience; this includes shared. You are still permitted to partake in puzzles that do not award experience, such as the Emote and Lever rooms. Requires at least 2 players in the party. |
| Master Chef | Cooked the most life points worth of food. | Cook more food than anyone else in your team. Cooking higher tiered food counts for more. |
| Master-of-none | Failed the most skill tasks. | Attempt and fail to do 10 skill tasks; make sure you receive damage from all of them. |
| Meat-shield | Most damage taken. | Tank more damage than anyone else in your team. This damage involves both combat and failing skill challenges. Requires at least 2 players in the party. |
| Medic! | You healed your teammates for the most life points. | Heal other team members, by using food on them, more than any other team member. Requires at least 2 players in the party. |
| Most Deaths | Exactly what it says on the tin. | Die more than anyone else in your team. If soloing, one death can trigger this title. |
| M.V.P | Most Valuable Player, most skills used. | In your team, be the player that solved more puzzles, used non-combat skills, and gained the most experience within the dungeon. Requires at least 2 players in the party. |
| Nine Lives | Died eight times and completing the dungeon on the ninth life. | Die eight times in a single dungeon; no more, no less. |
| Nothing Special | You did nothing to deserve any title, except this one. | Do not get any other titles. Die once to avoid Survivor, don't deal too much damage for any combat title, don't deal too little for Least Harmful, and don't do anything non-combat related. Requires at least 2 players in the party. |
| One Hit Wonder | You demonstrated your incredible strength by destroying every monster in the dungeon (with the exception of the boss) in one crushing blow. | Kill all the monsters in the dungeon in one hit. Excluding the boss. Best done if you set the dungeon to complexity 1. |
| Party Magician | Cast a lot of non-combat spells but otherwise dealt no damage. | Cast a variety of non-combat spells while not using any combat spells at all; multiple high alchemy is usually preferred. Requires at least 2 players in the party. |
| Rest in Peace | Put the most spirits to rest. | Be the player to use the most bones on an altar. If soloing, use 10+ bones on an altar. |
| Sharpshooter | Most ranged damage dealt. | Deal more ranged damage than anyone else in your team. If soloing, using ranged at any time automatically gains you this title. Damage dealt while fighting bosses does not count. |
| Spontaneous Combustion | Death by attempting to burn log-covered door and failing. | Attempt and fail to burn the flammable debris while on low health. |
| Survivor | Did not die. | Don't die, keep your life points at a safe level at all times. |
| Tele-fail | Most people teleport away from their current location. Not you. | Use the gatestone teleport while it is in your inventory or in the same room. This can be done with the group gatestone or a personal one. |
| The Chief | You gained Mod_Hulme's green fingers by harvesting at least 25 potatoes...but doing the least damage. | Plant and harvest cave potatoes while the rest of the team is fighting; avoid combat as much as possible. Requires at least 2 players in the party. |
| The Gate Escape | Used a Gatestone to escape a Boss on low health. | Use the gatestone teleport to escape a boss room when you have less than 10% of your life points remaining. |
| Too Little, Too Late | You tried to save someone from death by using a heim crab, but it was too late. | When a teammate's health reaches 0, use a heim crab on them. Requires at least 2 players in the party. |
| Uneconomical Alcher | Wasted the most money through alchemy. | Use alchemy on items of very little value such as Needles, or even your Fire runes. |
| Untouchable | Did not take any damage but dealt damage. | Use a protect/deflect at all times. A team is needed to do this easily, but it is possible to attain solo as well. |
| Vengeance is Mine! | Kill the boss with Vengeance spells effect. | Cast Vengeance when the boss is on very low health. Vengeance other may cause the aided player to get the title. Easiest to attain when fighting the Gravecreeper, Luminescent Icefiend, and Sagittare. |
| WoopWoopWoop! | You kept up with Mod_Chris_L, blitzing through the entire dungeon and entering new rooms without fear. | Complete a dungeon in less than 7 minutes; entering every room that is not a Bonus room. |
When you first start Dungeoneering, you will have no equipment excluding that which is on your toolbelt. As your skill progresses, you will be able to bind: one potion, one stack of ammunition, and up to 10 items (12 if you have completed the Hard Daemonheim Achievements) including: weapons, armor, and jewelry. Binding an item to your character will allow you to start any floor with it.
In order to bind an item, simply right click it in your inventory and select the "Bind" option. If you wish to bind another item, but already have your total number of items bound, you will need to destroy an item you currently have bound; doing this will cause you to lose the item completely, you will need to obtain another one if you want it back. The number of items you can have as your active bound items depends on your level (See table below). This set is the items that you will begin each floor wearing, wielding, and/or carrying. Note that the number of items you can bind at each level can be increased by 1 if you are using a main-hand and off-hand weapon; meaning that at most you can have 6 items per item set.
| Dungeoneering Level | Number of Active Bound Items | Recommended Binds |
| 1 | 1 | Weapon |
| 20 | 2 | Weapon and Armor top Weapon and Shadow silk hood |
| 50 | 3 | Weapon, Armor top, and Armor bottom Weapon, Armor top, and Shadow silk hood |
| 90 | 4 | Weapon, Armor top, Armor bottom, and Helmet Weapon, Armor top, Armor bottom, and Shadow silk hood |
| 120 | 5 | Weapon, Armor top, Armor bottom, Helmet, and Boots or Gloves Weapon, Armor top, Armor bottom, Boots or Gloves, and Shadow silk hood |
There are certain items you can find within Daemonheim that most players will always bind when they find them. This is because they are very useful; helping to both protect the player and kill monsters faster. Most of these highly valued items are rare to obtain. These include:
- Shadow silk hood - makes you invisible to most humanoids with a dungeon when worn. This means that you are at a distinct disadvantage if everyone in your party has a hood and you don't, as all the humanoids will only attack you. It also makes you safe within rooms that still have monsters in them.
- Blood necklace - when worn, has a special ability that activates every 15 seconds. It deals 40 damage to all enemies adjacent to you and heals you by the amount of damage it dealt to those enemies.
- There are also several staffs within Daemonheim which give you unlimited number of elemental runes, meaning they allow you cast any combat spell at any point. From Weakest to strongest, these include:
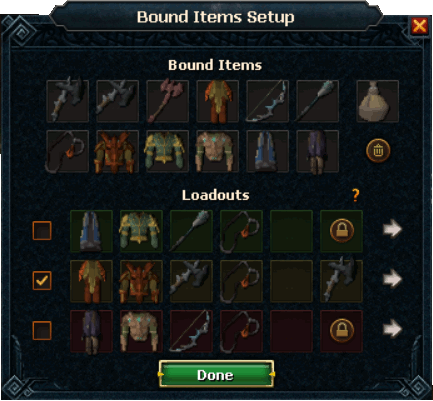
To be able to use your bound items, you have to assign them to a set. 3 sets of item slots are available at all Dungeoneering levels. To change your sets, right-click the smuggler and select "Bind setup" to open up the bind sets interface. To add an item to a set, drag it to a slot in that set. To remove an item from a set, simply click on it twice. Items can be used in several sets at the same time, however, only one set can be active at a time. You can switch between active sets by returning to the smuggler, opening the bind setup interface, and clicking the arrows next to the set you want active for your current floor. The checkbox to the left of the sets allows you to select which set you want to start every floor with. The padlocked slot in each set is reserved for off-hand weapons only (Note: Free players can now receive and equip off-hand drops from bosses).
Bound arrows and runes do to not take up a slot in the bound items list. They will always appear at the start of a floor no matter what set you have selected. You may bind a maximum of 125 units of arrows or runes. Completing Salt in the Wound will give you access to another 100 units, making the maximum number of bound arrows/runes 225. Also note that if you have completed the Medium Daemonheim Achievements, you will start each floor with 40 Cosmic runes and 40 Law Runes, enabling you to use your ammunition slot for arrows if desired. Alternatively, you can choose to bind other runes that may be helpful, such are Nature runes.
When binding potions, it is suggested to bind a strong dose version of something. For example, a combat potion to help clear floors faster. Or, if you take an overload or some other combat potion prior to entering dungeons, you can bind a strong dose skilling potion to make it easier to boost for skill doors and challenge rooms that require level 100+ to complete.
Getting experience in Dungeoneering may seem simple, but it is a little more complex than just completing floors over and over. Once you have finished a floor, you will see two boxes in the top of the breakdown interface that determines your Average experience: Base and Prestige. The Base experience is the set amount of experience you get for that floor, while the prestige is the critical part. This is determined by how many floors you have completed on this, or your last, prestige run, whichever value is higher.
To level your prestige, you will want to complete ALL floors that you can currently access, then choose to "Reset" on your Party interface. Doing this will unmark all the floors you have previously completed, making it so you can complete them as if it was your first time going through that floor again. Note that you do not have to complete the floors in order once they are open. For example, if you have cleared to floor 15, you do not need to start at floor 1 on your newest prestige; you can choose to start at floor 5, or floor 12. You will still need to clear your deepest floor available to reach the next deepest though. So, you will need to complete floor 15 before opening floor 16 once you have the level for it.
If you complete a floor that you have already done for this prestige run, you will not gain as much experience as you could have if you were doing an "incomplete" floor. Floors that have not yet been completed for your current prestige run will be a solid color on the floor selection interface, while those that have been completed will have a check mark. If you reset before completing all of your available floors, you will receive a lower prestige value when completing a floor. This will, in turn, lower the amount of experience you gain on all floors until your previous prestige is outranked by your current one. For example, if you reset at 10 floors complete on your last prestige, even though you could do 15, those first 10 floors completed will have a lower experience turnout than the last 5+ for that prestige.
After finishing a dungeon floor, you will be rewarded with a number of tokens based on how much experience you have earned. For every 10 experience points, you will receive 1 token. So, for example: if you have gained 1,000 experience, you will receive 100 tokens. These tokens can be exchanged for a variety of items from the Rewards trader in Daemonheim or Wythien in the Meilyr sector of Prifddinas. In addition to the items below, you can also purchase Dungeoneering experience at the rate of 1 experience point per Dungeoneering token. If you wish to know how many Dungeoneering tokens you currently have, you can use the quick chat option under Dungeoneering or you can look in the "Standard" section of your currency pouch.
| Item | Token Cost | Requirements | Member's Only | Notes |
Law staff |
10k | 45 Dungeoneering 45 Magic 40 Strength |
|
Accuracy: 815 Can hold up to 1,000 law runes. When equipped, there is a 10% chance of not using a law rune required for the spell you are casting. |
Gravite rapier |
40k | 45 Dungeoneering 45 Attack |
|
Damage: 673 Accuracy: 899 |
Gravite longsword |
40k | 45 Dungeoneering 45 Attack |
|
Damage: 673 Accuracy: 899 |
Gravite 2h sword |
40k | 45 Dungeoneering 45 Attack |
|
Damage: 1256 Accuracy: 899 |
Gravite staff |
40k | 45 Dungeoneering 45 Magic |
|
Accuracy: 899 |
Gravite shortbow |
40k | 45 Dungeoneering 45 Ranged |
|
Damage: 522 Accuracy: 899 |
Gravite knife |
40k | 45 Dungeoneering 55 Ranged |
|
Damage: 528 Accuracy: 983 |
Gravite wand |
40k | 45 Dungeoneering 55 Magic |
|
Damage: 0 Accuracy: 983 |
Gravite orb |
20k | 45 Dungeoneering 55 Magic |
|
Damage: 0 Accuracy: 983 |
Nature staff |
12k | 53 Dungeoneering 53 Magic 40 Strength |
|
Accuracy: 815 Can hold up to 1,000 Nature runes. When equipped, there is a 10% chance of not using a nature rune required for the spell you are casting. |
Chaotic rapier |
200k | 80 Dungeoneering 80 Attack |
|
Damage: 980 Accuracy: 3043 |
Chaotic longsword |
200k | 80 Dungeoneering 80 Attack |
|
Damage: 980 Accuracy: 3043 |
Chaotic maul |
200k | 80 Dungeoneering 80 Attack |
|
Damage: 1788 Accuracy: 3043 |
Chaotic staff |
200k | 80 Dungeoneering 80 Magic |
|
Accuracy: 3043 |
Chaotic crossbow |
200k | 80 Dungeoneering 80 Ranged |
|
Accuracy: 3043 |
| Item | Token Cost | Requirements | Member's Only | Notes |
Off-hand gravite longsword |
20k | 45 Dungeoneering 55 Attack |
|
Damage: 336 Accuracy: 983 |
Off-hand gravite rapier |
20k | 55 Dungeoneering 55 Attack |
|
Damage: 336 Accuracy: 983 |
Off-hand gravite knife |
20k | 45 Dungeoneering 55 Ranged |
|
Damage: 264 Accuracy: 983 |
Off-hand chaotic longsword |
100k | 80 Dungeoneering 80 Attack |
|
Damage: 490 Accuracy: 3,043 |
Off-hand chaotic rapier |
100k | 80 Dungeoneering 80 Attack |
|
Damage: 490 Accuracy: 3,043 |
Off-hand chaotic crossbow |
100k | 80 Dungeoneering 80 Ranged |
|
Accuracy: 3,043 |
Arcane pulse necklace |
6.5k | 30 Dungeoneering 30 Magic |
|
Magic Crit bonus: 13 |
Farsight quick shot necklace |
6.5k | 30 Dungeoneering 30 Ranged |
|
Ranged Crit bonus: 13 |
Brawler's jab necklace |
6.5k | 30 Dungeoneering 30 Attack |
|
Strength Crit bonus: 13 |
Twisted bird skull necklace |
8.5k | 30 Dungeoneering 30 Prayer |
|
3 Prayer When worn, it will restore 10 Prayer point for each bone buried (Bones, Burnt bones, and Bat bones). |
Tome of frost |
43k | 48 Dungeoneering 48 Magic |
|
Accuracy: 639 When equipped in the shield slot, it will act as an infinite supply of Water runes. |
Amulet of zealots |
40k | 48 Dungeoneering 48 Prayer |
|
-5 Prayer When worn, this amulet increases the effect of stat-boosting prayers/curses by 5%. This does not affect those that boost multiple stats at once. |
Arcane blast necklace |
15k | 50 Dungeoneering 50 Magic |
|
Magic Crit bonus: 24 |
Farsight snap shot necklace |
15k | 50 Dungeoneering 50 Ranged |
|
Ranged Crit bonus: 24 |
Brawler's hook necklace |
15k | 50 Dungeoneering 50 Attack |
|
Strength Crit bonus: 24 |
Split dragontooth necklace |
17k | 60 Dungeoneering 60 Prayer |
|
4 Prayer When worn, it has the same effect as the Twisted bird skull necklace and will also restore 20 Prayer point for each of the following bones buried (Big bones, Babydragon bones, and Wyvern bones. |
Anti-poison totem |
44k | 60 Dungeoneering 60 Defence 70 Herblore |
|
Armor bonus: 200 When equipped in the offhand slot, it prevents you from getting poisoned. However, it will not remove any existing poison effects. |
Ring of vigour |
50k | 62 Dungeoneering 62 Strength |
|
Strength bonus: 12 Ranged bonus: 12 Magic bonus: 12 When worn, it will add fill the Adrenaline bar by 10% after using an Ultimate ability. |
Chaotic kiteshield |
200k | 80 Dungeoneering 80 Defence |
|
Armor bonus: 384 Life bonus: 385 |
Eagle-eye kiteshield |
200k | 80 Dungeoneering 80 Defence |
|
Armor bonus: 384 Life bonus: 385 |
Farseer kiteshield |
200k | 80 Dungeoneering 80 Defence |
|
Armor bonus: 384 Life bonus: 385 |
Demon horn necklace |
35k | 90 Dungeoneering 90 Prayer |
|
5 Prayer When worn, it has the same effect as the Twisted bird skull necklace and Split dragontooth necklace. It will also restore 30 Prayer point for each of the following bones buried Dragon bones, Ourg bones, and Frost dragon bones. |
| Item | Token Cost | Requirements | Members Only | Use |
| Ring of kinship Reset  |
50k | None | |
Resets your Ring of kinship class customizations and refunds the tokens spent on the upgrades. |
| Hoardstalker ring Recharge  |
10k | A Hoardstalker ring in your inventory | |
Recharges a depleted Hoardstalker ring |
Wildcard |
20k | None | |
Unlocks the ability to gain a free card when entering a Sinkhole. |
Bonecrusher |
34k | 21 Dungeoneering 21 Prayer |
|
When in your inventory, any bones that you get from killing a monster will instantly be turned into prayer experience. This item can be added to your toolbelt for 500 Slayer points. |
Herbicide |
34k | 21 Dungeoneering 21 Herblore |
|
When in your inventory, any herbs received from drops will be destroyed in exchange for twice the Herblore experience that you would have gained from cleaning. The herbs to be destroyed can be defined in the Herbicide's interface. This item can be added to your toolbelt for 500 Slayer points. |
Charming imp |
100k | 21 Dungeoneering 21 Summoning |
|
The imp will pick up dropped charms and place them in your inventory, or convert them into experience if you configure it to do so. This item can be added to your toolbelt for 500 Slayer points. |
Scroll of life |
10k | 25 Dungeoneering 25 Farming |
|
Gives a permanent advantage once read. You have a 10% chance of retrieving your seeds when harvesting or clearing farming patches. There is also a 5% chance of getting your seed back when digging up fruit or normal trees. |
Gem bag |
2k | 25 Dungeoneering 25 Crafting |
|
Can hold up to 100 uncut gems in total (Uncut sapphire, Uncut Emerald, Uncut ruby, and Uncut Diamond). |
Smithing autoheater |
4k | 40 Dungeoneering 35 Mining |
|
When the Heat of an Unfinished smithing item reaches 0%, the autoheater will take 5 Coal from your metal bank and use it to heat your item to 33%. |
Gem bag upgrade |
20k | 40 Dungeoneering 40 Crafting |
|
Holds up to 60 of all types of gem up to Dragonstone. |
Shieldbow Sight |
10k | 45 Dungeoneering 45/55/65 Ranged |
|
At higher Ranged levels you can attach your Shieldbow sight to higher tier Shieldbows to grant increased Armor, Accuracy, Damage, and range.
|
Scroll of Cleansing |
20k | 49 Dungeoneering 49 Herblore |
|
Gives a permanent advantage once read. You have a 12.5% chance of making a potion twice as fast as normal. There is also a 10% chance of retaining an ingredient when making certain potions. |
Spirit cape |
45k | 50 Dungeoneering 50 Defence 50 Summoning |
|
When worn, the cost of the special attack for combat familiars is reduced by 20%. The cape also gives a 1.8% Melee, Magic and Ranged Crit bonus. |
Scroll of efficiency |
20k | 55Dungeoneering 55 Smithing |
|
Gives a permanent advantage once read. When smithing an item requiring 3 or more bars, there is a chance of saving a bar. Bronze - 50%, Iron - 25%, Steel - 20%, Mithril - 10%, Adamant - 8%, and Runite - 5% chance of retaining. |
Scroll of proficiency |
20k | 60 Dungeoneering 60 Construction |
|
Permanently give you the chance to save a plank when constructing an item requiring 3 or more planks:
|
Scroll of dexterity |
20k | 60 Dungeoneering 60 Crafting |
|
Permanently give you the chance to save a piece of material when crafting an item requiring 3 or more pieces of material:
|
Gold accumulator |
20-60k* | No Requirements | |
Automatically picks up coins dropped by monsters and deposits them into your money pouch. *The price to purchase a new accumulator increases by 20,000 tokens each time, up to a maximum of 60,000 tokens; at this point it can pick up a total of 1m coins. |
| Gold accumulator overcharge |
250k-1,060k* | No Requirements | |
Allows the Gold accumulator to pick up additional 5,000,000 coins. *This item can be stacked to pick up a total of 21,000,000 coins costing a total of 1,060,000 Dungeoneering tokens. |
Advanced Gold accumulator |
1.5m | No Requirements | |
Permanent version of the Gold accumulator that automatically picks up coins dropped by monsters and deposits them into your money pouch. While it does not degrade, it does "cost" 10% of all the gold it collects. This item can be added to your toolbelt for 500 Slayer points. |
Scroll of renewal |
107k | 65 Dungeoneering 65 Prayer |
|
Unlocks the Rapid Renewal prayer once read, which restores Life points at 5 times the normal restore rate. |
Scroll of Daemonheim |
30k | 70 Dungeoneering | |
Once used this scroll will permanently give you a 50% chance to obtain some extra Dungeoneering experience when you obtain non-combat experience in a Dungeoneering floor. |
Mercenary's gloves |
48k | 73 Dungeoneering 73 Ranged |
|
Armor bonus: 80 Life bonus: 0 |
Chaotic spike |
20k | 80 Dungeoneering 80 Attack |
|
Attach 5 to a Dragon claw and Off-hand dragon claw to make a Chaotic claw and Off-hand chaotic claw. Or attach 10 to a Zamorakian spear to create a Chaotic spear. |
Chaotic remnant |
100k | 80 Dungeoneering | |
Used to create Arcane stream, Brawler's knockout and Farsight sniper necklaces. |
Sneakerpeeper spawn pet |
85k | 85 Dungeoneering 85 Summoning |
|
This pet will grow into an Adult Version. Eats Eye of Newt, and when fed will say "Om nom nom nom". |
Frosty |
250k | 85 Dungeoneering 99 Summoning |
|
Frosty is a baby Frost dragon pet and will follow you around. |
Mini-blink |
500k | 95 Dungeoneering Must have killed Blink |
|
Mini-blink is a miniature version of Blink which follows you around like a pet. |
Hope nibbler |
1m | 101 Dungeoneering Must have killed Hope devourer |
|
Hope nibbler is a baby Hope Devourer pet and will follow you around. |
Meilyr Potion recipe |
500k | No Requirement | |
Allows you to purchase a random Combination potion recipe. |
Scroll of quick teleportation |
50k | 60 Dungeoneering | |
Allows you to quickly teleport Home while Dungeoneering. |
Members can upgrade their Ring of Kinship at the cost of tokens. There are four classes, each with three roles, for a total of 12 different upgrades. All upgrades purchased will remain if you switch to another role. While you can purchase upgrades for all 12 roles, only 1 or 2 (if you have completed the Easy Daemonheim Achievements) roles can be active at a time. Purchasing all 12 roles fully will cost you 3,878,580 Dungeoneering tokens.
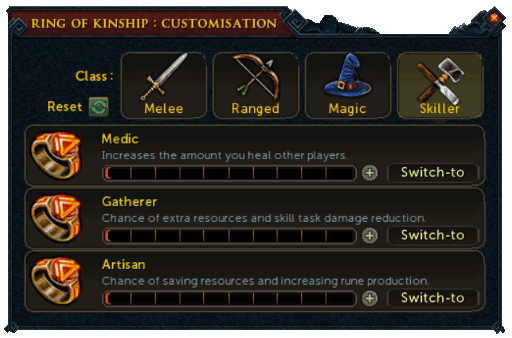
In order to customize your ring, right-click on it and choose "customise". You will need to be inside of a dungeon to open the interface seen above.
| Class | Role | Effect | Tier | |||||||||
| 1 | 2 | 3 | 4 | 5 | 6 | 7 | 8 | 9 | 10 | |||
Melee  |
Tank | Damage is reduced when wielding a shield. | 6% | 7% | 8% | 9% | 10% | 11% | 12% | 13% | 14% | 15% |
| Tactician | Increases chance of hitting with one-handed melee weapons. | 11% | 12% | 13% | 14% | 15% | 16% | 17% | 18% | 19% | 20% | |
| Berserker | Increases chance of hitting with two-handed melee weapons. | 11% | 12% | 13% | 14% | 15% | 16% | 17% | 18% | 19% | 20% | |
Ranged |
Sniper | Increases chance hitting with a bow. | 20% | 23% | 27% | 30% | 33% | 37% | 40% | 43% | 47% | 50% |
| Keen-eye | Chance of reducing an enemy's Defence level with Ranged attacks. | 40% | 47% | 53% | 60% | 67% | 73% | 80% | 87% | 93% | 100% | |
| Desperado | Increases damage of Ranged attacks. | 11% | 12% | 13% | 14% | 15% | 16% | 17% | 18% | 19% | 20% | |
Magic  |
Blazer | Chance of applying the combust effect to your target. | 5% | 10% | 15% | 20% | 25% | 30% | 35% | 40% | 45% | 50% |
| Blaster | Chance to slow down your opponent's attack speed. | 12% | 14% | 16% | 18% | 20% | 22% | 24% | 26% | 28% | 30% | |
| Blitzer | Increases your chance of hitting with magic weapons. | 10% | 20% | 30% | 40% | 50% | 60% | 70% | 80% | 90% | 100% | |
Skiller  |
Medic | Increases the amount you heal other players. | 20% | 23% | 27% | 30% | 33% | 37% | 40% | 43% | 47% | 50% |
| Gatherer | Chance of extra resources and skill task damage reduction. | 20% | 23% | 27% | 30% | 33% | 37% | 40% | 43% | 47% | 50% | |
| Artisan | Chance of saving resources and increasing rune production. | 20% | 23% | 27% | 30% | 33% | 37% | 40% | 43% | 47% | 50% | |
| Token Cost per Tier | 135 | 175 | 335 | 660 | 1,360 | 3,400 | 6,800 | 18,750 | 58,600 | 233,000 | ||
| Total Cost per Role | 135 | 310 | 645 | 1,305 | 2,665 | 6,065 | 12,865 | 31,615 | 90,215 | 323,215 | ||
To start the Sagas, you must first unfreeze Skaldrun from a random frozen floor of complexity level 2 or higher. To unfreeze him, you light a fire next to him with logs and a Tinderbox or cast a fire spell on him. Once he has been rescued, you must speak to him fully before he will return to the surface. Once he has returned to the surface, he will be found West of the Gorajo hoardstalker and you can speak to him to start the Sagas.
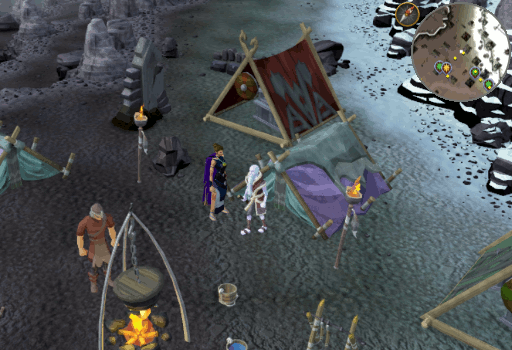
For more information about the Sagas and how to complete them, please see their guides respective guide. Note that they can be completed in any order as long as you have found the memory item for the associated quest.
Within the dungeons you may also stumble across various books and pages that are collectively referred to as Journals. A lootbeam will always appear when one has been dropped in the dungeon for you, however, you do not need to be the one to have killed the Boss or monster that drops it in order to receive the page. This page or journal will only remain a physical item while you are in the dungeon where it is found; if you fail to retrieve it before leaving, it will be lost and you must find it again. If you picked it up, once you have left, you will need to speak with the Dungeoneering tutor to see which ones you have found. Obtaining Miscellaneous journals 1-15 is a requirement of the Master quest cape.
Chronicles of Bilrach:
This is a collection of 30 pages to obtain. They are an uncommon drop received from the boss of any given floor. Each page will only be able to be found on a specific range of floors. These floors are always the Page number doubled and the floor above it (Page number doubled - 1).
So, for examples...
- Page 1... 1 + 1 = 2 and 1 + 1 - 1 = 1... Floors 1 and 2
- Page 15... 15 + 15 = 30 and 15 + 15 - 1 = 29... Floors 29 and 30
- Page 30... 30 + 30 = 59 and 30 + 30 - 1 = 59... Floors 59 and 60
Kal'gerion Notes:
This is a collection of 5 pages to obtain. They are an uncommon drop received from specific bosses on specific floors.
| Page | Boss | Floor Theme | Floor numbers |
| 1 | To'Kash the Bloodchiller | Frozen | 9-11 |
| 2 | Har'Lakk the Riftsplitter | Furnished | 18-29 |
| 3 | Bal'lak the Pummeller | Abandoned 2 | 33-35 |
| 4 | Yk'Lagor the Thunderous | Occult | 45; Won't be dropped on floors 46 or 47 due to a bug |
| 5 | Kal'Ger the Warmonger | Warped | 57-60 |
Stalker Notes:
This is a collection of 5 pages to obtain. They are an uncommon drop received from specific bosses on specific floors.
| Page | Boss | Floor Theme | Floor numbers |
| 1 | Plane-freezer Lakhrahnaz | Frozen | 6-11 |
| 2 | Night-gazer Khighorahk | Furnished | 26-29 |
| 3 | Shadow-forger Ihlakhizan | Abandoned 2 | 30-35 |
| 4 | Flesh-spoiler Haasghenahk | Occult | 42-47 |
| 5 | World-gorger Shukarhazh | Warped | 54-60 |
Bahemoth Notes:
This is a collection of 5 pages to obtain. They are an uncommon drop received from specific bosses on specific floors.
| Page | Boss | Floor Theme | Floor numbers |
| 1 | Gluttonous behemoth | Frozen | 1-11 |
| 2 | Bulwark beast | Abandoned | 18-29 |
| 3 | Stomp | Furnished | 12-17 and 30-35 |
| 4 | Runebound behemoth | Occult | 36-47 |
| 5 | Hope devourer | Warped | 51-60 |
Marmaros and Thok:
This is a collection of 10 pages to obtain. They are an uncommon drop received from specific bosses and various monsters found on specific floors depending on the specific journal sought. You have a 1/1,000 chance per Monster killed.
- Frozen floors 1-5
- Frozen floors 6-11
- Abandoned floors 12-14
- Abandoned floors 15-17
- Furnished floors 18-22
- Furnished floors 23-29
- Occult floors 36-40
- Occult floors 42-47
- Warped floors 48-53
- Warped floors 54-60
Miscellaneous Journals:
This is a collection of 20 journals to obtain. They are an uncommon drop received from various monsters found on specific floors. For journals 16-20 you have a 1/10,000 to 1/50,000 drop chance per Monster killed.
| Journal Number | Journal Name | Dropped By |
| 1 | Astea frostweb's journal | Astea Frostweb |
| 2 | Troll scrawlings | Icy Bones |
| 3 | Environmental effects (part 1) | Luminescent icefiend |
| 4 | Divine skinweaver's journal | Skeletal Horde |
| 5 | Hobgoblin scrawlings | Hobgoblin Geomancer |
| 6 | The price of betrayal | Unholy cursebearer |
| 7 | Equipment requisition receipts | Rammernaut |
| 8 | Lexicus runewright's journal | Lexicus Runewright |
| 9 | Ammunition requisition orders | Sagittare |
| 10 | Bellefleur's journal | Skeletal Trio |
| 11 | Tombstone transcription | Gravecreeper |
| 12 | Arch necrolord request | Necrolord |
| 13 | Blink's scribblings | Blink |
| 14 | Gulega missive | Warped Gulega |
| 15 | Resource requisition orders | Dreadnaut |
| 16 | Portal notes | Very rare drop from monsters on floors 48-60 (Warped) |
| 17 | Scrap of parchment | |
| 18 | Letter to an acolyte | |
| 19 | Letter from brundt | |
| 20 | Strange token |
Sinkholes are a Distraction and Diversion that takes place in various dungeons across Gielinor once every hour. Speak with Talsar to teleport to the location where the sinkhole will be; this can only be done up to 5 minutes before it appears. For more information on how to play and rewards to earn, see our Sinkholes guide.
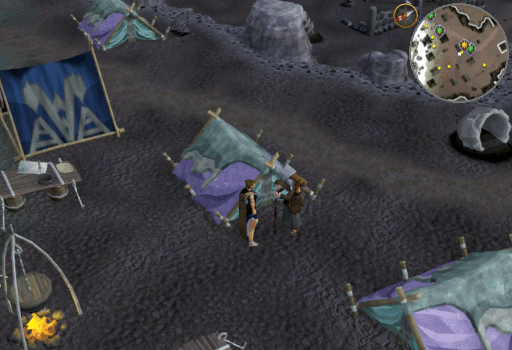
Similar to the cards found during Sinkholes, players level 95 Dungeoneering or above can obtain up to one Gorajo card daily from the Gorajo hoardstalker; he can be found either in the Northern Meilyr Resource dungeon or West of Thok in Daemonheim. Note that it is not possible to get a card from him at each of his locations; once you have claimed a card from him, that is all you can receive for that day. Be aware that you cannot obtain another card until you have used or destroyed the one you have. Choosing to destroy the card does not allow you to claim a new daily card from the Gorajo hoardstalker unless you have destroyed a previous day's card. The only exception to this would be if you gained a team card the day before and gain a solo card.
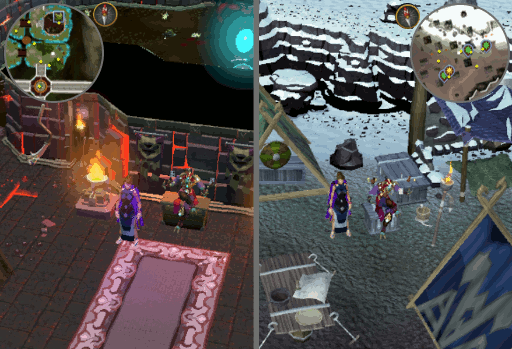
All cards come in both solo and team versions. Solo versions will only benefit you while team cards will benefit all of those on your team. Team cards are rather rare so you will see far more solo cards than team ones.
| Card | Solo | Team | Effect |
| Beguiling smoke devil card |  |
 |
Allows you to open skill doors without meeting level requirements. |
| Cloning mosquito card |  |
 |
Earn double tokens for the dungeon. |
| Consistent yak card |  |
 |
Find a Clan Meilyr combination potion recipe is guaranteed when you open a door, you will also not incur a penalty after your second death. |
| Preening ibis card |  |
 |
Dungeoneering experience is multiplied by 1.5 for the floor. |
| Protecting titan card |  |
 |
Damage taken against bosses is halved and other damage received during the floor is reduced by 5%. |
| Reversing phoenix card |  |
 |
Increases the chances for slayer creatures to spawn. |
| Scavenging meerkats card |  |
 |
Completing the floor provides a sinkhole replay ticket. Leaving the floor early loses the card's effect. |
| Thieving locust card |  |
 |
Double Dungeoneering experience for the floor. |
| Trading leech card |  |
 |
Start a dungeon with an additional selection of useful items. |
| Trading mantis card |  |
|
10% chance of gaining additional items when a creature dies. |
| Whimsical bunyip card |  |
 |
The effect of a random card is played. |
Spread across the land of Gielinor are several resource dungeons that you can access. You will receive a one-time Dungeoneering experience reward when you enter it for the first time. Below is a table of the locations of each dungeon, as well as requirements and contents of each.
| Location | Location Map | Dungeoneering Level | Contents | Gained Experience | Member's Only |
| Edgeville Dungeon (Chaos druids) |
 |
10 | 1,100 | |
|
| Dwarven Mines |  |
15 |
|
1,500 | |
| Edgeville Dungeon (Hill giants) |
 |
20 | 1,600 | |
|
| Karamja Volcano Dungeon | 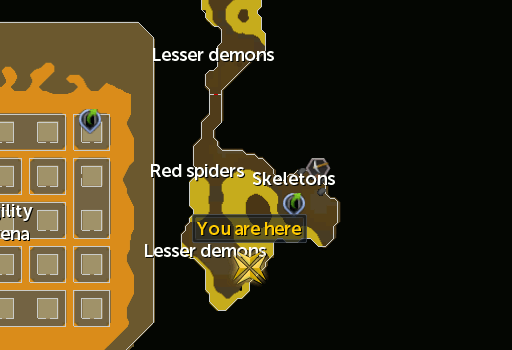 |
25 |
|
2,100 | |
| Daemonheim (Eastern Peninsula) |
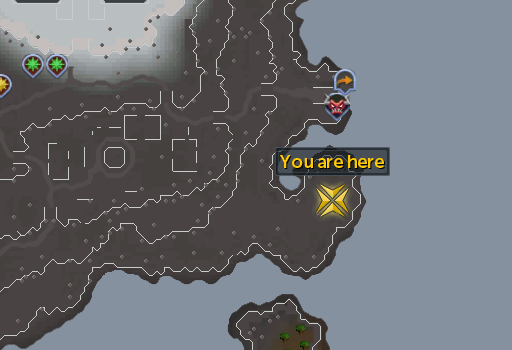 |
30 |
|
2,400 | |
| Baxtorian Falls Dungeon | 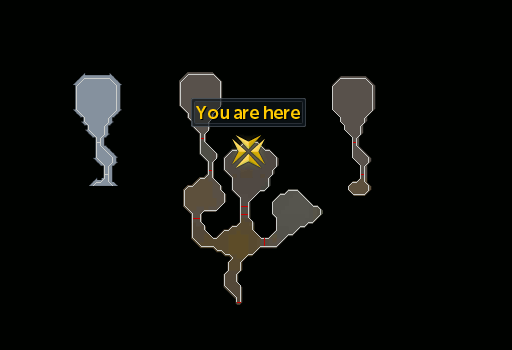 |
35 | 11 Fire giants | 3,000 | |
| Mining Guild | 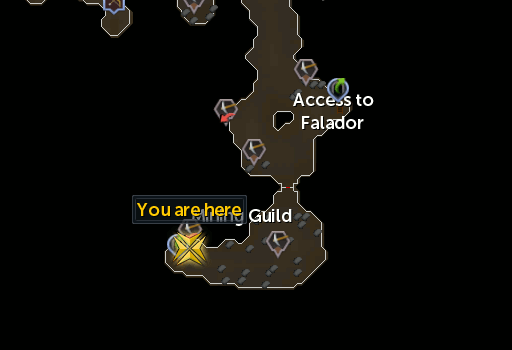 |
45 (and 60 Mining) | 4,400 | |
|
| Braindeath Island |  |
50 |
Must have started A Clockwork Syringe. Requires Diving apparatus and Fishbowl helmet to enter. |
0 | |
| Taverley Dungeon (Hellhounds) |
 |
55 | 12 Hellhounds | 6,200 | |
| Taverley Dungeon (Blue dragons) |
 |
60 | 7,000 | |
|
| Varrock Sewers |  |
65 |
|
8,500 | |
| Dragontooth Island | 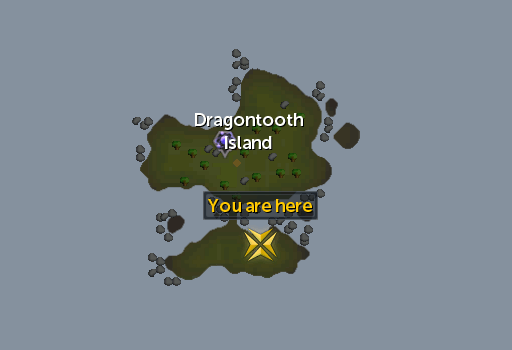 |
67 | 12 Celestial dragon Must have started One of a Kind. |
0 | |
| Chaos Tunnels (Black demon room) |
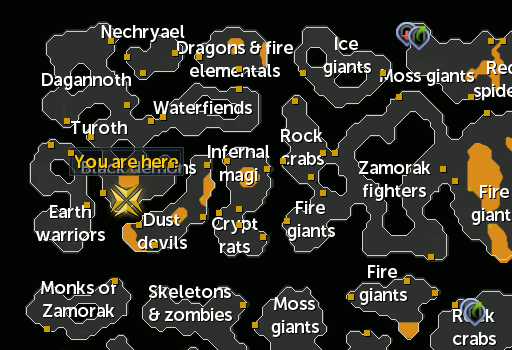 |
70 | 9 Black demons | 9,600 | |
| Al Kharid Mine | 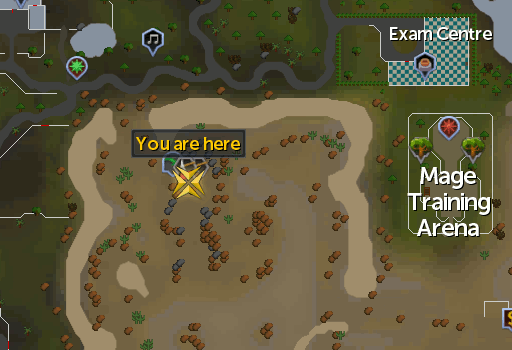 |
75 |
|
11,400 | |
| Brimhaven Dungeon (Iron/Steel dragon room) |
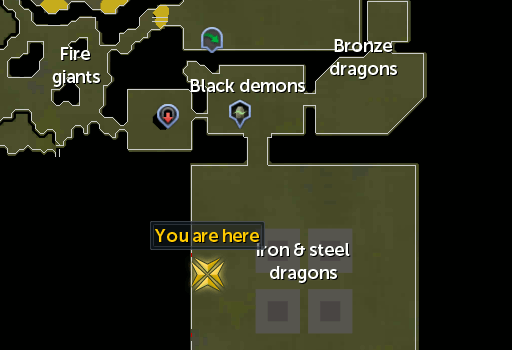 |
80 |
|
12,800 | |
| Polypore Dungeon (Top floor) |
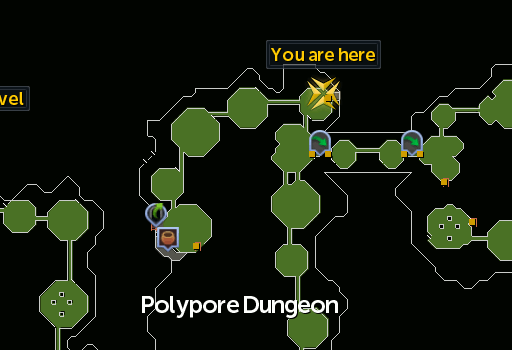 |
82 |
|
13,500 | |
| Asgarnian Ice dungeon |  |
85 | 12 Frost dragons | 15,000 | |
| Daemonheim (Western rock face) |
 |
90 |
|
17,500 | |
| North Meilyr (Gorajo dungeon) |
 |
95 |
|
30,000 | |
| Morytania Slayer Tower dungeon | 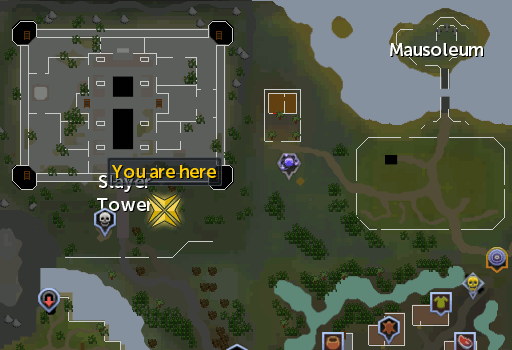 |
100 |
|
35,000 | |
| South Meilyr (Edimmu dungeon) |
 |
115 |
|
100,000 | |
Around the lands of Gielinor, there are three Elite Dungeons. Within them you must face 3 distinct bosses to complete the dungeon in its entirety. Unlike normal Dungeons, these can be left and reentered as necessary without resetting your progress; though not across separate log-ins. These dungeons can be completed in either Story or Normal mode. Story mode weakens the creatures within to about half their normal health and power, plus you will not receive drops as you kill creatures. In addition to various modes, you can choose to complete them Solo, Duo, or Trio; the less people, the higher the reward chances. Elite Dungeons include:
- Temple of Aminishi
- Dragonkin Laboratory
- Shadow Reef
Please bear with us as we work to add guides for each of these locations.

Once you have achieved level 99, you may visit Thok, Master of Dungeoneering, West of the teleport location via Ring of kinship, to purchase a Dungeoneering cape for 99,000 Coins.

Once you have achieved level 120, Thok, Master of Dungeoneering will sell you the Dungeoneering master cape for 120,000 Coins.
Discount
Note that as of December 2018, another one of Mod Daze's Easter Eggs have been found. This enables you to purchase a Skillcape for half price (only from Thok, not Elen) if you are wearing a Ring of Charos (a). Be aware that "Half price" is 92,000 Coins as the experience at level 92 is approximately half way to level 99.
This Skill Guide was written by ChathMurrpau. Thanks to Original guide writers: Jasper, Keata Kat, and Lord_Niek0, as well as Motion Man, DRAVAN, Senug 5, DarkBlitz, RunescapeJunkie, Necro, Dungingisfun, Jakesterwars, Orimis Elder, Mechachomp, Daemonprime, Egekalaycan, Laiorai, Nightfirecat, TheAdmiral , Jaywind, Neldoreht, Ludo, JunglePanter, JustinJackpot, TheAdmiral, CryForPeace, Crablogger, Roklykthat, Nfj-Aileron, Greg, CryForPeace, Force Gaia, Throwpearl, Mike cool97, Javezz, Jarkur, Xplosive2, Ksb Single, and ChathMurrpau for corrections.
This Skill Guide was entered into the database on Sun, Apr 25, 2010, at 12:00:00 AM by Motion_Man, and it was last updated on Tue, Apr 29, 2025, at 08:57:18 PM by Chath.
If anything is incorrect or missing, or if you have any new information to submit to this database, please submit it to us on our Content Submissions Forums.
If you see this guide on any other site, please report it to us so we can take legal action against anyone found stealing our content. This guide is copyrighted by RuneHQ, and its use on other sites is expressly forbidden. Do not ask if you can use our guides or images, the answer is and always will be NO!
Print this page with images - Back to the Skill Guide Index Page - Back to Top
