

Must be able to kill multiple level 78 to 81 enemies.
50+ Thieving and Agility is an advantage.
-
Talk to King Lathas in East Ardougne Castle's throne room and ask him if his scouts have found a way through the mountains. He'll tell you that they've found an ancient tunnel, but a group of cultists led by Lord Iban, who claims to be the son of Zamorak, have settled there. He'll then ask you to find a way through and direct you to his scout in West Ardougne.

-
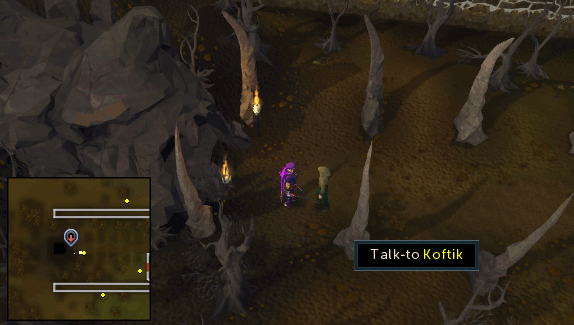
Make your way into West Ardougne through the gate in the front wall and head to the North-West corner of the city where you'll find Koftik waiting outside the entrance to the Underground Pass. Talk to him and after confirming that he's the scout you're looking for, he'll tell you to meet him at a bridge inside the cave.
-
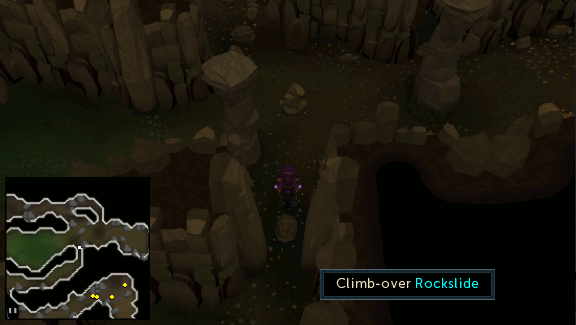
Enter the cave and make your way West until you come to a swamp with two paths leading off North and South. You can try crossing the swamp while avoiding the bubbles to proceed, but this can be failed resulting in you taking damage and having to climb out. Therefore it's recommended to just go around the swamp by climbing over the North or South rockslide and making your way West until you come out at the bridge.
-
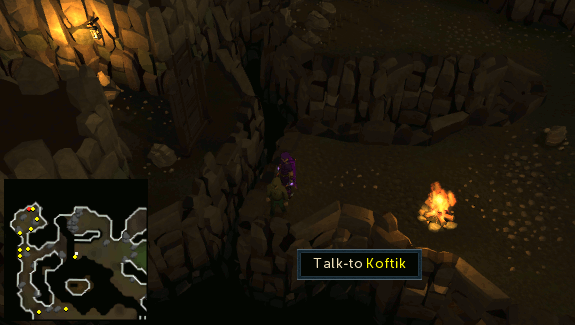
Once on the other side of the swamp, talk to Koftik again and he'll give you a Damp cloth. Use this on one of your arrows and choose the right-click option to light it or use it on the nearby fire to get a fire arrow.
-
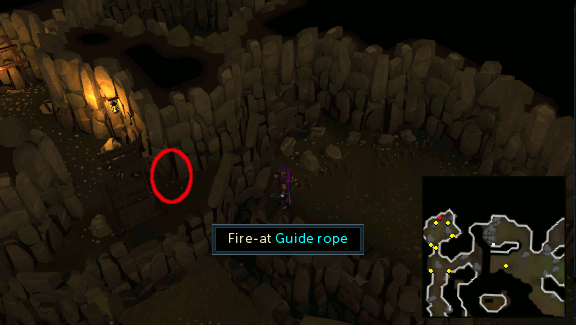
Equip your bow and fire arrow, then stand the raised platform to the North and click on the bridge's guide rope (circled in red) to fire your arrow at it. If successful this will burn the rope and lower the bridge, allowing you to cross. If you missed the rope, simply make another fire arrow and try again.
-
Once over the bridge, you'll see a red dot on your minimap to the North which is a Plank that you should pick up as you'll need it later. Now follow the path to the South and South-East around the curve until you come to a deep pit.
(Note: Do not enter the swampy area to the South containing Blessed spiders as you'll be sucked down and have to climb back out).
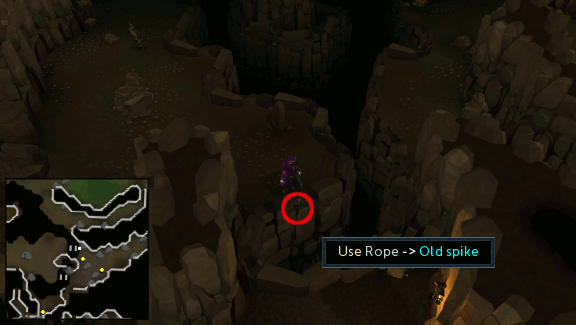
Use a Rope on the Old spike on your side of the pit (circled in red) and you'll loop it to the other side and attempt to cross.
Note: If you fail this obstacle, you will lose your Rope and end up in a maze where you will have to climb over a number of rockslides and reappear at the entrance of pass.
-
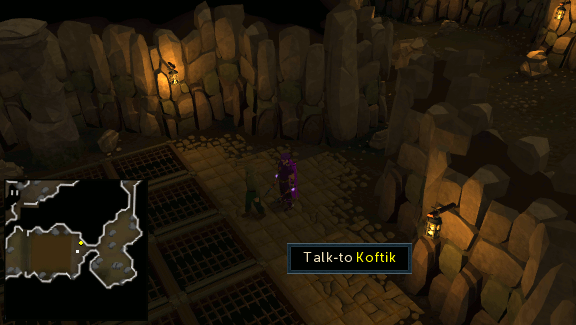
Once successfully over the pit, follow the path to the East and then South, climbing over the rockslides into you encounter Koftik again. Talk to him and you will find that he is hearing voices in his head and appears to be slowly going insane.
-
Now you will have to find a safe path across the large grid in front of you using trial and error as it is different for everyone. Start by finding a square on the first row that you can stand on without immediately falling into a pit, then find the square on the second row that supports you, then the third row and so on until you reach the other side.
Every time you step on the wrong square, you will immediately fall into a small pit and be dealt 150 damage. You'll then have to climb the protruding rock to get back out start again.
Note: If you stand on a square for too long, you will fall into the pit regardless of if it is the correct square. It is also highly recommended to save a note or image of the correct path for future journeys through the pass.

-
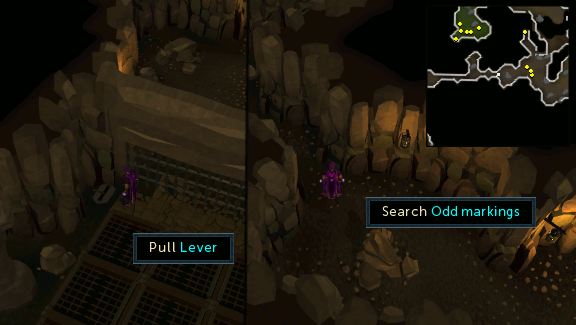
Once safely on the other side, pull the lever next to the portcullis and you'll find yourself in an room with a furnace which you can ignore for the moment and a narrow passage heading West. This passage contains two traps on the North wall and then three traps on the South wall which are identified by Odd markings. You can click on the markings to try and disable the traps or quickly run through the passage and keep your health up as the traps will rapidly hit every 2 seconds that you're stood in front of them.
-
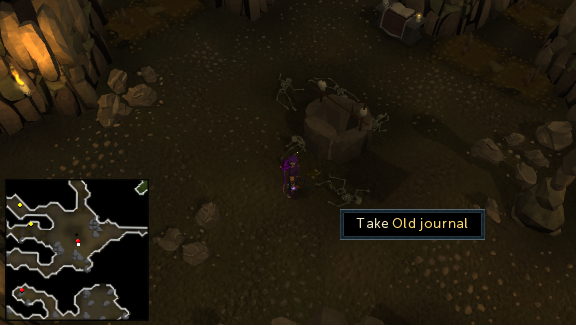
On the other side of the passage you'll find a room containing a well, an altar and an Old journal on the floor which you should pick up and read to learn more about Lord Iban and the creation of the Orbs of light.
Note: If you are low on Prayer points, then this is the time and place to recharge them.
-
To continue, you must pick up the 4 Orbs of light at the end of the passageways branching off from this room.
- Northern passage: Use a Plank on the stalagmites on the floor to avoid the traps.
- North-Western passage: Beware of Blessed spiders and Ogres guarding the orb.
- Western passage: Use a Plank on the stalagmites on the floor to avoid the traps.
- South-Western passage: Search the flat rock under the orb to disarm the trap before picking up the orb. If you fail you will be hit by a swinging log.
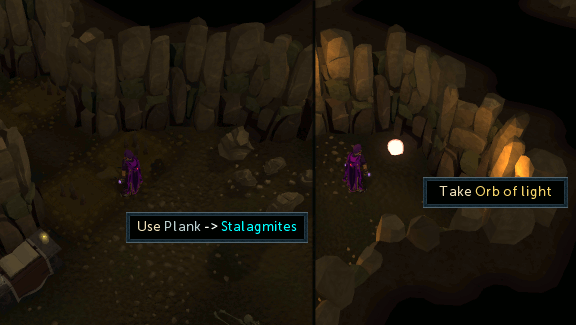
- Northern passage: Use a Plank on the stalagmites on the floor to avoid the traps.
-
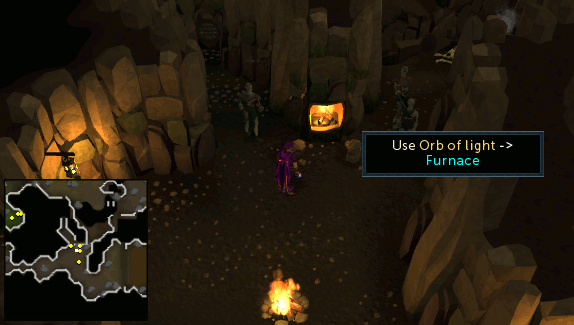
Return to the room with the furnace on the other side of the passage and use all four of the Orbs of light on it to destroy them, then make your way back to the well and climb down it.
-
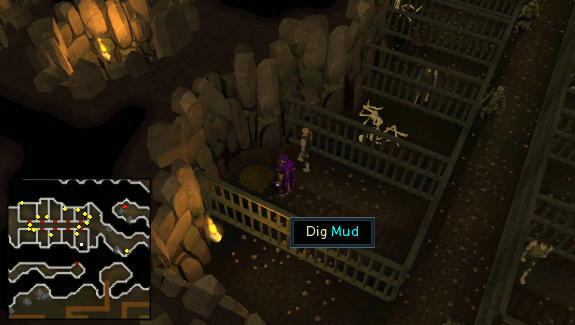
Head West towards a prison area and pick the lock of the most South-Eastern cage. Once inside, dig the mud to discover a tunnel. Follow the tunnel and cross the ledge at the end of it.
Note: If you are low on food, then search the crates to the East of the prison area to find 2 Meat pies and 2 Salmons. If you fail to cross the ledge, you will take a little damage.
-
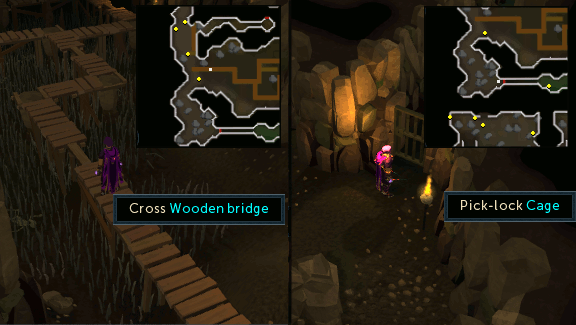
If you do not have 50 Thieving, you will now need to make your way across a wooden bridge maze over a floor covered in spikes. If you do have 50 Thieving, then you can avoid the maze by picking the lock of the door to the South and heading East through a swamp, making sure to avoid the bubbles.
Note: If you fall off the wooden bridges, you will take some damage and will have to find your way back to the start of the maze. However if you choose the other option and step onto a bubble, you will be sucked down and end up in a maze where you will have to climb over a number of rockslides to reappear at the entrance of the pass.
-
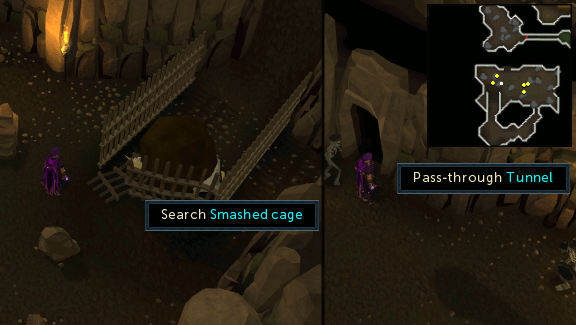
When you have made it across, head South and squeeze through an obstacle pipe. Search the cage with the Unicorn for a Piece of railing. Follow the path to the East that leads to the back of the cage and use the railing to push the boulder onto the Unicorn. Walk down into the smashed cage and search it to find a Unicorn horn, then pass through the tunnel on the North wall.
-
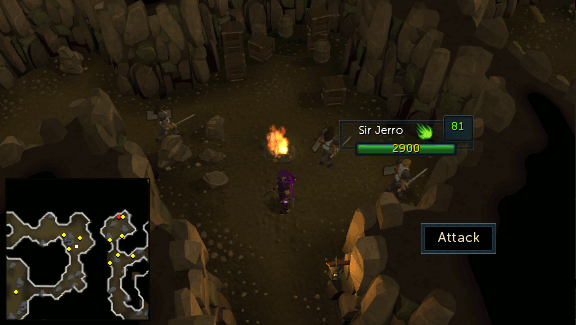
Follow the path past some Zombies until you come to a camp with three paladins called Sir Carl, Sir Harry, and Sir Jerro. Kill all 3 of the paladins to obtained their Paladin's badges (red, green and blue).
Note: It is advised that you talk to Sir Jerro before killing him, as he will give you an Attack potion (2), a Prayer potion (2), a Stew, 2 loafs of Bread, and 2 Meat pies.
-
Continue down the path and use a Plank on the stalagmites on the floor to avoid the trap. Use the Unicorn horn and the 3 Paladin's badges on the well, then go through the door to find yourself in a huge cavern with a deep chasm and wooden bridges surrounding Iban's lair.
Note: If you accidentally activate the trap, you will be dealt some damage.
-
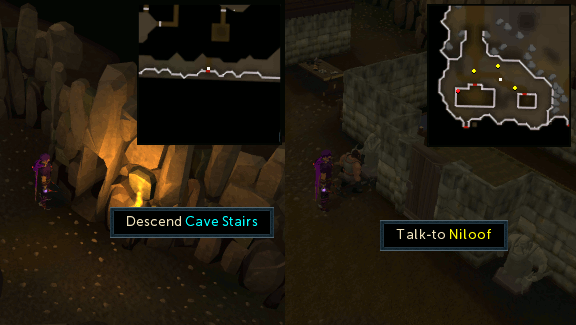
Travel all the way South down the Eastern wall, which curves around to the West, until you come to some cave stairs. Descend down the stairs to the lower level of the lair (See the Underground Pass map). When you set foot on this this floor, Koftik will will appear and mention that a few dwarves reside here. Talk to the 3 dwarves near their houses in South-Western corner of this floor. Niloof will direct you to Kardia, a witch who knows how to get rid of Lord Iban. He will also give you 2 Meat pies and a Meat pizza
Note: If you are still low on food, then talk Kamen, who will ask you if want some of his brew. If you accept his offer, you will take around a small amount of damage and your Agility level will temporarily be lowered by 3 levels. Though, he will have given you a Bread, a Stew, and a Meat pie. You can also decline his offer and instead pay 75 gold to buy food. You can repeat this process as much as you want, giving you an unlimited supply of food in the dungeon.
-
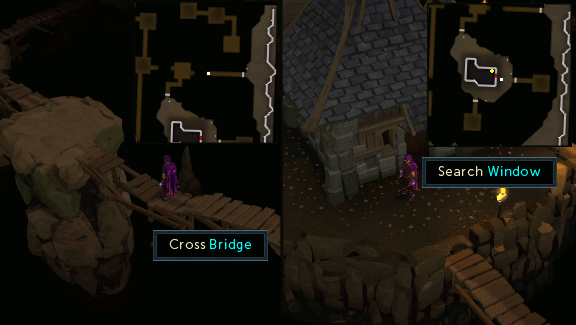
Return to the upper level and walk North along the Eastern wall until you come to a narrow bridge. Cross it and head South towards the witch's house. Search the window and learn that Kardia the witch is looking for her cat.
Note: If you fall off any of the bridges, you will end up at the bottom of the lair and take damage. Do not open or knock on the door, or you will take damage.
-
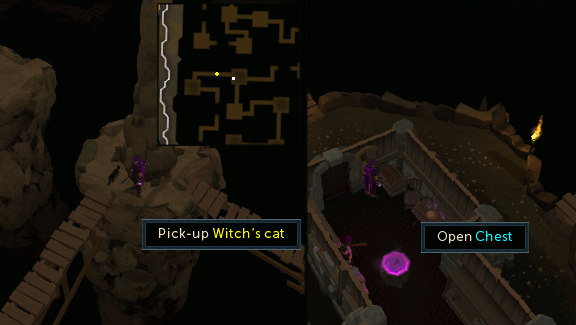
Head North and cross bridge to the West. Follow the path to the North until you spot the Witch's cat. Pick it up and return to Kardia's house. Use the Witch's cat on the door and you will automatically hide while she answers the door. While she is playing with the cat, enter and search the chest near the door. You will find a Doll of Iban, the History of iban, a Restore potion (3), Super attack potion(3).
-
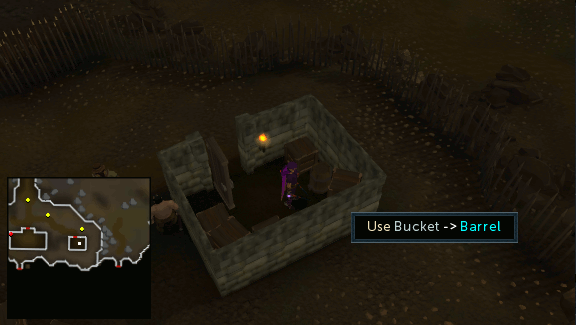
Return to the floor with the dwarves and talk to Niloof, who will tell you that you must find the four elements, mentioned in the History of Iban, to destroy Lord Iban. Speak with Klank, who will give you Klank's gauntlets. Pick up the Bucket in the house to the west and use it on the barrel in the small shed to the East to fill it up with Dwarf brew.
-
Head to Lord Iban's tomb in the South-Eastern corner of the cave and use the Dwarf brew on it. While wearing the gauntlets, set it on fire by right clicking on the tomb and choosing 'Search'. Iban's ashes will then automatically appears in your inventory. Now, smear them on the Doll of Iban.
Note: Do not search or you will take 100 damage.

-
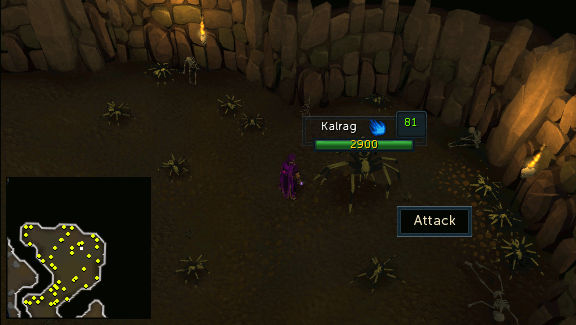
Head into cavern with Blessed spiders (level 42) in the North-Eastern corner of this floor and kill Kalrag. When you have defeated it, its blood will automatically get smeared onto the Doll of Iban.
Note: If you wish to fight it using Ranged/Magic, then run into the corridor leading to its cave. It will not be able to follow due to its width, therefore creating a safespot (See the image below). As soon as Kalrag dies, the Blessed spiders in the cavern will become aggressive to you.
-
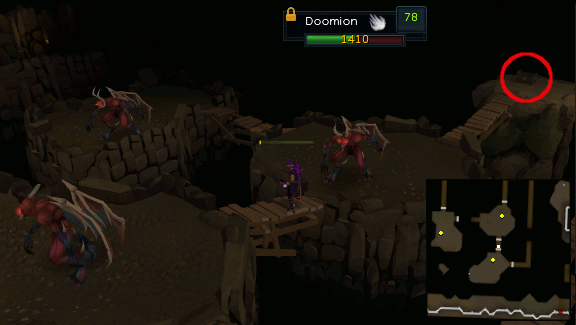
Go back up a floor and walk North along the Eastern wall until you come to a narrow bridge. Jump across it and then cross another one to West. Continue down the path to the South and cross another bridge to reach three demons, called Doomion, Holthion, and Othainian. Kill them and pick up the Amulet of Doomion, the Amulet of Holthion, and the Amulet of Othainian. Open the chest to the North (circled in red) and you automatically place the amulets inside of it to obtain Iban's shadow. Smear it on the Doll of Iban.
Note: If you wish to fight them using Ranged/Magic, stand on the wooden bridges. They will not be able to follow due to their width, therefore creating a safespot.
-
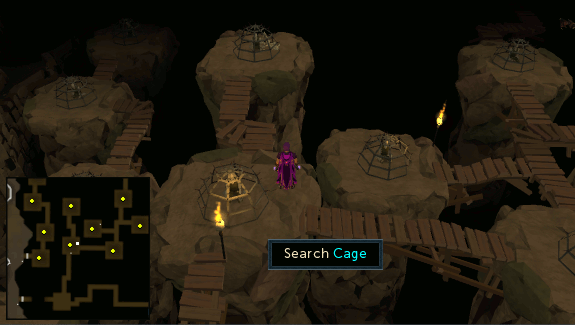
Put on Klank's gauntlets head to the North-Western corner of this floor. Search all of the cages until you find the one that contains Iban's dove. Smear it on the Doll of Iban. The Half-soulless will bite you, but will fail because you are wearing the gauntlets.
Note: If you do not have Klank's gauntlets equipped, then you will take 100 damage.
-
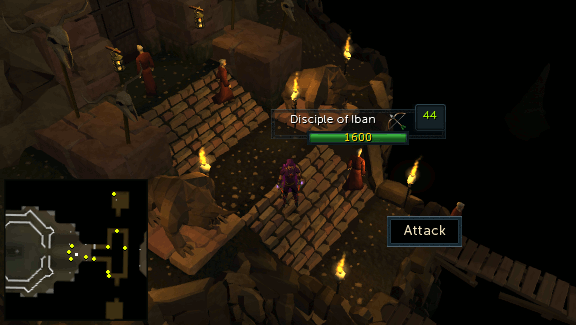
From the cages, head South-East crossing a number of bridges until you spot some Disciples of Iban. Kill them to obtain a Zamorak robe (top) and a Zamorak robe (bottom). Before proceeding to the next step, take off all your gear and put the Zamorak robes.
Note: Make sure you have 3 empty inventory slots before proceeding to the next step or you will not be able to receive the whole reward since you will be immediately teleported out of the room.
-
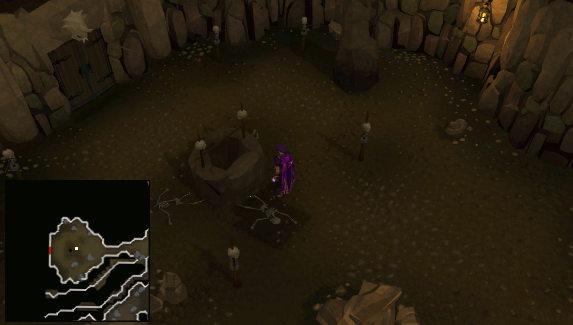
Enter the temple and Lord Iban will notice that you possess the only weapon to destroy him, the Doll of Iban. He will start casting spells at you. Run towards him, while attempting to dodge the spells, and throw the doll into the well.
Note:The Protect from Magic prayer does not work against Lord Iban's spells
-
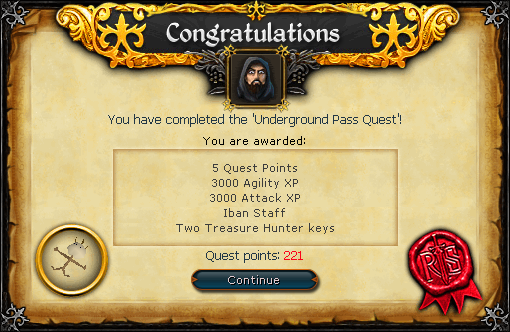
Lord Iban will die and you will end up in a cavern with Iban's staff, 30 Fire runes, and 15 Death runes. Talk to Koftik and he will teleport you to the entrance of the Underground Pass. Return to King Lathas and report that Lord Iban is dead.
Note: Some time after the quest, King Lathas will send a courier to you with the King's message, which will allow you to begin the Regicide quest.
Congratulations! Quest Complete!
This Quest Guide was written by Swaty, Alfawarlord, danthehunter, and quackmann. Thanks to Stormer, jimfromtx, ImaGasLT, jfta0007, Slow Cheetah, Ghoulies, u gone lol, HEAT, einsteinman, skydragon252, JoshB, Master242424, martori, greatgecko, DRAVAN, pokemama, Eq_S_Guy, meowmix686, Maury75, Tenseiken, aeacus_1, Cuine100, chimpo50, Nickstud, Egekalaycan, Weezius, Bloodbang, Venombreath8, deannn, FireHazard772, Javezz, DC Seperfall, pzq, Kwojiba, and Rooskii for corrections.
This Quest Guide was entered into the database on Mon, Apr 19, 2004, at 08:03:18 PM by DRAVAN and CJH, and it was last updated on Sun, Jan 08, 2017, at 12:36:53 AM by Rooskii.
If anything is incorrect or missing, or if you have any new information to submit to this database, please submit it to us on our Content Submissions Forums.
If you see this guide on any other site, please report it to us so we can take legal action against anyone found stealing our content. This guide is copyrighted by RuneHQ, and its use on other sites is expressly forbidden. Do not ask if you can use our guides or images, the answer is and always will be NO!
Print this page with images - Back to the Quest Guide Index Page - Back to Top
