

Ability to defeat a level 70 enemy.
-
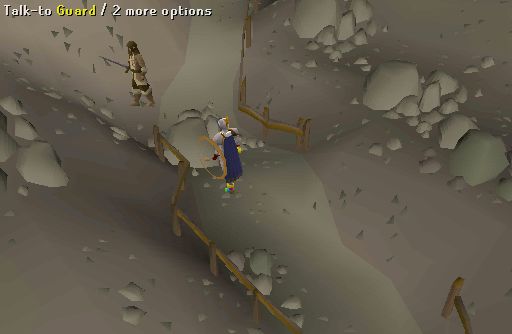
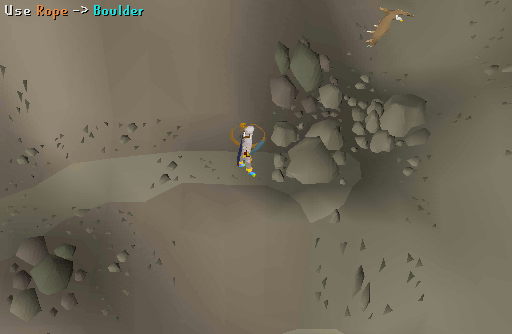
Go northeast of the Swaying Tree (where the Bunnies and Doogle leaves are, which is east of Rellekka, follow the path east after leaving the city.) Walk up the slope and try to talk to the Guard. He will tell you to leave. Now go to the left of the slope and walk up till you come to a rock on the side of a short cliff. Use your rope on this rock to climb down into the cavern below.
-
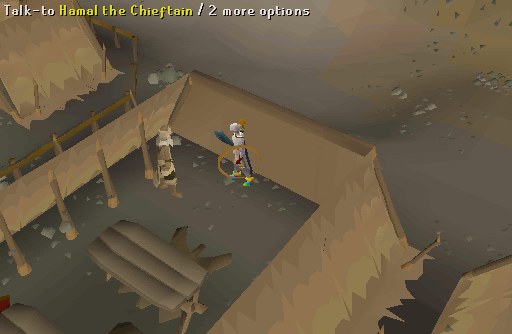
Follow the path east into the Mountain Camp and speak to Hamal the Chieftain. He tells you his daughter is missing. Offer to find her. Leave and head south to a mud pool. Dig up some mud. Now, go to the fenced area north of the Chieftain's tent. There is a pole spawn just north of the goat herd's tent. Pick up a pole.
-
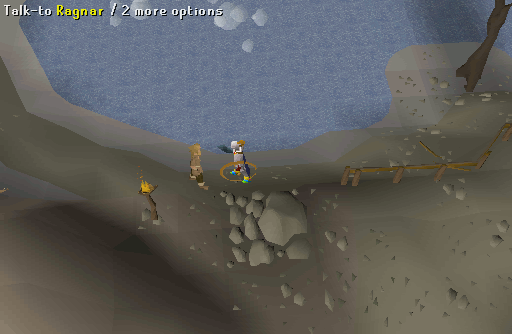
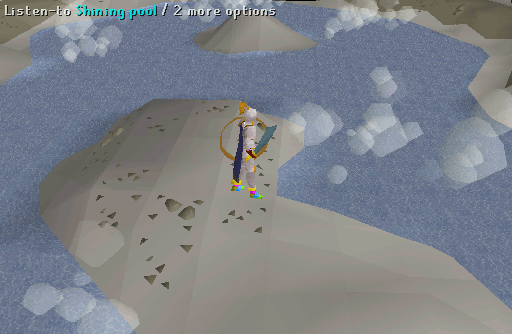
Head north from the goat farm and up a cliff to the Shiny Pool. Follow the path southwest until you reach Ragnar. Talk with him and he will tell you about Asleif, the Chieftain's daughter. After talking with him, use the mud at the base of the nearby Tall Tree and climb it to a small island.
- Use your pole on the middle rock to get across to the second island, then use the plank on the flat rocks to get to the third island. Now listen to the Shiny Pool. It will tell you that it is the voice of Asleif and give you two new assignments: A) Improve relations between Rellekka and the mountain camp, and B) Find a new source of food.
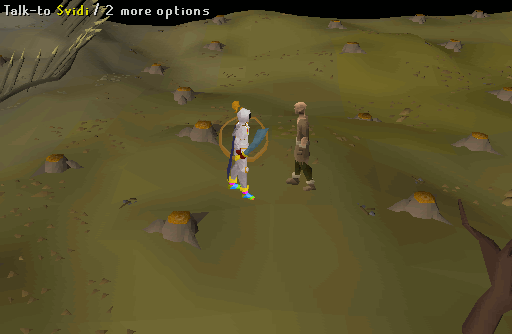
- Go speak to the Hamal the Chieftain about both of these things. He will mention that Svidi, the representative they sent to Rellekka, has gone missing. Offer to go look for him. (When you leave the camp heading for Rellekka, the guard will now allow you climb over the rock slide.)
- Go to back to the Swaying Tree (with Bunnies and Doogle leaves) located east of Rellekka. From there, head north to find Svidi wandering around near the Black unicorns. He says that he is afraid to enter Rellekka without a promise of safety guaranteed.
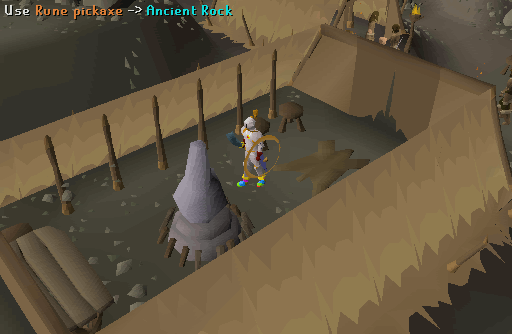
- Go talk with Brundt the Chieftain of Rellekka. Before he agrees to a safe passage he wants the stone back that the Mountain settlers took on their departure from the Fremennik. If you didn't bring your own pickaxe, go north of Rellekka (north of the Helmet shop, on the beach bluff near the Hobgoblins and Rock crabs) and pick up an Iron pickaxe, then head back to the Mountain Camp.
- Walk over to the mud pool (or the goat pen) and pick up any rock on the ground. Now walk inside the big tent on the south side of the camp; it has a guard outside. Use your Iron pickaxe on the rock to get Half a rock. Walk out of the tent and the guard will notice the rock, you will automatically show him the smaller rock you picked up and he will let you go by.
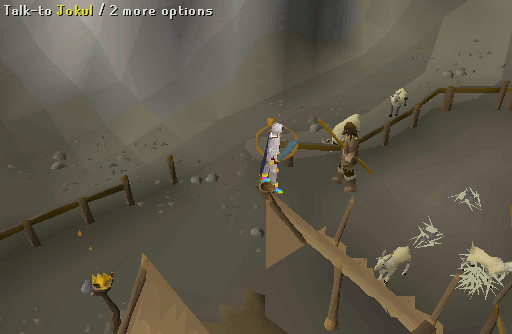
- Go talk with the Jokul, the goat herder, in his tent north of Hamal the Chieftain. He will tell you about the White Pearl fruit that grows on mountains.
- Take the Half a rock to the Rellekka Chieftain and he will give you a note of safe passage. Take the note to Svidi and he will thank you.
- Put on a pair of gloves (any kind except Mystic, Vambraces, Rogue gloves, or Graceful gloves are not allowed) and go to Wolf Mountain, located between Catherby and Taverley (not to be confused with Ice mountain). Pick a White Pearl fruit from the thornybush by the Gnome glider. (If wearing Mystic gloves, Rogue gloves, Graceful gloves, Vambraces, or Slayer gloves, you will take 4 damage and get no fruit!) Eat the fruit and take the seed to the Mountain Chieftain.
- Go speak to Asleif at the pool again and she will tell you to convince her dad that she is dead. She explains that she was killed by a creature whilst sitting at the lake.
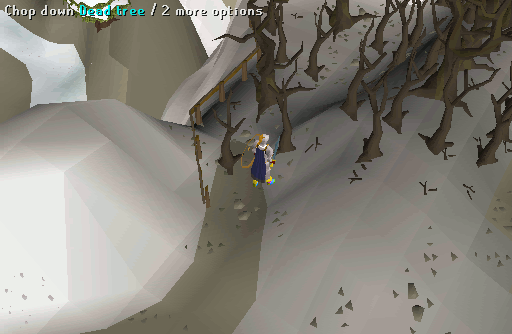
- Go speak to Hamal the Chieftain and you will simply tell him that his daughter is dead. He doesn't believe it and wants proof. Return north to the Shiny Pool and walk all the way around it (clockwise) to the end of the path. Use your Axe (hatchet) on the dead trees and enter the cave. (If you encounter problems getting through here, try standing directly west of the Dead tree blocking the open path beyond. Facing any other direction and cutting the tree puts you in the wrong place.)
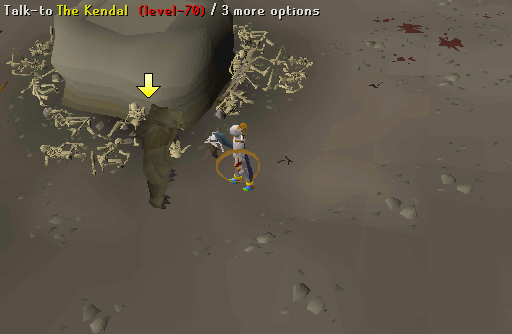
- Follow the cave till you come to a monstrous bear-like creature, The Kendal (level 70). Tell him you are no one special, ask him if he means a sacrifice, then tell him he looks like a man in a bear suit. His story will be told during this dialog. Now you must fight him. He is pretty easy, but if you want to you can pick up Steel knives from the spawn location in the middle of the room in case you didn't bring a weapon. It takes roughly 30 seconds for it to spawn. Once you kill him you will take his bear helmet as a trophy.
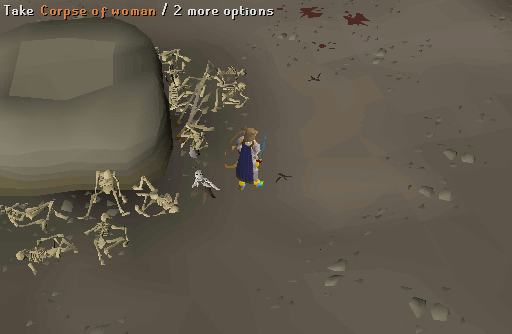
- Now collect the "Corpse of woman" and take it to Hamal the Chieftain. He will ask you to bury her on the island where her voice is heard, along with one of her possessions and 5 rocks, which you will build to make a type of marker.
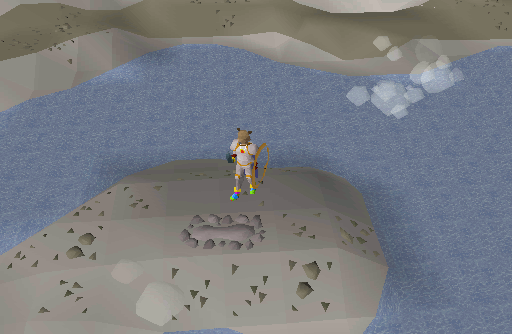
- Collect 5 rocks from the goat pen and then go talk to Ragnar by the Shiny Pool. He will give you Asleif's necklace. Now go to the middle island and bury her, then use the rocks on her burial mound.
Congratulations! Quest Complete!

This Old School Quest Guide was written by Legendlink0. Thanks to Jacobt4, Parsifal123, DRAVAN, Ju Juitsu, link465, Alex201285, HW bengy, Uber, Creepybacon, Mithriander, dragoncon_0, Demonichell, excojoe05, creekynoise, Weezyrowe, MrStormy, timr917, Oblivion590, Andro_Girl, Macoll71, ITIr Bamf, McSwindler, BexAvci, and Hitori for corrections.
This Old School Quest Guide was entered into the database on Mon, Mar 07, 2005, at 04:03:24 PM by nitr021, and it was last updated on Fri, Feb 24, 2017, at 09:14:18 PM by L1ttleR3d.
If anything is incorrect or missing, or if you have any new information to submit to this database, please submit it to us on our Content Submissions Forums.
If you see this guide on any other site, please report it to us so we can take legal action against anyone found stealing our content. This guide is copyrighted by RuneHQ, and its use on other sites is expressly forbidden. Do not ask if you can use our guides or images, the answer is and always will be NO!
Print this page with images - Back to the Old School Quest Guide Index Page - Back to Top
