

-
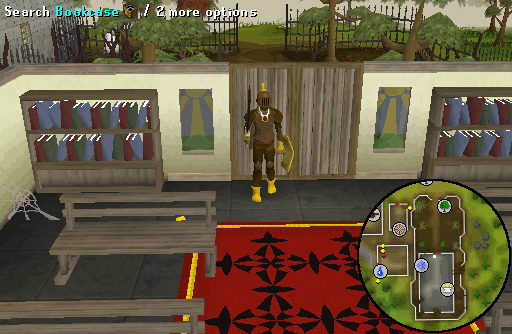
Travel to the Seers' Village Chapel and search
one of the bookcases to find a Ragged book. Read it to learn that it deals with the elemental body.
Note: The easiest way to reach the quest start is by using the Seers' Village lodestone network teleport.
-
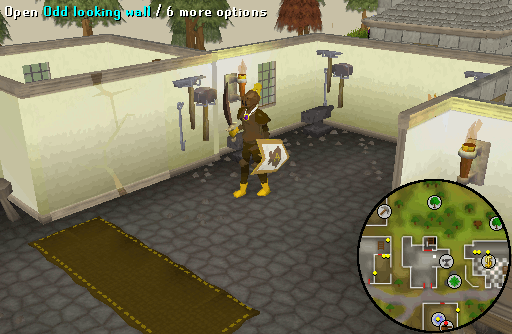
Leave the chapel and head north to the blacksmith, just west of the bank. Use the Battered key on the Odd-looking wall, and then descend the stairs to access the Elemental Workshop.
-
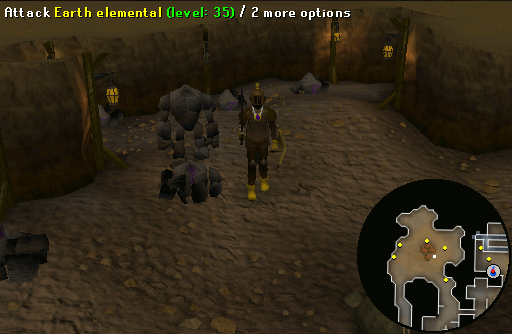
Once inside the workshop, head into the western passageway and try to mine an elemental rock. As you try to mine a rock, an Earth elemental (level 64) will attack you. Kill the Earth elemental and pick up the Elemental ore it drops. Repeat this process two more times until you have gathered 3 Elemental ores.
-
Return to the central room and walk south towards the furnace. Throw the 3 Elemental ores and the coal on the furnace to Smith 3 Elemental bars. Create a Key mould by using the Soft clay on the Ragged book. Now, use it on the furnace along with one of the Elemental bars to make a Ragged elemental key.

-
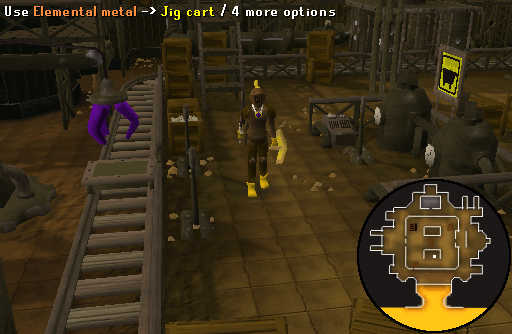
Now you need to create a Primed bar. Go down one floor and repeat the same method you used in The Elemental Workshop II quest. Place an Elemental bar on the jig cart, then dip it in the lava using the claw and the two old levers on either side. Put the bar on the cart, then pull the left lever first to pick up the bar and lift up the crane. Use the right lever to rotate the crane, then use the left lever again to dip the bar in the lava. Pull it again to pick it up. Now, pull the lever located underneath the yellow jig cart icon to move the cart towards the press, and then pull the lever near the pipes to flatten it.
-
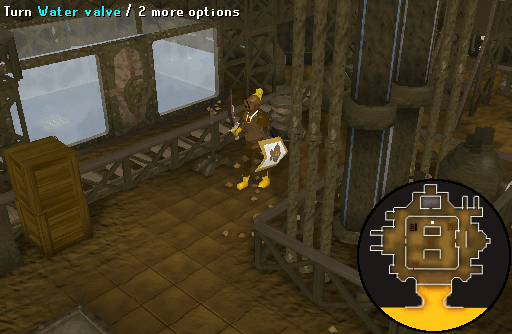
Once you have flattened it, you need to cool it down. Pull the lever by the jig cart symbol to move the cart in front of the water tank. Open the door with the lever in front of the cart and then hoist the bar into the tank by rotating the corkscrew lever to the right two times. When the bar is inside, close the door again and open the two valves nearby to let the water flow in. Then turn the valves again to let the water flow out, open the door, rotate the corkscrew driver to move the cart back on track and close the door again. Then pull the lever to let the cart continue over the track.
-
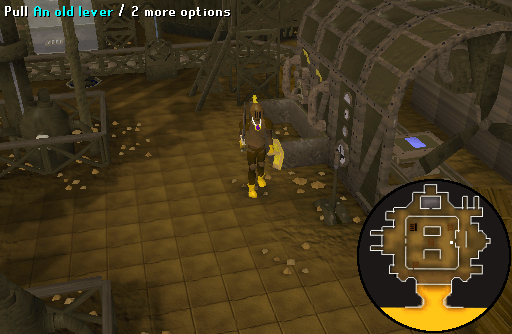
Move the cart with the bar into the wind tunnel. You must then pull the lever located near the machinery to turn on the fan. Pull the lever again to turn off the fan and move the cart back to the crane. Pick up the Primed bar and do the entire process again to produce a second Primed bar.
-
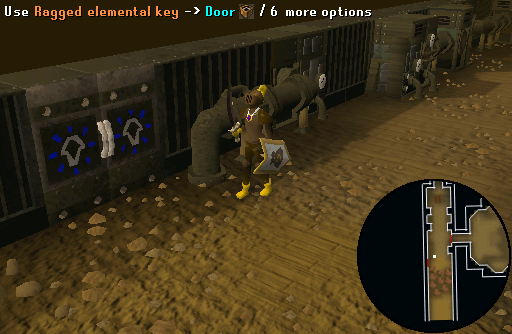
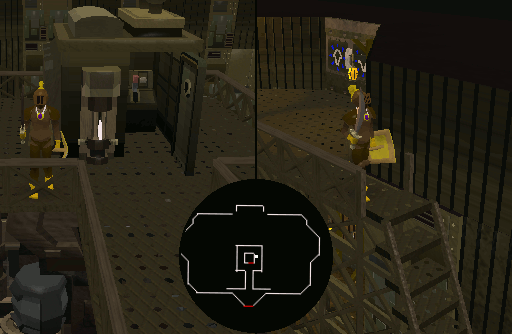
Once you have made the bars, climb down the stairwell to the west. When you have reached the bottom floor of the workshop, head south and use the Ragged elemental key on the Body door to enter.
-
You will have entered a room with a door and a slot next to it. If you try to open the door, you will notice that it is stuck. Use the Primed bar on the slot. The door will open.
-
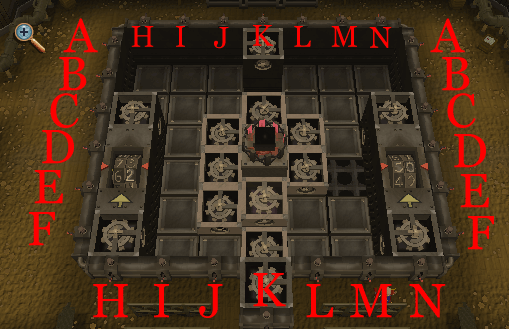
Climb down the stairs to the west or the east of the platform to start solving a puzzle. The aim is to get all the cogs spinning by pulling the levers.
Note: The directions on how to solve the puzzle are given in the following steps. It is advised to use the zoomed out view, because this will save you a lot of camera rotating.
Notice that the screen is now on its side and there are no compass indications. At the top of the grid, you will find two large levers. The left lever will reset all of your moves, while the right lever will undo your last move. You only have 50 tries to solve the puzzle. When you have to pull one of the levels labeled A-F then you only have to pull the corresponding lever on one side; no need to pull it on both sides.
-
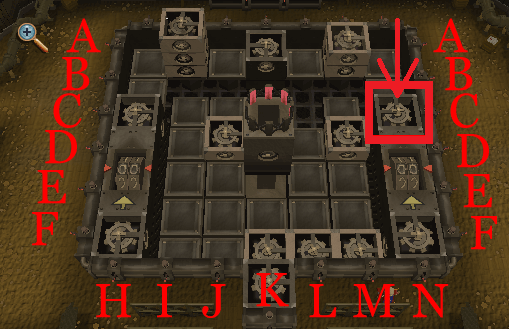
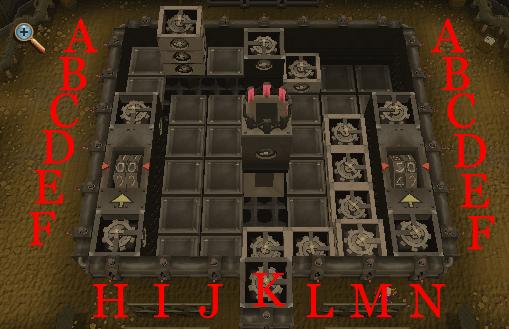
To solve the puzzle, start with activating the cog marked in red (not the Lever allotted to Label C). Pull the levers in the following order: J, E, M, F, L, D, M, F, L, E, K, F and J. Now, the first 3 cogs will be set like in the image below.
-
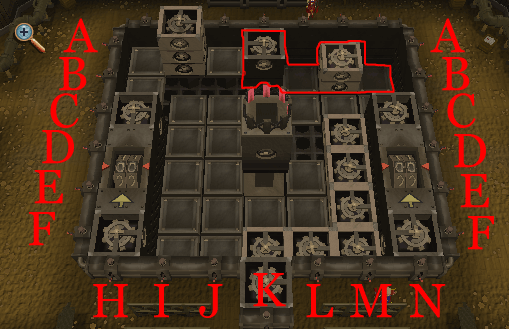
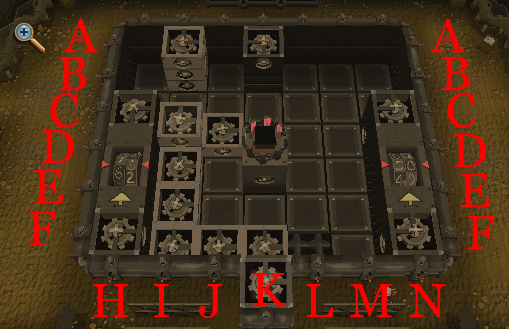
Continue by pulling the levers E, L, B, M, C, I, E, M, D, L, C, J, E, M, C, J, E, M, C, and L. All the cogs will be lined up like this. The cogs marked in red in the image below, are the pieces that have been lowered to gain access to the next couple of cogs.
-
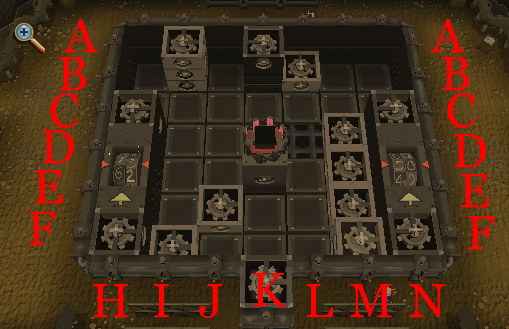
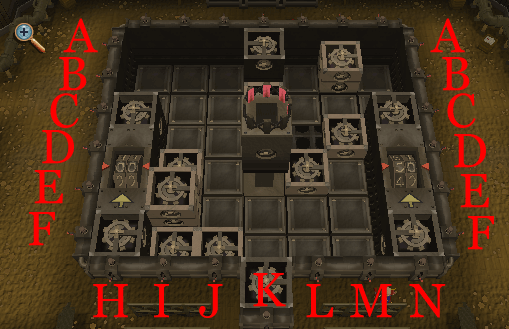
To activate the right counter, reset the puzzle by clicking the lever to the left which says "reset". This will allow you to re-do all the moves you did earlier, without having the issue that there is no power left in the machine. Start by pulling lever A, L, F, M, B, K, C, and I. Now, all the 4 cogs will be in line. Pull lever F, M, C, I, F, M, C, I, F, M, C, and L. Now, it will look like this.
-
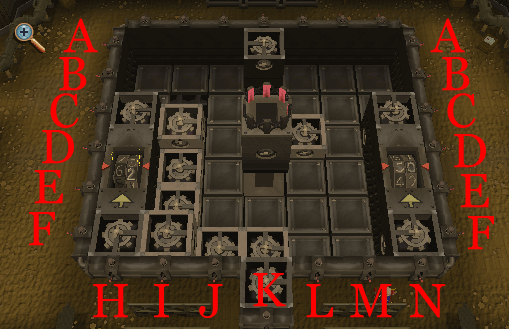
Now you must to attach the cogs to the main cog. Start by pulling levers I, F, L, E, I, F, L, E, J, F, L, E, K, F, L, and E. Now, it will look like this.
-
The third part of the puzzle is going to lower the last pieces of the puzzle. To do this, however, you need to reset the puzzle first. After it is reset, pull levers A, L, B, M, C, L, A, M, C, L, B, K, C, M, and E. All the 4 blocks will now be in 1 row. Pull levers I, C, L, F, I, C, L, F, I, C, L, F, J, E, L, F, J, E, L, F, M, E, K, F, and L. Now, it will look like this.
-
Now that all the parts for the puzzle have been unlocked, it is time to set the left counter. Before you start, reset the puzzle. Pull levers I, C, J, B, I, A, J, F, I, B, M, F, I, C, M, F, I, D, J, C, and L. Now, it will look like this.
-
Now pull levers F, H, C, M, A, L, B, M, F, L, E, J, B, M, E, J, C, I, B, M, E, J, C, I, B, J, D, I, and to finish things, pull lever B once more. Now you will have everything arranged as follows.
-
Now, you need to attach the cogs to the back pillar. Reset the puzzle again, then start by pulling levers B, I, A, J, B, I, F, M, B, I, D, J, F, M, C, L, D, M, F, L, C, M, F, I, E, L, F, I, E, L, D, M, F, K, E, and L. The middle part has now been lowered, and it will look like this.

-
It is time for the final part of the puzzle. Reset it for the last time, and start by pulling levers A, L, F, M, B, I, A, J, C, I, B, J, C, I, B, K, C, I, F, M, B, I, D, J, B, I, F, L, D, M, E, L, C, M, F, K, E, L, F, I, B, L, A, M, C, L, and B. Now, pull the following levers: K, C, and L. The middle part of the machine will rise again.
-
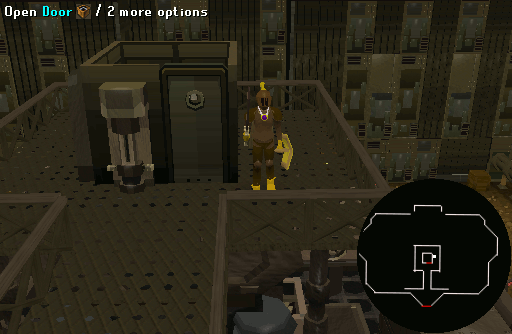
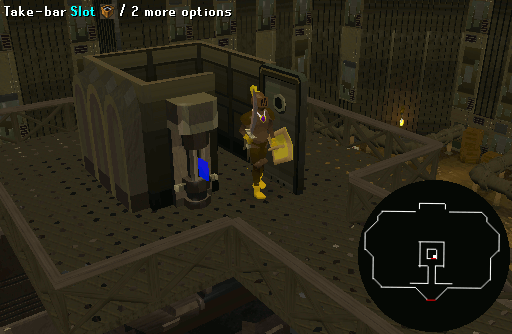
Go up the stairs and enter the little cabin. Close the door using the lever and push the big red button to produce a Body bar. Pull the lever again to open the door and take the bar out of the slot.
Note: Each time you produce a Body bar, your Defence level will be drained by 33 points.
-
Now, you must make a second Body bar. Climb down the stairs and pull levers K and L. This will lower the middle part of the machine. Move the cog away again by pulling levers K and A to power the middle part. Pull lever C, then lever L, and go up the stairs. Use the remaining Primed bar on the slot and enter the cabin. Pull the lever to close the door and push the big red button. Flip the lever again to leave the cabin and take out the second Body bar.
-
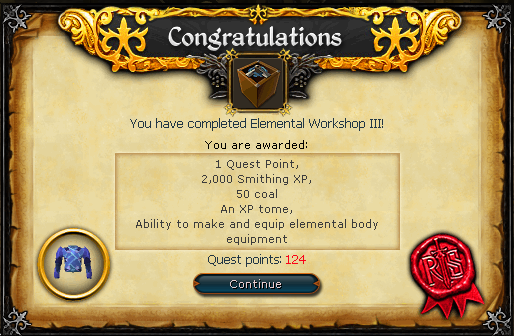
Return to the central area of the workshop and Smith the two Body bars into a Body body on the workbench using a Hammer and the Ragged book.
Congratulations! Quest complete!
After the quest:
After the quest, if you wish to make more body bars, you can do so by pulling the levers K, A, C, L, K, A, C, L.
This Quest Guide was written by Jasper and Senug5. Thanks to 00MRC, ThomasRM, Theundeadgod, Jakesterwars, Scorchy_Devil, RunescapeJunkie, Heavens_Vibe, Wesley, awp5379, Var da Stick, OhMan tiMMe, Double_D_Edd, Im4eversmart, Evanstheman2, Bob, Goldish Star, Coin Slot, fishing376, Alfawarlord, Powotae, and Gavala for corrections.
This Quest Guide was entered into the database on Wed, May 26, 2010, at 10:28:17 PM by Scott, and it was last updated on Wed, Jun 28, 2017, at 12:28:24 AM by L1ttleR3d.
If anything is incorrect or missing, or if you have any new information to submit to this database, please submit it to us on our Content Submissions Forums.
If you see this guide on any other site, please report it to us so we can take legal action against anyone found stealing our content. This guide is copyrighted by RuneHQ, and its use on other sites is expressly forbidden. Do not ask if you can use our guides or images, the answer is and always will be NO!
Print this page with images - Back to the Quest Guide Index Page - Back to Top
