

| Chicken | Cow | Cow Calf | Drake | ||||
| Duck | Farmer | Goblin (level 2) | Giant spider | ||||
| H.A.M. Guard (level 20) | H.A.M. Guard (level 30) | H.A.M. Guard (level 32) | Imp | ||||
| Man | Ram | Rat | Spider | ||||
| Woman |
| Bowl | Bronze arrow | Bronze dagger | Bucket | ||||
| Cabbage | Egg | Empty pot | Jug | ||||
| Knife | Leather boots | Logs | Mind rune | ||||
| Shears |
- Cook's Assistant - Speak to Cook
- The Lost Tribe - Speak to Sigmund (2nd floor castle)
- Myths of the White Lands - Speak to Explorer Jack
- Recipe for Disaster - Speak to Cook
- The Restless Ghost - Speak to Father Aereck
- The Blood Pact - Speak to Xenia
- Buyers and Cellars - Speak to Darren Lightfinger
- Love Story - Speak to Mabel
- Sheep Shearer(mini-quest) - Speak to Fred the Farmer
|
1. Clay Mine 2. Windmill 3. Beefy Bill 4. Hops Patch 5. Fred's Farm 6. Groats' Farm 7. Yew Trees 8. Thieves' Guild 9. God Statue |
10. H.A.M. Hideout 11. Cow Field 12. Fishing Store 13. Combat Academy 14. Furnace 15. Canoe Station 16. Explorer Jack 17. General Store 18. Tree Patch |
19. Fishing Spots 20. Goblin Houses 21. Crater and Memorial Fountain 22. Castle 23. Lodestone 24. Bob's Brilliant Axes 25. Church 26. Graveyard |
Locations
-
Clay Mine:
On the edge of the Draynor Manor property is a mine. This mine contains 3 Clay rocks for your use.
-
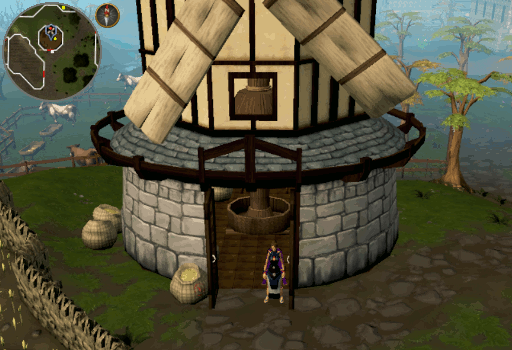
Windmill:
This is Lumbridge's local windmill. On the first floor of this area you have Millie Miller who can tell you how to mill flour if you do not know how to yet and an Empty pot spawn. The second floor is empty and the third floor has the hopper and operating controls. In a field nearby, you can pick the Wheat to make your flour with.
-
Beefy Bill:
To the North, you will find a second General Store run by Beefy Bill. He will buy/sell all the items you want and the nearby bridge will provide you a quicker access to the city of Varrock. In the pastures surrounding him are several Cow and Cow calves.

-
Hops Patch:
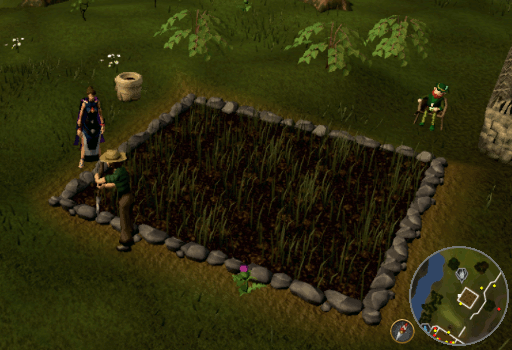
Here is a Farming patch where you can grow hops from level 4 up; Vasquen and a Tool leprechaun are nearby to assist. To the East of the patch is a field of Potatoes which can be harvested for Cooking.
-
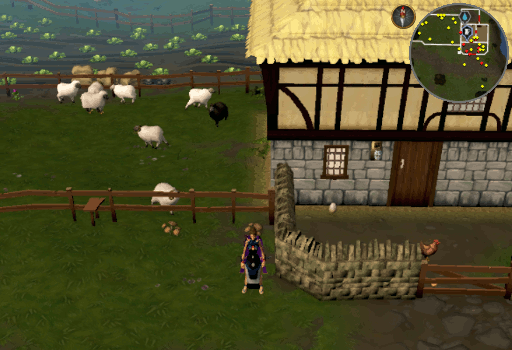
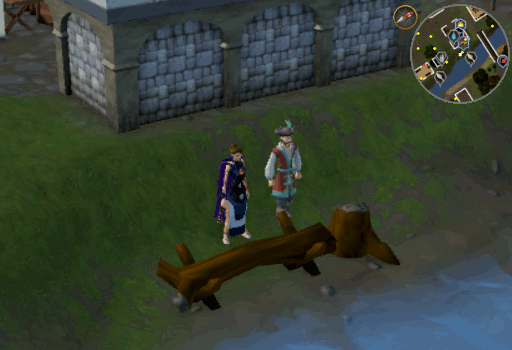
Fred's Farm:
Here is Fred the Farmer's home. To the West of the house, he has a sheep pen where you can use Shears on all his sheep, except for the Ram of course. If you search hard enough, you will see a sheep that looks suspicious. Upon closer inspection, you will notice that it is really two penguins dressed as a sheep, named Sheep 'Thing'. Outside his front door, are several Chickens and Egg spawns. Within his home is a Shears spawn as well as the Sheep engram, used in the Memorial to Guthix, and a dairy churn. North of the house he has both a Cabbage patch and an Onion patch.
-
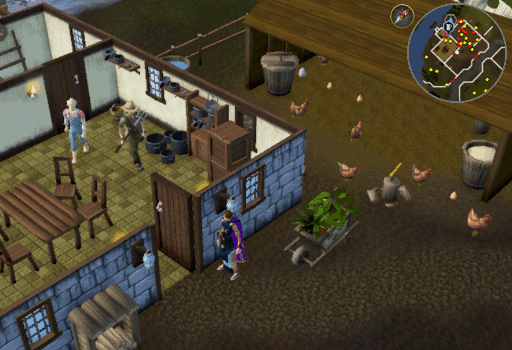
Groats' Farm:
Directly East of Fred’s farm is Seth Groats' farm. This one has several Chickens, Eggs, a Bucket, and a dairy churn. You can usually find a Farmer or 2 in this general area as well; these can be used for either Combat or Pickpocket training.
-
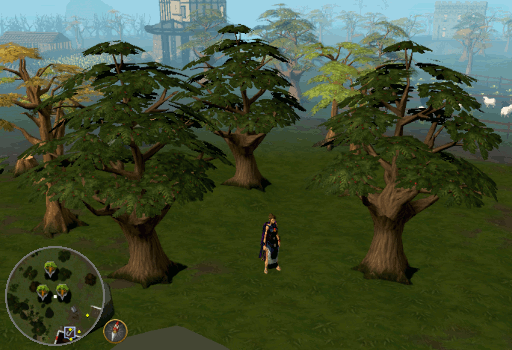
Yew Trees:
North of the crater are 3 Yew trees. This is a decent location to collect logs as the chest in the crater makes for a convenient place to bank.
-
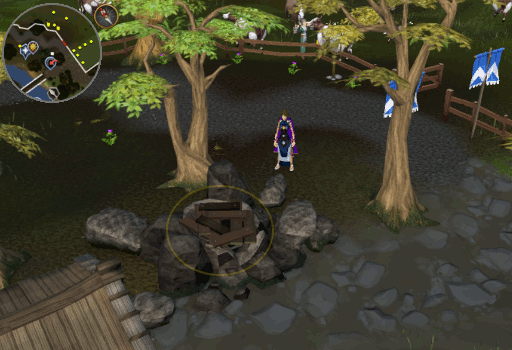
Thieves' Guild:
On the Northern side of the house just South of Fred’s farm is a trapdoor. Climbing down this trapdoor, you can access the Thieves' Guild and start Buyers and Cellars. On the ground level of the house above, you can usually find the Zamorakian herbalist. On the second floor is a female Zamorakian herbalist and their son.

-
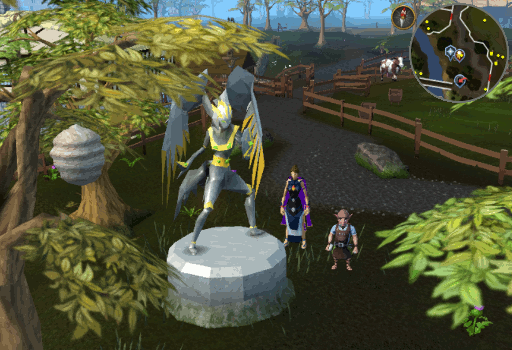
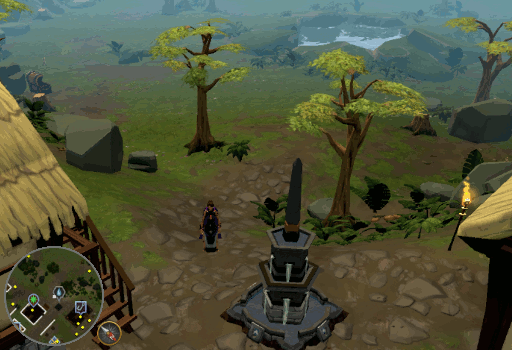
God Statue:
Here is one of five God Statue locations where you can help Copernicus Glyph. While you can choose to build any statue in this location, if you want to obtain Prayer experience instead of Slayer/Combat experience, you will need to build the statue of Zilyana (as shown).
-
H.A.M. Headquarters:
Just East of the Northern bridge is an old mine entrance that leads to the H.A.M. Headquarters. Within the hideout, you can thieve from the H.A.M. members and kill the guards. This little area is a nice place to train Thieving early on (Level 15+). This area is also used in Death to the Dorgeshuun, One Small Favour, and The Lost Tribe.
-
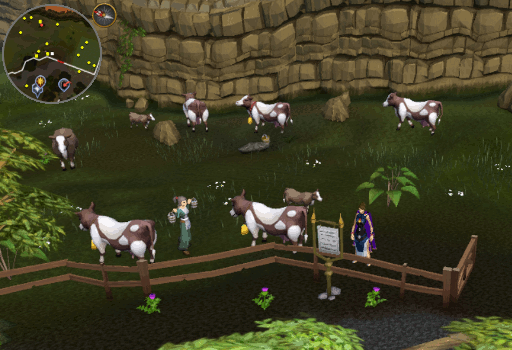
Cow Field:
Directly East of the farm is a large pasture with Cow, Cow calves, and milking cows. A sign outside informs you how many cows in the field have been slain during the current day.
-
Fishing store:
Here Hank runs the Lumbridge Fishing store. You can buy/sell your fishing supplies, plus claim a Crayfish cage and a Small fishing net for free.
-
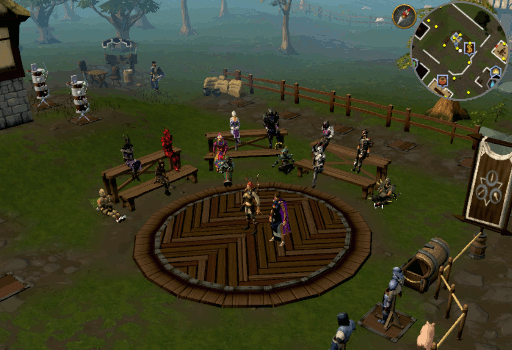
Combat Academy:
The Combat Academy is led by Lady Deathknell, here she can help you to learn the basics of the Evolution of Combat. There is a total of 7 lessons which you can complete. For each rank you earn, you will earn a combat experience lamp. This area also has several spectators (Barr Rows, Minnie Gamer, Polly Paw, and Will Dee) as well as Harlan to the North West and a bank along the Western fence.
-
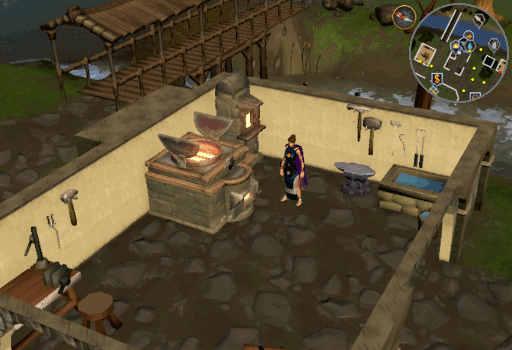
Furnace:
Directly East of the Combat Academy is the furnace. Here you can smelt and create various armor and weaponry. The bank chest within the Combat Academy makes this a good place to start Smithing training.
-
Canoe Station:
Here you can craft a canoe so you can travel to various locations along the River Lum. You can talk to Barfy Bill for more information on canoes or see Woodcutting guide.
-
Explorer Jack:
This is Explorer Jack's house where you can claim the Explorer's ring (1) and the ability to perform the "Explore" emote after you complete the Lumbridge and Draynor Village Easy Achievements. On the second floor you can find the Saradomininist priest, priestess, and their daughter.
-
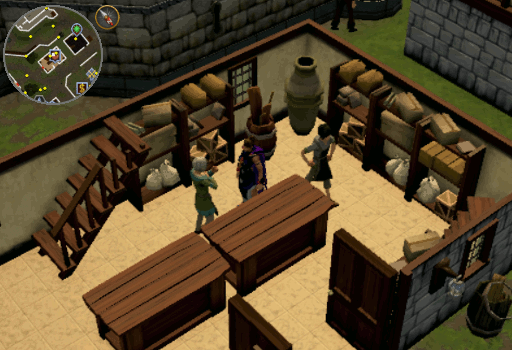
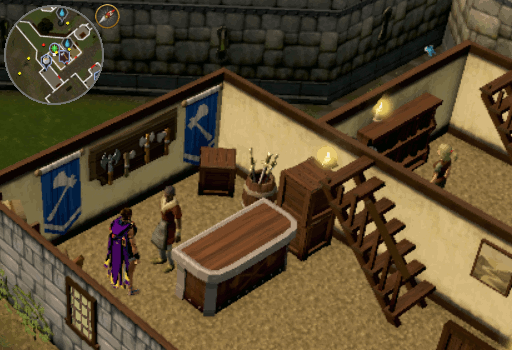
General Store:
South of the Combat Academy is the Lumbridge General Store. Here you can buy/sell the usual items and obtain a tinderbox, hammer, plus main and off-hand Bronze daggers for free. Wandering around the area you can also find Donie. She can offer suggestions about quests that you can do and give you a small bit of information about them. If you have completed any of the quests, you will discuss what happened during it.
-
Tree Patch:
Here is a Farming patch where members can grow trees from level 15 up; Fayeth and a Tool leprechaun are nearby to assist. The Herald of Lumbridge can also be found near by, though she cannot assist you at farming.
-
Fishing Spots:
To the East of the river, it is possible to access the two Lure/Bait Fishing spots. Here you can catch trout, pike, and salmon at level 20 or higher.
-
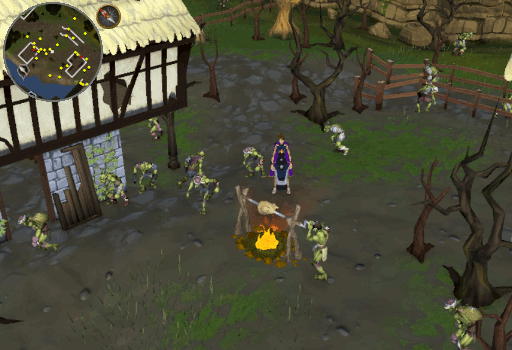
Goblin Houses:
Near the passageway to Al Kharid are 2 abandoned houses that are overrun with Goblins and a couple of Giant spiders. They provide an excellent training ground for those just starting their Combat skills. There is even an Iron dagger spawn in the Northern of the two houses.
-
Crater and Memorial Fountain:
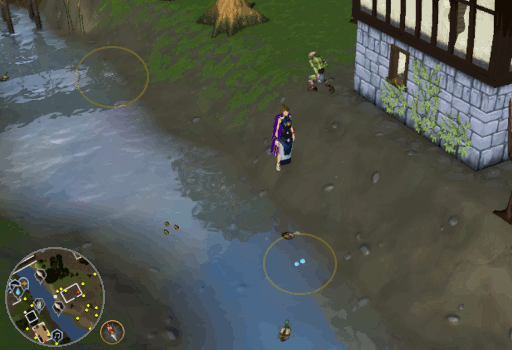
Behind the castle you'll find a huge crater which is a permanent scar on the landscape. It is left over from the Battle of Lumbridge. In more recent years the crater itself has once again started to support life. In the center is a small pool of water, around it can be found trees growing and Rabbits (and sometimes Imps) frolicking. The crater is also often used as a hub for various events, some are only seen a few times while others become a yearly event. On the Eastern side of the crater is a permanent bank chest. To the North East side of the crater, near the Fishing shop and Explorer Jack’s home is a Memorial fountain, dedicated to those who died during the battle which was constructed by players during an event known as the Lumbridge Rebuildathon.
-
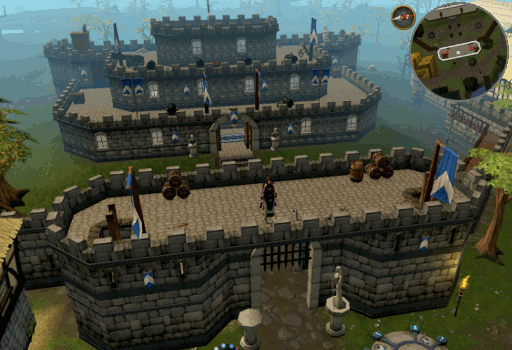
Castle:
This is Lumbridge castle. Previously the first location a player would visit when they started the game. Outside the Castle we can find Hans patrolling the grounds. On his venture, he will encounter several Men and Women as well as Nastroth. The castle itself consists of 4 levels (basement, ground floor, 2nd floor, and 3rd floor) and multiple levels of the Gatehouse out front and a tower section behind the castle.
-
Gatehouse:
This location is mainly worth mentioning because there are 2 Bronze pickaxe spawns on the top-most level. Beyond this, there is not much to note.
-
Basement:
Down here there are respawns for 2 Leather boots, a Cabbage , a Knife, a Bucket, and an Empty pot, as well as a Spider and the Culinaromancer's Chest (Members Only, from Recipe for Disaster). In addition to the food shop and an armor store accessed from the chest, it can also act a handy bank by Right-clicking it. The entrance to the Dorgesh-Kaan caves can also be found down here, however, you must have started The Lost Tribe to enter.
-
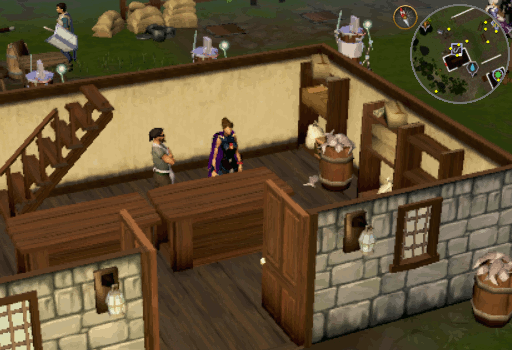
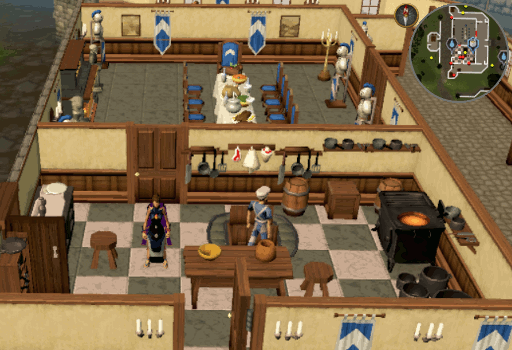
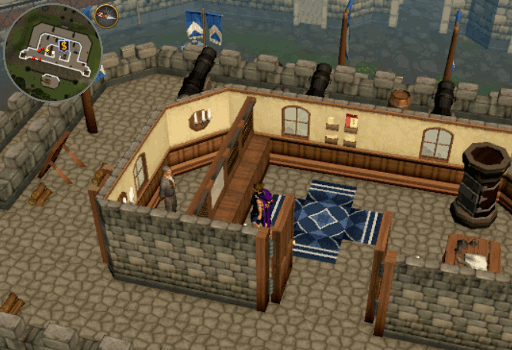
Ground Floor:
The kitchen area of the castle is where you can start Cook's Assistant and Recipe for Disaster. It is home to the Cook, and occasionally his brother, and spawns the following items: Bowl, Jug, Knife, and Empty pot. Within the kitchen is also the "Cook-o-matic 25". It requires completion of Cook's Assistant to use, however, it provides the lowest burn rate in all of Gielinor.To the South of the kitchen can be found a Mind rune and several Rats. To the North of the kitchen is the Dining room. It is used in several quests such as Recipe for Disaster and The Lost Tribe. Near the stairwell North of the Dining room is a Bronze arrow spawn and Guardsman Peale.
-
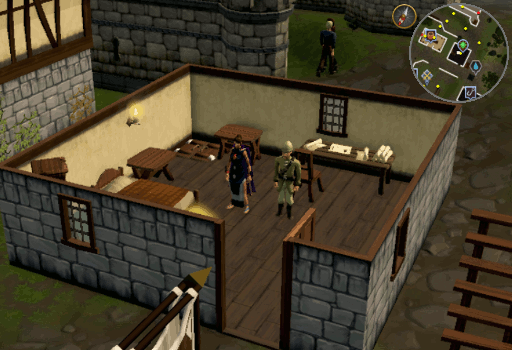
Second Floor:
On this floor, we have a balcony that spans the Eastern side of the Castle. Here we can find Guardsmen Dante, Brawn, and Pazel; their cohort DeShawn can be found along the hallway in the main part of the building with a Man. Within this area of the Castle there are 2 rooms.
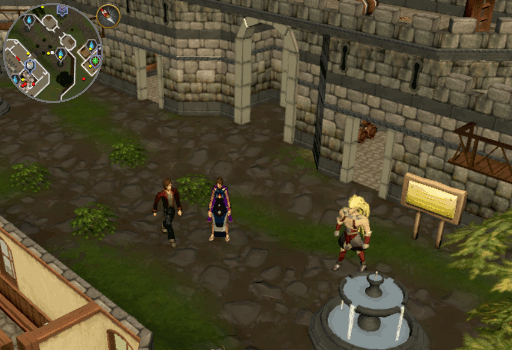
The Northern room is Duke Horacio’s room. Here you can find him to begin Dragon Slayer as well as his advisor, Sigmund, whom you can speak to in order to begin The Lost Tribe. Note that the advisor will no longer be present after completion of The Lost Tribe.
The Southern room contains a Bronze dagger spawn as well as a Spinning wheel.

-
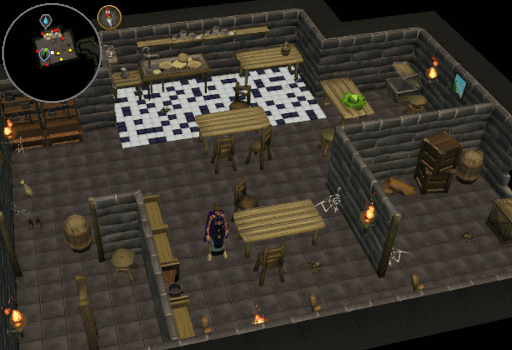
Third Floor:
Finally we reach the third and final accessible floor of the Castle. In the one and only room of this floor we find a bank with a deposit box. This makes the Spinning wheel downstairs a viable location for spinning flax and Wool. North of this room you can also find 4 Log spawns.
-
Gatehouse:
-
Lodestone:
Just outside of the Castle is the Lumbridge lodestone. You can teleport here for free once you have activated the lodestone. North of it is a Musician that can be used to recuperate your run energy and the Doomsayer whom you can speak to in order to toggle which warnings you will receive. North East of it, near the bridge is a Lumbridge guardsman with his canine companion. And directly to the East of it is the Lumbridge Sage who can tell you about the city.
-
Bob's Brilliant Axes:
Here is Bob's Brilliant Axes shop. Bob sells an assortment of hatchets, battleaxes, and pickaxes; you can even obtain a Bronze pickaxe and a Bronze hatchet for free. He also repairs armor and weapons that need to be fixed, for a fee.
-
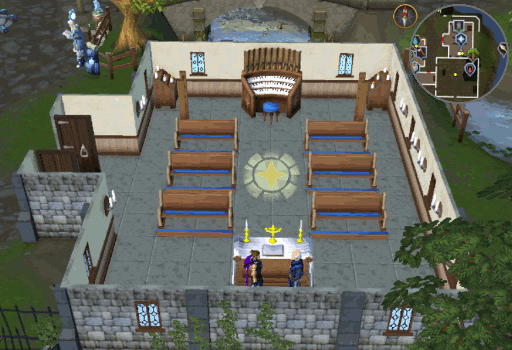
Church:
Within the church of Lumbridge you can recharge your Prayer points and start The Restless Ghost by talking to Father Aereck. You can also talk to him about changing your gravestone marker. Within the church is an organ which you can choose to watch a cutscene of skeleton hands playing it. Climbing to the top of the church, you will find a large bell that can be rung. This does nothing more than startle the Lumbridge inhabitants. Behind the church are three Fishing spots. Here you can catch Crayfish by using a Crayfish cage.
-
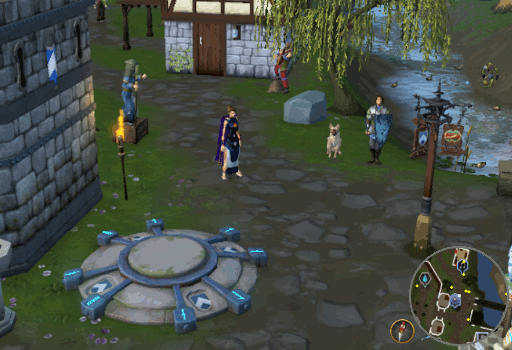
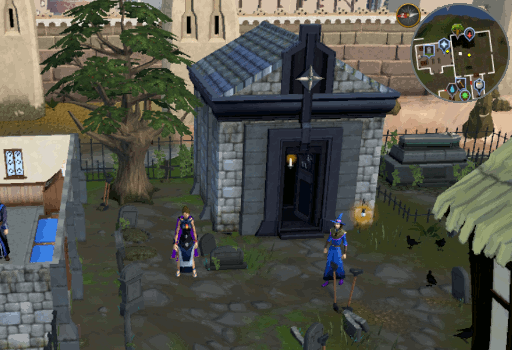
Graveyard:
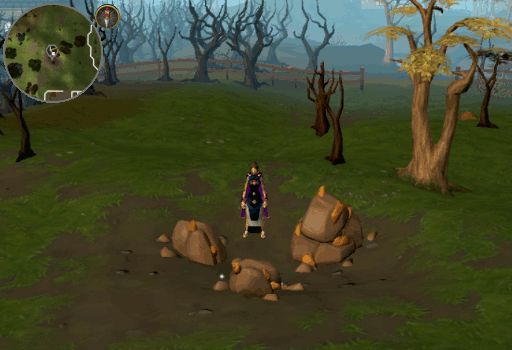
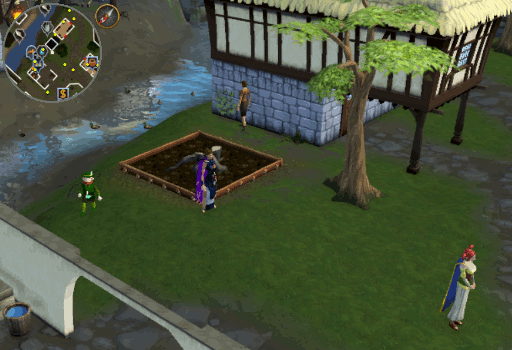
This is the Lumbridge graveyard. Here you will find Xenia (later Wizard Ilona as seen in the image below), who you can speak with to start The Blood Pact and to obtain access to the Lumbridge catacombs, as well as the ghost for The Restless Ghost (Must have the Ghostspeak amulet to speak to the ghost). Next to the catacomb entrance is also a Yew tree growing. This area also provides a pathway for a quick route to the Lumbridge Swamp as well as a shortcut to Tuska’s back and Al Kharid. Note that entering the Graveyard will apply a night filter to your screen, this can be removed by reapplying another filter/skybox.
This City/Area Guide was written by ChathMurrpau. Thanks to previous guide writer: jb sk8ter12, as well as Hampster_Hat, Imperial G96,Watsermetjou, Alientech, Boy 1331, Fireball0236, Halk_5, Scorchy_Devil, Alfawarlord, Meowmix686, Maonzhi, Jakesterwars, Sheep01, Andro_Girl, Runehq User, Ventura2oo5, Ralkal, Crablogger, Javezz, and yumyumtoast for corrections.
This City/Area Guide was entered into the database on Sun, Apr 18, 2004, at 07:53:30 PM by stormer, and it was last updated on Thu, May 16, 2019, at 02:14:54 AM by Chath.
If anything is incorrect or missing, or if you have any new information to submit to this database, please submit it to us on our Content Submissions Forums.
If you see this guide on any other site, please report it to us so we can take legal action against anyone found stealing our content. This guide is copyrighted by RuneHQ, and its use on other sites is expressly forbidden. Do not ask if you can use our guides or images, the answer is and always will be NO!
Print this page with images - Back to the City/Area Guide Index Page - Back to Top
