

41 Summoning
61 Agility
64 Ranged
64 Mining
64 Strength
66 Thieving
Must have restored Senliten to 100%.
-
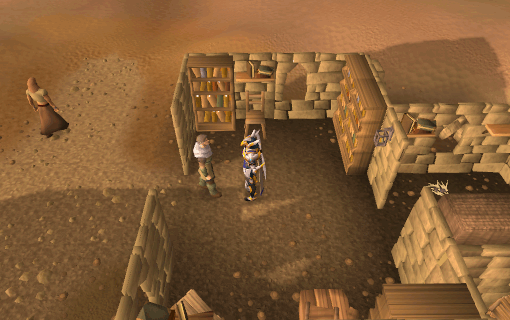
Speak to Ali the Wise in the house at the north end of Nardah to start the quest. He'll tell you that a contact of his has found some caves on Trollheim mountain, but wasn't able to excavate them.
-
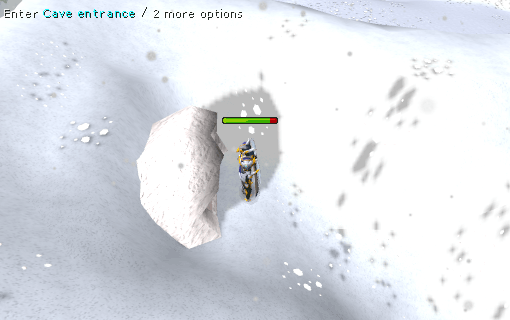
Walk or teleport to Trollheim, and head northwest of the teleport location until you get to the Icy Gate. Just northwest of that is a cave entrance. Go in through the cave entrance and make your way through the caves. This area is populated with Ice Trolls (level 84), so Protect from Melee is recommended.
-
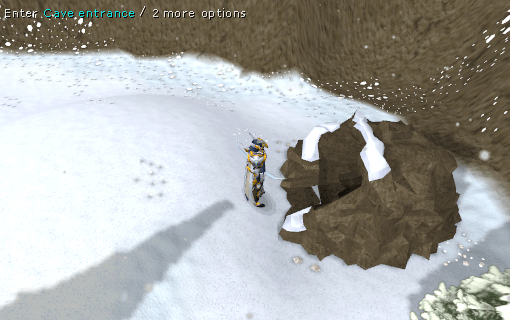
Head through the crevice at the end of the tunnel, then continue east and go through the next cave entrance.
-
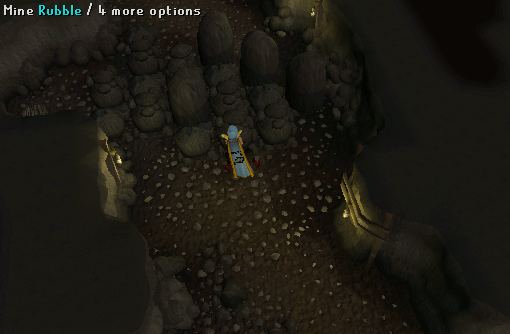
In here, there are some piles of rubble which need to be cleared for you to get through. You will only be able to mine the rubble one time each, on the north, south, east and west sides. There are several kinds of rubble piles:
- Solid pillar - cannot be removed at all
- Rubble with large pile of stones on top - after you mine it, more rubble will fall in front of you
- Rubble with small pile of stones on top - needs to be mined twice
- Rubble with cracks in - only needs to be mined once
-
Go north and mine the small pile of rubble there. Go south and then east to the next mound and mine that rubble. Continue north through the patch you've just mined and head west. Mine the northern mound again from the east side, and then mine the rubble directly north of it. You can now continue through the caves.
Note: Players with 62 Mining can also boost their level to 64 by drinking Dwarven stout (m).
-
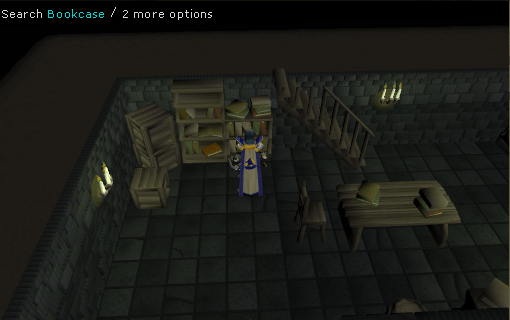
Make your way through the rest of the tunnels until you're able to get to the cellar in the southeast corner. Once there, search the short bookcase beneath the stairs to get Notes (a-j).
-
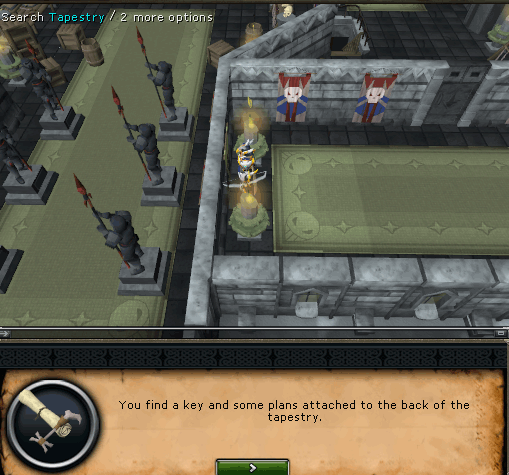
Go up the stairs and you'll see Arrav. Speak to him, and he'll attack. You will need to then attack him back. Before you kill him, he will be called away. He will then tell you to search behind the tapestry in the room to the south. Go to the southern room and search the tapestry to receive the Base key and Base plans.
-
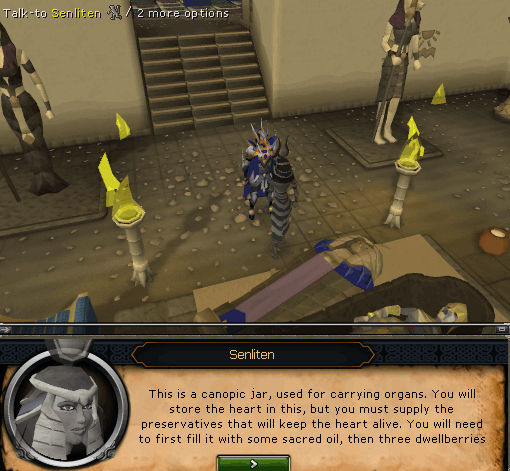
Return to Ali the Wise in Nardah and update him on your progress. After a cutscene, you need to go to speak to Senliten the pharaoh queen, just south of the Ruins of Uzer. Please check our Missing My Mummy quest guide to help you get to her. If you have completed the Missing My Mummy quest you can right-click the entrance to go straight to her.
Senliten will give you an Empty canopic jar, and explain how to fill it. You will need Sacred oil(1), 3 Dwellberries, and a Ring of life. Use the Sacred oil(1), followed by the Dwellberries and the Ring of life, on the Empty canopic jar to prepare it. You will then receive a Full canopic jar.
- Return to Ali the Wise in Nardah and show him the jar. He will give you advice on infiltrating Zemouregal's base which is located in the Wilderness under the Chaos Altar. You will need to bring Insulated boots, a Mith grapple (Roped), any type of Crossbow, the Base key, and a Macaw pouch with you.
-
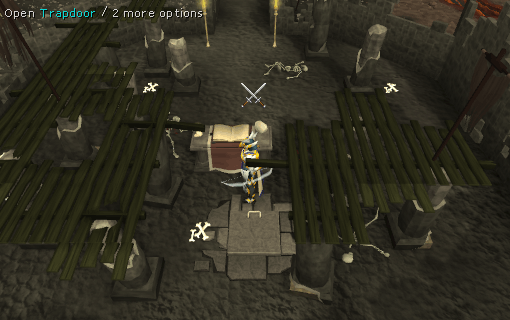
Head to the Varrock Palace and ask Hartwin in the northwestern tower to escort you to the Zemouregal's base, under the Chaos Altar in the low level wilderness just to the north of Varrock. If you try to open the trapdoor at the Chaos Altar without Hartwin following you, you will not be able to open it.
Click Image to enlarge -
Go under the Chaos Altar and follow the path until you reach a metal door.

-
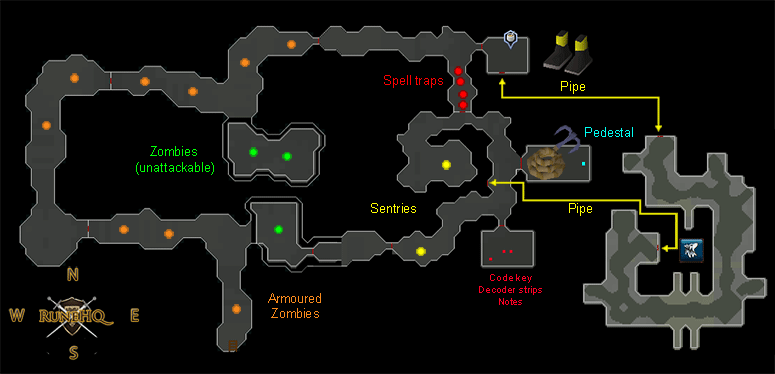
Go east, following the path once again, until you reach a small room that contains a range. On the southern wall of that room, there is a pipe. Equip your Insulated boots and enter it.
-
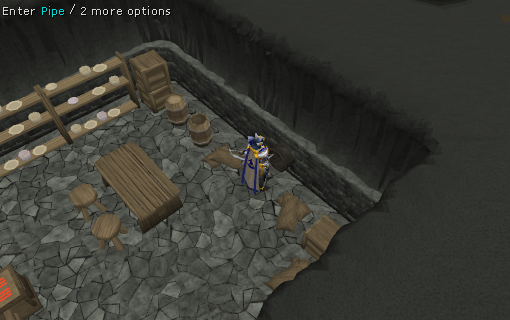
Follow the path until you reach another pipe. Once there, select to enter the pipe. Before being allowed to go in, you need a way to remotely see if there are any patrolling zombies on the other side of the pipe, so summon your Macaw.
-
Once your Macaw has been summoned, right-click it and select "Interact", and then the "Remote view" option. The Macaw will then go in the pipe for you and scout the area, and then you will climb through the pipe. You will now be inside Zemouregal's base.
Note: If you are unable to right-click it, you will need to go into your game settings and find the "Hide Familiar options" toggle. Make sure this is turned off. -
Note: You only have 5 minutes to get into the vault before the zombies come back!
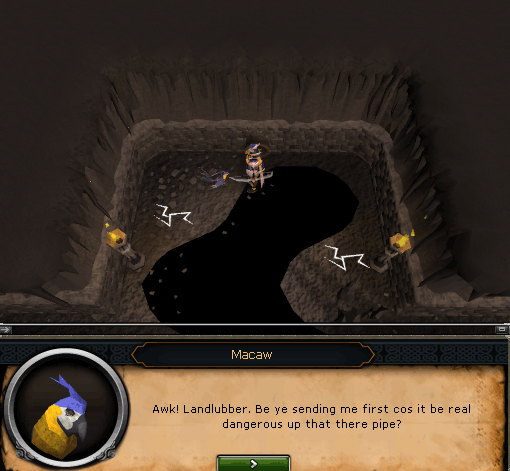
Once inside, run to the south room and search the tables for Decoder strips and Notes (k-z). Then, pick the lock on the nearby chest for the Code key.
- Run to the north, then to the east you will see a Metal door and a keypad. Interact with the keyboard, and try to solve the puzzle code. If you fail, the room will become filled with gas, and you will become unconscious and be sent back to the beginning of Zemouregal's base.
-
The first step in getting through this door is to read your Code key. This will give you a 4 letter code that is different for every player. You will then need to interact with the door keypad, which looks like the following.
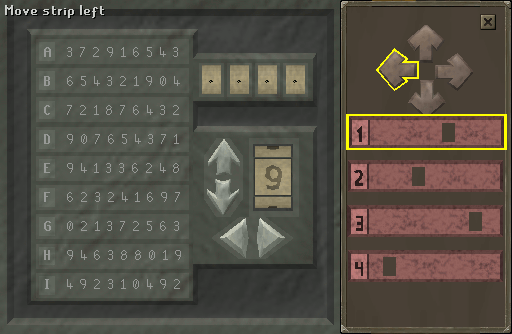
-
Next, select the decoder strip that has the number 1 on it. You can then move it over the list on the right with the arrow keys above the decoder strips. If your first letter from your Code key was D for example, move the decoder strip over the letter D on the list. The strip will then reveal a number. That number will be the first in the code.
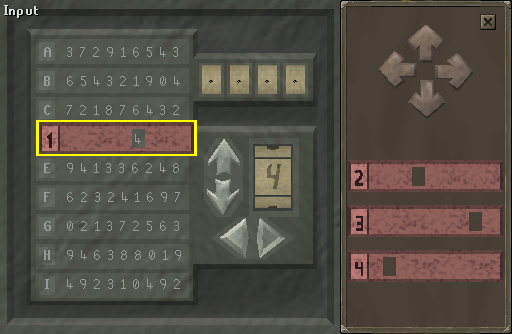
- Input this number by selecting it with the up and down arrows to the left of the number letter combination and then either using the input arrow to confirm your selection or the delete arrow if you make an error. Do the same with the strips 2, 3, and 4 until the puzzle is solved. If you have a repeating letter in your key code, just move the first strip out of the way to get the next strip in place. If you successfully input the 4 correct letters, the door will open.
-
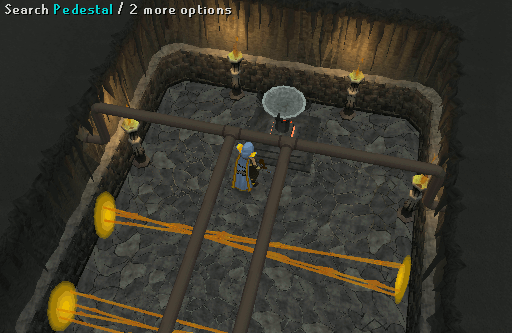
Once the latch is open and you enter the Metal door, equip your Crossbow and Mith grapple (Roped). Grapple the pipes to bypass the fire trap. Once on the other side, use the Full canopic jar on the pedestal. You will now have a Heart in a canopic jar.
-
Teleport out of Zemouregal's base and head back to Ali the Wise. Talk to him, and he will take the Heart in a canopic jar and give you your reward.
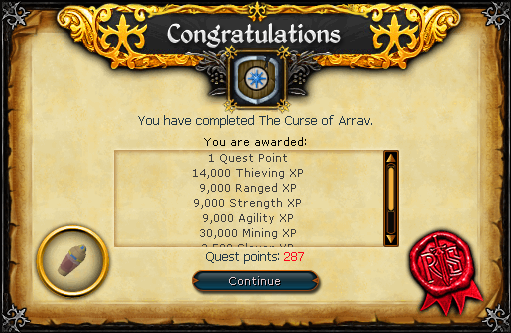
Congratulations! Quest Complete!
This Quest Guide was written by JoeC and Hilwin1. Thanks to Clamball, Kittyhawk, Mongols1, Rowan, Skeletonmat, Zidane3838, Koanga, Griffin, Motion Man, watch127, Mr Style, I_Love_You, I Predator, ieatcookiez1, HEROIC NIKKI, Ksb Single, Unview, and TusenLappen for corrections.
This Quest Guide was entered into the database on Tue, Jul 21, 2009, at 06:27:35 PM by Im4eversmart, and it was last updated on Sun, Oct 07, 2018, at 07:07:38 PM by Chath.
If anything is incorrect or missing, or if you have any new information to submit to this database, please submit it to us on our Content Submissions Forums.
If you see this guide on any other site, please report it to us so we can take legal action against anyone found stealing our content. This guide is copyrighted by RuneHQ, and its use on other sites is expressly forbidden. Do not ask if you can use our guides or images, the answer is and always will be NO!
Print this page with images - Back to the Quest Guide Index Page - Back to Top
