

-
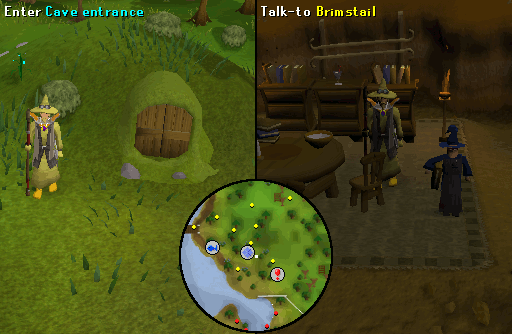
To start, head to the southwestern part of the Tree Gnome Stronghold and you'll see door in a hill marked by a dungeon symbol on the map. Enter the cave and ask Brimstail about the Cute creature. He will tell you that it is his pet and will then ask you if you are interested in his research. He will then tell you to inspect everything in the next cave.
Note: The easiest way to reach the Tree Gnome Stronghold is by using the Spirit Tree transportation system (required completion of the Tree Gnome Village quest) or the Hot Air Balloon transportation system (requires completion of the Enlightened Journey quest).
-
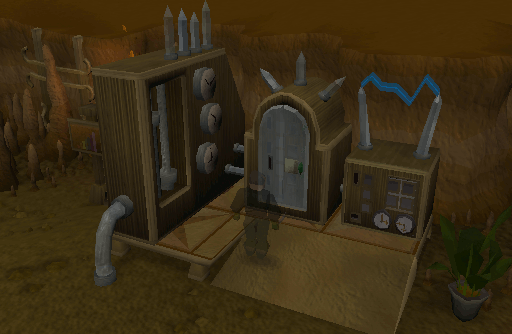
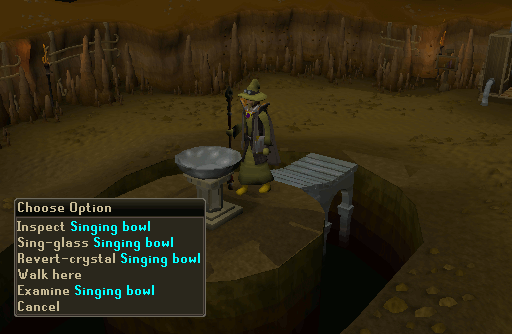
Head into the next cave and take a closer look at the singing bowl, the machine panel, Oaknock's machine, Oaknock's exchanger, and the aspidistra plant. When you have inspected everything, return to Brimstail. He will tell you that he doesn't know what they are used for and directs you to a gnome called Hazelmere.

-
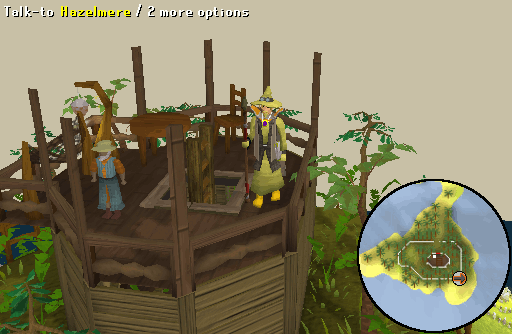
Hazelmere can be found on the top floor of his house, on the small island east of Yanille. At first, he will only speak nonsense, but will then cast a spell on you so that you can understand him. Continue talking to him and a cut scene will occur about the Goblin Wars and Glouphrie. Once the cut scene has ended, Hazelmere will give you a Violet pentagon.
Note: Beware of Jungle spiders (level 86) near Hazelmere's house. The easiest way to reach the small island is by using the Fairy Ring code CLS. Other options are to teleport to the Castle Wars arena using a Ring of duelling, or to teleport to Yanille using the Yanille lodestone.
-
Report back to Brimstail and another cut scene will occur of an invisible masked gnome destroying the machine. Talk to Brimstail again and you will come to the conclusion that someone invisible sabotaged the machine. Inspect the machine to find out that you will need Oak logs, Maple logs, a Hammer, a Saw, and a magical glue to repair it. Mix the Ground mud rune into the Bucket of sap, and you will produce some Magic glue. Repair the machine and talk to Brimstail. He will give you two more crystals.
Note: The easiest way reach the Tree Gnome Stronghold is to teleport to the Mobilising Armies area, using a Ring of duelling, and then use the nearby Spirit Tree to teleport to the Tree Gnome Stronghold.
-
Now it is time to unlock to the machine. The lock is based on numbers and shapes. Your goal is to insert crystals into the machine so that they equal the number displayed (see the table below). For example, if the first number you need is a 10 and there is only one crystal slot, then you would need to put an orange pentagon in the machine. If you do not have the required crystal, you may use the exchanger to the right to convert high numbered crystals into multiple lower numbered ones. You can also exchange a couple of low value crystals to get a fewer higher valued crystals. By speaking to Brimstail, you will also receive more crystals. When you have unlocked it, a cut scene will occur of the cute creature becoming an evil creature. When you talk to Brimstail, you will conclude that they are spies. He will then tell you to go talk to King Narnode Shareen.
Note:The numbers differ from player to player.
Crystal Color Number Values Circle Triangle Square Pentagon Red 1 3 4 5 Orange 2 6 8 10 Yellow 3 9 12 15 Green 4 12 16 20 Blue 5 15 20 25 Indigo 6 18 24 30 Violet 7 21 28 35 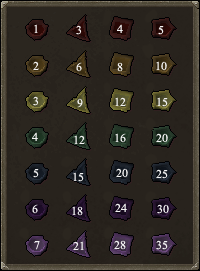

-
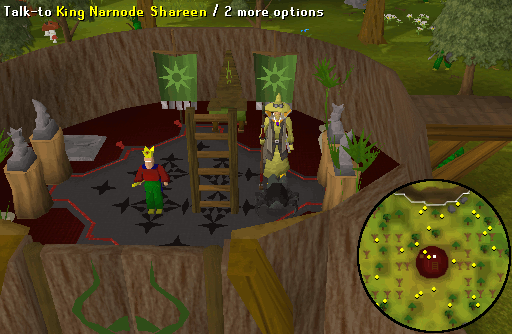
Head to the Grand Tree, in the northeastern corner of the Tree Gnome Stronghold, and talk to King Narnode Shareen. After establishing that his pet became a monster too, he will ask you to kill all the remaining Evil creatures.
-
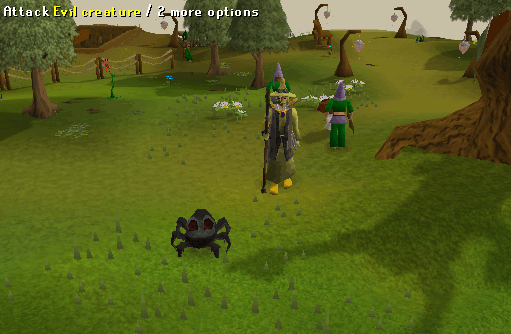
Now, you will have to kill all of the evil creatures in the following places. Food or Armor are not required as they only have 1 Lifepoint.
- In Brimstail's cave, in the southwestern corner of the stronghold*
- On the Grand Tree's first floor, by King Narnode Shareen
- On the Grand Tree's top floor, by the prison
- At the Tortoise field, northwest of the Grand Tree
- Near the Spirit Tree, in the center of the stronghold
- Near the city gate
-
When you have killed all of the Evil creatures, talk to King Narnode Shareen to claim your reward.
Congratulations! Quest Complete!
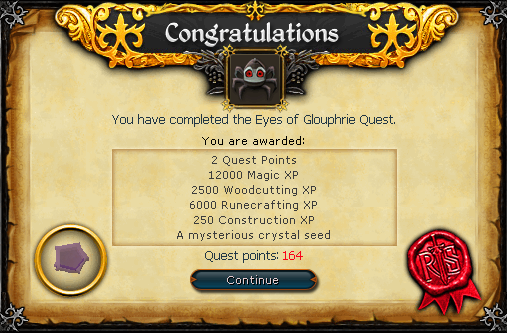
Small crystal seed:
You can turn the Small crystal seed into a Crystal saw by selecting the sing-glass option on the singing bowl in Brimstail cave. If you lose your seed or saw, you can retrieve another seed from talking to Brimstail. The Crystal saw gives you +3 level boost in Construction when building objects or areas in your player owned house that require a saw to be built. When you have built 28 things with it, the saw will revert back to a Small crystal seed.
This Quest Guide was written by Markusthaman. Thanks to kaiza666, Belgarath, crito, Clamball, ArnoudX, computre, Robin-E, HugARhino, airbusa300, Tumeg, Piro_Omar, Fireball0236, Im4eversmart, Lordofchao50, Boomer_Q, Turbo_kilee, Olorin, andro_girl, Ceielo, Chickenman51, Bum4548, Amithysia, diamondi3ack, Kitty0333100, Bob, Eragon7985, Alfawarlord, RisingSouI, and Unview for corrections.
This Quest Guide was entered into the database on Tue, Aug 15, 2006, at 09:17:34 AM by Im4eversmart, and it was last updated on Wed, Jun 10, 2015, at 10:04:14 PM by Jarkur.
If anything is incorrect or missing, or if you have any new information to submit to this database, please submit it to us on our Content Submissions Forums.
If you see this guide on any other site, please report it to us so we can take legal action against anyone found stealing our content. This guide is copyrighted by RuneHQ, and its use on other sites is expressly forbidden. Do not ask if you can use our guides or images, the answer is and always will be NO!
Print this page with images - Back to the Quest Guide Index Page - Back to Top
