

| Armor* | Food* | Potions* | Weapon* | ||||
| Archaeology journal | Tokkul-zo |
-
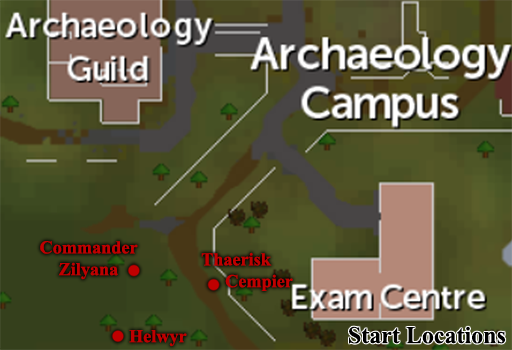
Just North East of the Archaeology Guild, you will find Ali the Wise and Wizard Trindy (who, you may recall, are actually the mahjarrat Wahisietel and Trindine, respectively). Speak to either one to accept and begin the miniquest. After Trindy takes the time to complain about you always being in the right place at the right time and Ali tells you that Reiniger found what she thinks could be a surviving way into the city of Senntisten, a cutscene will play.
After this cutscene ends, you will be put into a series of battles (each with 3 waves) in which you first place your allies to assist you and then commence the battle. These fights are not safe, you will be sent to Death's office should you die. Luckily, they also can be done without participating providing you set up your allies properly. This can be done by clicking one of them then clicking where you want them to stand/fight from - be sure to not place them where they will stand ON any of the monsters they need to fight. Once placed and the combat initiated, you can either choose to assist in defeating the creatures or choose to use the bank in the Research building to work on training any skills that can be done at a bank, such as Herblore or Fletching.
Note that you do not HAVE to place your allies where we have advised, many others have found different layouts which work for them. You will note colored sprites which show you the path monsters will take for each wave before beginning any of the battles. If you fail a battle (any barrier is destroyed) or you die you will be kicked from the instance and must speak with Ali the Wise and/or Wizard Trindy again.
-
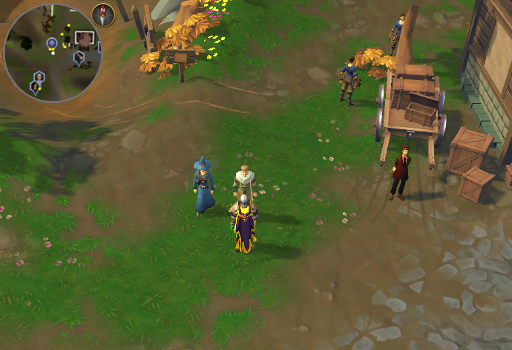
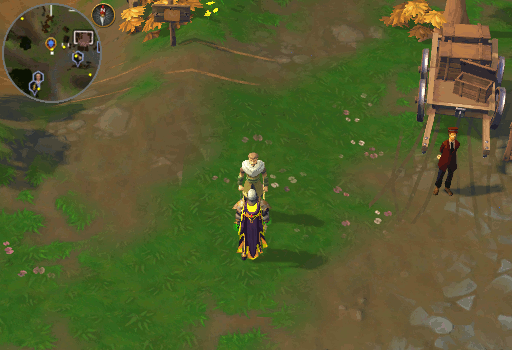
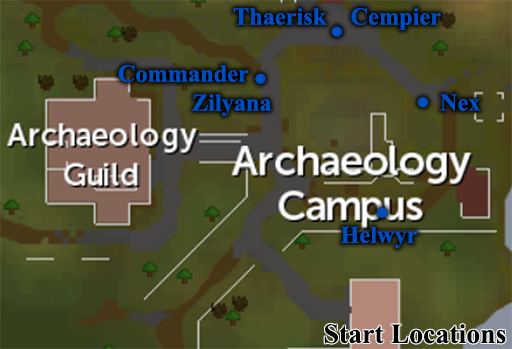
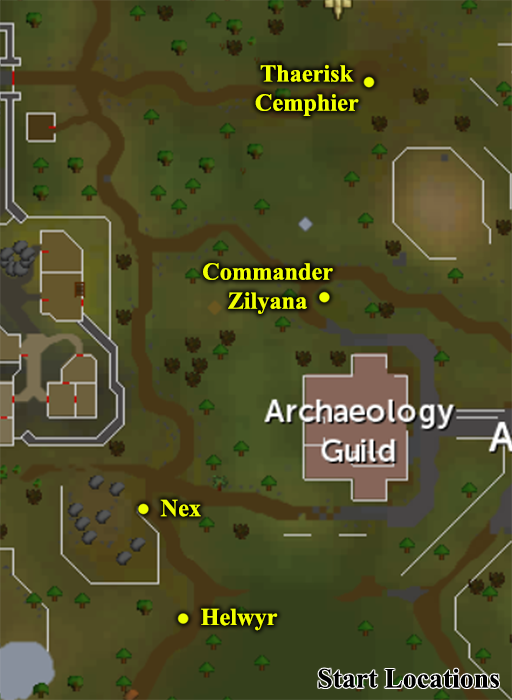
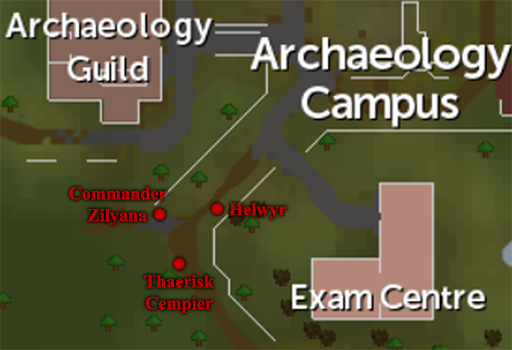
In the first fight, Seren will lend you the assistance of Helwyr, Commander Zilyana, and Thaerisk Cemphier. See the image below for where your allies can be found before relocating them. To avoid having to do anything, you can place them as seen by clicking the image below.
-
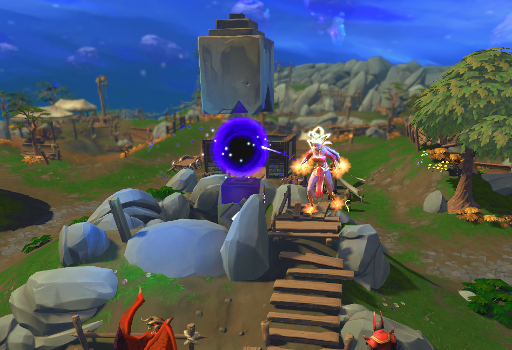
Once the attacking enemies are done getting murdered, you will leave the instance and be placed back near Ali the Wise. Talk to him and, early in the conversation, Zaros will teleport in (frustrated that his minions aren't enough and that he has to do it himself), followed by Seren. An argument will ensue in which Zaros will claim Gielinor is lost and its inhabitants are no family of theirs. Seren's benevolence prevents her from being willing to kill Zaros, so she leaves. Zaros speaks of how the Codex (which we more commonly know as the monolith) exists to seal Gielinor from other worlds, such as Frenskae, and on the other side of its seal is Erebus, where he intends to go.
-
A short cutscene will follow in which Zaros uses the Monolith to leave for Erebus and creatures stream forth from the tear in reality. After the cutscene, Azzanadra persuades Saradomin to take a temporary truce so they can fend off the creatures together.
-
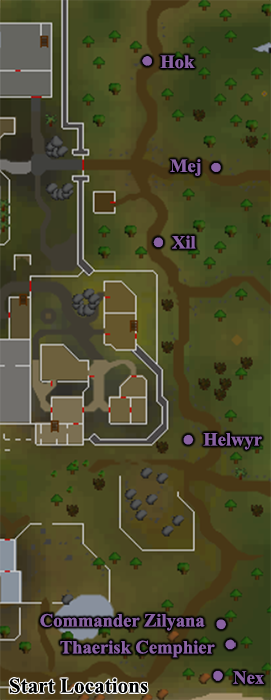
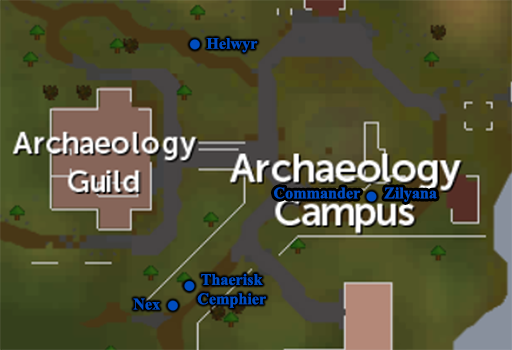
This is where the second fight begins. In this fight you have the assistance of Helwyr, Commander Zilyana, Thaerisk Cemphier, AND Nex. See the image below for where your allies can be found before relocating them. To avoid having to do anything, you can place them as seen by clicking the image below.
-
Once the battle ends and you leave the instance, talk to Ali or Trindy. They will conclude that the enemies are too strong for the temporary alliance and that they need assistance. The Aviansie and Zamorakians are not viable options as potential reinforcements, so suggest that they enlist the TokHaar. They will send you off to make contact.
-
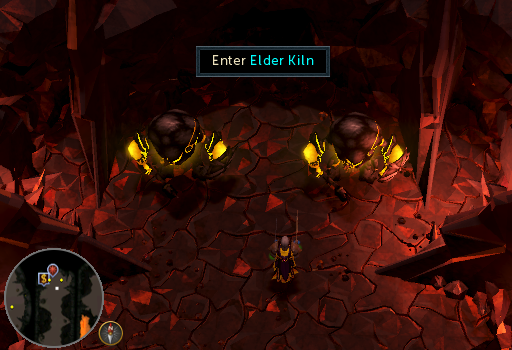
Make your way to the Fight Kiln - teleport using the TokKul-Zo or the Karamja Lodestone. When you attempt to enter, you will be prompted to decide whether you are continuing the quest or doing a run through the Fight Kiln; Choose to continue the quest and complete your conversation with TokHaar-Hok... You will be left hanging, but return to the Archaeology Campus.
-
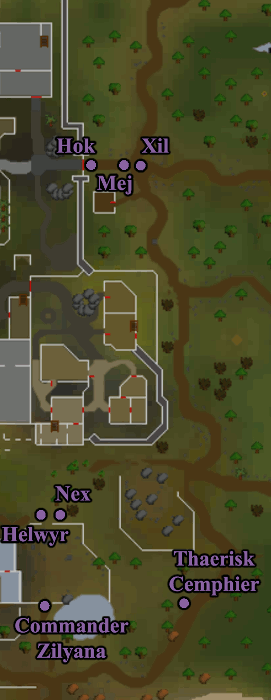
Speak to Ali the Wise and you will trigger a cutscene in which the TokHaar arrive to help fend off the enemy. After that and a little chat with Saradomin, you will begin arranging your allies for the next battle. First, Right click Thaerisk Cemphier and the TokHaar-Xil to toggle their target settings to the "Furthest away" option. See the image below for where your allies can be found before relocating them. To avoid having to do anything, you can place them as seen by clicking the image below.
-
Once the battle is over, speak to Ali the Wise again. A cutscene will occur in which Char is sucked into the portal. The backlash causes Azzanadra to ascend to godhood and he seals the rift.
-
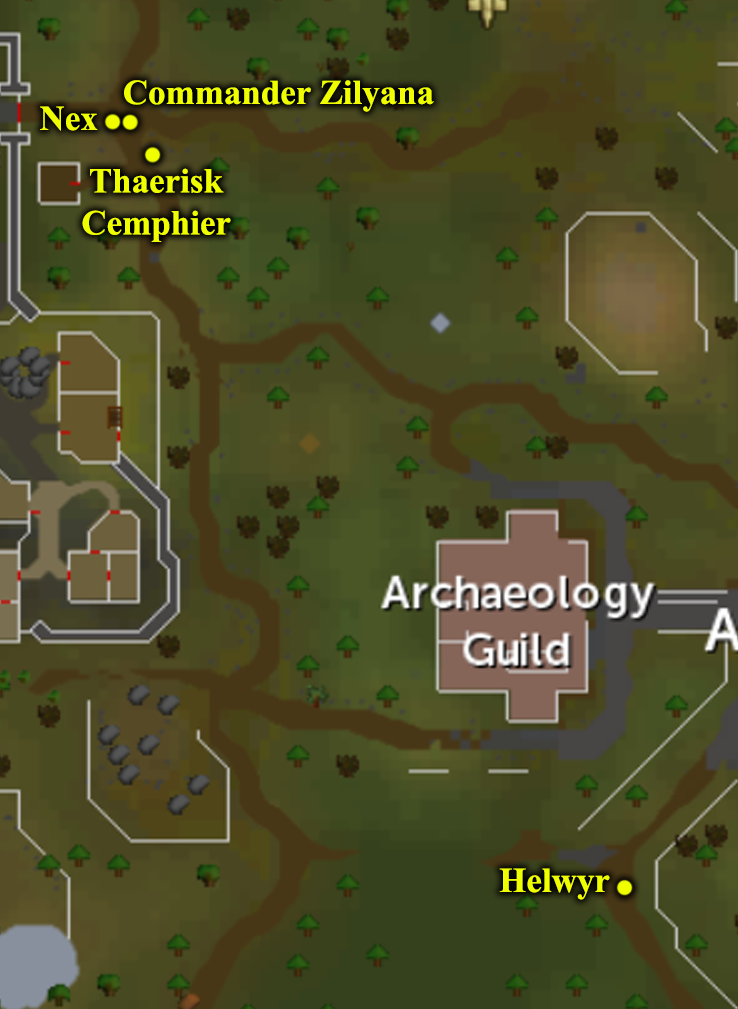
Unfortunately, for reasons not well explained, the TokHaar are displeased by the results of this and now you will have to fight them. First, Right click Thaerisk Cemphier to toggle his target settings to the "Furthest away" option. See the image below for where your allies can be found before relocating them. To avoid having to do anything, you can place them as seen by clicking the image below.
-
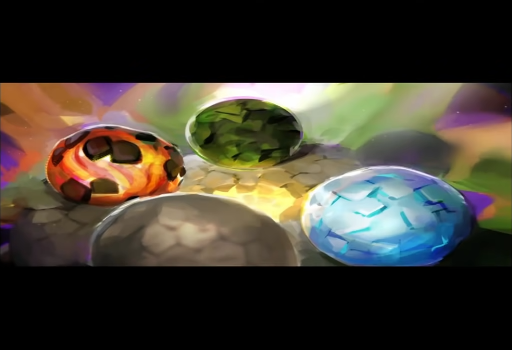
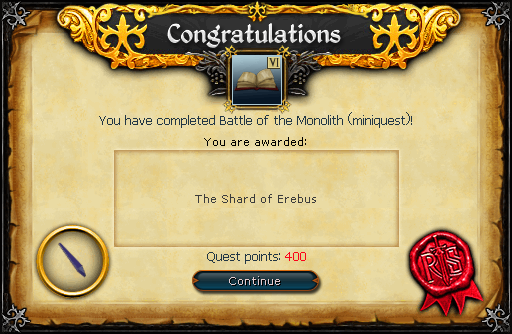
Once the battle is over speak to Ali the Wise to trigger a cutscene. When the conversation ends, Azzanadra will give you the Shard of Erebus. Talk to Wizard Trindy or Ali the Wise to leave the scene and trigger another cutscene: The Elder God Eggs are getting ready to hatch!
Congratulations Mini-Quest Complete!
This Quest Guide was written by 3ter 1 and ChathMurrpau. Thanks to KSB Single for corrections.
This Quest Guide was entered into the database on Sat, Mar 05, 2022, at 05:20:45 PM by Chath, and it was last updated on Sun, Mar 19, 2023, at 04:06:27 AM by KsbSingle.
If anything is incorrect or missing, or if you have any new information to submit to this database, please submit it to us on our Content Submissions Forums.
If you see this guide on any other site, please report it to us so we can take legal action against anyone found stealing our content. This guide is copyrighted by RuneHQ, and its use on other sites is expressly forbidden. Do not ask if you can use our guides or images, the answer is and always will be NO!
Print this page with images - Back to the Quest Guide Index Page - Back to Top
