

-
Travel to McGrubor’s wood and locate the normal tree amongst a bunch of Oaks. It is found directly South of Fairy code A-L-S and is right where the quest icon is. The Fairy ring is the quickest route to the quest start location, however, teleporting to Seers' Village and squeezing through the bars North East of the building is another viable route.
Once you have located the tree, chop it to receive a Mysterious clue scroll and view a cutscene with the Double agent. Read the scroll to prompt the “do you want to start this quest” window. Select yes.

-
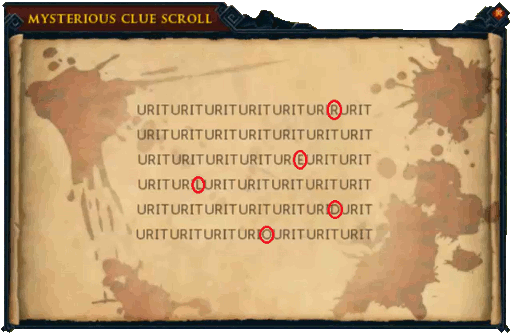
Read your clue scroll again and you will notice it is covered in URIT, only some of the letters are different. In each row, 1 of the T’s are replaced by a new letter: R – E – L – D – O.
-
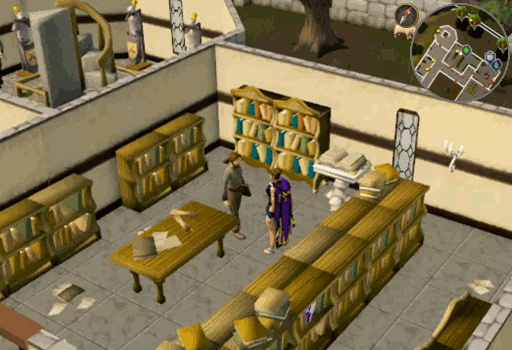
Travel to Varrock library and speak with Reldo. He will be dismayed when he sees what you have. He will warn you that all whom have received this Mysterious clue scroll before you have either died or gone missing. Reluctantly, he signs the scroll and the text changes to your next location.
-
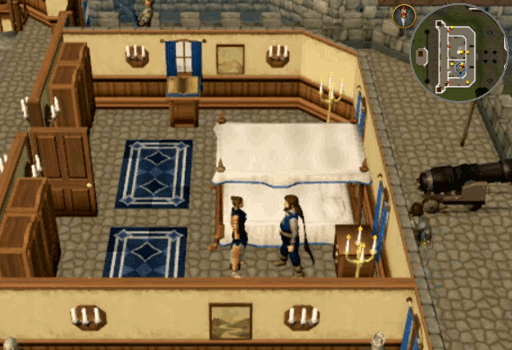
Read the scroll again for your next clue. This time you will need to teleport to Lumbridge, climb either staircase to the second floor, and enter Duke Horacio’s chambers (the Northern room). Ensure that you aren’t wearing anything, then cry and panic near the Duke. This will prompt a cutscene where you are surrounded by the Double agent appearing as Ripper demons wearing hats followed by a cutscene depicting Uri and Duke Horacio. Once the cutscenes end, your clue scroll will progress to the next clue.
-
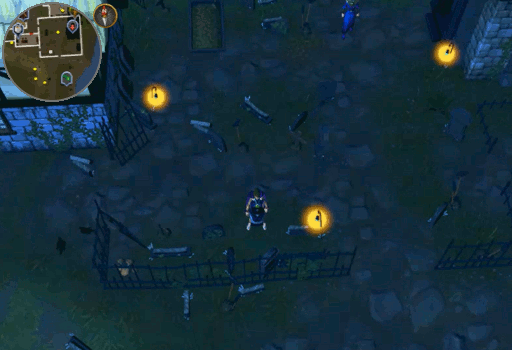
Reading the Mysterious clue scroll, you will find yourself looking at coordinates. Luckily, they are rather close. Exit the castle, either by walking down the stairs and out the door or by teleporting to the Lumbridge lodestone. Once outside, go to the graveyard located in South East Lumbridge. Here, you will need to locate the light to the West of the Southern gate and dig to the West of it. Note that you do not need to bring a spade, Right-clicking the scroll will give you a dig option like normal Clue scrolls do.
Once you dig, a cutscene will play depicting Uri looting a casket he obtained from a nearby grave. The Double agent will appear and speak with you at the end of the cutscene. You will then obtain a Locked casket and your Mysterious clue scroll will update.
-
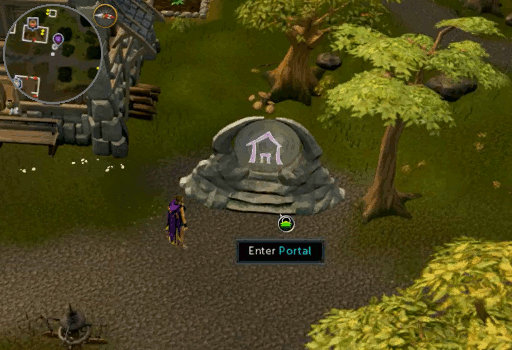
Opening the Mysterious clue scroll will provide you with a map of your next location. Travel to Port Sarim and then walk West to Rimmington. Once here, enter the Player-Owned house portal and you will witness yet another cutscene. This one shows Uri speaking with a woman about burring her now deceased husband. When the cutscene ends your scroll will once again update.
-
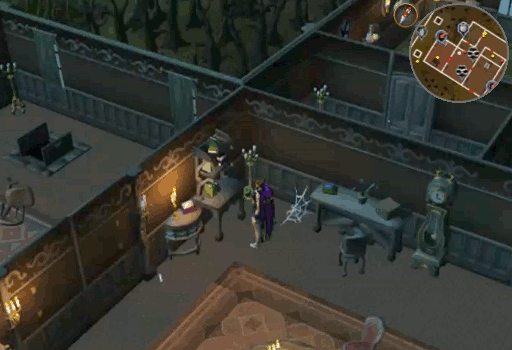
Reading the scroll will provide you with a riddle in order to find the next location. Travel to Draynor Village and enter the Manor North of the Lodestone. Once inside, enter the room to the West and search the bookshelves in the North West corner. Doing so will grant you a Casket key. Use this key on the Locked casket to obtain an Old necklace and your scroll will update for the last time.
-
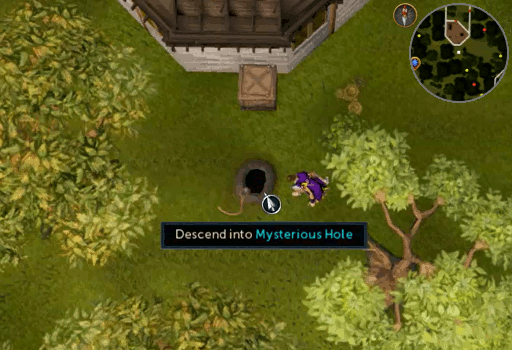
You will now find that you have a scanning clue scroll. Ensure you have a Rope and return to McGrubor’s wood. On the South side of the building you will find a wooden crate. Step 2 paces South of the crate and dig. This will create a hole where you were standing, investigate it to add the Rope then click the hole once more to descend into the darkness.
-
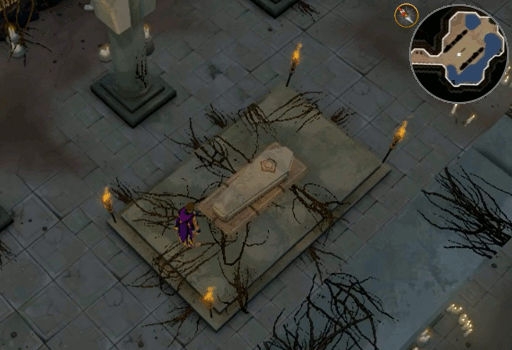
Now underground, follow the path North then East to the main chamber. Here you will find a coffin. Investigate it to obtain Charos's Journal and witness another cutscene. In this one you will see Uri in the same chamber making wishes before being trapped underground. At the end the Double agent will appear and you can ask him several questions. Ultimately, you will need to ask him what happens next (Option 3) to find out that you should select the proper statue to avoid being killed.
-
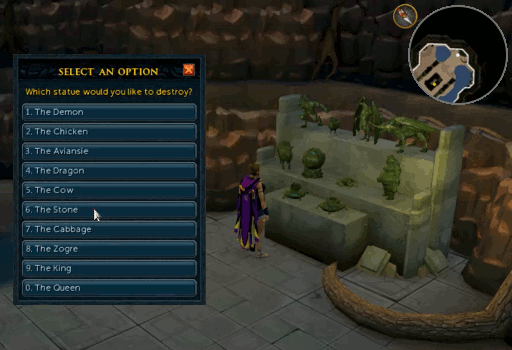
Once you are finished asking questions, walk to the shelves East of the coffin. Here you will find 10 different statues, you must choose the correct one to smash. Choosing the wrong statue will cause you to die a safe death and reappear just outside. Reading Charos's Journal you will learn that he once fashioned a ball and chain to look like the Stone of Jas – This is the statue you must destroy, the stone (option 6). A cutscene will depict you selecting the statue, smashing it, and receiving a puzzle casket. You will then see the Double agent disappear and Uri resume his place.
-
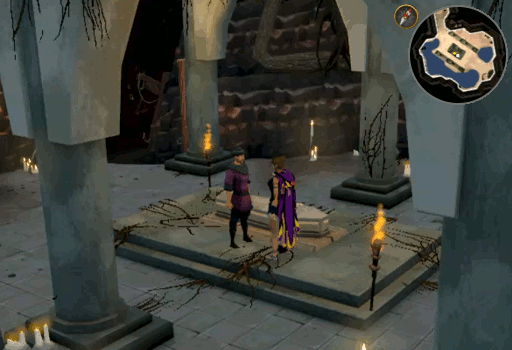
With the cutscene complete, walk West and speak with Uri. He will profusely thank you for what you’ve done, he never expected this day would come. He will then explain his plans and inform you that the Old necklace once belonged to Charos and can be used to answer some of his questions about Charos.
-
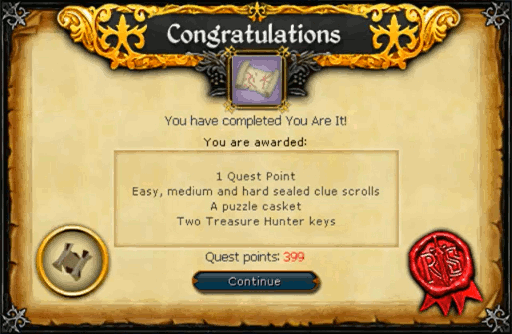
After the conversation he will reward you with your due items and the quest is complete!
After the quest is complete, you have the ability to use the Old necklace to find 5 trinkets to create the Necklace of Charos; locating each trinket will also unlock an additional section of the book. Creating the necklace will complete the Trickster’s Trinkets achievement to obtain the Master Quest Cape. See our guide for more assistance obtaining it.
Locating the trinkets works similarly to locating spots on scan clues. Right-click the necklace and choose scan to begin. Note that the scan clue will spin wildly until you are relitively close to the location. The trinkets can be found in the following locations:
| Trinket | Location | Notes |
| 1 |  |
Equip House Drakan robes to avoid being harassed by the Vampyres and use Drakan Medallion to teleport to Darkmeyer for quick access. |
| 2 | 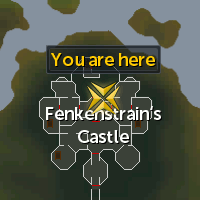 |
Teleport to the Canifis lodestone and walk North East to the castle. Completion of Creature of Fenkenstrain is not necessary to access this trinket. |
| 3 | 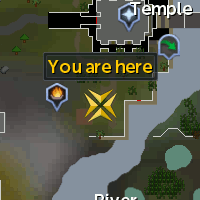 |
This location can be quickly accessed various ways. Fairy ring C-K-S or Ring of Slaying (to the Slayer Tower) followed by an Agility shortcut, running from Canifis or Varrock lodestone, Digsite pentant teleportation, and Hot Air Balloon to Varrock are just a few methods. |
| 4 | 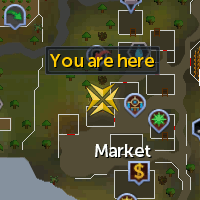 |
This location can be accessed quickly via the Draynor Village lodestone, use of Amulet of glory, or use of Explorer's ring (3/4). |
| 5 | 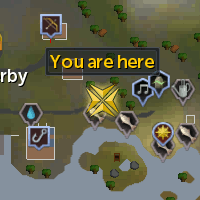 |
This locatin is quickly accessed via Catherby lodestone or teleportation spell or use of Charter ships. |
Each trinket discovered will award you with 10,000 Dungeoneering and a new section to Charos's Journal. You can either add the trinkets to the necklace as you find them, or wait until you have all 5 pieces. Adding the trinkets will transform the Old necklace into the Necklace of Charos and complete the requirement.
You can return to Uri after completing the necklace to show him. He will seem to think it may be able to nullify spells hiding ones identity. He will want to do more research first though.
This Quest Guide was written by ChathMurrpau.
This Quest Guide was entered into the database on Fri, Jun 15, 2018, at 04:05:32 AM by ChathMurrpau, and it was last updated on Thu, May 16, 2019, at 12:12:44 AM by Chath.
If anything is incorrect or missing, or if you have any new information to submit to this database, please submit it to us on our Content Submissions Forums.
If you see this guide on any other site, please report it to us so we can take legal action against anyone found stealing our content. This guide is copyrighted by RuneHQ, and its use on other sites is expressly forbidden. Do not ask if you can use our guides or images, the answer is and always will be NO!
Print this page with images - Back to the Quest Guide Index Page - Back to Top
