

- Try to enter your house via the house portal and Postie Pete will pop up, giving you a Letter from Bill Teach. Reading the letter will prompt you to start the quest before you can see the text. Once you have accepted the quest you will read the letter to see that Bill Teach is in trouble and he needs your help.

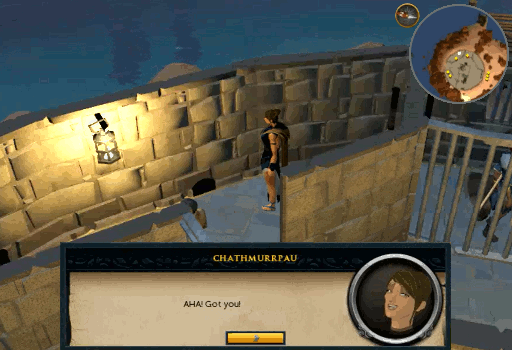
- Ensure that you are neither wearing anything nor carrying any items. Go to the Customs Sergeant in Rimmington and speak to him. Choose a crime to be arrested for and he will send you to Rock Island prison. If you missed something equipped or in your inventory, there is a deposit box (locker) on the North wall of the office.
NOTE: Easiest way to get to the Customs Office is by teleporting to the Port Sarim lodestone and running South West.
- Once you're in Rock Island prison, shout through the barred window on the East side of the cell and talk to Bill Teach. He will tell you he had found something strange with the customs office, but they caught him and sent him to prison. Unfortunately, the Customs guards keep taking away prisoners and never bringing them back; seems like it's time to get out of here.
- Shout through the window on the window on the West side of your cell and speak to Two-Eyed Eric. Ask him to give you a hand and he will give you his hook.
- You need to try and break out of the cell now. First, use Eric's hook with the bed in your cell to get a Piece of cloth, then use the hook with the Piece of cloth to make Eric's hook attached to cloth.
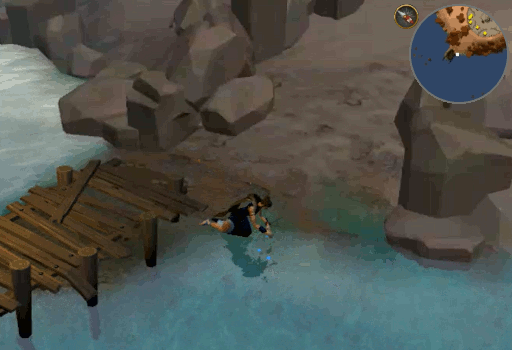
- Exit your cell through the hole in the North, walk around the island to the East and go to the fishing spot next to the pier. Use Eric's hook attached to cloth on the fishing spot to create Eric's hook (sharpened) and catch a Fish.
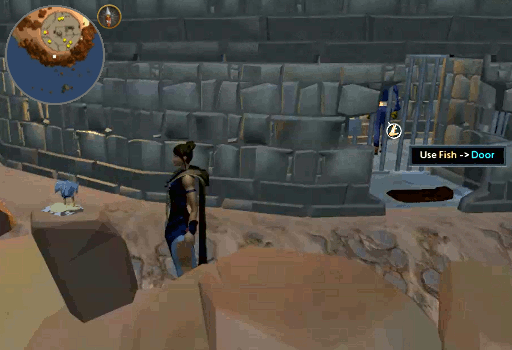
- Use the Fish on the rock perch outside your cell and a seagull named Count Ludwig Koppenploppen will land. Mistaking him for Baron von Hattenkrapper will offend him greatly and he will threaten you if you do not give him your Fish. Instead of handing it to him, use it on your cell door. He will swoop in and distract the guards which will leave you free to use Eric's hook (sharpened) on the door to open it.
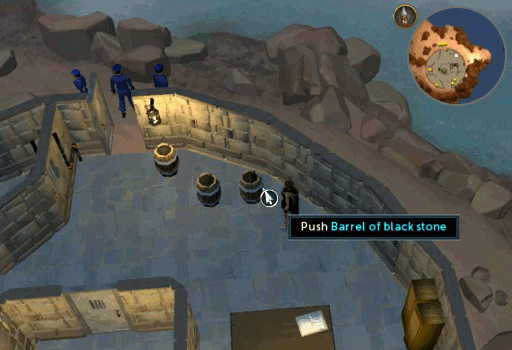
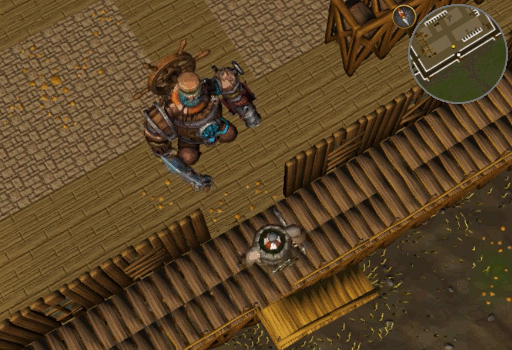
- Now in the main section of the prison, push one of the barrels near the Southern door and you will use them to block it, locking them outside.Then use Eric's hook (sharpened) on Bill Teach's cell door to free him. Upon freeing him you will accidentally drop the hook and it will get snatched by a rat. Since you still need the hook to open the other doors, you will need to find a way to retrieve it from the rat.
-
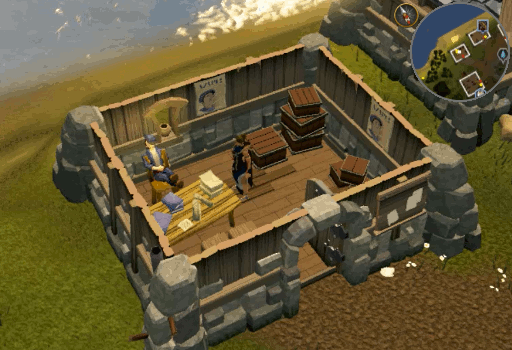
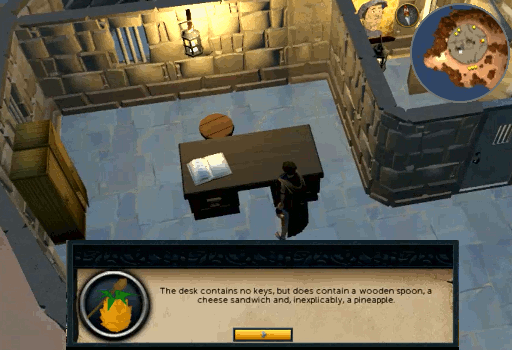
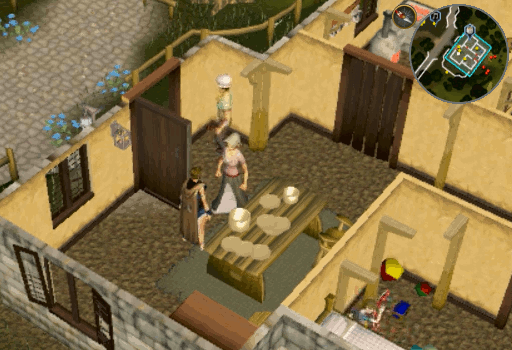
Search the crates slightly South of you to obtain a Small crate. Walk around the room with the stairs and check the desk to obtain a Wooden spoon, Cheese sandwich, and Pineapple. Finally, search the wardrobe to the West for a Customs uniform: Customs shirt, Customs trousers, and Customs hat.
- Use the Wooden spoon on the Small crate to make an Unbaited box trap, then use Cheese sandwich on the trap to bait it. Go to Bill Teach's cell use the Baited trap on the rat hole along the Northern wall. Doing so you will catch a rat named Wilson. You need to interact with it now to get the hook back. Choose to Firmly admonish the rat, then inform the rat of your plight, and then introduce yourself properly. Finally, ask it for help to free your friends and it will give you Guard's keys.
Chat options 3, 4, 2, 4.
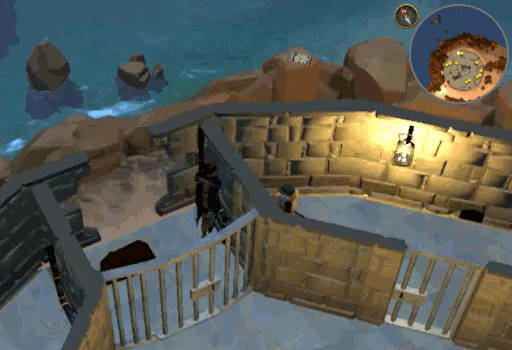
- Use the Guard's keys on one of the other cell doors and everyone will be freed. You need to find a way to open the door that leads upstairs. Upon trying to open it, you will find out that it is warded and Bill Teach will check and suggest you speak to Madame Shih. Talk to her and she will tell you that the door is locked by a voice activation spell, meaning that you need to know the password to enter.
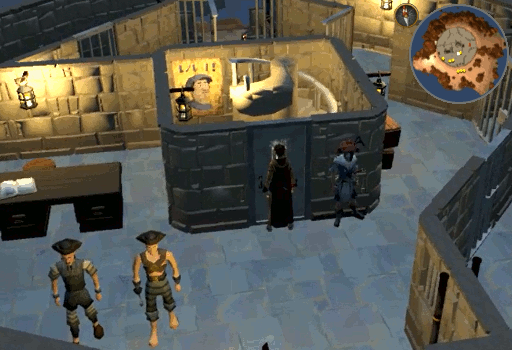
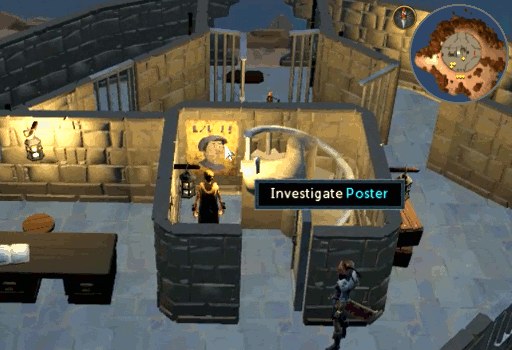
- Speak to Jimmy the Parrot and you will ask him if he remembers what guards said to open the door. He will confirm that he knows the password. You will then tell him to repeat the phrase when you check the door. Try to open the door and Jimmy will say the passphrase, enabling you to open it. Go through the door and investigate the poster along the North wall. On the back side there will be a note warning that the guards have all changed and telling you that there are keys under a bed on the next floor.
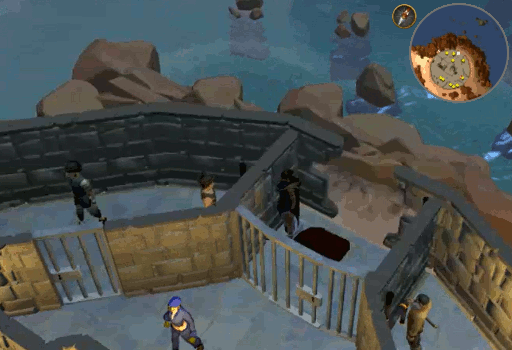
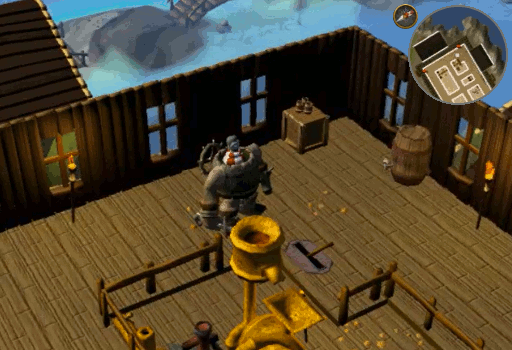
- Equip the Customs uniform pieces and go upstairs. Here you will see a Crassian guard wandering around; it won't attack you, but it won't let you go up more floors either. If you have forgotten to equip the outfit, you will immediately return down stairs repeating "Nope" several times. On the second floor, search the lockers near the Northern door to obtain 'Rum' then use the Pineapple on the slime puddle near the Southern door to get Pineapple (sticky). Use it on Wilson to get Pineapple Wilson. Use him on the Southern door to chuck him through and distract the guard. With the guard occupied, go in and quickly investigate a bed for the First floor keys.
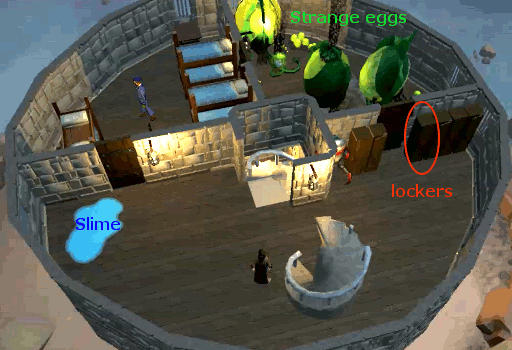
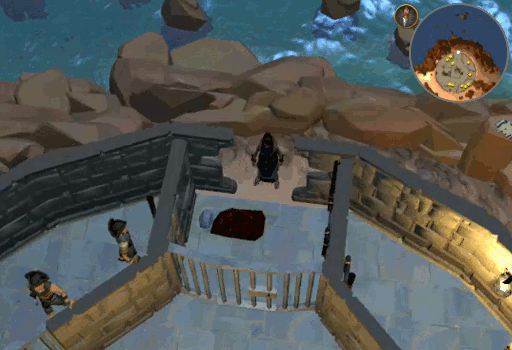
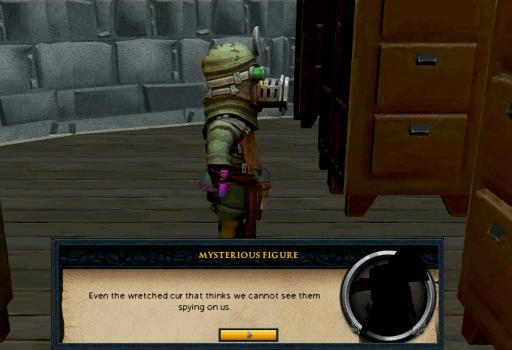
- Enter the Northern room through either door and use the 'Rum' on any one of the strange eggs. Choose to create hellfire and you will now have both the human and Crassian guards distracted. Run up the stairs to the next floor to witness a dialogue between Mi-Gor and a Mysterious figure about injecting pirates. They will eventually notice you, making it necessary to get your friends and escape the island.
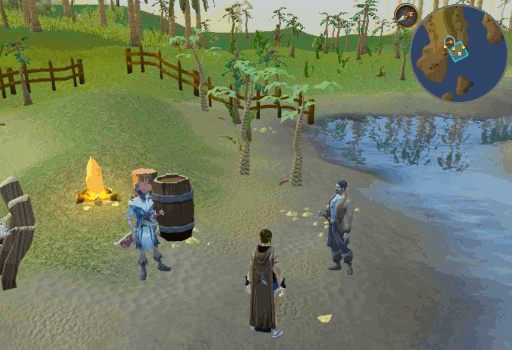
- You will automatically find yourself on the ground floor. Escape through the hole in your cell and dive off the pier where you caught the Fish. You will then find yourself on the coast of Karamja with Bill Teach and Madame Shih. You will now need to go to Mos Le'Harmless and Bill Teach will offer to sail you there. Accept the offer or choose to arrive there yourself.
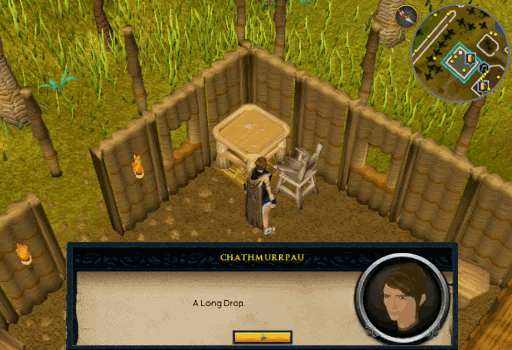
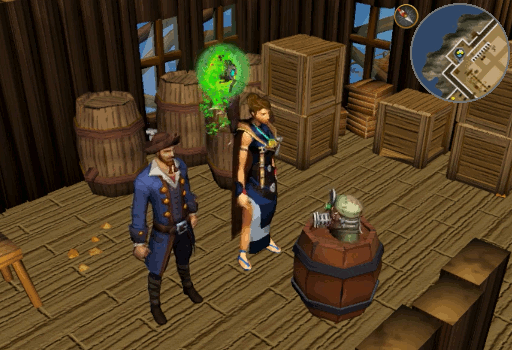
- Once you're on Mos Le'Harmless, go to the pub near the North gate. Sit on the chair in the North East corner of the building and choose to receive a "long drop" to access the secret basement. Upon getting dropped inside, you will see an argument taking place between Bill Teach, Madame Shih, Cap'n Izzy No-Beard, and Brass Hand Harry. You can choose to interrupt them or let them continue. When the discussion closes, you will all begin to talk about how to reach Rabid Jack. If only we could talk to one of those undead pirates that worked for him... Luckily you can. You will need to kindly interrogate the Zombie pirate head (chat option 2) and "come to an agreement" (chat option 3). The Zombie pirate head will reveal what it knows about the secret hideout of Rabid Jack if you fulfill 2 requirements: find it a true companion and let it watch sunrise at a tropical beach. You will pick up the Zombie pirate head and carry it with you for the next few steps as you complete the agreement.
True Companion:
Items needed: 2 leather and 1 gold bar
- Teleport to Varrock and visit Gertrude's house outside the West gate. Ask her for a pet for your friend and she will tell you she has run out, but you can ask her children if they have seen any around. Enter one of the Southern rooms and talk to either Kanel or Philop and they'll tell you there is a cat at the sawmill.
- Go to the sawmill North East of Varrock and search the jiggling crate. Keep searching it until eventually you take Wilson out. Both Wilson and the Zombie pirate head will come to an agreement to accompany each other adventuring. The Zombie pirate head will now ask you to mark the rat as his companion by making a collar out of 2 leather and a gold bar. Once the collar is made, Wilson will put it on and the task will be complete.

Sunset:
Items needed: Blurberry Special, Drunk Dragon, and Chocolate Saturday (Pre-made versions will also work here)
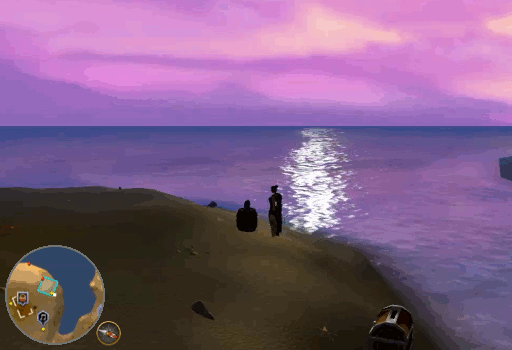
- Teleport to Karamja and walk to the beach South of the lodestone, you should see a blue box indicating the area you want to be in. Once there the Zombie pirate head will tell you to stop as it is the perfect place. Put it down and talk to it. It will then tell you that something is missing, it needs cocktails.

- Continue the conversation and one-by-one you will give the Zombie pirate head the cocktails. After drinking the last one you will watch the sunset together, completing the second task. Before the Zombie pirate head will reveal everything it knows, you will need to go back to the secret basement in the pub in Mos Le'Harmless.
- Teleport to Varrock and visit Gertrude's house outside the West gate. Ask her for a pet for your friend and she will tell you she has run out, but you can ask her children if they have seen any around. Enter one of the Southern rooms and talk to either Kanel or Philop and they'll tell you there is a cat at the sawmill.
-
Return to Mos Le'Harmless via your choice of route (suggestions include: Ectophial and Bill Teach's ship, you will need to speak with the Pirate on the deck as Bill is in Mos Le'Harmless still, or use of Fairy Ring code D-I-P if you have repaired the bridges to the mainland) and enter the secret hideout. Once inside, the head reveals that Rabid Jack has a secret island called Kraken Tooth island. This is where Rabid Jack conducts his experiments and, even though it doesn't want to go back to the island, it will mark the location on your map.
- Exit up the ladder and go to the bank South East of the pub. You will need to prepare for a fight against Zogoth. For this battle it is suggested to bring your highest level Melee gear, any combat boosting potions desired, food, and antipoisons unless you wish to tank the damage. When ready, board the rowboat waiting at the South West shore of Mos Le'Harmless.
Note: If you leave or die during the fight, you can re-access this area via the rowboat. Also be aware that NONE of the deaths during this quest are safe deaths. You will find yourself face to face with Death to reclaim your items.
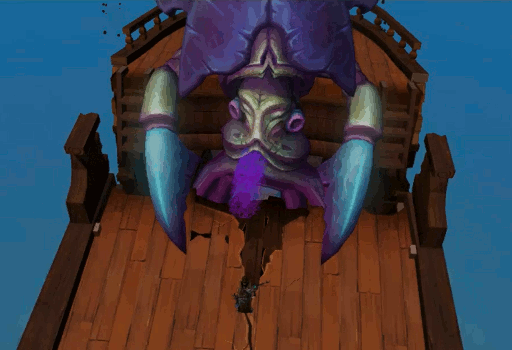
- The ship will eventually stop as it hits something and you are asked to check below deck for any damage. As you check the door, Rabid Jack arrives and introduces himself. You will then need to kill the tentacles on the sides of the ship, holding your friends. These only have 201 health and should go down easily. After the tentacles are dead, Zogoth's main body will arrive.
The body will be at the back end of the ship while the tentacles will remain closer to the front. If you move too far from the body, the tentacles will appear and randomly smash down on you, causing typless damage; this can be avoided by moving out of the way, but it's easier if you do not need to worry about it. Be aware that Zogoth uses a water jet that can knock you toward the back of the ship; this can also be avoided as it only reaches half of the ship.
Occasionally, Zogoth will spawn Crassian minions that will attack you, there are both Ranged and Melee styles. The Ranged style minion will attack from the front end of the ship. If possible, simply ignore this minion when using Melee as you will need to enter the area where tentacles become aggressive to attack them and it isn't worth the time to kill them. The Melee minion will of course attack more closely and attempt to move you. If necessary, attempt the combat using Magic or Ranged so that you can remove the Ranged minions without entering the tentacle territory.
When Zogoth reaches half and quarter of his total health points, it will shield itself briefly and attack you with acid from above. This will land in a 3X3 area that can be seen by shadows on the ground before it hits. Note that area of effect and damage over time effects can still injure Zogoth even if direct attacks will not work at this time.
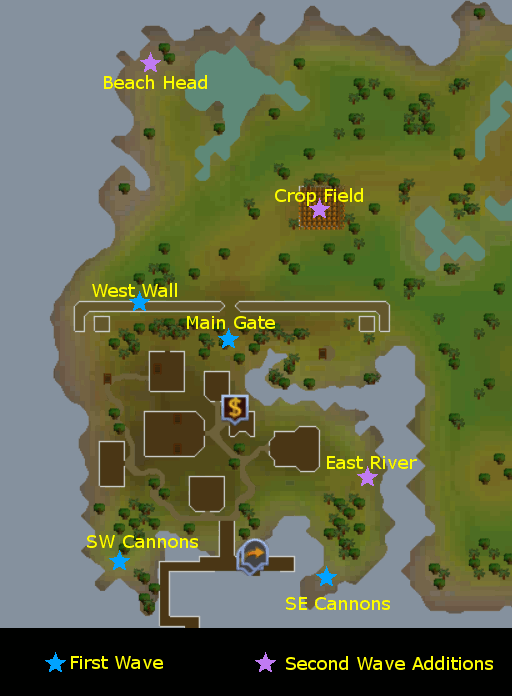
- When Zogoth has been defeated, Bill Teach will ask Pirate Pete to teleport all of you to Mos Le'Harmless which you will now need to defend. This is done in 2 waves. The first will require you to complete tasks in 4 areas and the second one requires the same 4 plus 3 more areas. In each area you must kill all the Zombie pirates, Zombie captains, and DKS or Barrelchest before helping to fortify the area. In the windows that tell you which area(s) to clear, you will notice skulls. These indicate how far the area is from being cleared. If the skulls/text become red it means that area has the potential to infect other areas. For example if the West wall is cleared, but the Main gate isn't and you go to clear the beach, the Main gate can infect the West wall causing you to have to clear it again.
Note: It is possible to use the bank within Mos Le'Harmless during the siege. Use of Air spells is suggested as all of the monsters are weak to them or to nothing.
After the second wave is complete you learn that the invasion was just a cover-up; Rabid Jack wants the distillery. You will now need to infiltrate the distillery.
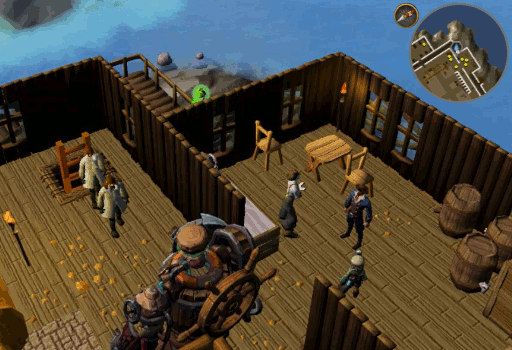
- You will now need to go to Braindeath Island; make sure you have at least 3 empty inventory spaces. Do NOT use a Dungeoneering cape or Hoardstalker ring to get here as you will not be able to continue the quest if you do. It is suggested to use the Ectophial and then the boat North East of the Ectofunctus. Once on the island, walk South to the stairs. Climb down the Eastern stairs then walk West around the building and climb the stairs on the side of the building. You should now be in a room with Davey, you can choose to talk to him or continue past him along the walkway to the North side of the building. When you reach the end there will be a window that you can listen through.
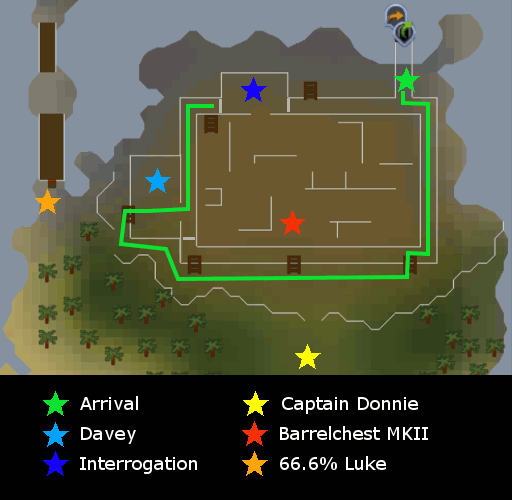
- A cut-scene will occur where Mi-Gor interrogates Captain Braindeath about the final ingredient of the 'rum'. Captain Braindeath will notice you listening and "give in" to the interrogation by telling them it is Witchwood. They will not believe it is Witchwood due to the rarity of it and will force the brewers into the basement as incentive for Captain Braindeath.
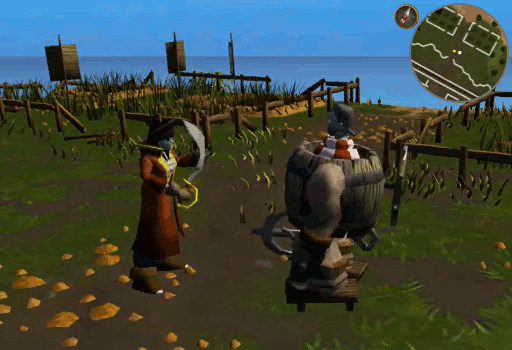
- Walk back to Davey and speak with him. You will tell him what Captain Braindeath said and he will tell you about Operation Witchwood before giving you a Barrelchest disguise. Equip the disguise then walk down the stairs and head South of the building to speak with Captain Donnie. Tell him that Mi-Gor would like some witchwood and he will fetch 100% Luke's leg to give you.
- With the leg, walk up a set of stairs into the distillery and speak with the Barrelchest MKI and you will find out that you need a password to enter. Walk back down to Captain Donnie and tell him that Mi-Gor wants to see him right now (chat option 2). He will get huffy about it and insist that he wants to insult Mi-Gor himself instead of giving you the message to pass on. Thinking on your toes you will tell him that he needs to give you the passphrase before you'll step aside.
- Now with the passphrase, walk back up the stairs and repeat it for the Barrelchest MKI, "How appropriate. You fight like a zombie sea cow" (chat option 5). Once inside, climb up the ladder in the South East corner. On the second floor, walk to the North West corner and use 100% Luke's leg on the pressure barrel before pulling the lever next to it. This will cause the distillery to malfunction and spray 'rum' all over Mi-Gor and his minions. Before leaving, pick up the 2 Barrels of rum from along the Western wall. Exit the distillery, remove your Barrelchest disguise, then head toward Luke.
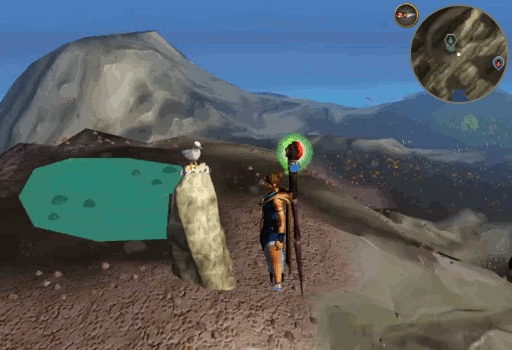
- Here you can choose to have a conversation with him about his name or simply walk past him through the gate. On the Northern section of the island, walk up the hill North of the Resource dungeon and investigate the perch. Baron von Hattenkrapper will land and inform you that he has been keeping an eye on you but he isn't too pleased that you consorted with his greatest enemy earlier in the quest. After assuring him it was simply an arrangement of convenience, you will request that he help blow up the near by dungeon.
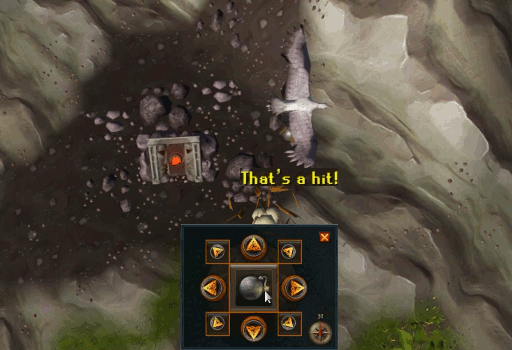
- Excited by both the future explosions and the crabs, Baron von Hattenkrapper will agree to assist. You will give him the Barrels of rum to use as bombs, then your display will change so that you are in control of his bombing efforts. You will need to hit the Resource dungeon entrance 3 times. It is suggested to rotate your window to face North as your controls assume you are; your controls are directional arrows with a bomb icon in the center, found in a small window near the bottom of your screen. Try to click the bomb icon a bit before the seagull is above the door to allow for wind direction when aiming.
- Once the door has been bombed, a cut-scene will show a crab coming out and "following" Operation Witchwood; several parts will be censored by showing you kittens playing instead of the actual events. After everything is done, talk to Captain Braindeath or Mi-Gor. In the conversation, Mi-Gor will reveal that you haven't actually stopped Rabid Jack and that he's at Kraken Tooth Island. If you feel you are ready to face Rabid Jack, you can skip straight to sailing there thanks to an option at the end of the conversation. If you are not prepared, you can reach the area later via the rowboat you used on the South West shore of Mos Le'Harmless; this boat can also be used to re-enter the battle area later.
Rabid Jack has no weakness so it is suggested to bring your highest weapons and armor, high healing food, a 1-click teleport option in case you need to leave, as well as any potions necessary. Melee is a great style to bring as it will help avoid one of his specials that mainly occurs when you are several paces from him, more on this later. Beasts of burden cannot be brought through the water leading to the battle, however, if you re-enter the fight they can be brought and used.
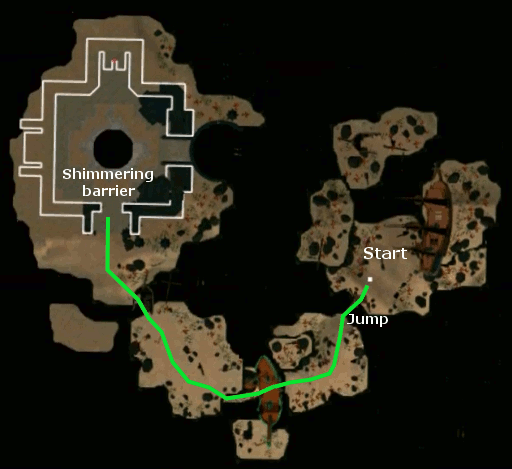
- While sailing to Kraken Tooth Island, Rabid Jack will attack again, this time leaving the ship on fire. You will need to escape. Luckily, there is a crate full of diving gear that you can use before jumping off into the water. You will now be on a sunken island. Walk to the South West side and jump off the edge to the next island. Walk across the boat to the West, then go North across another boat. Pass through the shimmering barriers in the North and the water will magically turn to air, enabling you to breathe and re-equip your gear (this is done automatically). It is time for the final fight.
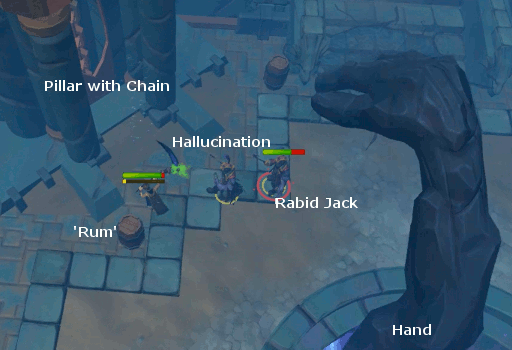
- A brief cut-scene will play showing a conversation between Rabid Jack and Madame Shih. He will then notice that you have joined them and get angry that you are a more troublesome foe than he anticipated. The fight against Captain Rabid Jack will now begin. In the arena you will notice several things:
- A huge hole in the ground with a giant arm that will reach through and attempt to hit you. This happens occasionally and the amount of damage dealt depends on how far under the palm you are when it hits the ground. Note that it does have an area of attack so you can still be damaged if close to the landing location.
- Insanity. As you enter the arena you will receive a warning suggesting you keep an eye on your sanity. Sanity is determined by the black cat icon in your debuff bar. If this number becomes elevated, you will experience hallucinations (with 1,000 health each) and your camera will begin to tilt.
- Barrels of 'rum' around the pillars. These can be drunk to help keep your sanity in check. Each barrel of 'rum' will reduce the count by 2, but do not drink multiple in a row as this can kill you.
- A pillar with a chain in each of the corners. One of these will need to be loosened after each time you "defeat" Captain Rabid Jack.
Captain Rabid Jack will only use Melee and his special attack. This consists of him stunning you, dragging you toward him, then choking you mid-air for several seconds or until you break the attack by using Freedom or Anticipation. It is suggested to mainly use Anticipation to break the effects of his special as freedom may be necessary to avoid the hand if you are stunned just before it hits.
Reminders: Death here is not a safe one, you will see Death. Your grave stone can be found near the rowboat in Mos Le'Harmless which you will use to re-enter the fight.
-
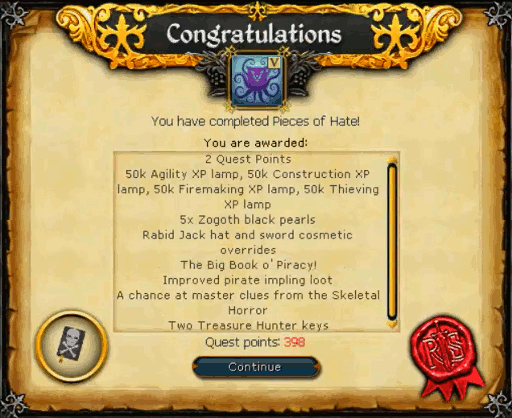
Once the fight is complete, talk to Madame Shih. You can take this opportunity to ask her several questions or simply agree to meet her back in the Mos Le'Harmless secret hideout. You will now find yourself near the rowboat along the South West shore. Ensure you have at least 6 free inventory places before running North to get "a long drop" in the pub once more. Inside the secret hideout you will find your allies alive and well. When the cut-scene ends, congratulations. You have completed the quest!
After completion of the quest, you can return to the sunken island to claim experience and complete the "Roake Kal" requirement to obtain the Master Quest cape.
This can be completed when you have 85 Agility, Construction, Firemaking, and Thieving; Note that this skills can NOT be boosted. Return to Mos Le'Harmless and travel on the rowboat on the West coast; it will ask if you want to return to Ulthven Kreath, tell it yes.
Walk North West to the temple (see step 29 for a map if necessary) and pass through the shimmering barrier. Along the Western wall are 4 murals that you will need to decipher to complete the requirement. From South to North you will receive 50,000 experience in: Thieving, Agility, Firemaking, and Construction.
Be aware that you must decipher the previous mural before you can do the next one. For example, you must clear the Agility mural before you can do the Firemaking one.
See our Tips and Tricks to obtaining the Master Quest Cape guide for more help obtaining the cape.
This Quest Guide was written by Senug and ChathMurrpau.
This Quest Guide was entered into the database on Tue, Mar 20, 2018, at 02:04:33 PM by ChathMurrpau, and it was last updated on Wed, Jun 20, 2018, at 07:24:20 PM by ChathMurrpau.
If anything is incorrect or missing, or if you have any new information to submit to this database, please submit it to us on our Content Submissions Forums.
If you see this guide on any other site, please report it to us so we can take legal action against anyone found stealing our content. This guide is copyrighted by RuneHQ, and its use on other sites is expressly forbidden. Do not ask if you can use our guides or images, the answer is and always will be NO!
Print this page with images - Back to the Quest Guide Index Page - Back to Top
