

-
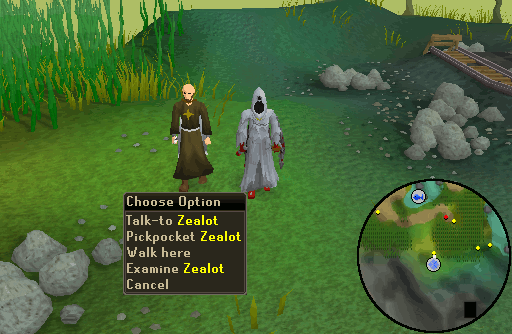
Make your way to the abandoned mine in the southern part of the Mort Myre Swamp. Talk to Zealot, just north of the mine. Go through the chat and tell him that you are here to seek challenges and quests, and he will share some information with you about a secret cave and the Salve amulet. End the conversation and pickpocket Zealot to obtain Zealot's key.
Note: Beware of Vampyres (level 88) wandering around near the mine. The easiest way to reach the Mort Myre swamp is by using the Ectophial or the Fairy Ring codes BKR and CKS.
-
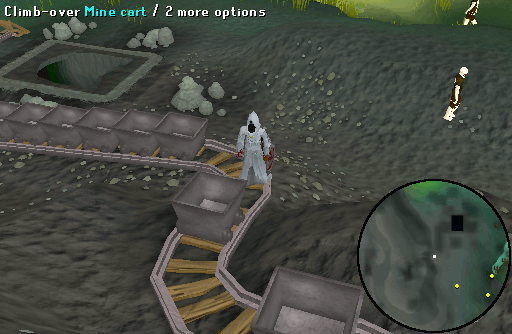
Head south until you spot a freestanding mine cart. Climb over it and walk up the track towards a cart tunnel. Crawl down the tunnel to access the mines.
Note: Beware of Vampyres (level 88) wandering around near the mine.
-
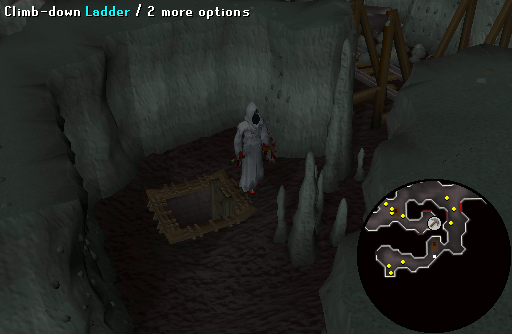
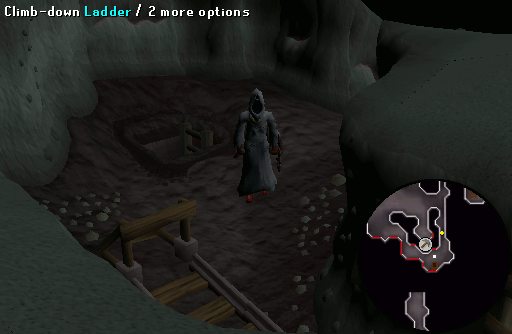
Once inside of the mines, walk west and head back outside through another cart tunnel. Follow the rails to another cart tunnel and crawl down it. Walk east and climb down the ladder to access the second floor of the mines.
Note: Beware of skeleton corpses in the mines, as they will be resurrected and attack you as soon as you walk past or touch them.
-
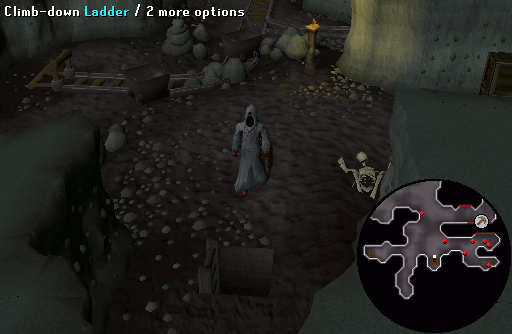
From there, head east again and descend down another ladder to reach the third floor of the mine.
-
On the third floor of the mine, you will see a mine cart moving around to your west. Make your way south down the tracks whilst hiding in the alcoves on the side whenever the cart is about the bump into you. When you have reached the end of the tracks, climb down the nearby ladder.
Note: If the cart bumps into you, you will take a lot of damage and be pushed towards the end of the track.
-
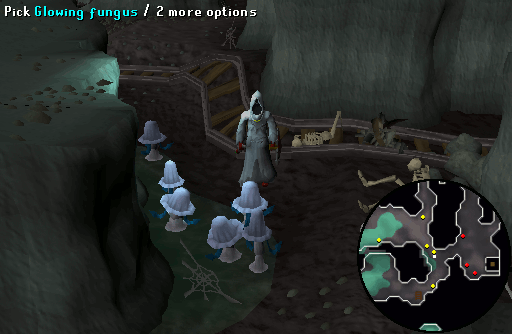
You will appear on the fourth floor of the abandoned mine. Go a bit north and pick a Glowing fungus (Location details shown below in the picture).
Warning: If you take the glowing fungus outside of this dungeon, it will dissolve into dust.
-
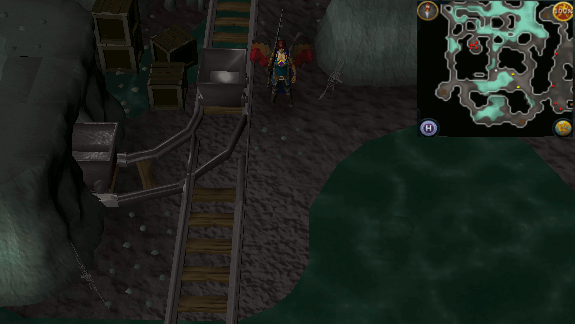
You will need this fungus in your inventory to see on the lower floors of the mines, therefore you need to transport the it to the other side of the mining complex via the mining carts. Head northwest and put the Glowing fungus into the mine cart.
-
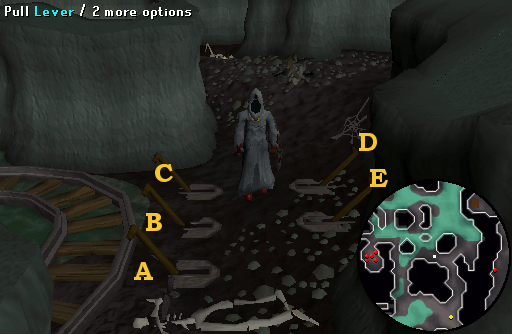
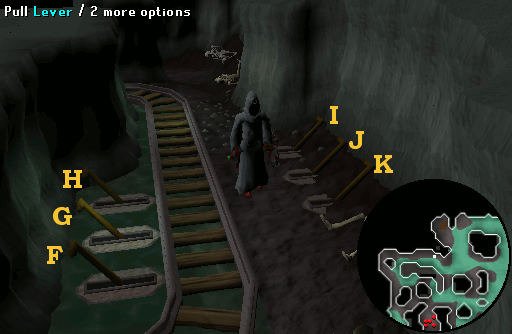
Walk a bit east and then north into a passageway to a set of cart controls levers. Examine the levers and you will notice that each one has a letter inscribed on it. Pull the levers A, B, D and E.
-
Make your way to the northwestern corner of this floor to another set of cart controls levers. Examine the levers and you will notice that each one has a letter inscribed on it. Pull the levers I and J.
-
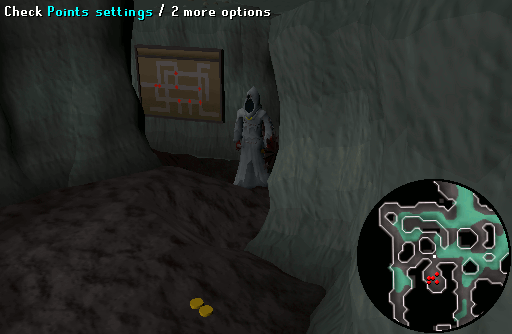
Head back south towards a tracking map on one of the walls and check the point settings.
-
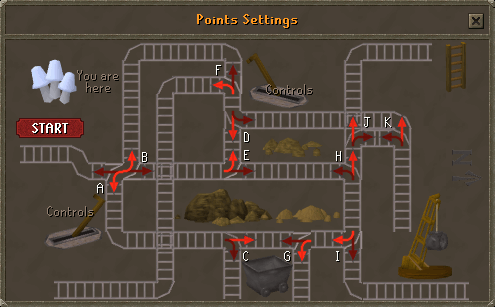
Ensure that the map matches the image below and press the start button on the tracking map. This will transport the mine cart, with the Glowing fungus in it, to the other side of the maze.
Note: The map differs from player to player. If it does not match the image below, then keep pulling the levers until it does.
-
Head back to floor 1 of the abandoned mine (On floor 4 use the ladder to the south, floor 3 use the east ladder, and floor 2 use the west ladder to reach floor 1), through the section of mine cart track that is open to the surface. This area is the reason you solved the mine cart puzzle; if you try to take your glowing fungus through here instead, it will dissolve. Go down the ladder [left - refer to the picture below] to the second floor. Now make your way a little north-east and climb down the ladder [right - refer to the picture below] to the third floor.

-
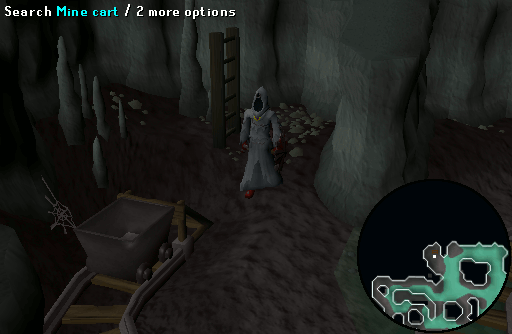
Go to the north-west corner of the cave and go down the ladder. Search the cart just south to get the Glowing fungus. Go back up the north ladder and head all the way east to another ladder, just past a moving mining cart.
Note: If the cart bumps into you, you will take a lot of damage and be pushed towards the end of the track.
-
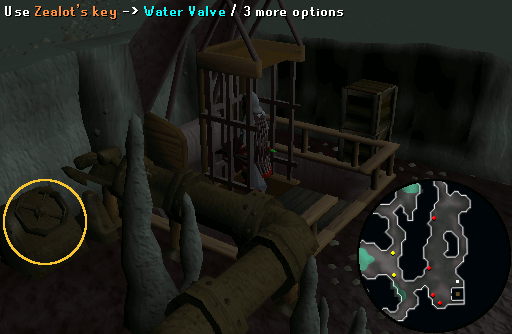
Climb down that ladder and keep walking south until you reach a water valve. Use Zealot's key, which you pick-pocketed earlier, on it and run as fast as you can to the lift before the ghost turns the valve. Go down the lift and head south to a crossing. Take the eastern passage and go down the stairs. Make sure you have high energy before you do it.
Note: Beware of Iron pickaxes lying on the ground, as they will be resurrected and transformed into level 49 Possessed Pickaxe (Aggressive) should you come close to them.
-
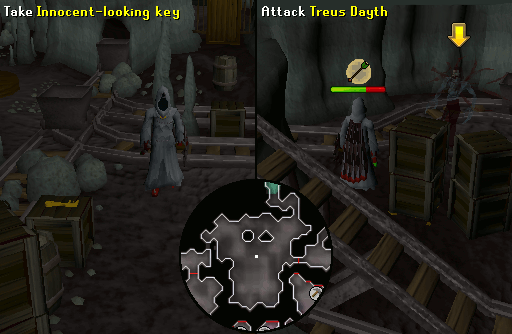
Prepare yourself for a battle and open the door to the west. Try to take the innocent key from the crate. A ghost called Treus Dayth (level 63) will appear and attack you. During the battle he will teleport around the room and throw pickaxes at you. As soon as Treus Dayth appears, all the machinery in the room will come to life, so be beware of the moving mine carts and the rotating cranes.
Note: Using the Protect from Ranged prayer will only reduce the taken damage and not protect you from it.
-
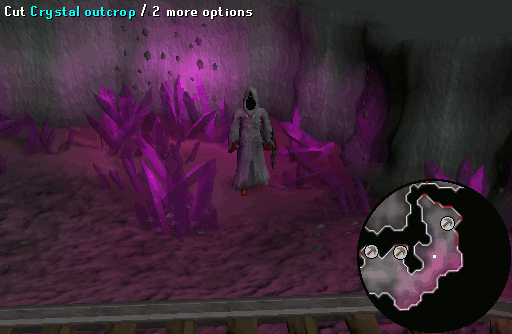
Once you have him defeated him, take the innocent looking key. Leave the area through the door to the east and go back up the stairs. Head west and walk down a similar staircase. Open the large door using the Crystal-mine key and cut a Salve shard from one of the crystal outcrops using a Chisel.
Note: To get out of the Haunted mine, simply teleport out or go back up lift and make your way to the surface.
Congratulations! Quest Complete!
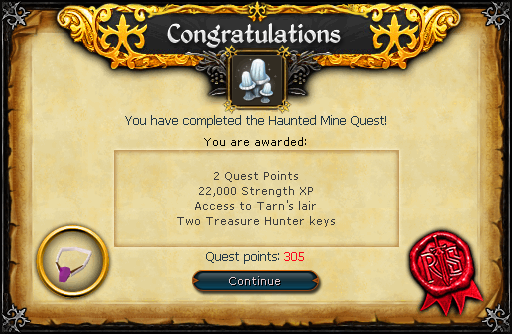
Salve Amulet:

Upon completion of the quest, a Salve amulet can be made by using a Ball of wool on the Salve shard. When worn, the amulet increases your Attack and Strength by 15% when fighting the undead. After having completed the The Lair of Tarn Razorlor mini-quest the amulet can be enchanted into a Salve amulet (e), which increases the above mentioned skills by 20%.
This Quest Guide was written by Im4eversmart and Alfawarlord. Thanks to charbeneau0, Remillius, Xaero0010, Ghoulies, onfire91, r k o orton, JoshB, DRAVAN, bainsy44, Clamball, Bob, DarkAdvisor, Halfven, Jarkur, Anon, Super Beav, Emso, and Rooskii. for corrections.
This Quest Guide was entered into the database on Tue, Dec 21, 2004, at 06:34:15 PM by monkeymatt, and it was last updated on Sun, Mar 17, 2024, at 04:09:48 AM by KsbSingle.
If anything is incorrect or missing, or if you have any new information to submit to this database, please submit it to us on our Content Submissions Forums.
If you see this guide on any other site, please report it to us so we can take legal action against anyone found stealing our content. This guide is copyrighted by RuneHQ, and its use on other sites is expressly forbidden. Do not ask if you can use our guides or images, the answer is and always will be NO!
Print this page with images - Back to the Quest Guide Index Page - Back to Top
