

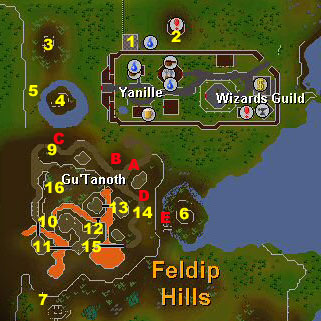
14 Magic
15 Thieving
25 Agility
40 Mining
Must defeat level 68 monsters.
-
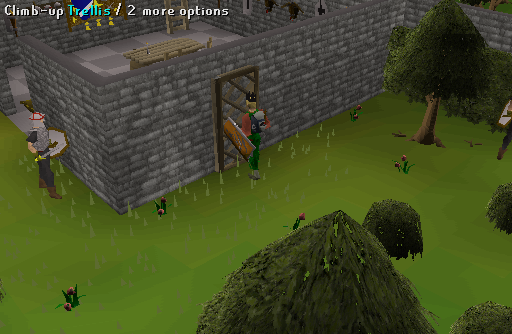
Once you see the Watchtower (location #1), look around it for the "trellis". You should find it on the North outside wall of the Watchtower. This is the only way to get in at first. The Guards will attack you if you try to use the ladder. Climb up the Trellis and you'll be inside on the 2nd floor of the watchtower. Continue up the ladder to the 3rd floor and speak to the Watchtower Wizard.
-
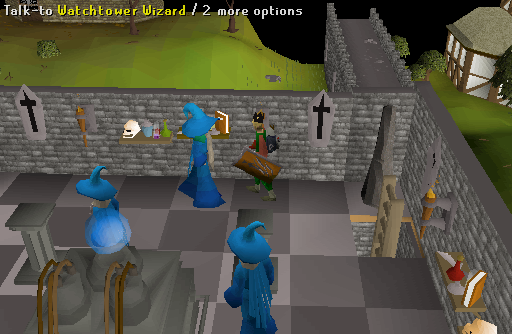
After you have spoken to the Watchtower Wizard, you will need to go outside (down 2 ladders) and search all the bushes around the Watchtower till you find some fingernails, an eye patch, a dagger and some armor. Go back to the wizard and talk to him - this time you can use the ladder. He will send you on your mission to recover the crystals.
Note: When you are searching the bushes you may not find a dagger, but a robe instead...
This item is acceptable as long as you have the tattered eyepatch fingernails and armour that looks like goblin mail.
-
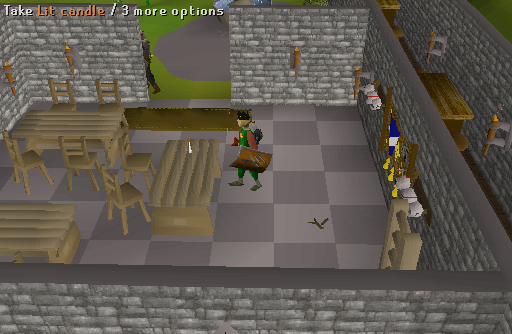
Now go down to the first floor and take the lit candle that respawns on the table (if you don't already have a lit candle). Also if you don't have a bat bone yet, you can get them now. There is a dungeon just East of the Watchtower (location #2). Cut through the webs and go down the stairs. Kill a bat to get bat bones.
-
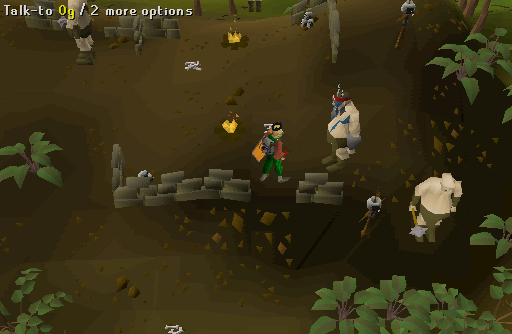
First you will need to talk to Og. Exit Yanille through the West gate and you come to the ogre settlement (location #3). Speak with him and he will help you - but only after you have helped him. Og will give you a key and ask you to retrieve his gold bar that was stolen by Toban.
-
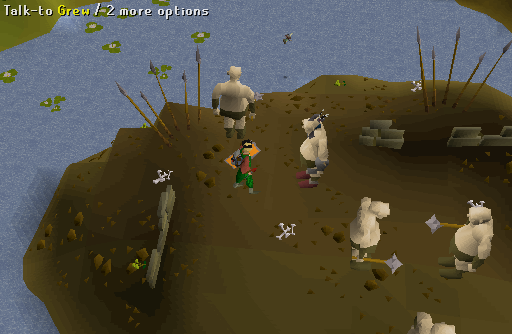
Just South of Og, you will see a little island (location #4). Use the rope with the branch on the "long branched tree" (location#5). You will now swing over to the island. Talk to Grew. He will ask for a tooth of his enemy - Gorad the Ogre. While you are here, get jangerberries before you swing back across. You will need them later in the quest.
-
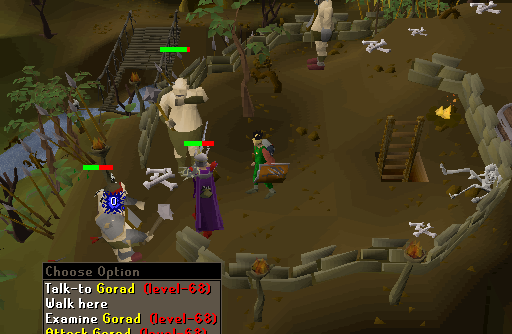
To get to Toban and Gorad, you will need to gain access to the small island South of Yanille (location #6). You will not be able to access the island from the bridge. You will need to find the cave entrance that is South-West of the small island (location #7). When you're on the island, attack Gorad (level 68) and kill him (make sure that you have room in your inventory for this tooth, or you will have to kill him again). Now go talk to Toban. He will ask you for a dragon bone. Give him a dragon bone and he'll give you a part of the ogre statue. Now go open Toban's chest (which is on the same island) to get Og's gold bar.
-
Go back to the other island (location #4) and use your second rope on the "long branched tree" branch (location #5) and swing across. Talk to Grew and give him the tooth. He will give you another part of the ogre statue. Go back to Og and talk to him. Give him the stolen gold bar and he will give you a third part of the ogre statue (one of the 3 ogres, either Og, Grew or Toban, will give you a crystal along with the statue part).
-
Now go back to the Watchtower wizard (location #1) and use the items on him. He will give you an ogre statue when you give him all the 3 parts. With the statue, you can now enter the Ogre city.
-
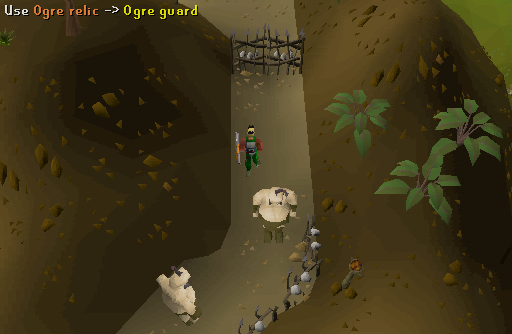
South of Yanille is a road that leads to Ogre city. Follow the road up the hill and then follow the western path. Use the statue with the Ogre guard (location #9) to get through to the Ogre city.
-
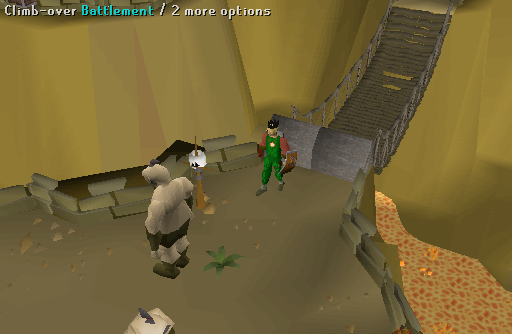
Follow the path and enter the market area. Southwest in the market area you will find a Rock Cake Stall, steal a Rock Cake from here (Don't eat the Rock Cake! If you do it will result in the loss of Hitpoints). Leave the market area and follow the path south till you see 2 ogre guards and a battlement (location #11). Try to climb the battlement and you will be stopped by the guard. He wants a rock cake. Give the Ogre the stolen rock cake and he will allow you to climb over the battlement and across the bridge.
-
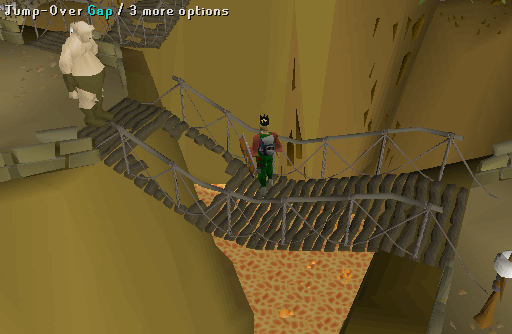
Now you will come to your next obstacle (location #12). You will come to a bridge with a gap that you need to jump over (to jump, simply click on the edge of the bridge). Try to jump and you will be stopped by the guard and you'll have to pay 20gp to jump. If you jump successfully, you will end up on the other side. Go over the bridge and you'll see some city guards (location #13). Talk to one of them and they will give you a riddle. The answer is death rune. Use a death rune with him and he will give you a Skavid map.
-
Go out of the city and follow the path from the gate. Follow the path east till you see a cave (Scared skavid location varies player to player so be sure to enter all the caves). Be sure to have the Skavid map and the lit candle on you. If you don't have a lit candle, you will end up in a empty cave and have to find a way out. Enter the cave and talk to the Scared skavid. He will help teach you their language. However, you must speak with the other Skavid (regular) as well.
Note: The location of the Scared skavid may vary for each person, hence you will need to enter all of the caves until you find the Scared skavid.

-
Exit the cave and search around the ogre city for caves (locations #A, B, C, D, E). Enter the caves starting with (location #D) and talk to the Skavid. Give him the right response. When you have given the right response to all the Skavids, go to the Scared skavid again and talk to them.
- If he says "Ar cur," the correct response is "Gor."
- If he says "Bidith ig," the correct response is "Cur."
- If he says "Gor nod," the correct response is "Tanath."
- If he says "Cur tanath," the correct response is "Bidith."
- If he says "Bidith tanath," the correct response is "Cur."
- If he says "Tanath gor," the correct response is "Nod"
- If he says "Cur bidith," the correct response is "Ig."
- If he says "Gor cur," the correct response is "Ar."
Note: Each time you enter a Skavid cave, they talk gibberish and then you pick a reply. If you pick the wrong one, the conversation ends. Write down what they said. Exit the cave, re-enter and pick a different answer. Then write down the one that they finally liked.
-
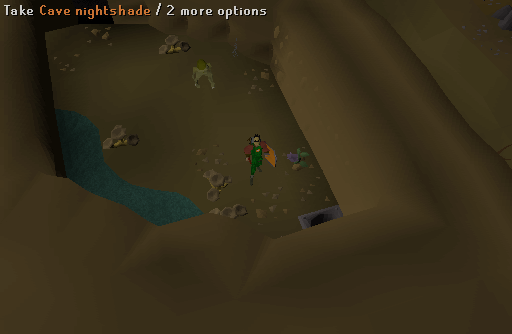
Go out of the cave and follow the path south till you see 2 ogre guards (location #14). Talk to one of them. He will ask for a gold bar. Use the gold bar with him and he will let you through. Follow the road, cross the bridge and enter the cave (location #15). Talk to the Mad skavid in there. Give him the right response (he uses the same phrases as above just rearranged, for example: he says Ar Cur and you respond Gor) and he'll give you the second crystal. Take 2 nightshades that respawn there.
-
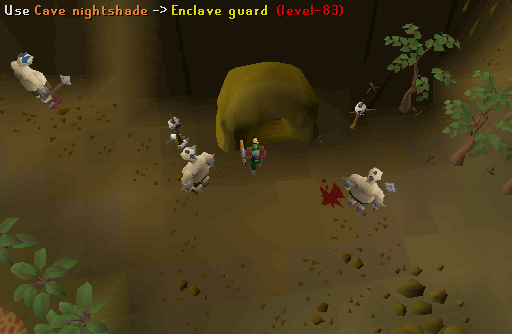
Go to the market and use the Nightshade with the guard in front of a cave entrance (location #16). You must be careful not to eat the Nightshade, or else it will cause heavy damage to your character's lifepoints. Equip your Anti-dragon shield and enter the cave. Once you're inside the cave, you'll come across Ogre shamans, Ogre guards and Blue dragons. You must not attack the ogre shamans, and head north until you see a cave exit. Go out the exit and back to the wizard. He will tell you about a potion that will kill the ogre shamans.
-
Get your Jangerberries, Guam leaf, Pestle and mortar, Water filled vial and Bat bones.
Mix the ingredients in the following order: Use the Clean guam with a Vial of water to make a Guam potion (unf). Add the Jangerberries to it to produce a Vial with a mixture of Jangerberries and Clean guam. Grind up Bat bones using the Pestle and mortar into Ground bat bones. Now, add the Ground bat bones to the mixture to produce a Potion. Give this to the Watchtower Wizard and he will enchant it into a Magic ogre potion.
Note: If you do not mix the ingredients in the order mentioned above, you will create a Vial that will explode dealing you fair amount of damage.
-
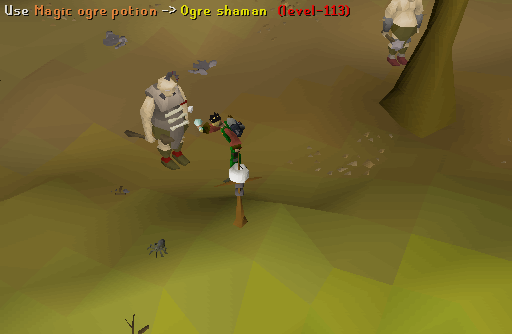
Go back to the market cave (location #16) and use your second nightshade on the guard (again be Careful Not to Eat it!) When you're in the cave, you'll have to use the potion with all the shamans. When you used the potion on the last shaman, he disappears and drops the third crystal.
Note: Do not attack nor talk to the Ogre shamans or you will lose most of your Life points. After having used the Magic ogre potion on all six of the Ogre shaman, you may simply search the Shaman robe in the eastern part of the enclave to obtain the Cyan Crystal.
-
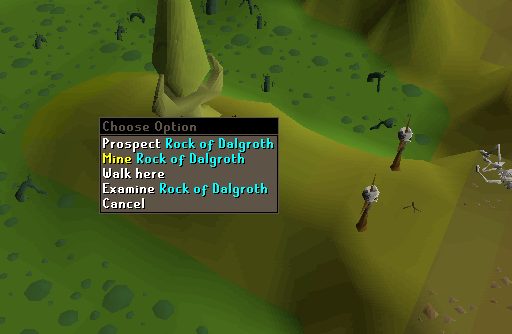
Go to the rock in the middle of the cave. Mine the rock and you should get the fourth and last crystal.
-
Go back to the wizard and talk to him. Place the four crystals on the appropriate pillars, and then pull the lever.
- Purple crystal - North-east pillar
- White crystal - South-east pillar
- Yellow crystal - South-west pillar
- Cyan crystal - North-west pillar
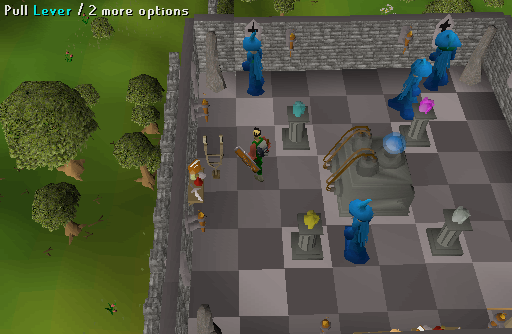
Congratulations! Quest Complete!

This Old School Quest Guide was written by payman and irish_buddha. Thanks to Fireball0236, goatluver500, whitey21, JasonMagicka23, Eq_S_Guy, L3tHaL LeAdA, Grand Gaia, Keystone, halk 5, DRAVAN, pokemama, shendoa, cna070621, Maonzhi, Bingo, Honor Them, McSwindler, PvM Jezus, Jarkur, Lucipurisluv, Afig3ns, Zeu, H0LDEN, Paladins, CaIlisto Dad, Jtnf, Ksb Single, and XualI for corrections.
This Old School Quest Guide was entered into the database on Tue, May 18, 2004, at 04:26:49 PM by DRAVAN and CJH, and it was last updated on Thu, Mar 22, 2018, at 06:33:36 PM by ksb single.
If anything is incorrect or missing, or if you have any new information to submit to this database, please submit it to us on our Content Submissions Forums.
If you see this guide on any other site, please report it to us so we can take legal action against anyone found stealing our content. This guide is copyrighted by RuneHQ, and its use on other sites is expressly forbidden. Do not ask if you can use our guides or images, the answer is and always will be NO!
Print this page with images - Back to the Old School Quest Guide Index Page - Back to Top
