

Recommended Quests:
Contact!, The Feud, and The Great Brain Robbery.
There are several ways to get to the pyramid:
- Go through the Shantay pass and take a carpet ride to Pollnivneach, then walk south until you see another carpet merchant. Talk to him and go to Sophanem. Once there, enter the city and head a little south to the pyramid.
- Use your Camulet to go to Enakhra's Temple, and then from there you can walk to Sophanem (Waterskins needed).
- Teleport to the Desert Bandit Camp using the lodestone network. From there, head east across a bridge and then south to the Sophanem. (Waterskins needed).
- Use the Desert amulet 2 to teleport to Nardah, and from there head South-west to Sophanem (Waterskins recommended).
- The best way to get there is to use the teleport on the Pharaoh's Sceptre or Sceptre of the gods to Jalsavrah, it takes you directly to the mummy. For more information about thess sceptre, see the rewards section of this guide.
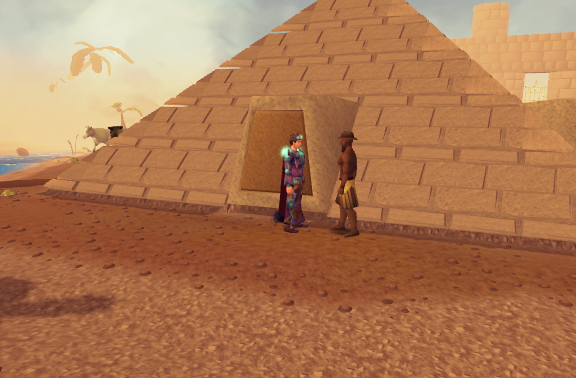
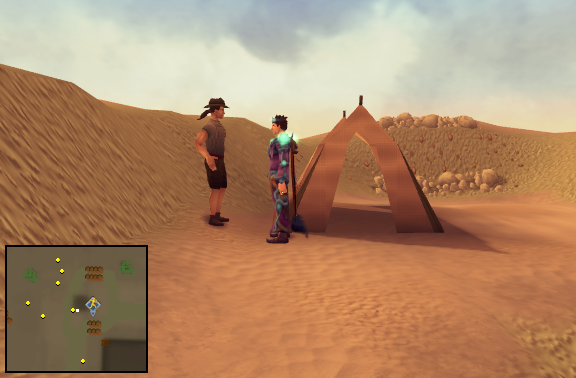
Once at the pyramid, talk to Tarik. He will tell you about the dangers of the pyramid, the rewards, and about an ancient sceptre.
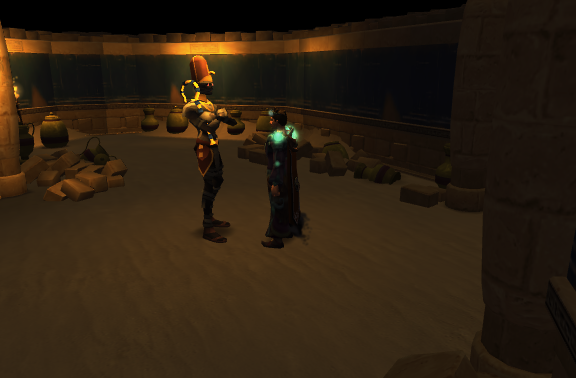
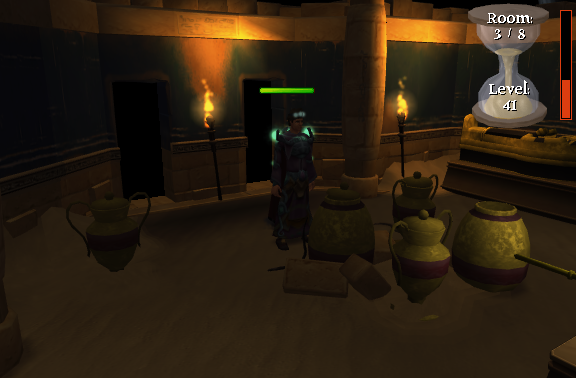
Now enter through one of the four entrances and you will be in a tomb. If the tomb has a Guardian mummy in it, you are in the right tomb If not, try another one. Each time you enter a tomb with a mummy in it you gain 20 Thieving XP. Talk to the Guardian mummy (or right-click him and select "Start activity"). He will tell you about the activity and will ask you if you want to give it a try. Accept his offer and you'll start the activity. One game lasts 5 minutes.
Each room requires a different Thieving level. Here are the room requirements.
| Room Number |
Thieving Level Required |
Thieving XP Per Urn Checked |
Thieving XP Per Urn Looted* |
Thieving XP Per Golden Chest** |
Strength XP Per Sarcophagus |
Thieving Xp Per Door*** |
Thieving XP Per Trap |
| 1 | 21 | 20 | 60 (40) | 40 | 20 | 40 (20) | 10 |
| 2 | 31 | 30 | 90 (60) | 60 | 30 | 60 (30) | 10 |
| 3 | 41 | 50 | 150 (100) | 100 | 50 | 100 (50) | 10 |
| 4 | 51 | 70 | 215 (140) | 140 | 70 | 140 (70) | 10 |
| 5 | 61 | 100 | 300 (200) | 200 | 100 | 200 (100) | 10 |
| 6 | 71 | 150 | 450 (300) | 300 | 150 | 300 (150) | 10 |
| 7 | 81 | 225 | 675 (450) | 450 | 225 | 450 (225) | 10 |
| 8 | 91 | 275 | 825 (550) | 550 | 275 | N/A | 10 |
*If you check an urn for snakes, you are rewarded half the experience for searching it normally. If you have charmed the snake before searching the urn, you will only receive 2/3 of the experience for searching it. The best experience from urns is from searching for snakes, NOT charming the snake, and looting the urn.
**You do not receive this experience if a scarab swarm appears when you open the chest.
***If you use a Lockpick to open a door, you will only receive half of the experience you would normally gain without the use of a Lockpick
All the rooms have the same principle. When you enter the room, deactivate the spear trap in front of you and then either continue on to the next level room or start searching the urns, chests, and sarcophagi.
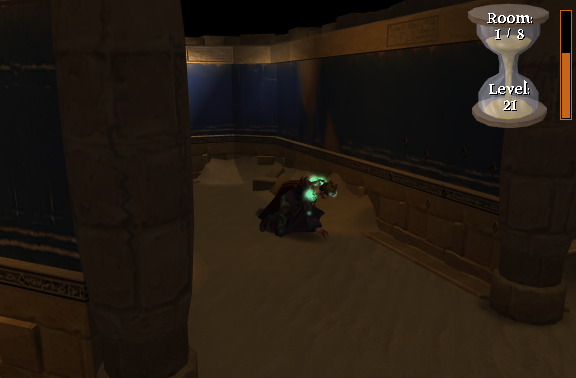
To continue on to a higher level room, picklock the numerous tomb doors around you until you find the one that isn't a dead end.

Any of the urns, chests, and sarcophagi can contain an artifact, but they all can have traps too. A chest can contain a level 112 Scarab swarm, an urn can contain a snake that poisons you, and a sarcophagus can contain a level 100 Mummy. You can avoid the snake by first searching the urn for snakes and then when one appears, you can click on it to charm it (requires a Snake charmer, and you may still be bitten occasionally causing you to be poisoned.)
Loot an urn and if you get bitten by the snake then check the urn for snakes. Once the snake pops up loot the urn. You will have a higher success rate than looting the urn with the snake still inside. You also get the same experience (for example: in the Level 61+ room checking for snakes earns you 100 exp and then looting it you yields 200 exp, which is the same amount as just looting the urn, which is 300 exp). Do not charm the snake, as you will receive only half the exp. Try and loot the Chest and the Sarcophagus last because they have a chance of monsters coming out and attacking you, making it harder to loot the urns. However make sure you get to the chest and sarcophagus before the time runs out. Drop all artifacts under stone scarab while keeping the others. If you did Contact! quest then once you have an inventory consisting mostly of stone scarab artifacts and above, climb down the ladder to the east of the pyramid and bank your artifacts.
Fastest route to completion:
Do not loot anything except the chest in the lower level rooms. Once you get to the highest level room you can get into lootiing all the urns before looting the chest and sarcophagus. Exit the room through the Tomb Door once you have looted the entire room.
Most EXP per game:
Loot the Chest in every room and when you get to the second highest room loot the Chest and the urns until the timer almost reaches the half-way mark. Then move on to the highest level room you can enter and loot the room completely.
Bank:
Those who have completed the Contact! quest have access to a nearby bank. It's located the east of the pyramid, in the basement of the room with a ladder. After each completion of the activity you can bank the artifacts to sell later.
As you progress through the rooms, the possible loot becomes better (Gold statuettes appear beginning in the 7th room), and generally more valuable artifacts can be found in higher-level rooms. Chests and sarcophagi also tend to yield better items than urns. All of the artifacts you obtain can be sold in noted form to Simon Templeton at the Agility Pyramid (Northeast of Sophanem). However, Jewelled golden statuettes and Diamond statuettes can not be exchanged in noted form.
The chance of receiving better drops is increased by the Ring of fortune,
Enhanced luck potion, Collector's insignia (charged), or Luck of the dwarves.
| Name | Image | Price |
| Ivory Comb |  |
50gp |
| Pottery scarab |  |
75 |
| Pottery statuette |  |
100 |
| Stone seal |  |
150 |
| Stone scarab |  |
175 |
| Stone statuette |  |
200 |
| Gold seal |  |
750 |
| Golden scarab |  |
1000 |
| Golden statuette |  |
1250 |
| Jewelled golden statuette |  |
1250gp |
| Diamond statuette |  |
12500gp |
Pharaoh's Sceptre:

In addition to the standard artifacts that may be looted from the pyramid, chests and sarcophagi have a chance of yielding a special artifact called the Pharaoh's Sceptre. This tradable sceptre allows a user three teleports to the a number of pyramids. After these teleports are used up, it may be recharged by offering the Guardian Mummy either 1 Jewelled golden statuette, 6 gold artifacts, 12 stone artifacts, or 24 ivory/pottery artifacts. The mummy does not accept noted artifacts. After completion of the hard Desert Tasks, the scepter will hold a total of 6 charges. It is possible to get multiple sceptres per player, but when one is found, the player is escorted out of the pyramid by the Guardian Mummy and must begin a new game of Pyramid Plunder to re-enter the pyramid.
| Pyramid Name | Location |
| Jalsavrah | The Pyramid Plunder Pyramid, in Sophanem |
| Jaleustrophos | The Agility Pyramid, southwest of Nardah |
| Jaldraocht | The Desert Treasure Pyramid, southwest of Pollnivneach |
Scepter of the Gods:

The Sceptre of the gods may be obtained by looting the engraved sarcophagus in the 8th room. 91 Thieving and 75 Runecrafting are required to loot the sarcophagus. This untradable sceptre allows a user to teleport to the same locations as the pharaoh's sceptre but holds 10 teleport charges (20 with the hard Desert Tasks completed). After these teleports are used up, it may be recharged by offering the Guardian Mummy either 1 Jewelled golden statuette and 4 gold artifacts, 10 gold artiifacts, or 20 stone artifacts. The mummy does not accept noted artifacts. If you posses a Jewelled diamond statuette, the you may recharge this scepter by using it on the scepter without having to talk to the mummy. When wielded in Pyramid plunder, 4 additional urns will be visible in the last two rooms and your chances of obtaining the Black Ibis outfit pieces are increased.
There is a small chance to receive a part of the Black ibis outfit whe looting urns and sarcophagi. When worn, each piece will increase your Thieving experience by 1% (up to 5% for the complete set). The experience gained from Blackjacking is not boosted by these pieces. The chances of receiving it are increase when wielding a scepter of gods. The complete set may be placed in the armor case in the costume room of your player-owned-house
| Name | Image | XP Bonus |
| Black ibis mask |  |
1% |
| Black ibis body |  |
1% |
| Black ibis legs |  |
1% |
| Black ibis boots |  |
1% |
| Complete set | 5% | |
Exoskeleton set is obtained as a reward after completion of Plague's End - the final grandmaster quest of Elf series. Wearing the full set provides a 25% chance to avoid being stunned and damaged when pickpocketing and a 25% chance to avoid being bitten when looting urns in Pyramid Plunder. If you have looted the Black ibis outfit from Pyramid Plunder, the exoskeleton has the same benefits. The bracers give the same benefits as gloves of silence, if the player has 75 Hunter and 75 Thieving. Every piece of the exoskeleton you wear reduces your weight by 2 kg. The exoskeleton may be stored in the armor case in your player owned house.
The full set consists of Headband, Torso, Legs, and Bracers.
This Minigame Guide was written by Watsermetjou and Ismajosh. Thanks to computre, dark913, Fireball0236, sksfrontiers, theamazingbender, Im4eversmart, Will9637, carduel, Oblivion590, Snaily2, I M Bad13, Random605, TitanofLife, Phox1616, Sumurai8, October rust, Alfawarlord, Jarkur, and Big Ginger1 for corrections.
This Minigame Guide was entered into the database on Mon, Jul 17, 2006, at 01:23:14 PM by Im4eversmart, and it was last updated on Tue, May 16, 2017, at 04:35:16 AM by Numerous One.
If anything is incorrect or missing, or if you have any new information to submit to this database, please submit it to us on our Content Submissions Forums.
If you see this guide on any other site, please report it to us so we can take legal action against anyone found stealing our content. This guide is copyrighted by RuneHQ, and its use on other sites is expressly forbidden. Do not ask if you can use our guides or images, the answer is and always will be NO!
Print this page with images - Back to the Minigame Guide Index Page - Back to Top
