

-
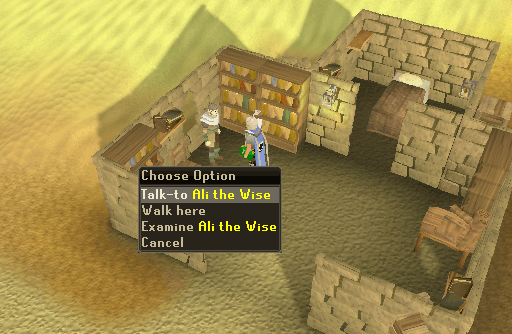
Speak to Ali the Wise in Nardah. He asks you about the Mahjarrats and what you think of them. He asks you to go to the Digsite Exam Centre to see his contact, Dr. Nabanik. Ask him for help to get at the Digsite Centre and he will give you a Digsite pendant (or Ali's pendant).
-
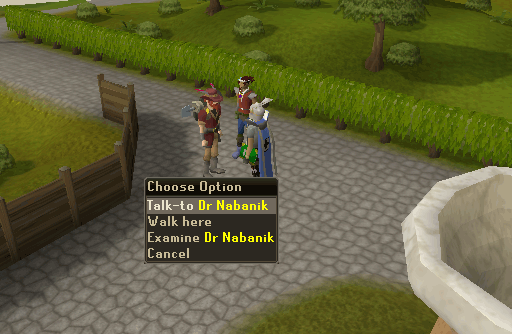
Rub the pendant, and once you arrive there, walk south then east to reach the Digsite Centre. Talk to Dr. Nabanik located outside the Exam Centre and he will reveal that he is Azzanadra in disguise. He tells you that he wants a Restoration certificate from you.
-
Go inside the Exam Centre and talk to the Terry Balando. Tell him that Dr. Nabanik was in the pyramid a long time and that you have seen the beetles and that they are huge. Then tell him he studies immortality. When he asks for his personal background, say he has interests in the desert religions. If you said the correct things, he will give a Restoration certificate.

-
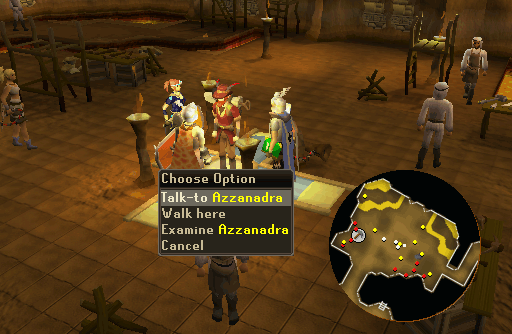
Give the Restoration certificate to Dr. Nabanik. He asks you to meet him outside the temple under the Digsite. Dr. Nabanik gives you a Rope for this. Use the rope on the winch in the northwestern part of the digsite to go down. Once down head south and you will now see Azzanadra instead of Dr. Nabanik. He has two more dangerous jobs for you, one in Morytania and one in the far north.
-
As you discuss the jobs, Azzanadra hands you a Ruined backpack from one of his men. Open the Ruined backpack and you'll receive a Battered letter and a Heat globe.
-
Talk to Azzanadra about the Battered letter and tell him that the contact was out of runes. Azzandra's colleague had only taken combat runes to the frozen fortress, but discovered that it was necessary to move globes without touching them. This means you will need Law runes and Air runes for the Telegrab spell.
-
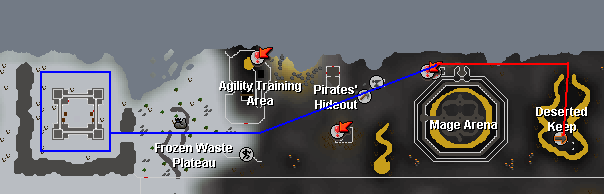
Job at North (Fortress west of Frozen Waste Plateau in the Wilderness)
Option: (Players can get up to the frozen fortress by using a boat from the Trollweis Hunter area. This prevents having to ever go into the wilderness. Fairy ring D-K-S is just to the south-east of the Trollweis Hunter area.)
Note: For this step and other steps, do NOT forget your Anti-dragon shield and/or your Antifire potion. Also, do NOT forget your Telekinetic grab runes (Law runes and Air runes; Level 33 Magic)
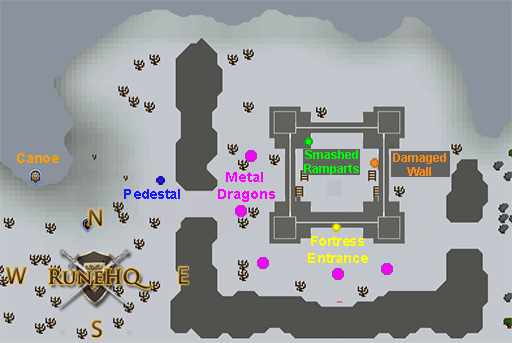
Head over to the Frozen Waste Plateau, in the northwestern part of the Wilderness. If you have completed The Tale of the Muspah quest, then the fortress can be accessed safely by using the canoe, on the west coast of the trollweiss hunter area, to travel to the dungeon entrance to the north. From there head east to the fortress.
-
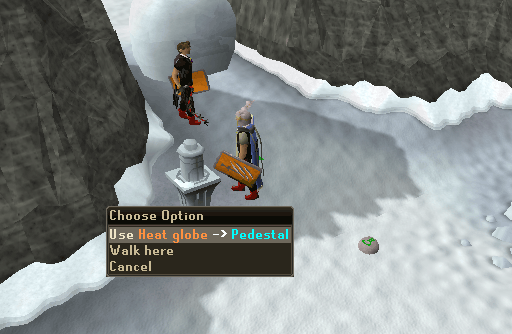
Put the Heat globe on the pedestal, and squeeze past the ice. Run to the south wall and into the fortress, past the Metal dragons.
-
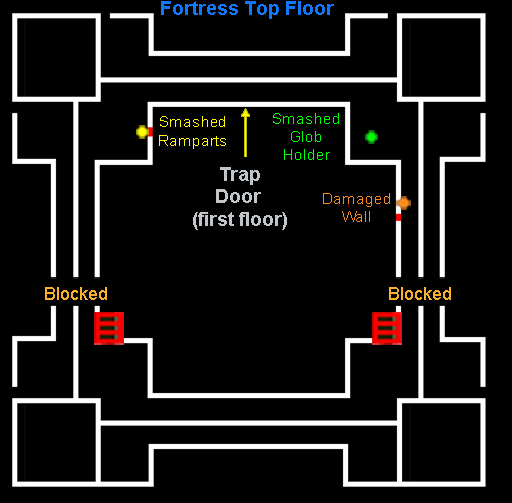
Due to snow blockage preventing access to the east stairs directly and snow blockage on the upper floor of the fortress, you have to climb the western stairs, run east to the eastern stairs and go back down. Just past the door on the eastern wall on the floor level is a damaged wall.
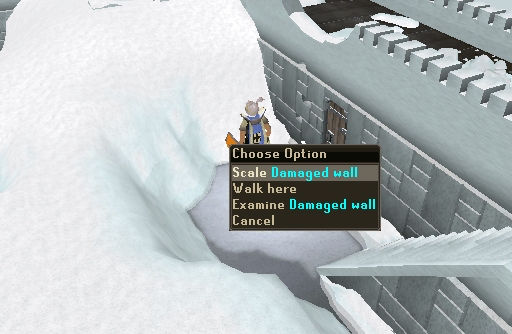
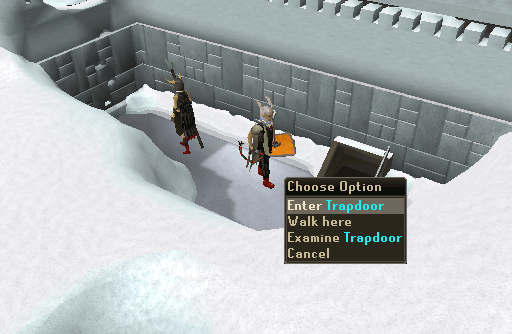
Scale the damaged wall in order to get to the other side of the snow blockage on the second floor. Run past the smashed Globe holder to the north western corner and climb down the smashed ramparts and then enter the trap door.
Note: If you log out while you are in the dungeon, you can continue from where you were. You will be given two options if you try to enter the trapdoor again. If you did not bring a Hammer, then climb down the trapdoor and loot the crate south of the Pedestal.
-
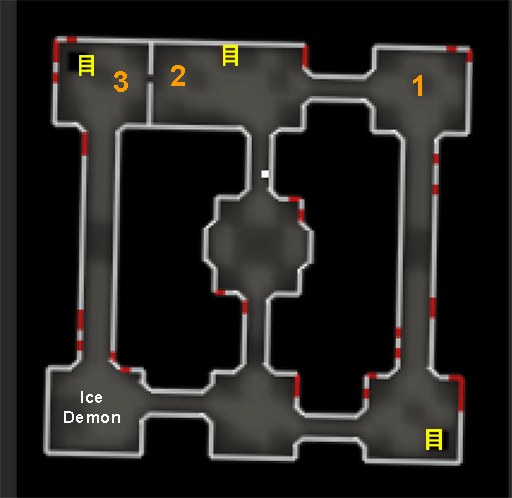
Start by taking a Heat globe globe from the pedestal located east of you (#1). Run west and place the globe on the pedestal west of the stairs (#2), which will melt the ice block. A waterfiend will appear, however you do not have to kill it if you can get away with out being attacked. Run west into the next room past where the ice block was, then telegrab your globe (from #2).
-
Now use your globe on the nearby pedestal (#3). Another waterfiend will appear, as well as a trapdoor. Go down the trapdoor.
-
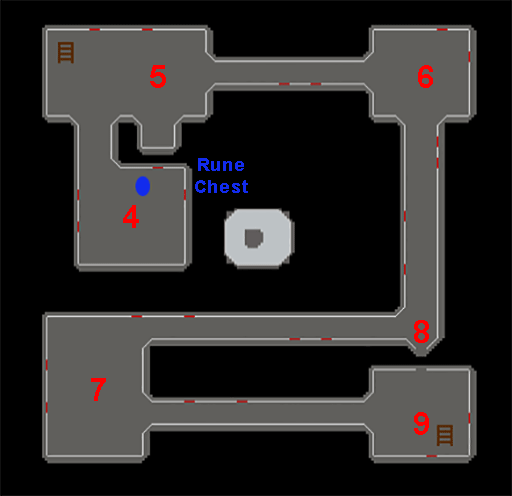
Head south and pick up another Heat globe (#4). If you wish, you can loot the crate near the southern waterfiend for 40 Law runes.
-
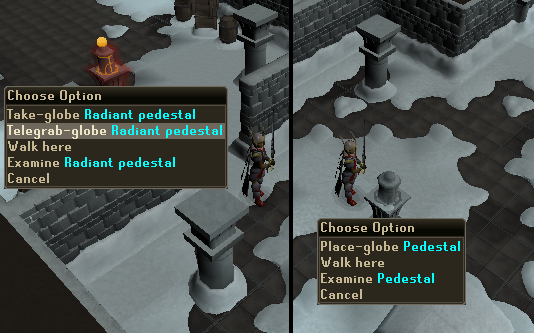
Place the Heat globe on the pedestal to the north(#5) and two more ice blocks will melt. Afterwards, head east to the radiant pedestal(#6).
-
Remove the globe from the pedestal (#6), only this time you will get an Imperfect heat globe.
-
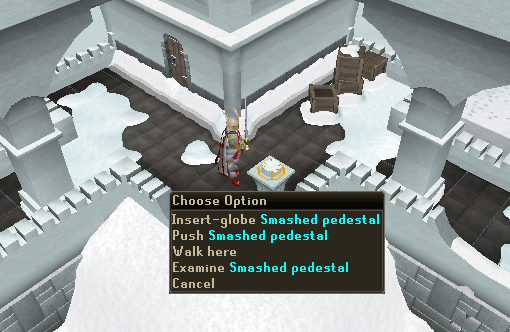
Retrace your steps and go back out of the dungeon. Scale the Smashed Ramparts and head east to the smashed pedestal. Insert the globe into the smashed pedestal holder on the floor. Then push it down the hole and it will fall into the cavern, melting some ice for you. Run back down and re-enter the trapdoor.
-
Climb back down the trapdoor to the west, then run back to the place where you got the Imperfect heat globe (#6). Continue south then west and you'll see another Heat globe(#7). Take this globe.
-
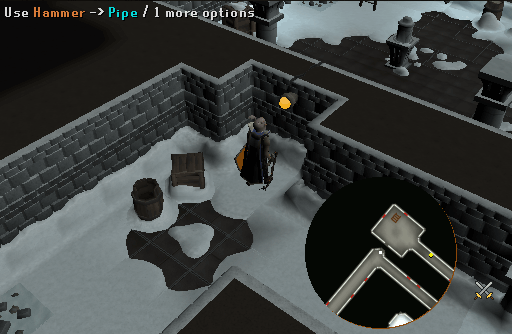
Use the Heat globe with the pipe(#8) in the nook to the east. The globe will get stuck, so use your Hammer with the pipe to hit the globe through (Or right click and choose "whack" to use the hammer on your toolbelt), causing the ice block to melt as the globe lands on the pedestal. Run through and go up the ladder.
-
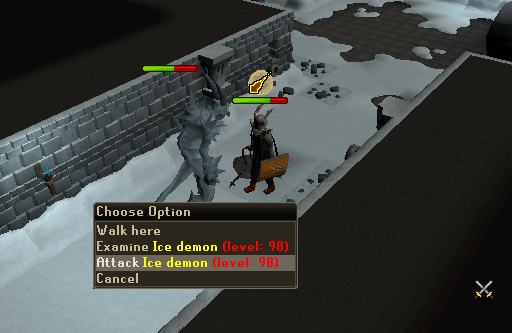
Now run far west and you will meet an Ice demon, which you will have to kill (Use Protect from magic). It will drop the Frostenhorn. Once you have it teleport out and get ready for your next task.
-
Job at Morytania
Prepare you inventory and armor for a Barrows run (If you are not sure what to take, have a look at our Barrows guide). The Barrows are located in the southeast of Morytania, just east of Mort'ton.
-
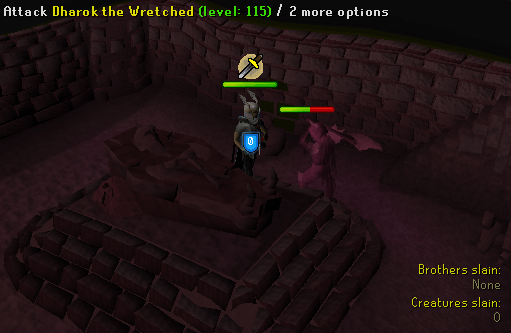
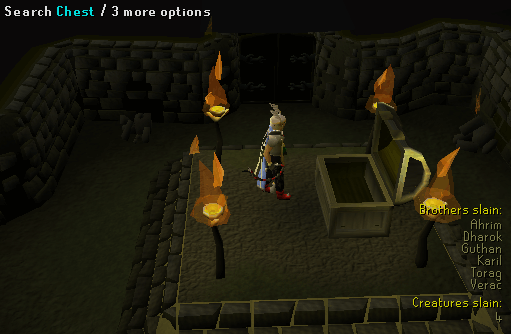
For this job, you will have to enter each crypt and kill 5 of the 6 brothers. The 6th one will be in the tunnel.
-
Find your way to the middle of the tunnel system. Solve the puzzle and attempt to open the Chest. If you have not encountered the last brother yet, you will once you open the Chest. Open up the Chest to claim your normal Barrows reward plus the Barrows icon. Take this back to Azzanadra along with the Frostenhorn.
-
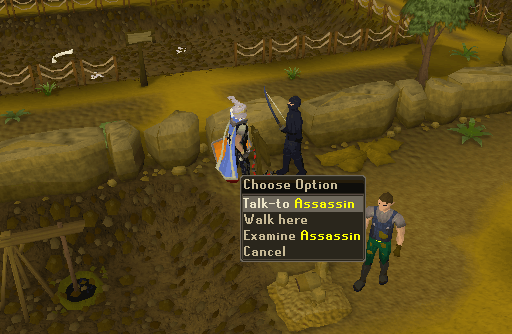
Teleport back to the Digsite with the Digsite pendant and speak to Azzanadra. Azzanadra will ask you to retrieve the final item from someone just outside the winch. Head out of the cave and talk to the Assassin. Take the Relic from him.
-
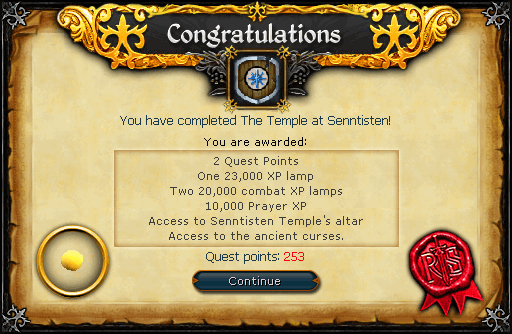
Return back to Azzanadra. A cutscene will occur where Azzanadra contacts Zaros and mysterious occurrences take place around the world. Speak to Azzanadra again to claim your reward.
Congratulations! Quest Complete!
New Prayers:
After the quest, you will have access to the new Prayers, below you will find a table listing all of them and their effects. To activate the Prayers, return back to Azzanadra, near him you will find an Altar of Zaros. Pray and you will have two options asking if you want to active Curses or not. The altar will also grant you a 15% boost over your Prayer level.
| Level | Image | Prayer Name | Member's Only | Prayer Effect |
| 50 |  |
Protect Item | Yes | Keeps 1 extra item if you die. |
| 50 |  |
Sap Warrior | Yes | Drains 10% of enemy Attack, Strength and Defence, increasing to 20% overtime. |
| 52 |  |
Sap Ranger | Yes | Drains 10% of enemy Ranged and Defence, increasing to 20% over time. |
| 53 |  |
Sap Range Strength | Yes | Drains 10% of enemy Ranged strength, increasing to 20% over time. |
| 54 |  |
Sap Mage | Yes | Drains 10% of enemy Magic and Defence, increasing to 20% over time. |
| 55 |  |
Sap Magic Strength | Yes | Drains 10% of enemy Magic strength, increasing to 20% over time. |
| 56 |  |
Sap Spirit | Yes | Drains enemy adrenaline. |
| 57 |  |
Sap Defence | Yes | Drains 10% of enemy Defence rating, increasing to 20% over time. |
| 58 |  |
Sap Stength | Yes | Drains 10% of enemy Melee strength, increasing to 20% over time. |
| 59 |  |
Berserker | Yes | Boosted stats last 15% longer. |
| 62 |  |
Deflect Summoning | Yes | Reduces damage dealt from Summoning scrolls, prevents the use of a familiar's special attack, and can deflect some of the damage back to the attacker. |
| 65 |  |
Deflect Magic | Yes | Reduces damage dealt from magical attacks and can deflect some of the damage. |
| 68 |  |
Deflect Missiles | Yes | Reduces damage dealt from ranged attacks and can deflect some of the damage. |
| 71 |  |
Deflect Melee | Yes | Reduces damage dealt from melee attacks and can deflect some of the damage. |
| 74 |  |
Leech Attack | Yes | Boosts Attack by 5%, increasing to 10% overtime, while draining enemy Attack by 10%, increasing to 25% over time. |
| 76 |  |
Leech Ranged | Yes | Boosts Ranged by 5%, increasing to 10% overtime, while draining enemy Ranged by 10%, increasing to 25% over time. |
| 77 |  |
Leech Range Strength | Yes | Boosts Ranged strength by 5%, increasing to 10% overtime, while draining enemy Ranged strength by 10%, increasing to 25% over time. |
| 78 |  |
Leech Magic | Yes | Boosts Magic by 5%, increasing to 10% overtime, while draining enemy Magic by 10%, increasing to 25% over time. |
| 79 |  |
Leech Magic Strength | Yes | Boosts Magic strength by 5%, increasing to 10% overtime, while draining enemy Magic strength by 10%, increasing to 25% over time. |
| 80 |  |
Leech Defence | Yes | Boosts Defence by 5%, increasing to 10% overtime, while draining enemy Defence by 10%, increasing to 25% over time. |
| 82 |  |
Leech Strength | Yes | Boosts Strength by 5%, increasing to 10% over time, while draining enemy Strength by 10%, increasing to 25% over time. |
| 84 |  |
Leech Energy | Yes | Drains enemy run energy by up to 10%, while increasing your own. |
| 86 |  |
Leech Adrenaline | Yes | Drains enemy adrenaline by up to 10%, while increasing your own. |
| 89 |  |
Wrath | Yes | Inflicts damage up to 25% of your maximum prayer level to nearby targets if you die. |
| 92 |  |
Soul Split | Yes | 1/50 of damage dealt is also removed from opponent's Prayer and added to your health up to 250. |
| 95 |  |
Turmoil | Yes | Increases Attack and Defence by 15%, plus 15% of your enemy's Attack/Defence (up to 14 levels), and Strength by 23%, plus 10% of your enemy's Strength (up to 9 levels). |
| 95 |  |
Torment | Yes | Increases Magic Attack, Magic Strength, and Magic Defence by 15%, plus 15% of your enemy's Magic Attack/Magic Strength/Magic Defence (up to 14 levels), while draining your enemies Magic Attack, Magic Strength, and Magic Defence by 23%, plus 10% of your enemy's Magic Attack/Magic Strength/Magic Defence (up to 9 levels). |
| 95 |  |
Anguish | Yes | Increases Ranged Attack, Ranged Strength, and Ranged Defence by 15%, plus 15% of your enemy's Ranged Attack/Ranged Strength/Ranged Defence (up to 14 levels), while draining your enemies Ranged Attack, Ranged Strength, and Ranged Defence by 23%, plus 10% of your enemy's Ranged Attack/Ranged Strength/Ranged Defence (up to 9 levels). |
This Quest Guide was written by Heavens Vibe and senug5. Thanks to Superior kel, Ralkal, dragoon889, Eragon7985, Egekalaycan, Im4eversmart, Clamball, Sandman366, Rose Evil, 2003 Veteran,HEROIC NIKKI, Ksb Single, and Numerous One. for corrections.
This Quest Guide was entered into the database on Fri, Dec 04, 2009, at 02:40:02 AM by Scott, and it was last updated on Tue, Jul 03, 2018, at 02:55:19 AM by Ksb Single.
If anything is incorrect or missing, or if you have any new information to submit to this database, please submit it to us on our Content Submissions Forums.
If you see this guide on any other site, please report it to us so we can take legal action against anyone found stealing our content. This guide is copyrighted by RuneHQ, and its use on other sites is expressly forbidden. Do not ask if you can use our guides or images, the answer is and always will be NO!
Print this page with images - Back to the Quest Guide Index Page - Back to Top
