

-
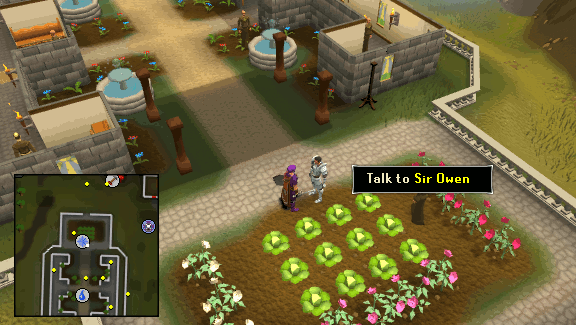
Talk to Sir Owen in the garden of the monastery west of Edgeville and he'll say "The owl hoots at midnight". Answer him with any of the first three responses and he'll say you're not the contact he's expecting, but you look familiar. Choose any answer and he'll tell you that Sir Amik Varze received a vision from Saradomin to send Sir Owen to the monastery, but he doesn't know why. Choose any response and a cutscene will follow in which Saradomin appears in the garden.
-
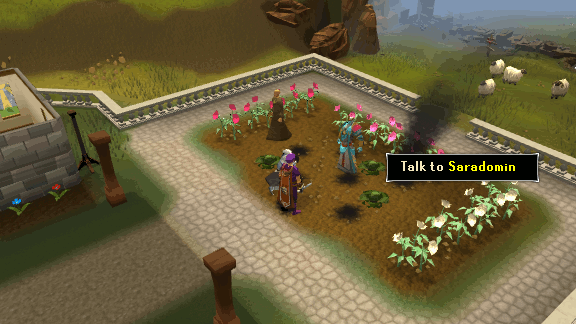
Attempt to talk to Saradomin and go through Sir Owen's chat until you have a decision to make. Choose one of the options and Saradomin will ask what you think of his new look; choose an option and some more chat will follow until you have to select how to respond to Saradomin again. He will now inform you that the Zamorak's black knights, the Kinshra, have discovered a powerful weapon last used during the God Wars and if they obtain it, they'll use it to destroy the city of Falador. He will now task you and Sir Owen with recovering the weapon before the Black knights.
-
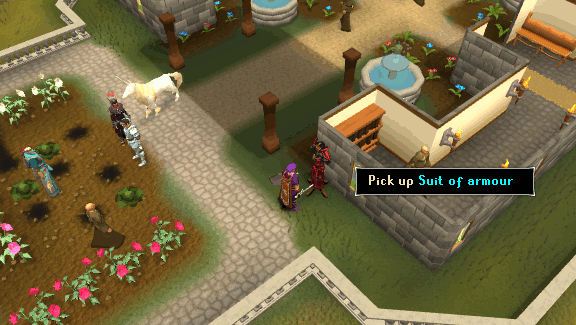
Accept the quest and Saradomin will tell you that you need a disguise to infiltrate the Black Knights' Fortress and spawn a set of armor for you to wear. Take the set and equip it, then speak to Saradomin again. He'll tell you that you'll be impersonating Captain Dulcin, the overseer of the Black Knights' Fortress, and Sir Owen will act as your prisoner. Saradomin will now offer to teleport you to the fortress, accept and you'll arrive at the entrance.
-
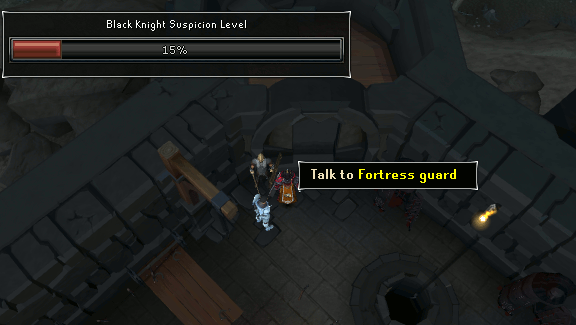
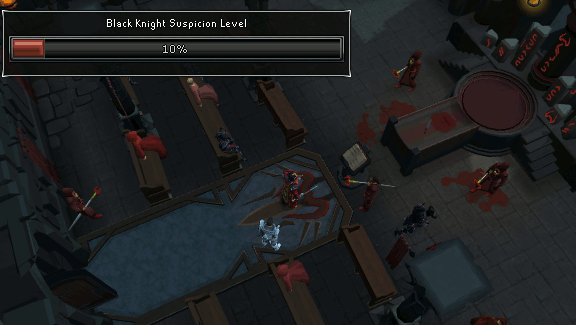
Once there, Saradomin will tell you to make your way to the top of the tallest tower and recover the weapon. Attempt to open the portcullis and you'll notice a 'Black Knight Suspicion Level' bar appears on your screen. The guard will then talk to you and your answers will determine if the level of the bar increases or descreases - you must act like a high-ranking officer to maintain your cover throughout your time in the fortress. First select option 3 and he'll ask you why you have a Saradominist with you, then select option 3 again and the guard will let you enter the fortress.
-
Make your way north and you'll be stopped by Lieutenant York who asks why the prisoner is not under guard, respond with option 2 and you'll be able to continue. Head into the northwest room and talk to the Fortress guard, choose option 1 and then option 3 and you'll find yourself on the next floor of the tower.
-
Now head all the way south and Hierophant Marius will ask you if you're ready to bear the mark of Zamorak. Say yes and he'll ask you to remove your helmet, select option 2 and then talk to the fortress guard in the southeast corner of the room. Select option 2 and then option 1 and you'll climb to the next floor.
-
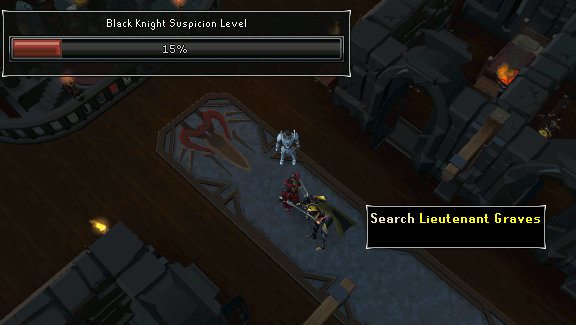
Now go north and you'll be stopped by Lieutenant Graves who informs you that the he believes the operation to recover the weapon has been sabotaged. Respond with option 3 and then option 1. Sir Owen will knock the Lieutenant out while he's distracted. Search his body to find 250gp and choose for Sir Owen to either kill him and hide the body or just tie him up and hide him.
-
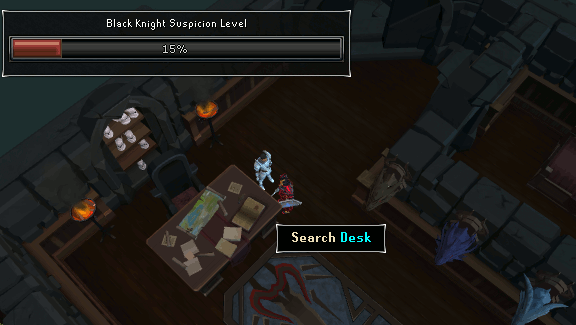
Head north into the office and search the desk to find Captain Dulcin's journal and you'll see that you need a key to unlock it. Now climb the staircase in the northeast corner of the room.
-
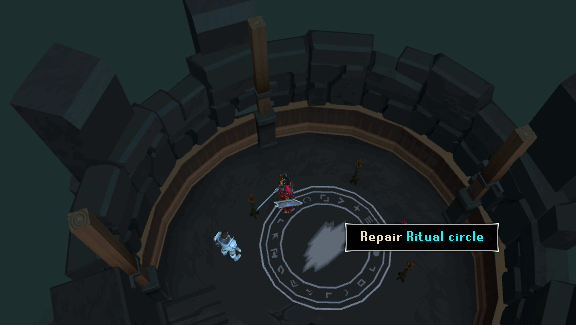
You'll now be in the ritual chamber. Sir Owen will notice the inactive ritual circle and you'll take a look at it. Ask Sir Owen what to do now and he'll suggest that you complete the ritual. Search the room to find a Letter from Lord Daquarius, three Red candles and Chalk, then read the Grimoire to take the book and read it again to see what the circle should look like. Now replace the candles in the three holders around the circle and light them and then repair the circle itself by choosing the option that matches the Grimoire.
-
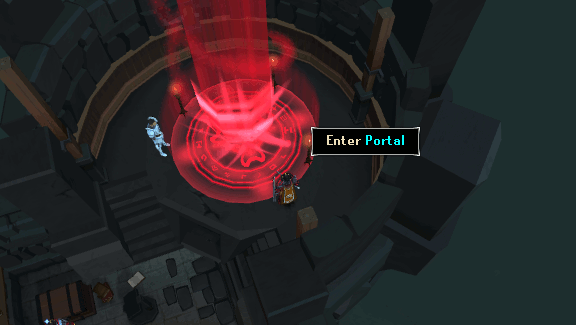
You'll now need to chant the words detailed in the Grimoire over each candle and a portal will appear in the circle. Attempt to enter it and Sir Owen will suggest you use the chest in the room to prepare for battle before seeing where the portal takes you. Bank everything you've obtained in the quest and take out armor and food and then enter the portal.
-
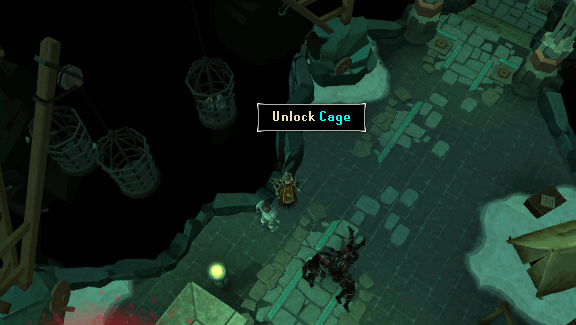
You'll arrive in a Saradominist tomb somewhere beneath the Wilderness and find three Black knights throwing rocks at a woman locked in a cage. Kill the knights and search their bodies to find a Cage door key and use this to unlock the cage and free the woman. Talk to her to find out that her name is Dawn and she is a sister from the Abbey of St. Elspeth Citharede. She was on a pilgrimage when her caravan was ambushed by the Black knights, who brought her and several other sisters and fathers to the tomb. She'll then reveal that the knights have been using their blood to try and breach the ward protecting the weapon which they have found sealed in the tomb.
Note: If you search the Supply crate south of the portal you will receive 200 Water runes and 100 Fire runes.
-
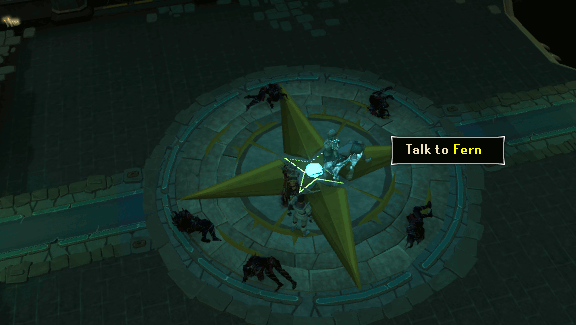
Enter the doorway to the east and make your way down the stairs into a crypt. Here you'll see many piles of bones which Sir Owen says belong to Saradominists who died in the God Wars; inspect them if you wish and then move onto the tunnel to the south and open the portcullis. Make your way down into the next room and the ghost of a centaur called Fern will appear and inform you that she is the Guardian of the Wand of Resurrection and tell you about her past and how she came to be here. Once you've listened to everything she has to say, tell her you are ready to be judged and she will tell you that you must kill her in order to prove yourself worthy. She is not particularly difficult, but make sure you move out of the way when
you receive a warning that she is about to charge.
-
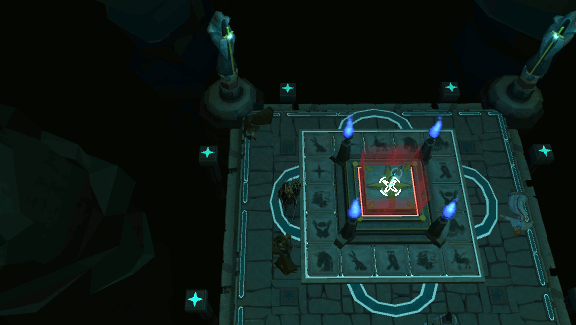
Once she's dead, head south down the stairs and you will find the wand protected by a ward. You must now touch the tiles around the wand to reveal pictures of animals and find the eight matching pairs. You have eight chances to match them all before the puzzle resets. (The finished puzzle is shown below).
-
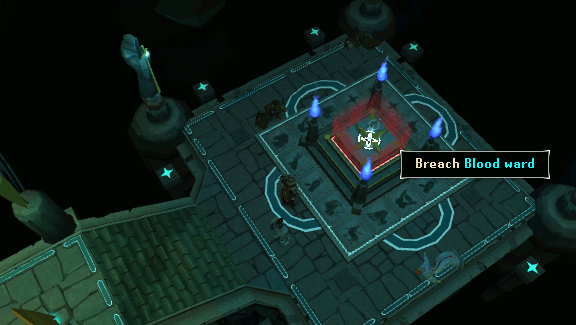
Now attempt to breach the final ward and you'll find you need a blood sacrifice. Say you'll use your own blood and a cutscene will follow in which you banish the ward and then Dawn, dressed in the armor of a Black Knight, will teleport in and steal the wand. Go north up the stairs to find Dawn and speak to her to find out that she plans to raise an undead army with the wand. She will then kill Sir Owen and resurrect him and the surrounding dead Black knights.
-
Kill Sir Owen and the Black knight zombies then search Sir Owen's body and compose a eulogy. Now make your way north back into the crypt and prepare to fight Dawn.
Note: Dawn has no weaknesses, but since she attacks with magic, ranged armour and weapons are beneficial.

-
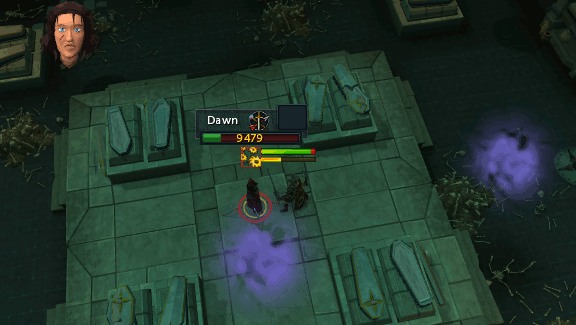
Dawn's attack consists of pushing you away and firing an attack that first looks like ripples underneath you before turning into a cloud of purple smoke. If you do not move out of the way, this attack will hit you for 10% of your maximum lifepoints every 2 seconds. She also periodically summons skeletal minions which must be killed first before you can continue to attack her. The most efficient strategy is to either run down the stairs or take cover behind a coffin so that Dawn cannot attack you, allowing you to focus all your attacks onto the skeletons only. Once she's dead, search her body to retrieve the Wand of Resurrection, Dawn's key (used to open Captain Dulcin's journal) and the Skull of Remembrance.
Note: If you need to leave the fight with Dawn to get extra food, make sure you are still wearing the Black Knights outfit and travel to the Black Knight Fortress entrance. Click on the portcullis and it will give you the option of returning to the ritual room. Enter the portal and go north to fight Dawn.
Alternatively, you can also simply talk to Saradomin at the Edgeville Monastery and he will teleport you to the ritual portal where you can use the bank chest.
If you still have sufficient life points to survive the attacks, you can walk all the way back to the ritual portal and use the bank chest in there without leaving the fortress.
-
Go back down to Sir Owen's body and speak to Saradomin, choose any option and you'll give him the wand (even if you say you're going to destroy it). A cutscene will follow in which Saradomin resurrects Sir Owen, but unfortunately he is corrupted by the rot of the grave. After talking to Saradomin again, he will inform you that he intends to resurrect the Centaurs and Fern will reappear and offer to guide you to their burial grounds. Saradomin will then give Sir Owen the wand and Fern and Sir Owen will teleport away. Finally, Saradomin will then offer to teleport you to the monastery and give you your reward.
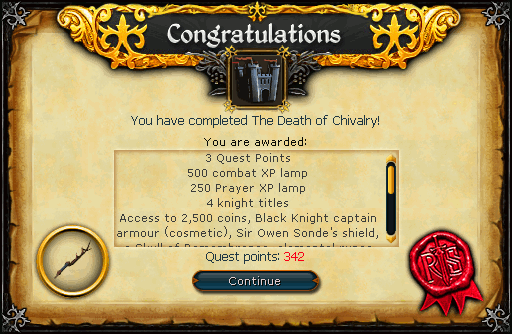
Congratulations! Quest Complete!
Additional Rewards:
After the quest RuneScape Members can use the Skull of Remembrance to return to the crypt in the tomb and search the coffins to receive the following:
- 3,500 Xp Combat lamp (requires level 40 Strength and level 40 in the chosen skill).
- Gilded cabbage. Kick this 30 times to receive 10,000 bonus Prayer XP, doubling XP values while you train (requires 60 Strength).
- 60,000 Prayer Xp (requires level 80 Strength and 65 Prayer).
- Templar outfit.
- The ability to fight Dawn again by using the Skull on her body.
- The ability to replant the cabbages behind Edgeville Monastery with at least 7 Farming and 12 Cabbage seeds (Exp: 250).
This Quest Guide was written by Javezz. Thanks to Amoa, Littlw Wimp, Mr Tudjay, Derick , Fred P Wolf, Xorion, Jarkur, Catas4trophy, and Essernoble for corrections.
This Quest Guide was entered into the database on Sat, Feb 07, 2004, at 10:08:20 PM by Chownuggs and CJH, and it was last updated on Fri, Apr 15, 2016, at 01:30:46 AM by DRAVAN.
If anything is incorrect or missing, or if you have any new information to submit to this database, please submit it to us on our Content Submissions Forums.
If you see this guide on any other site, please report it to us so we can take legal action against anyone found stealing our content. This guide is copyrighted by RuneHQ, and its use on other sites is expressly forbidden. Do not ask if you can use our guides or images, the answer is and always will be NO!
Print this page with images - Back to the Quest Guide Index Page - Back to Top
