

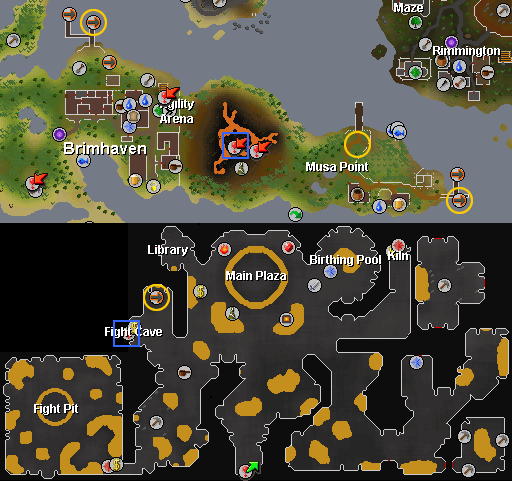
How To Get there:
Make your way to the top of the Musa Point Volcano on Karmaja and walk through the middle to the entrance of TzHaar City. The Fight Cave itself can be found near the bank in the northern part of the the city, just west of the city. There are various ways to reach the TzHaar City.
- The Fairy code BLP will take you to straight to the TzHaar City.
- Take the boat from Port Sarim to Musa Point and walk west from there into the volcano.
- Use an Amulet of glory to teleport to Karmaja and walk west from there into the volcano.
- Charter a boat from one of the various harbors to Brimhaven and walk southeast from there into the volcano.
Recommended Gear:
The easiest way to complete the Fight Cave is by using Magic, more specifically Water/Ice spells.
Recommended Mage Equipment:
- Helmet: Obsidian mage helm > Sea singer's hood/Virtus mask > Ganodermic visor > Hood of subjugation/Ahrim's hood
- Body: Obsidian platebody > Sea singer's robe top > Virtus robe top > Ganodermic poncho > Garb of subjugation/Ahrim's robe top
- Legs: Obsidian platelegs > Sea singer's robe bottom > Virtus robe legs > Ganodermic leggings > Gown of subjugation/Ahrim's robe skirt
- Gloves: Obsidian gloves > Static gloves > Spellcaster gloves > Virtus gloves > Ganodermic gloves > Gloves of subjugation
- Boots: Obsidian boots > Ragefire boots > Virtus boots > Ganodermic boots > Boots of subjugation
- Cape: God capes > Any skillcape
- Ring: Tokkul-Zo > Sixth-age circuit > Seers' ring
- Weapon: Seismic wand > Chaotic staff/Virtus wand > Armadyl battlestaff > Staff of light/Ahrim's wand/Wand of treachery > Master wand
- Off-hand: Obsidian kiteshield > Seismic singularity > Virtus book > Ahrim's book of magic > Ward of subjugation
- Pocket: Sign of death
Inventory:
- Runes for your best Water spell (Note: Using Ice Blitz or Barrage is highly recommended)
- 2-3 Prayer flasks, 1 Prayer renewal flask (optional)
- 1-2 Overload flask/Extreme magic flask or Super magic flask
- Rocktails/Rocktail soup (with at least 95 Constitution) or the best food for your Constitution level - Food will only heal the maximum if your Constitution level is equal to or higher than the Cooking level required to cook it.
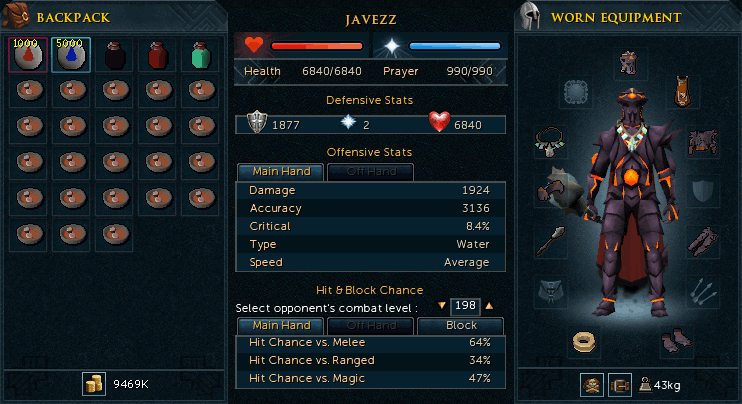
Example Setup and Inventory:
Recommended Ranged Equipment:
Note that the majority of the monsters in the cave are melee based and resistant to ranged. Therefore, using ranged can prove to be an ineffective way to attempt the cave and is not recommended unless you have level 80+ and are using stat-boosting potions.
- Helmet: Obsidian ranger helm > Death lotus hood > Pernix cowl > Karil's coif > Armadyl helmet > Archer helm
- Body: Obsidian platebody > Death lotus chestplate > Pernix body > Karil's top > Armadyl chestplate
- Legs: Obsidian platelegs > Death lotus chaps > Pernix chaps > Karil's skirt > Armadyl plateskirt
- Gloves: Obsidian gloves > Tracking gloves > Swift gloves > Pernix gloves > Armadyl gloves > Barrows Gloves > Royal d'hide vambraces
- Boots: Obsidian boots > Glaiven boots > Pernix boots > Armadyl boots > Spined boots
- Cape: Ava's alerter > Ava's accumulator > Any Skill cape
- Ring: Tokkul-Zo > Sixth-age circuit > Archers' ring
- Weapon: Ascension crossbow > Royal crossbow/Chaotic crossbow/Zaryte bow > Dark bow/Crystal bow > Dragon crossbow > Rune crossbow
- Off-hand: Off-hand ascension crossbow > Off-hand chaotic crossbow > Off-hand dragon crossbow > Off-hand rune crossbow > Obsidian kiteshield
- Pocket: Sign of death
Inventory:
- 2-3 Prayer flasks, 1 Prayer renewal flask (optional)
- 1-2 Overload flask/Extreme ranging flask or Super ranging flask
- Rocktails/Rocktail soup (with at least 95 Constitution) or the best food for your Constitution level - Food will only heal the maximum if your Constitution level is equal to or higher than the Cooking level required to cook it.
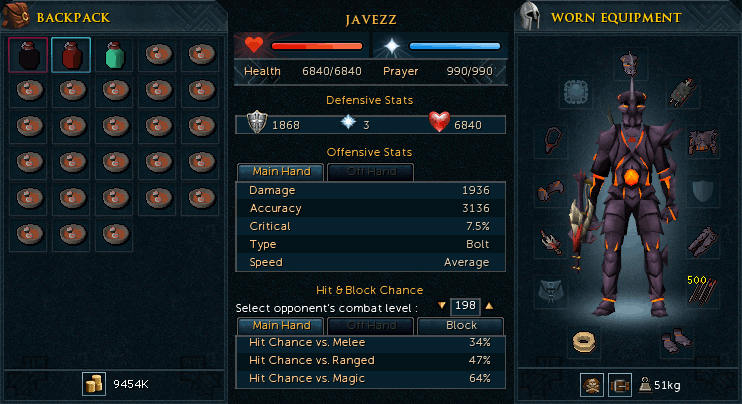
Example Setup and Inventory:
Note: You are not allowed to use Dwarf Multi-Cannons in the Fight Cave!
Monsters:
During your time in the Fight Cave, you will have to battle a variety of monsters. You will start off by being attacked by a small group of Tz-Kih (level 22), and as you continue to progress in your killing spree, your enemies become stronger. The last monster you will have to fight is TzTok-Jad (level 702). There are 63 waves of enemies in total and the game averages 1-2 hours depending on your levels.
Each type of monster uses a different method of attack and therefore requires a different strategy. Most of these monsters also have a special ability. Below is the list of all the different monsters that you will encounter on each wave. Use this list as a guideline during the fight so that you know which monsters to expect. For simplicity, the monsters are only mentioned by their combat levels.
| Image | Name | Combat Level | Lifepoints | Attack Style | Threat Level | Notes |
 |
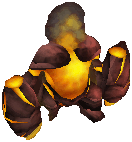
Tz-Kih | 22 | 3000 | Melee | High | Every time a Tz-Kih attacks you, your Prayer will be lowered by the damage it hits plus one. |
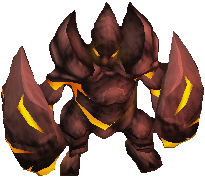 |
Tz-Kek | 45 | 6200 | Melee | Low | When you damage a Tz-Kek with melee, you will be hit for 10 Lifepoints damage in return. |
 |
Tz-Kek | 22 | 6200 | Melee | Low | Two of these spawn when you kill a larger Tz-Kek. |
 |
Tok-Xil | 90 | 7500 | Melee, Range | Medium | These pose little threat unless attacking in the same group as a Ket-Zek. |
 |
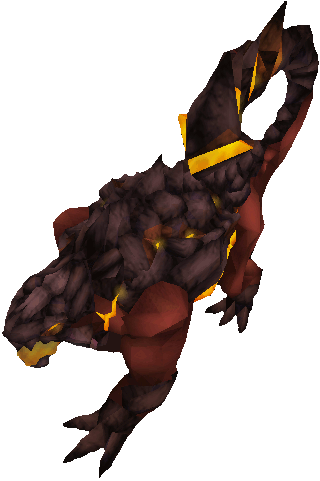
Yt-MejKot | 180 | 10000 | Melee | Medium - High | These will heal themselves for 1,000-2,000 Life points every couple of seconds once below half health and in attack range. They also heal any other nearby TzHarr for 500-1,000 Life points. Therefore, it is recommended to kill them monster quickly or use stun abilities to prevent it from healing. |
 |
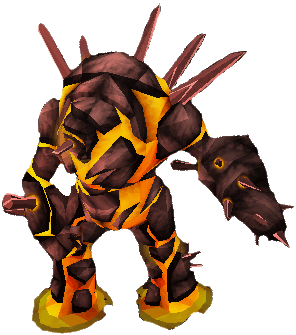
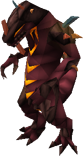
Ket-Zek | 360 | 15000 | Melee, Magic | High | This monster is fairlyba harmless if you stand where it can't melee you and you have Protect From Magic on. |
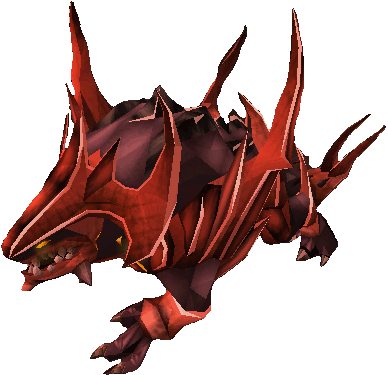 |
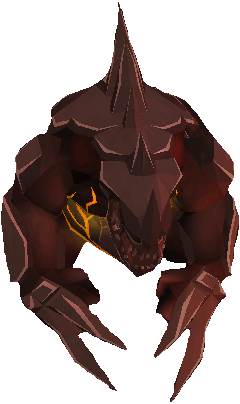
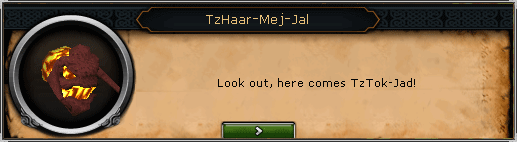
TzTok-Jad | 702 | 40000 | Melee, Magic, Range | Extremely High | At half health, four level 108 healers will come. See our dedicated section for strategies. |
 |
Yt-HurKot | 108 | 10000 | Melee | High | These little pests come out whenever the TzTok-Jad reaches half health. If you don't kill them before they fully heal him, they will respawn when he reaches half health again. |
| Wave | Monsters |
| 1 | 22 |
| 2 | 22, 22 |
| 3 | 45 |
| 4 | 45, 22 |
| 5 | 45, 22, 22 |
| 6 | 45, 45 |
| 7 | 90 |
| 8 | 90, 22 |
| 9 | 90, 22, 22 |
| 10 | 90, 45 |
| 11 | 90, 45, 22 |
| 12 | 90, 45, 22, 22 |
| 13 | 90, 45, 45 |
| 14 | 90, 90 |
| 15 | 180 |
| 16 | 180, 22 |
| 17 | 180, 22, 22 |
| 18 | 180, 45 |
| 19 | 180, 45, 22 |
| 20 | 180, 45, 22, 22 |
| 21 | 180, 45, 45 |
| 22 | 180, 90 |
| 23 | 180, 90, 22 |
| 24 | 180, 90, 22, 22 |
| 25 | 180, 90, 45 |
| 26 | 180, 90, 45, 22 |
| 27 | 180, 90, 45, 22, 22 |
| 28 | 180, 90, 45, 45 |
| 29 | 180, 90, 90 |
| 30 | 180, 180 |
| 31 | 360 |
| 32 | 360, 22 |
| 33 | 360, 22, 22 |
| 34 | 360, 45 |
| 35 | 360, 45, 22 |
| 36 | 360, 45, 22, 22 |
| 37 | 360, 45, 45 |
| 38 | 360, 90 |
| 39 | 360, 90, 22 |
| 40 | 360, 90, 22, 22 |
| 41 | 360, 90, 45 |
| 42 | 360, 90, 45, 22 |
| 43 | 360, 90, 45, 22, 22 |
| 44 | 360, 90, 45, 45 |
| 45 | 360, 90, 90 |
| 46 | 360, 180 |
| 47 | 360, 180, 22 |
| 48 | 360, 180, 22, 22 |
| 49 | 360, 180, 45 |
| 50 | 360, 180, 45, 22 |
| 51 | 360, 180, 45, 22, 22 |
| 52 | 360, 180, 45, 45 |
| 53 | 360, 180, 90 |
| 54 | 360, 180, 90, 22 |
| 55 | 360, 180, 90, 22, 22 |
| 56 | 360, 180, 90, 45 |
| 57 | 360, 180, 90, 45, 22 |
| 58 | 360, 180, 90, 45, 22, 22 |
| 59 | 360, 180, 90, 45, 45 |
| 60 | 360, 180, 90, 90 |
| 61 | 360, 180, 180 |
| 62 | 360, 360 |
| 63 | 702, 108, 108, 108, 108 |
Logging out:
If you attempt to log out during a wave, you will be given the option to either log out immediately or at the end of the current wave. If you log out straight away, you will have to start from the beginning of the wave when you log back in, but if you finish off all of the remaining monster in the wave, you will be automatically logged out and will start from the next wave when you log back in.
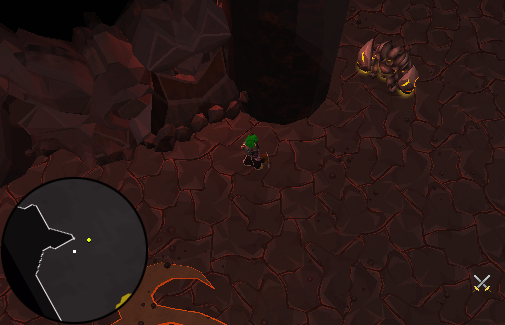
Safe spots:
As seen on the map below, there are three areas in the Fight Cave that players can use to safely attack monsters from a distance:

The most popular safe spot is known as Boot Rock. The Boot rock formation (shaped like a boot and thus named) is perhaps the most useful terrain advantage you have, as enemies can be stuck on both the Northern and Southern sides and become free to range. It is especially useful for dealing with the Yt-MejKot monsters, as they can only attack through melee. This area will later be a huge part of your final battle with TzTok-Jad.
Killing order:
- Start off by killing any and all Tz-Kih (level 22). Though they aren't particularly dangerous, but their prayer draining can really take a toll on your overall effort. It is possible to trap them behind the larger monsters and safely attack them from a distance.
- Next kill any Tok-Xil (level 90) in the area. These are most dangerous when there are Ket-Zek (level 360) monsters in the same wave, but are still dangerous alone.
- Kill Ket-Zek (level 360) if there is one. If any other monsters are around, get them trapped against a rock face or on the opposite side of Ket-Zek so you can deal with them later. You want to be able to kill with as little interruption as possible.
- Trap Yt-MejKot (level 180) against a rock face and kill it with range.
- Kill Tz-Kek (levels 45), they should be all that is left to kill.
Note: Please read through the entire strategy before starting the final wave! See the safespot section above for usuable safespots.
TzTok-Jad uses the full combat triangle and depending on your armor choice, is easily capable of killing you in a single hit if you make a mistake. The key to defeating him is to attack him from a distance and negate his melee attack as he will not move to attack you, which allows you to then focus on switching between Protect from/deflect range and magic to completely block his other two attacks (Jad is the only monster whose attacks are 100% blocked by protection prayers). He uses distinctive animations before using each type of attack and you must make sure you are in a position to see and recognize them and are able to switch prayers fast enough. It is highly recommended to place the protection prayers on the action bar and use keybinds to switch between them when necessary.
Mage Attack: TzTok-Jad stands on his hind legs for a few seconds before shooting fire at you. Protect From Magic must be activated in the time he is on his hind legs, before he shoots the attack, or it will still hit.
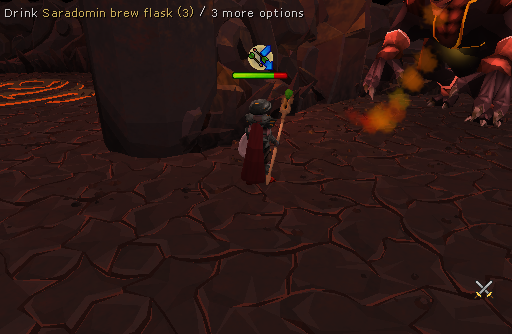
Range attack: TzTok-Jad stands on his hind legs and comes down, slamming the ground with his front legs. You have a few seconds between the impact of his legs hitting the ground before the attack in the form of falling rocks hits you. Protect From Range must be activated during that time.
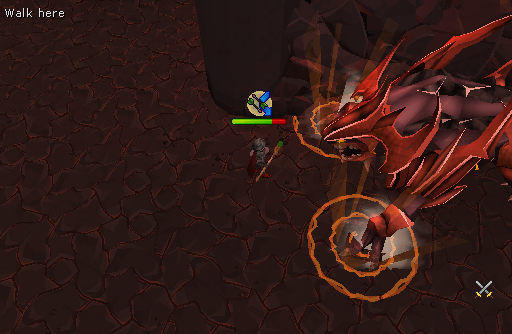
If you manage to get TzTok-Jad to 50% health, then four Yt-HurKot (level 108) will spawn and begin to rapidly heal him. It is vital that you distract all four by immediately attacking them (an easy way to do this while keeping your focus on Jad is to use the Chain ability). Note that the Yt-Hurkot will continue to heal Jad if they are within melee range of him, even if you're attacking them. Therefore, it is necessary to either lure them away from Jad or kill them as soon as possible. If they manage to fully heal him, then they will respawn when he reaches half health again. However, if you kill them before he's fully healed, they won't respawn. Remember to ensure that you keep an eye on Jad's attack and switch protection prayer accordingly while dealing with the Yt-MejKot.
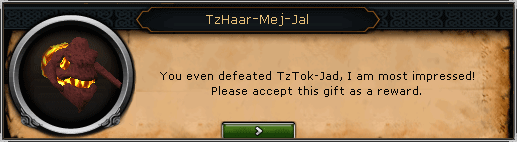
Once you've killed the four Yt-MejKot, the remainder of the fight should be relatively easy as long as you continue to switch prayers correctly. Once Jad is dead, enjoy the death animation and you'll appear outside of the cave and be awarded your Fire cape!
This Minigame Guide was written by darren_1994, InuYasha3336, and Darkblitz. Thanks to Oberon Black, Shinraz, crusader sid, Elanthiel, Babyhamster, pretty_baby, Jonathan14, Narcu, TheRulnig, Sir Reyson, christs sldr, site, sw1ndla, Articuno888, 1hug4me, alientech, watsermetjou, Brandon, Javezz, zl5000, Jarkur, InfinityXX, Darth Remus1, and Zing101 for corrections.
This Minigame Guide was entered into the database on Sat, Oct 29, 2005, at 04:03:46 AM by Fireball0236, and it was last updated on Mon, Jul 20, 2015, at 09:30:03 PM by Jarkur.
If anything is incorrect or missing, or if you have any new information to submit to this database, please submit it to us on our Content Submissions Forums.
If you see this guide on any other site, please report it to us so we can take legal action against anyone found stealing our content. This guide is copyrighted by RuneHQ, and its use on other sites is expressly forbidden. Do not ask if you can use our guides or images, the answer is and always will be NO!
Print this page with images - Back to the Minigame Guide Index Page - Back to Top
