

-
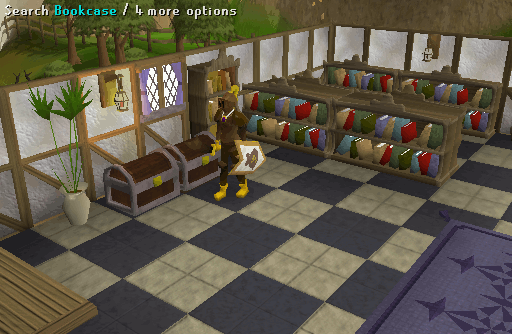
Make your way to the Exam Centre, South East of Varrock, and search the bookcases to find a Beaten book. Read it and a Scroll will appear in your inventory containing a set of coordinates. Read the scroll before proceeding to the next step.
Note: Do not drop the Beaten book, as you will need it to complete the quest.
-
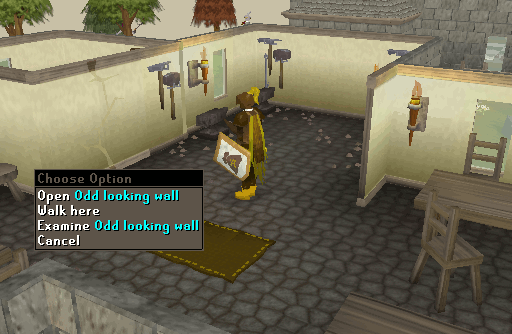
Head over to the Elemental Workshop in Seers' Village, and go through the odd-looking wall using the Battered key.
Note: The easiest way to reach the elemental workshop is by using the Seers' Village lodestone network teleport.
-
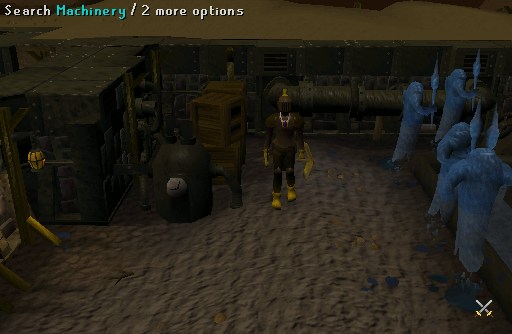
Follow the directions on the Scroll. You will then be in the area to the North with the Water elementals. Search the machinery and you will find a Key.
-
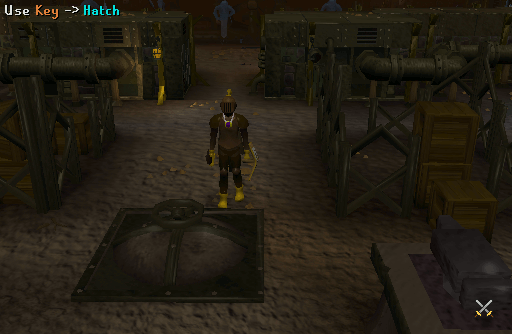
Return of the center of the Elemental Workshop and you will notice a hatch. Use the Key you just found to open it and descend into the basement floor of the workshop.
-
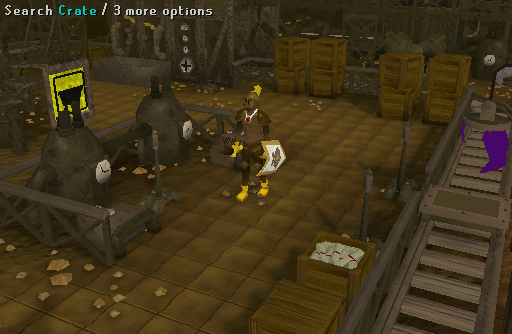
Once in the basement, you will notice that there are four machines that need repairing, namely the tank, the press, the crane, and the wind tunnel. Search all the crates on this new floor to find a Crane schematic, a Lever schematic, a Large cog, a Medium cog, a Small cog, and a Pipe. Read both schematics before proceeding to the next step.
Note: Some of the items may be located upstairs on the catwalk. The catwalk can be accessed by the stairs in the North Eastern and Sout Western corners.
-
To repair the tank you must fix the pipes. Go upstairs to the catwalk and then use the Pipe with the broken piping to the North.

-
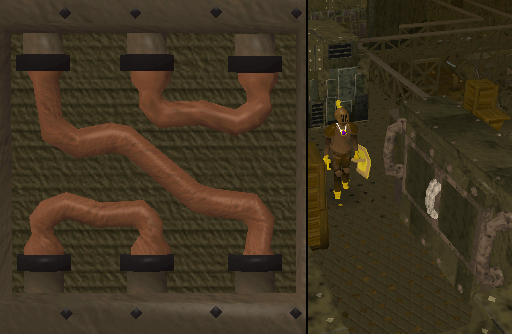
To fix the press, head to the Western section of the catwalk and open the junction box. Connect the top left socket to the bottom right socket, connect the top middle socket to the top right socket, and then connect the bottom left socket to the bottom middle socket.
-
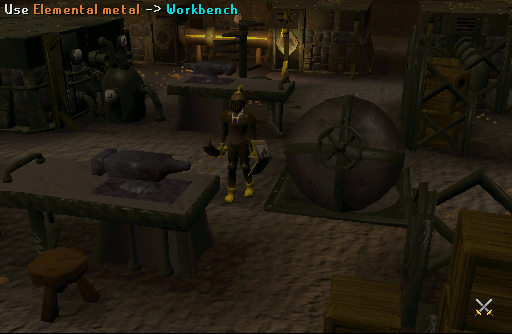
Return to the main floor of the workshop, and use one of the Elemental bars on the workbench to smith a Crane claw.
-
Go back down the hatch and walk over to the the old crane to the South. Now, pull the lever to the West of the crane and use the Crane claw with the old crane to repair it.

-
To fix the wind tunnel, head East and use the Large cog on the far right pin, the Medium cog on the lower left pin, and the Small cog on the upper left pin.
-
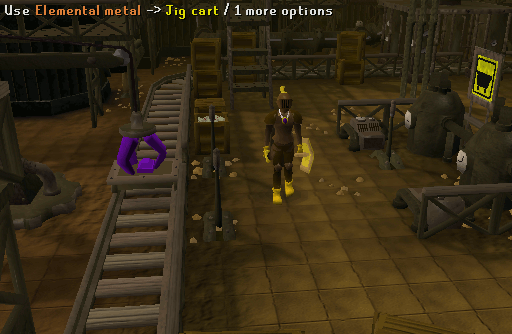
Head back to the crane. Pull the lever to the North, below the mine cart sign, until the jig cart is below the crane. Place the remaining Elemental bar on the jig cart. Pull the lever to the West of the jig cart twice to make the claw pick up the bar. Now, pull the lever to the East of the jig cart once to swing it over the lava. Pull the lever to the West to dip it in the lava. Pull the Western lever again to lift the claw out of the lava. Then, pull the lever to East to bring the crane back to the jig cart. Finally pull the Western lever twice to drop the hot bar onto the jig cart.
-
Now, pull the lever to the North, below the mine cart sign, to bring the cart around to the press. Pull the nearby lever to flatten the bar, then pull the lever below the sign again to move the bar on to the next machine.
-
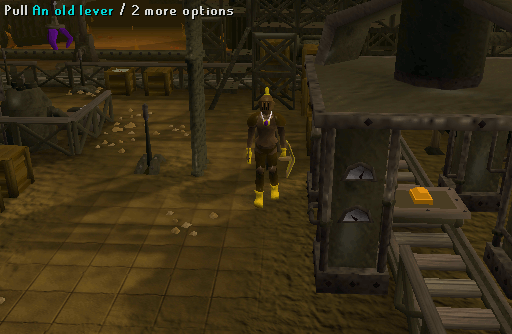
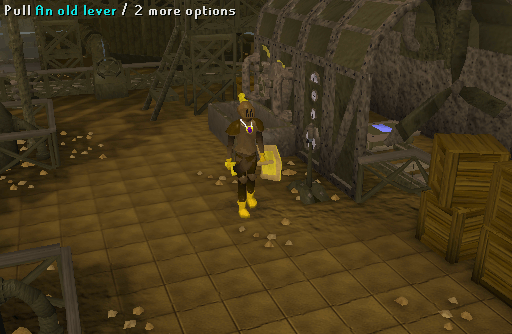
Head to the North and open the tank doors using the old lever. Now turn the corkscrew lever twice to move the bar into the tank. After that, close the tank door using the old lever. Turn both the water valves once to fill the tank with water, after that turn them both again to drain the tank. You can now pull the old lever and turn the corkscrew lever twice to move the bar back onto the cart, and to retract the rack back into the tank. You then have to pull the old lever once more to close the tank door.
-
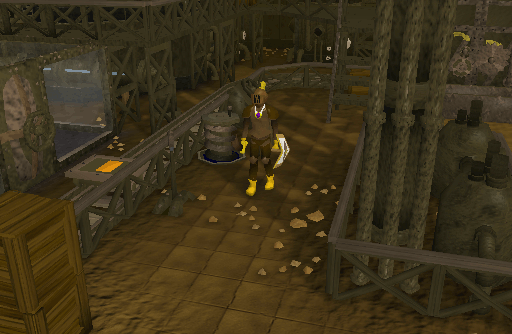
Move the bar to the next machine (by pulling the lever below the "Mine cart sign" again, North of the crane) and then pull the nearby lever. The wind tunnel will blow air on the bar and turn it white. Turn off the fan by pulling the lever again, then move the bar back to the crane. Pick up the Primed bar from the jig cart.
-
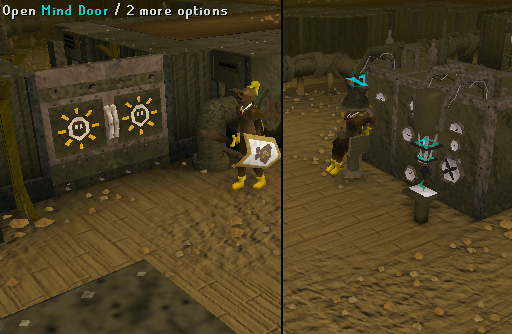
Go down the stairs to another level and open the Mind door. Head to the center of the room and use the Primed bar with the extractor gun. Operate the extractor hat and then remove the Elemental mind bar.
Note: Each time you use the extractor hat, your magic points will be lowered by 20.
-
Take the bar back upstairs to the main floor of the Elemental Workshop and Smith a Mind helmet by using the Elemental mind bar with one of the workbenches. Make sure that you have the Beaten book in your inventory or you will not be able to smith the armor.
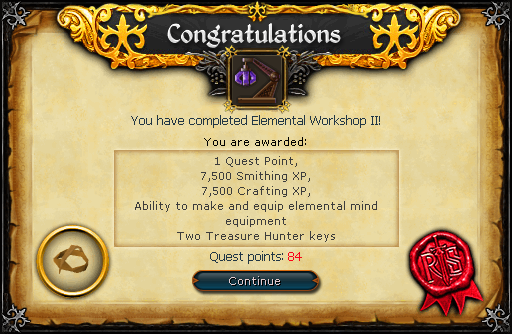
Congratulations! Quest Complete!
Elemental equipment:
Upon completing the quest, you can smith a Mind helmet by using an Elemental mind bar on one of the workbenches whilst having the Beaten book in your inventory. An Elemental helmet can be made by using an Elemental bar whilst having the Beaten book in your inventory. To make a Mind shield, use an Elemental mind bar on one of the workbenches whilst having the Slashed book in your inventory.
| Item | Image | Defence Bonus | |
| Magic | Summoning | ||
| Elemental helmet |  |
+4 | 0 |
| Elemental shield |  |
+6 | 0 |
| Mind helmet |  |
+6 | 0 |
| Mind shield |  |
+9 | +9 |
This Quest Guide was written by Scorchy_Devil, Have_A_Nice_Day, Giac_Jr, and ssj_metroidn. Thanks to Meowmix686, Seethru, Magic, Alk12, Budmash, sam10187, MrDusty, Blazedman, PhilBear, Im4eversmart, Bob, LogGamer, Alfawarlord, ZedoMann, Dark, and Slotterhaus for corrections.
This Quest Guide was entered into the database on Mon, Oct 02, 2006, at 02:47:30 PM by Im4eversmart, and it was last updated on Sun, Aug 04, 2019, at 10:24:53 AM by Alk12.
If anything is incorrect or missing, or if you have any new information to submit to this database, please submit it to us on our Content Submissions Forums.
If you see this guide on any other site, please report it to us so we can take legal action against anyone found stealing our content. This guide is copyrighted by RuneHQ, and its use on other sites is expressly forbidden. Do not ask if you can use our guides or images, the answer is and always will be NO!
Print this page with images - Back to the Quest Guide Index Page - Back to Top
