

-
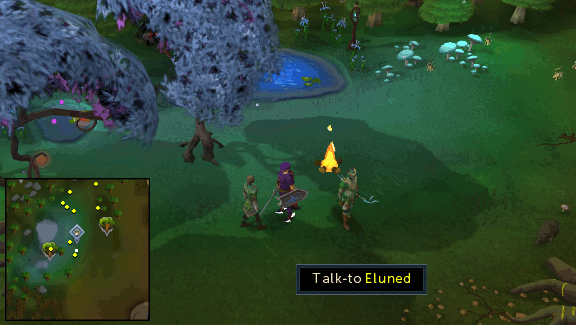
Find Eluned either southwest of Lletya by the Magic trees or in the clearing east of the Tyras Camp. Talk to her to learn that Arianwyn wants to meet with you in the village of Lletya and offers to take you there. Agree and you will appear in Lletya and be given a Teleport crystal (4), which can be used to teleport to the village in future. However, you will need to have Eluned recharge it for a small price once the charges are used up.
Note: Eluned switches between the two spots every 5 minutes, so you may need to wait around a bit until she appears. The easiest way to reach Tirannwn is by using the Tirannwn lodestone or by chartering a ship to the Tyras Camp.
-
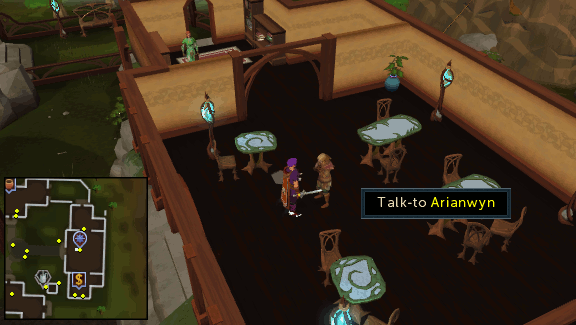
Talk to Arianwyn in the large building on the east side of the village, the one you appeared in, and he will tell you that he has recently seen a large increase in the numbers of Mourners crossing the Arandar Pass. When you ask why plague healers would be in the mountains, he will inform you that the Mourners are actually dark elves from Prifddinas in disguise and will ask you to infiltrate the Mourners in West Ardougne to find out what they are up to.
-
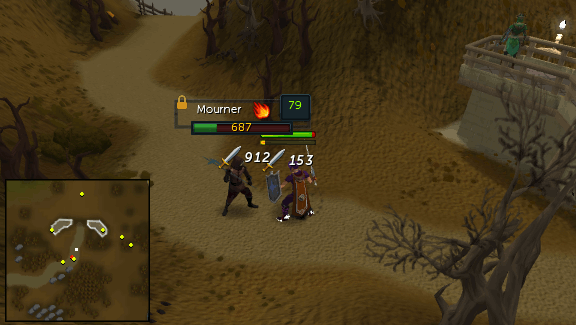
Head to the Arandar Pass found southwest of the Tree Gnome Stronghold and go through the gate. Wait for a Mourner to make their way down the pass and attack him. Once dead, he will drop Mourner boots, Mourner gloves, a Mourner cloak, a Mourner top, Mourner trousers, a Gas mask and a Mourner letter which provides a recommendation to join the Death Guard. Pick all of these items up. You will accidentally rip the trousers and splatter blood on the top.
Note: The easiest way to reach the Arandar Pass is either by using the Eagles' Peak lodestone and heading southeast or by teleporting to the Tree Gnome Stronghold via Spirit tree and heading southwest from the stronghold gate. You can also walk through Isafdar to the pass from Lletya, but should beware of the traps and other obstacles on the way.
-
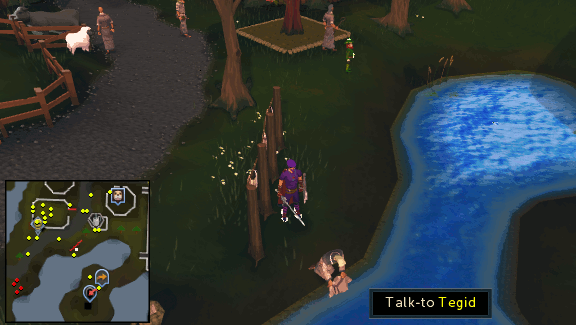
To clean the Bloody mourner top, make your way to Taverley and talk to Tegid who can be found washing clothes in the lake southwest of the pet shop. He will tell you about a special soap he uses to remove all stains, but refuses to give you any. Search the basket next to him to just steal Tegid's soap instead. Use this on the Bloody mourner top with a Bucket of water to clean out the blood stains and obtain a Mourner top.
Note: The easiest way to reach Taverley is via the Taverley lodestone.
-
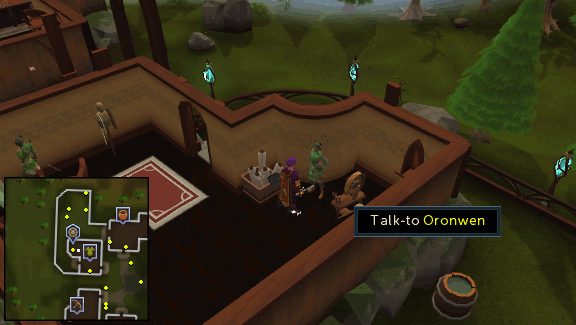
To repair the damaged Mourner trousers return to Lletya and talk to Oronwen the seamstress in the clothes shop, in the northwestern corner of the city. Ask her if she can repair the trousers and she will agree to do so if you give her Bear fur and 2 pieces of Silk. Give them to her and wait a minute for her to complete the repair. Talk to her again to obtain Mourner trousers.
Note: The easiest way to reach Lletya, is by using the Teleport crystal or the Tirannwn lodestone and then running east through the forest. If you do not have any colored dyes, purchase them while you are still in Lletya to save some time.
-
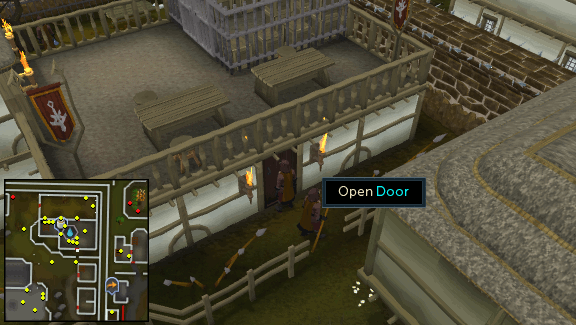
Now, it is time to infiltrate the Mourners. Wear only the Mourner equipment and head to their headquarters in the northeast corner of West Ardougne. Enter the building and climb down the trapdoor in the northwestern room to find yourself in a dungeon.
Note: If you have anything equipped other than Mourner clothing, then you will not be able to enter the headquarters. The easiest way to reach West Ardougne is by using the Ardougne lodestone.
-
Inside the dungeon, locate the Head Mourner in the southeastern room and talk him. When he asks for your letter of recommendation, you will give him the Mourner letter you obtained earlier. The mourner will then tell you that the Mourner's have been fooling the people of Ardougne into believing that the plague exists by dying sheep to make them look ill. However, the color is now washing away and needs to be re-applied, but the gnome-made device they used has broken and they have run out 'fat green parcels' they were using as ammunition. At the end of the conversation, he will give you a Broken device and a Tarnished key for the cell next door, where they are keeping a gnome inventor.

-
Open the cell next door and talk to the Gnome on a rack. He will refuse to tell you how to fix the device and no form of torture will make him talk. However he accidentally mentions that his feet are ticklish and he loves Toad crunchies. So, use a Feather on him to tickle his feet and he will still refuse to talk. Tickle him again and you will also tease him by holding the Toad crunchies just out of reach. He will give in and tell you to bring him Leather and a Magic log. Speak to him again and agree to release him. A Mourner will stop you but you will convince him that the gnome needs be released. Now, give the Leather and Magic logs to the Gnome and he will give you a Fixed device in return.
Note: There is a possibility that the gnome will disappear completely upon releasing it. If this happens, simply return to the surface and climb down the trapdoor again.

-
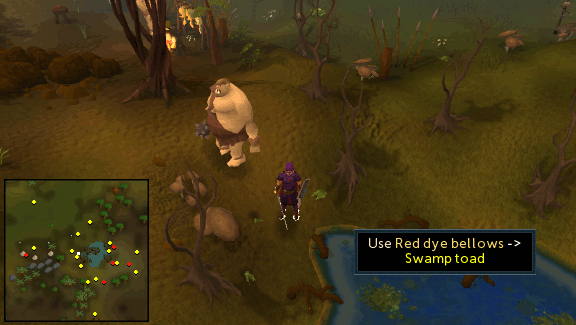
Before you can use the device, you will need to obtain some ammunition for it. To do so, make sure you have your Ogre bellows and the various colored dyes. Head to the swamps found between Gu'Tanoth and the Feldip Hills. Use the Blue dye on the Ogre bellows to create Blue dye bellows. Then use these bellows on one of the toads hopping around the swamp pools to fill it with the dye and obtain a Blue toad. Repeat this process for the other 3 ways to obtain a Green toad, Red toad, and a Yellow toad
Note: The easiest way to reach the swamps is via the Fairy code AKS or the Oo'glog lodestone and then walking northeast. If you have lost your bellows, they can be retrieved from the chest in Rantz's cave. You may want to collect more than one of each toad in case you need more ammo for the device.
-
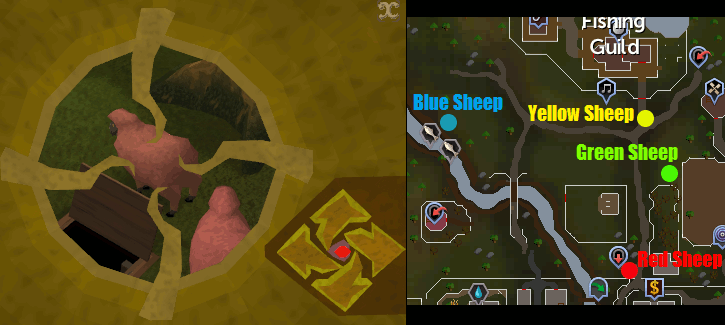
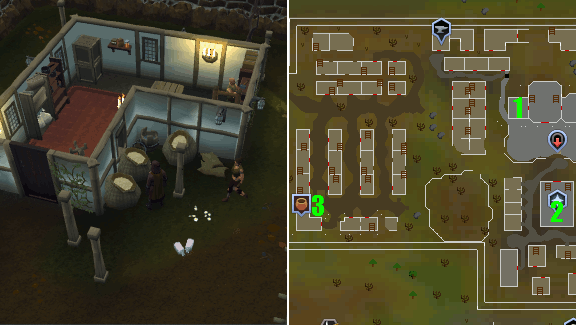
When you have acquired enough ammunition, make your way to the farm area north of East Ardougne's north bank and you will see some red sick-looking sheep wandering around just northwest of it. Now, use a Red toad on the Fixed device and equip it. Open the Worn Equipment tab, right click the device, and select Fire to open up the aiming interface. Use the arrows to move the cross-hairs around and position it with a sheep directly in the middle. Finally, click the red button in the middle of the arrows to fire the toad and re-dye the sheep. If you miss, you will need to reload with another Red toad and try again. Unequip the device and then repeat this process with the remaining colored dyes on the other sick-looking sheep (See map below).
Note: The easiest way to reach East Ardougne is by using the Ardougne lodestone. You may need to be using the RS3 interface layout to be able to accurately hit the sheep as the cross-hairs appear to be out of alignment on other layouts.
-
Once you have re-dyed all of the sheep, return to the Head Mourner and he will inform you that the Mourner's stew was recently poisoned. The mourner will then ask you to find out who made the poison and what they used so that you can replicate it. With his own batch of the poison he wants you to contaminate 2 of West Ardougne's 3 food stocks so that the citizens remain ill. This way, the mourners will be able to maintain the appearance that the plague exists and enslave the citizens.
Note: Before proceeding to the next step, exit the Mourner headquarters and take the Rotten apple from the ground northwest of the building.

-
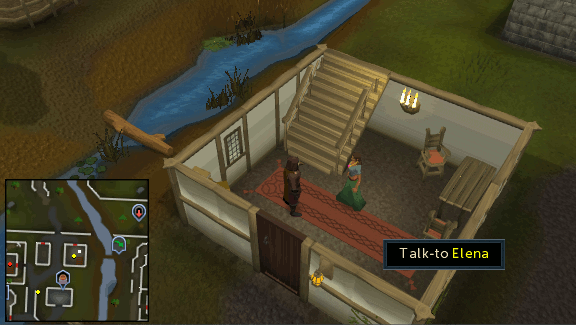
Head over to Elena's house in the northwest corner of East Ardougne and after revealing that you are not actually a mourner, ask her about making a poison from the Rotten apple. She will tell you that when you used it previously, the poison probably came from a mold. After explaining to her why you need the poison, give her the apple. Give her the chance to examine it for a few minutes. Talk to her again and she will tell you the steps required to make a poison from the apple mold. Before you leave, she will give you a Sieve.
-
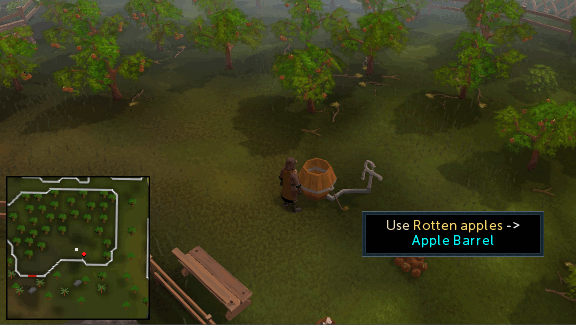
First, you will need to obtain a barrel of mashed apples. To do so, head to the apple orchard found northwest of Elena's house, west of Combat Training Camp, and pick up 2 Barrels. Then, use one of the 2 barrels on one of the nearby rotten apple piles to acquire a barrel of Rotten apples. Use this on the Apple barrel machine to mash them into a mush and obtain an Apple barrel.
-
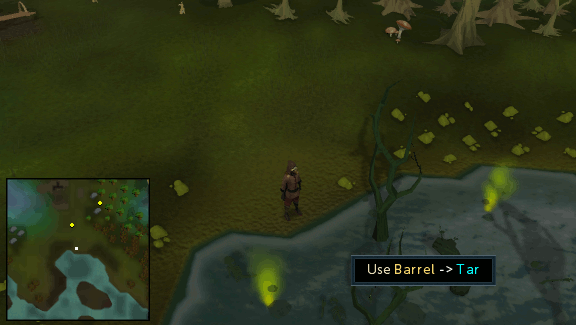
Make your way to the Poison Waste, southwest of Lletya. Use the empty Barrel you picked up in the previous step on the tar pits to obtain a Barrel of coal-tar.
Note: The easiest way to reach the Poison Waste is by using the Tirannwn lodestone and then running south.
-
Fill up your inventory with 10 to 20 pieces of Coal and travel to the Chemist's house in the west part of Rimmington. Distill the tar by putting the Barrel of coal-tar in the fractionation still, just outside of the house, and then adding Coal (See instructions below). Your goal is to have both the pressure and heat meters in the green/red areas. Once you have filled the 'total distilled' bar, exit the interface and you will receive a Barrel of naphtha.
Note: The easiest way to reach Rimmington is to travel to Port Sarim by using the Port Sarim lodestone and from there head west towards the village.
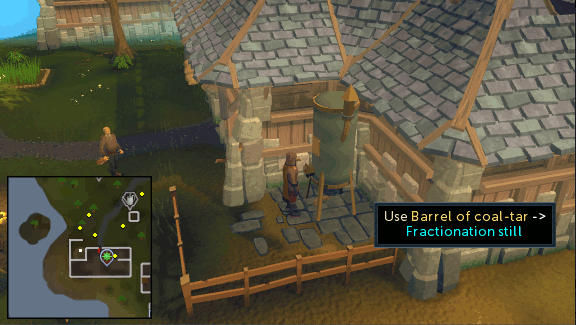
How to Distill:- Use the Barrel of coal-tar with the distiller.
- Right click on the right side of right valve twice, so the tar will flow at maximum. You will see the 'pressure' indicator on the left go up.
- When the indicator reaches the green region, click the right side of the valve on the left to let out pressure. This will raise the indicator on the right.
- If the heat indicator is below the green are, add more Coal. Heat rises fairly slow so be cautious when you add coal or else you will reset the process. If it is in the red area, do not add add coal until it gets lower.
Note: If the heat indicator stays in the red area for too long, the distilling process will reset and you will have to start over by adding another Barrel of coal-tar. If you run out of Coal, the current distilling process will be paused, allowing you to gather more coal without having to start all over.

-
Use the Barrel of naphtha on the Apple barrel to dissolve the mashed apples and obtain a Naphtha apple mix. Use this with your Sieve to strain the mix and obtain Toxic naphtha and finally use this on a range to obtain two piles of Toxic powder. Now, return to West Ardougne and use the Toxic powder on the sacks of grain found at two of the locations shown in the map below. The sacks at location 2 are located upstairs.
Note: Do not attempt to cook the Toxic naphtha on a fire, otherwise it will explode and you will have to obtain it from scratch.
-
Report back to the Head Mourner to claim your reward. He will inform you that he is pleased to have more slaves soon. The mourner will then mention that the Death Guard have discovered an ancient elven temple built around an altar beneath the mountains that provides a source of great power and they intend to use the slaves to dig to the temple and harness this power to bring back the Dark Lord.
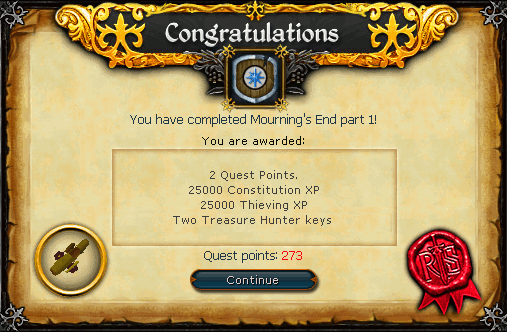
Congratulations! Quest Complete!
This Quest Guide was written by Javezz. Thanks to Blaze Amor, bloodyneck, Raver, scotto16, 1337CoMmAnDo, Spydenie, evildemon86, Cactuar, Fireball0236, fieldy409, leontjuh1, trekkie, Gnat, holly45638, Fbrink144, Fiend 000, trekkie, Goten1702, Ponteaus, markusthaman, supertrek32, Bellsab, jtfa0007, Mage017, gt390ford, leontjuh1, sir karamu, zhaksta, Henry_n, sir karamu, iamanarab, DRAVAN, Pokedude97, thamasta47, DarkBlitz, dark zorg, Im4eversmart, evilishies, Watsermetjou, Mythiquedame, Yeldarb12, Double_D_Edd, Beau, Alk12, Arkayla, Aredjay, Eragon7985, uknowme60, Amoa123, Jakaldd, Alfawarlord, Sarawr, Nagilfar, Nagama, and Uncle Si for corrections.
This Quest Guide was entered into the database on Tue, Jul 19, 2005, at 11:48:59 AM by Im4eversmart, and it was last updated on Mon, Mar 02, 2020, at 04:56:09 AM by KsbSingle.
If anything is incorrect or missing, or if you have any new information to submit to this database, please submit it to us on our Content Submissions Forums.
If you see this guide on any other site, please report it to us so we can take legal action against anyone found stealing our content. This guide is copyrighted by RuneHQ, and its use on other sites is expressly forbidden. Do not ask if you can use our guides or images, the answer is and always will be NO!
Print this page with images - Back to the Quest Guide Index Page - Back to Top
