

32 Agility (can be boosted)
Must be able to defeat Nazastarool in its 3 forms (level 53).
* This item on your toolbelt will work for this quest.
** This item on your toolbelt will only work for certain parts of this quest. Therefore, it's advised to bring an extra with you.
-
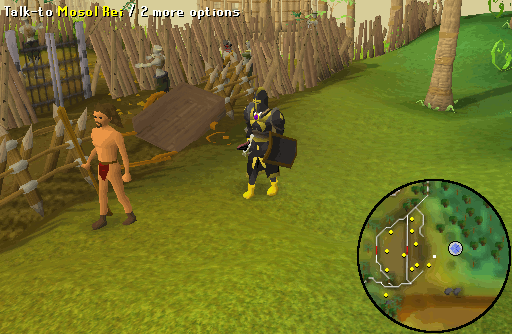
Make your way to the entrance of the Shilo Village in the southeastern part of the Karamja jungle. Just east of the entrance, you will find Mosol Rei. Ask him the following questions (see below) and he will tell you about Rashiliyia, who has brought a plague of Undead ones upon the village. Mosol Rei will then give you a Wampum belt to that you must pass on to Trufitus, the elder of the Tai Bwo Wannai village.
- Why do I need to run?
- Rashiliyia? Who is she?
- What can we do?
- I'll go to see the shaman.
- Yes, I'm sure and I'll take the Wampum belt to Trufitus.
Note: If you ask "What danger is there around here?", you will be attack by an Undead one. The easiest way to reach the Karamja jungle is by using the Gnome Glider transportation system (requires completion of The Grand Tree quest), the Giant Eagle transportation system (requires completion of the Eagles' Peak and the Back to my Roots quests), the Fairy Ring codes CKR and DKP, or a Nature altar teleport tablet.
-
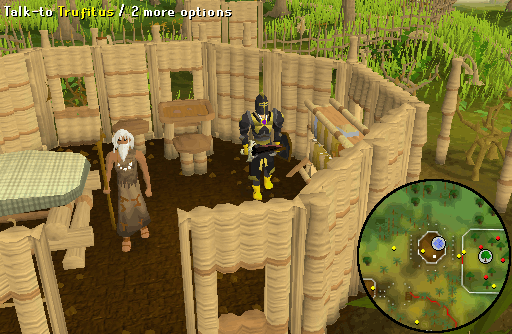
Head northwest to the Tai Bwo Wannai village. Give Wampum belt to Trufitus at his house, just west of the Mahogany and Teak trees, and ask him about the legend. He will talk about a place called Ah Zha Rhoon, which may contain the key to how to destroy Rashiliyia. Ask him why it is called that way and he will tell you that its name means magnificence floating on water, possibly meaning that the temple was once stood on an island. Tell him that you will look for the temple and appreciate his help.
Note: Beware of Tribesman, Jungle spiders, and Jogres in the jungle.
-
Leave the village and travel east until you reach a river. Cross it by walking across the wooden log and head south to a mound of earth. Use a Spade it and a fissure will appear. Use a light source on it to light up the fissure. Finally, use a Rope the fissure and search it to climb down into the Ancient Temple dungeon.
Note: Do not use an expensive light source because you will not get it back. After a while the fissure will be covered in earth again. You will have to use your spade to uncover it again. However, the Rope and light source will still be in place. Use a Chisel on the strange looking stone near the circular pond to the south of the entrance to obtain a Stone-plaque. Upon completing the quest, it can be sold to Yanni Salika at the Shilo Village for 100 coins. If you fail to cross the wooden log, you will take damage.

-
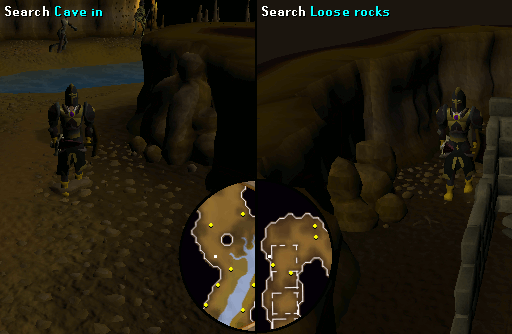
Walk a bit south and search the cave in. Wriggle through it and you will appear in another cave. Head north and search the loose rocks in the northwestern corner to find a Tattered scroll.
Note: Failing to wriggle through or searching the rocks will cause you to take damage. Beware of Undead ones in the dungeon.
-
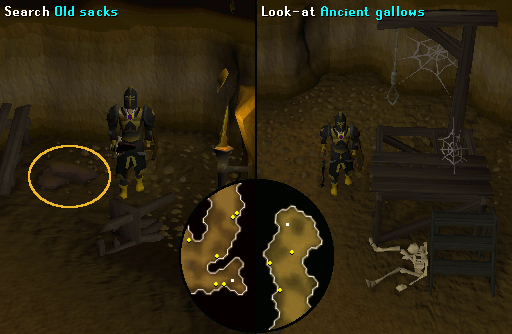
Head southeast into a small room and search the old sacks to obtain a Crumpled scroll. Now, run all the way north and you will see an ancient gallows. Search it and you will find the Zadimus corpse.
-
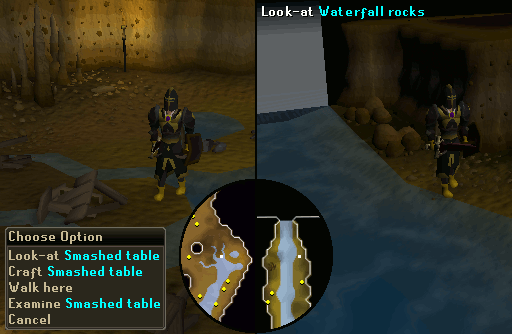
Leave the Ancient Temple, either by using a lodestone teleport or going back to the first cave and crafting the smashed table into a crude raft. You will then board it and float across the stream towards the waterfall. The raft will crash down the waterfall. A more dangerous option is to follow the stream on foot and search the waterfall rocks. Both options will make you end up on shore east of Mosol Rei.
Note: You can only craft and use the raft once. If you try to craft it again, you will notice that there is not enough wood remaining. If you fall into the waterfall using the rocks option, you will take a lot of damage.
-
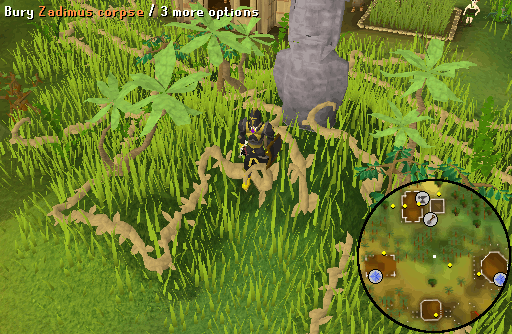
Read the scrolls, then show all the three items obtained in the temple to Trufitus at the Tai Bwo Wannai village by using each one on him. He will tell that they could very well help find the secret temple, which could save the village, and that you should bury the Zadimus corpse in front of the tribal statue in the center of their village. Head northwest to the tribal statue and bury the corpse in front it. Zadimus will appear and tell you that he is the key. Before he disappears he will give a Bone shard, which you should take to Trufitus. Tell Trufitus that it appeared when you buried the Zadimus corpse and that Zadimus said something about keys and kin. He will then ask you to look for Bervirius's tomb.
-
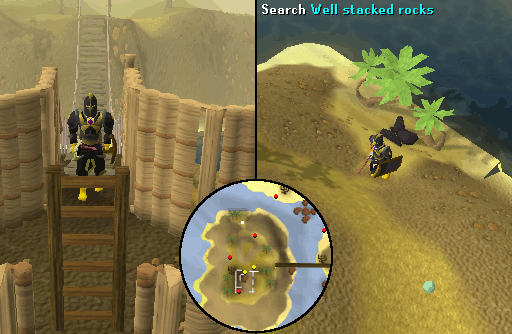
Head southwest of the village to Cairn Isle. To get onto the island, you must climb the rocks and cross the bridge. When you have crossed the bridge, walk a bit north and search the well stacked rocks.
Note: The easiest way to reach Cairn Isle is by using the Fairy Ring code CKR. Failing to climb the rocks or cross the bridge will cause you to take damage.
-
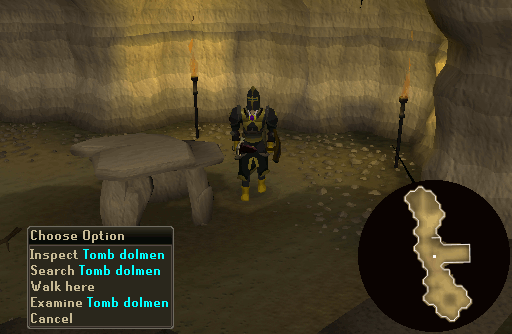
You will drop down and appear in Bervirius's tomb. Head south until you see a tomb dolmen. Search it and you will obtain a Sword pommel, a Locating crystal and Bervirius notes. Read the notes and climb up the rocks to the northeast to get out of the tomb.
Note: Failure to climb the rocks successfully may result in your character taking damage. And, if your inventory is full when you try to pick up the notes or if you lose them by any chance, then you will need to have some Charcoal and a Papyrus in your inventory then search the tomb dolmen again to retrieve the notes.
-
Return to Trufitus and show him all 3 items. He will tell you that you will need a necklace to protect you from Rashiliyia. Use a Chisel (which is in your inventory) on the Sword pommel to create some Bone beads. Now, string the beads using a Bronze wire to create the Beads of the dead. Prepare yourself to fight 3 monsters around level 50 before you proceed to the next step.
-
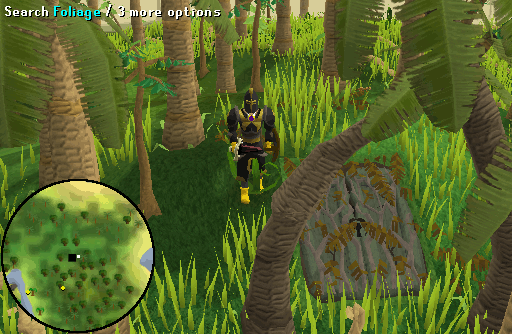
From the Tai Bwo Wannai village, head east into the jungle until you reach a wooden log over a small river. Cross the log and head north until you find a foliage on the ground. Search it and a locked door will appear. Use a Chisel on the
Bone shard you acquired earlier in the quest to create a Bone key. Equip the Beads of the dead and use the key to open the door.
Note: The easiest way to reach Rashiliyia's tomb is by using the Fairy Ring code DKP. If you fail to cross the wooden log, you will take damage. Beware of Tribesman, Jungle spiders, and Jogres in the jungle.
-
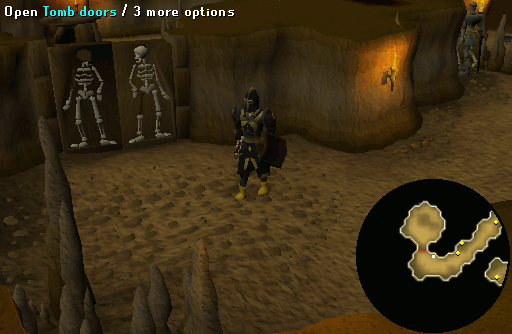
Enter the ancient door and you will appear in Rashiliyia's tomb. Open the ancient metal gate to the south and climb down the rocks. Head southwest until you find a door. Use 3 Bones on the doors and they will open.
Note: If you fail to climb the rocks, you will take damage. If you forgot to bring 3 Bones, then kill Undead ones.
-
Search the dolmen and Nazastarool, in the form of a level 53 zombie, will attack you. Once defeated, it will reappear as a level 53 skeleton. Kill it and Nazastaroo's final form, a level 53 ghost, will appear. When you have defeated Nazastarool in its 3 forms, take the Rashiliya corpse from the tomb. Head back to the first room you appeared in and use the Bone key to open the tomb's exit.
Note: There is a stalagmite near the dolmen, that can be used as a safespot. If you run out of food, you may leave to get supplies. When you return, you will only have the fight the forms that you have not defeated. Do not drop the Rashiliya corpse or you will have to fight Nazastarool in its 3 forms again.

-
Return to Bervirius's tomb on Cairn Isle and use the Rashiliya corpse on the tomb dolmen. Rashiliya will appear and reward you.
Congratulations! Quest Complete!
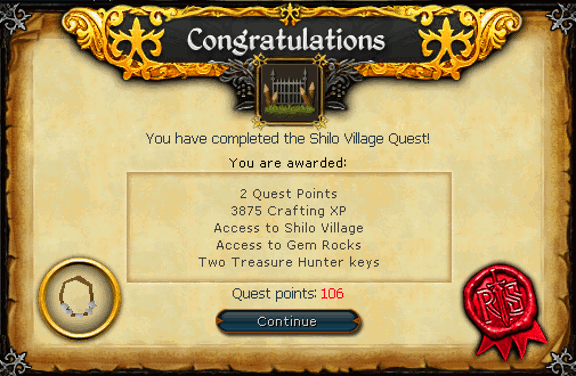
There you go! After completing this quest, you will be able to mine the exclusive Shilo Village Gem rocks your random gems (Uncut jade through Uncut diamond). You can also visit Yanni Salika, an antiques dealer who will purchase some of your leftover items from this quest (such as the Locating crystal and the scrolls, etc.)
This Quest Guide was written by Alfawarlord. Thanks to henry-x, |[Dracon]|, bubble edie, skydragon252, knight_v3, Swaty, manticore, DRAVAN, Fireball0236, KalphiteKing, Koppen, cookie d2293, Bingo, Ju Juitsu, L3tHaL_LeAdA_, Sculd1, Shinraz, Alphadash1, Toeby, HiddenWoody, Sputchbait, Mulan 40, 6skittles9, Sariali, Mannowrath, Smokeyol, Joe_C, lucius titus, MerchMaster, and Jarkur for corrections.
This Quest Guide was entered into the database on Wed, Mar 10, 2004, at 10:09:44 PM by Wiz-Master and CJH, and it was last updated on Wed, Oct 26, 2016, at 08:31:47 AM by Dark.
If anything is incorrect or missing, or if you have any new information to submit to this database, please submit it to us on our Content Submissions Forums.
If you see this guide on any other site, please report it to us so we can take legal action against anyone found stealing our content. This guide is copyrighted by RuneHQ, and its use on other sites is expressly forbidden. Do not ask if you can use our guides or images, the answer is and always will be NO!
Print this page with images - Back to the Quest Guide Index Page - Back to Top
