

Level 43 Prayer is highly recommended.
-
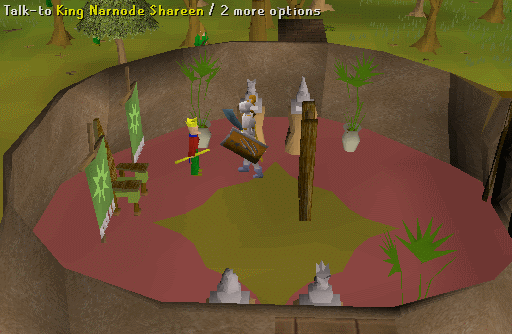
Speak to King Narnode and learn that he has a new quest for you. He will tell you that Glough has been replaced and you now must deliver a Seal to the King's Royal Guard.
-
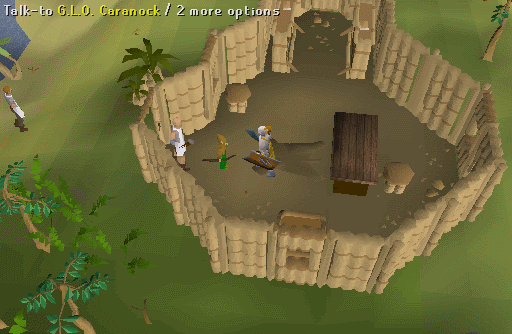
Go to the top of The Grand Tree and take the glider to Karamja (Gandius). Travel north to the shipyard and talk with G.L.O. Caranock who is in the southern building inside the shipyard. He will tell you that the Royal Guard might have been blown off course by some winds.
Note: If you do not already have monkey bones (or monkey corpse) from Karamja, you may kill a monkey right next to the glider landing point to obtain one.
-
Go back to King Narnode and tell him what Caranock said. He will give you Narnode's orders and tell you to speak to Daero, who can be found at Blurberry's Bar on the second floor of the Grand Tree, on the east side.
-
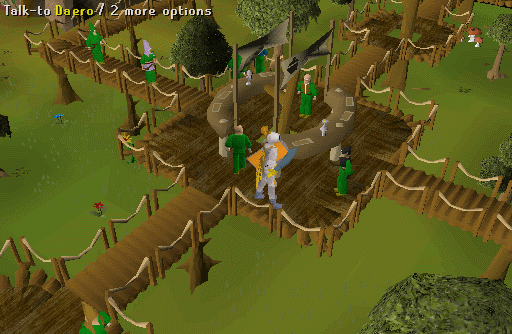
Ascend up to the second floor, and talk to Daero near Blurberry Bar. Go through all the chat options and then tell him you're prepared to leave. He will blindfold you and take you to a glider hangar.
Note: Make sure you have plenty of antipoison and food before moving on to the next steps. There's also a bank on the same floor that you can access.
-
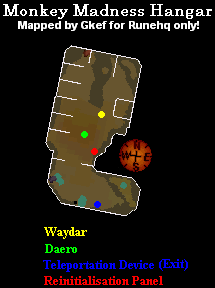
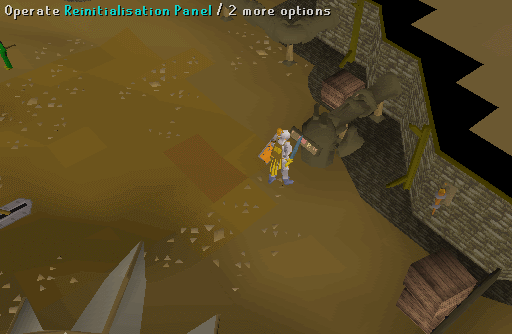
Talk to Daero again who will introduce you to Waydar. Ask Waydar why the gliders are folded and he will tell you that they are locked with a code, which happens to be a sliding puzzle you have to solve (See solution below). Do this by operating the Reinitialisation Panel to the south-east. Players can take some Spare controls from the nearby crate to view the solution.
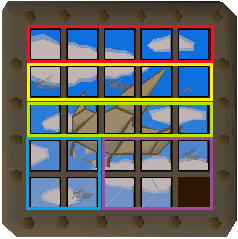
Note: If you logout half way through the puzzle, you will have to start all over. Alternately, pay 200K coins to Glough, who resides in a Tree house located eastern side of Tree Gnome Stronghold, north of the Agility course, up a ladder.
-
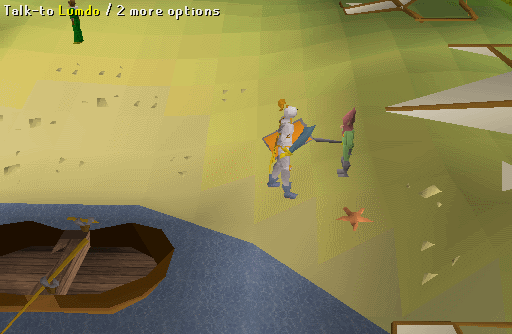
The screen will change and the gliders will fold out and stand ready. Now you are ready to go. Talk to Daero then Waydar and you will fly to the isle where the 10th guard crashed, known as Crash Island. You will find a member of the 10th squad named Lumdo. Ask Lumdo to sail you to Ape Atoll, but he will refuse to take you. Talk to Waydar about convincing him, and then talk to Lumdo once again who will now take you to Ape Atoll.
Note: Be careful of poisonous scorpions nearby. They are capable of dealing high damage to players.
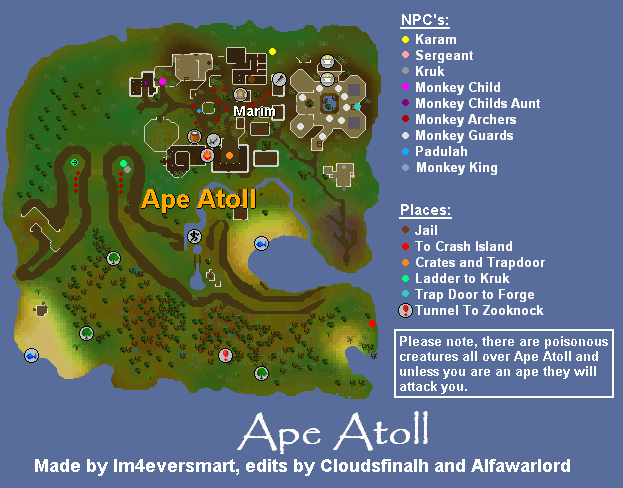
Here is a map of Ape Atoll. You may have to use this map as a reference for multiple steps.
-
Once you arrive on Ape Atoll, travel north-west until you find a cliff. Follow this west, when the cliff turns, head that way (North). You will be attacked by a lot of arrows when you reach the Ape Atoll gate, so it is advised to turn on the Protect from Missiles prayer. Eventually you will lose consciousness.
Note: On your way you'll also come across aggressive poisonous Snakes (Level 24), Scorpions (Level 38), and Jungle spiders, who will attack you regardless of your combat level.
-
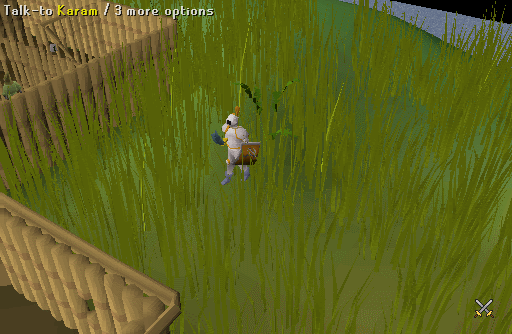
You will end up in a cell in the Jail with three members of the 10th guard, who will talk for a little while. There are Monkey guards outside. Do not get to close to them (stay back from the cage walls, otherwise you will be dealt heavy damage when a guard walks by). One of them will patrol 2 times then go to the switch room and switch with his partner. Your only chance to escape is when he heads to that room. Pick the lock and run out to the grass area (north of the jail) where Karam is located. Talk to Karam once you have reached the grass area.
Note: Beware that if you want to pick the lock beforehand and wait outside on the left of the cell, you may do so. However, there is a level 1 spider near the cage that will keep attacking you in an attempt to poison you. Secondly, do not talk to any monkeys (except for Hafuba), doing so will send you back to jail.
-
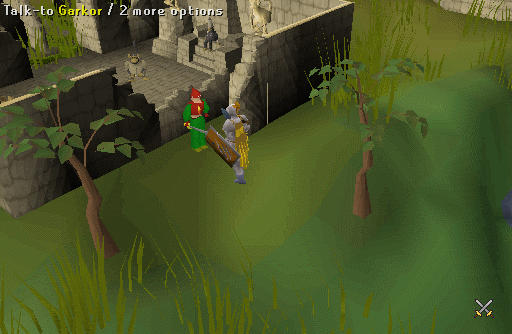
Now you must speak to the sergeant, Garkor. Head south from Karam until you reach south of the temple. Then go east through the tall grass. Do not walk past the Elder guard, if you do he will put you back in jail. When you see the house south of the temple, you will find the sergeant on the east side of it. Speak to him, he will tell you that you will have to make an alliance with the monkey king and speak to Zooknock in a tunnel.
-
You now have to access a house, filled with crates south of the statue in the middle of the city (refer to the map above). Head north, then rush towards west to the grass with Protect from Missiles prayer on. Continue west behind the buildings in the grass until you reach the bamboo like doorway. You must stay in the dark brown area of the floor once inside the house.
Note: Stay in the grass as much as possible; do not run too long, even with protect from missiles prayer on.
-
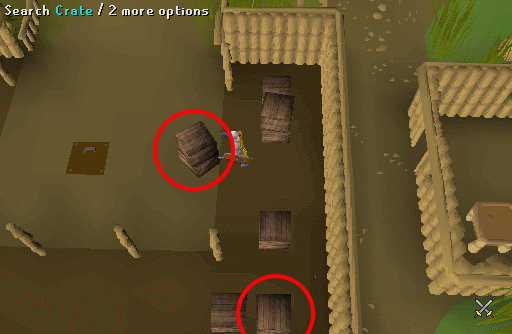
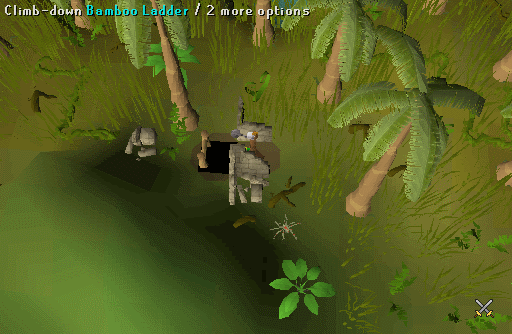
Search the stacked crates near the trapdoor. Take the Monkey Dentures you find in the crate. Now search the most south-eastern crate, and select the yes option, after which you will end up in a cave - you may also take damage if you have less than 50 Agility.
Note: Do not go near the trapdoor, or else the sleeping monkey guard will wake up and summon its fellow guards to send you back to jail.
-
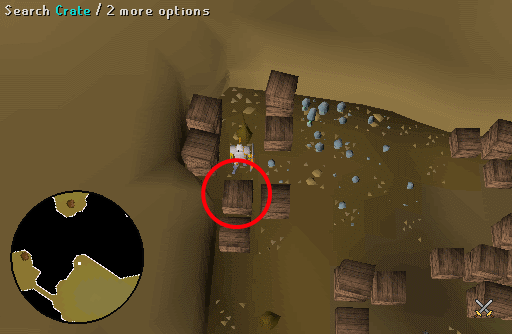
Travel to the north-west part of this cave, and search the crates to obtain the M'amulet mould. You may now teleport to the mainland if you need to restock or restore prayer points.
Note: Each crate has a specific item in it, if the Monkey Amulet mould isn't in one, check the next crate.
-
Items required: Gold bar, Monkey Dentures, M'amulet mould, Ball of wool, 5 Bananas (obtainable during quest), Plank (obtainable during quest), Antipoison potions, Energy potions, and Food.
Find your way back to the Grand Tree. Climb up the ladder and speak with Daero to go to the hangar again. Then talk to Waydar and then to Lumdo. Once on Ape Atoll proceed into the dungeon just west of the little boat.
Note: If you do not have a plank then go to the house in the south-west corner of the island and pick up a plank from there.

-
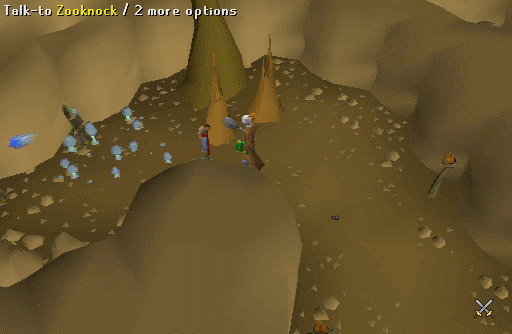
Once inside the tunnel, the best way to get through to the end is by ignoring all the monsters (Auto-retaliate off), spikes, and wall traps. Just watch out for the claw traps and use your plank on them. Run to the end of the tunnel until you find three gnomes: Zooknock, Waymottin and Bunkwicket.
Note: Low level players are advised to turn on their Protect from Melee prayer and keep running at all times. Eat food when you have low health, drink antipoisons when you are poisoned, and drink energy potions when you are running out of energy.
-
Speak with the Mage gnome, Zooknock. After the conversation, use the Gold bar, Monkey Dentures, and M'amulet mould with Zooknock. In exchange for these items he will give you an "Enchanted Bar" and the M'amulet mould back.
-
Teleport out and travel back to Ape Atoll (or leave the tunnels the way you came in). Follow the path as you did when first coming to Ape Atoll, until you get shot down again and you end up in jail. Escape from the cell as before and head east towards the temple door.
-
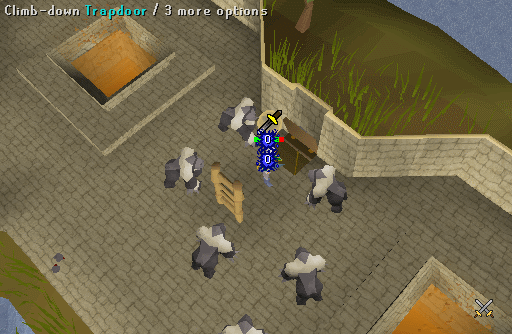
Now you need to go down the trapdoor to the east in the temple past Level 167 Monkey Guards.
Note: It is advised to turn on Protect from Melee to avoid the Monkey Guards' attacks. These guards are high levelled and may surround you, preventing movement, and a non-magical escape. An easy way to get to the trap door is to go upstairs in the temple where there are very few guards. There will be a ladder leading back downstairs right next to the trapdoor.
-
Once you've descended down, quickly use the Enchanted Bar with either wall of flame, then use your Ball of wool with the amulet to make a M'speak amulet amulet. You may now either teleport out to resupply or return up the ladder from which you came and travel back to the jail.
-
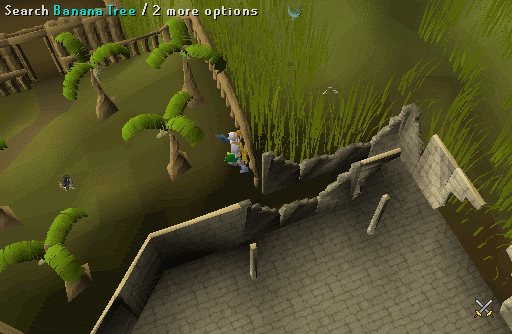
Go west from the jail to the banana garden once you have reached the safety of the jungle grass north of the jail. The banana garden is between two buildings. There is an entrance to the garden at its north-east corner, that leads to a corridor. Search the trees to get 5 bananas, if you do not already have of your own.
Note: The Monkey's Aunt patrols in a loop. Only enter the banana garden when The Monkey's Aunt exits the south gate. When she returns (or is about to return) to the garden through the west gate, run into the corridor to the north-east so that the aunt doesn't see you. If The Monkey's Aunt spots you, Ninja Monkeys will come to imprison you.
-
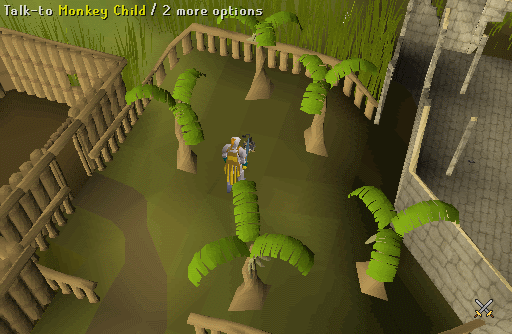
Wear your Monkeyspeak amulet, then talk to the Monkey Child, while avoiding The Monkey's Aunt. Tell him that you are his uncle (This may take several tries). He will tell you that his aunt has asked him to collect 20 bananas. Speak with him again and give him 5 bananas (He doesn't count very well). Wait for The Monkey's Aunt to make another loop, then speak to him again. He will give you the Monkey talisman (The toy). Teleport off the island.
Note: In case you lose the Monkey talisman, you may obtain it from him again. If he cries, simply wait or log out to stop his crying.
-
Items required: Monkey talisman, Monkey part (any of these will work, but it must be from Karamja: Monkey corpse, Monkey bones, or Monkey skull), Energy potions, Plank, and Food.
Make your way back to Ape Atoll, then go down the tunnel for the second time to Zooknock. Use the Monkey talisman and Monkey part with Zooknock to get a Monkey Greegree.
Note: When you equip this Monkey Greegree, you will turn into a Karamja monkey and no longer be attacked on Ape Atoll.
-
Equip your Monkeyspeak amulet and Monkey Greegree, then leave the tunnel (Teleport or walk). Go north-west following the cliff until you see a gate (where the Monkey Archers normally shoot you down). Go through the gate and travel all the way east and speak to Sergeant Garkor. Afterwards, speak to the Elder guard right by the sergeant. He will not let you through and tells you to speak to Kruk.
-
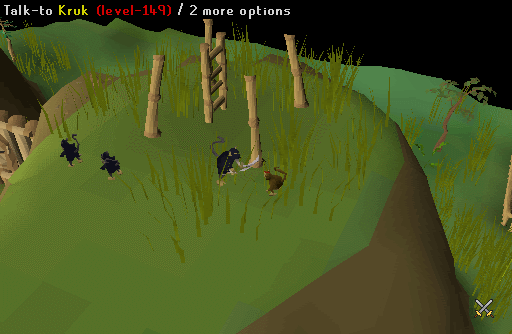
To get to Kruk, travel west of the town gate, then south along the shore. Travel up the cliff, climb up the ladder, cross the bridge, and go down the next ladder to speak to Kruk. Kruk will take you to Awowogei, the monkey king.
-
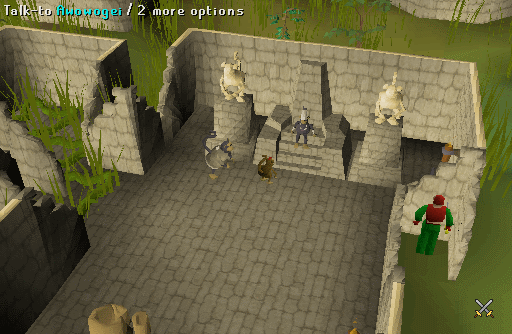
Speak with Awowogei and ask him for an alliance. He will tell you to rescue a monkey from Ardougne Zoo. Talk to the Elder guard south of the throne, to leave Awowogei's house when you have finished talking with him.
-
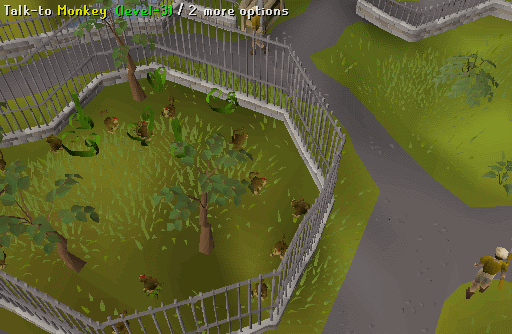
Teleport to Ardougne and head over to the zoo (you will need to unequip the Monkey Greegree to do this). Equip your Monkey Greegree and talk to the Monkey Minder who will then place you in the cage. Speak with a monkey inside of the cage and you will put it in your inventory. Then unequip your Monkey Greegree to turn back into a human. Speak with the Monkey Minder and he will let you out.
Off-Topic Tip: Once outside the cage, grab some bananas and use them on the monkey to get a clue scroll (medium). It's rare, can be done once and at this point only. DO NOT TELEPORT, OR THE MONKEY WILL BE LOST.
-
Travel by foot to the Grand Tree. Any method of teleportation will result in the monkey leaving the inventory. Once there, fly back to Ape Atoll in the usual fashion. Equip the Monkey Greegree and Monkeyspeak amulet again, then go to Awowogei by speaking to one of the Elder guards. Speak to the king, who will consider alliance. Afterwards, talk to the Sergeant who will give you a 10th squad sigil.
Note: You may need to talk to the Sergeant multiple times to get the Sigil. If you die and lose the 10th squad sigil, you will need to talk to Sergeant again, who will send you to Waymottin at the end of Zooknock's tunnel.
-
Items required: Food, Combat equipment, Prayer potions and Antipoison potions.
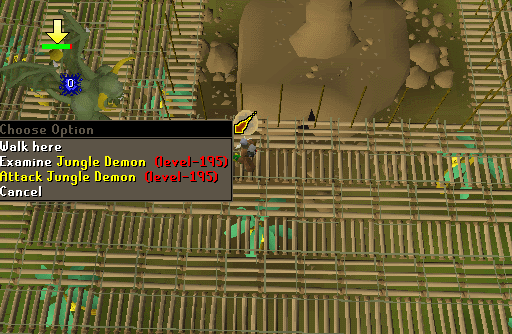
It is time to fight the level 195 Jungle demon. Check ways to defeat it below this step. If you are ready to fight the Jungle demon, simply equip the 10th squad sigil and operate it. The ground will start to shake and you will be teleported to a platform where you will have to defeat the Jungle demon with the help of the 10th Guard.
How to Defeat the Demon:
There are several ways of defeating the demon. Before you face it you should take at least two Prayer potions, one Antipoison potion, good food, and a Ring of dueling or Amulet of glory. When you wear the sigil you will be teleported into an arena with the level 195 demon in it. The demon is very fierce and deals 30+ damage with its melee and magic attacks, so as soon as you put the sigil on make sure you also turn on the Protect from Magic prayer. Once you are down there you can use any of the following strategies:
A. You can mage him using high level attack spells (wind spells aren't suggested, they often miss and don't hit him, use fire spells instead).
B. You can range him if you are a good ranger.
C. You can melee him, but since he can deal over 30 damage I wouldn't recommend going near him (though melee seems to work quite well on him at around level 90 Combat, with good food you should be able to finish him off very fast).
Note: You must deal the final blow the demon or else he will fully heal again.
Once you have killed the level 195 demon, speak to the person which the arrow is pointing at. You will then be teleported to Ape Atoll. Now teleport to Al-Kharid using dueling ring or amulet of glory.
-
Take the glider in Al-Kharid to Tree Gnome Stronghold. Speak with King Narnode on the bottom floor to finish the quest. Then go up the ladder and speak with Daero to get trained in other skills. For pures, you do not have to talk to Daero for it will level up your defence.
Congratulations! Quest Complete!
Note: You can go back and kill other monkeys (Temple, Archer, Guard, or Zombie) for their bones. Get a new Talisman (1k gp from Tutab in the Village Magic Shop) and then take their remains to Zooknock and he will make you additional Greegrees which will change you into the form of the monkey you killed.
Another note: If you lose your monkey talisman, you can go back to the kid in the house. Just say that you lost it and he'll give you another.
This Old School Quest Guide was written by MuH-K0o0o and Jarkur. Thanks to Peloner, Fireball0236, Alk12, andro_girl, DRAVAN, Bob151jr, Im4eversmart, pokemama, bubble edie, BratDawg1, Brenden, spitfire_18, kndguild, Sonyshower, amiele, jeremy_78, Kynar, doublejk2000, pingu head, jubala, agent929, Mosy, Wizard Bob04, Demonichell, gkef, Dragoness246, Sheep01, greatgecko, theamazingbender, LogGamer, Maxima908, Thugbrudda, Hammeh, Flyer702, Drowned Pk, Borg Sphere, McSwindler, Envies, and SirQuackers for corrections.
This Old School Quest Guide was entered into the database on Wed, Dec 08, 2004, at 08:44:11 PM by dravan, and it was last updated on Fri, Oct 06, 2017, at 08:57:10 PM by DRAVAN.
If anything is incorrect or missing, or if you have any new information to submit to this database, please submit it to us on our Content Submissions Forums.
If you see this guide on any other site, please report it to us so we can take legal action against anyone found stealing our content. This guide is copyrighted by RuneHQ, and its use on other sites is expressly forbidden. Do not ask if you can use our guides or images, the answer is and always will be NO!
Print this page with images - Back to the Old School Quest Guide Index Page - Back to Top
