

20 Mining
22 Thieving
26 Agility
32 Crafting
33 Magic
40 Strength (Boostable)
| 2 Planks | 8 Iron nails (or any other kind) | ||
| Hammer | Knife | ||
| Air rune (Can be obtained during the quest) | Law rune (Can be obtained during the quest) |
Note: Make sure you are on the standard spellbook during this quest as the use of the Telekenetic grab spell is required.
-
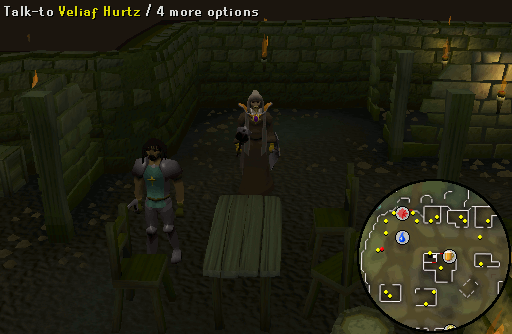
Make your way to the inn of Burgh de Rott. Climb over the broken wall and descend into the basement. Talk to Veliaf Hurtz, who will tell you that the next stage of the mission will involve the Sanquinesti region and that you will also be involved in a diplomatic mission to Misthalin to secure allies to fight against Draken. Your first task is to find a way into the Sanquinesti region, since the route is blocked by a high wall.
-
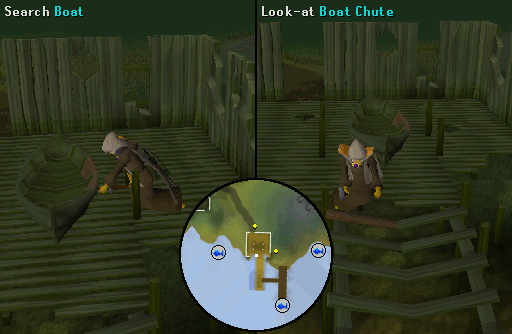
Head South East towards the shore until you find a house with a boat. Search the boat to find out that it is broken. Use a Plank on the boat to repair it. Now, search the broken boat chute. You will now have to repair the chute too. Use your remaining plank and nails to repair it. Once repaired push the boat down the slipway and board it.
-
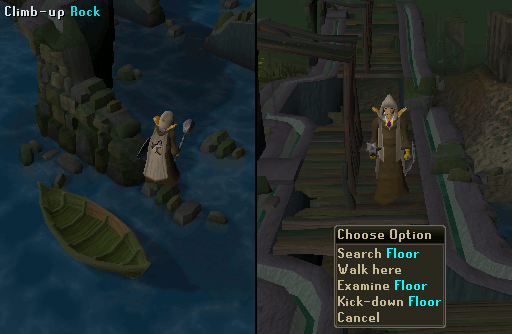
You will arrive close to the Sanquinesti wall. Jump onto the nearby rock and then climb up. Walk on the wall until you reach a spot where it says that the planks creak. Kick in the floorboards, climb down and then over a pile of wall rubble.
Note: During your stay in the Sanquinesti region, you might be noticed by a Vyrewatch. If this happens, you will have the following options: pay the blood tithe (60 Lifepoints), get attacked and run away (if you have many Prayer points), or distract them. The successfulness of the last option depends on your Thieving level. If you fail to distract them, you will still have to pay the blood tithe.
-
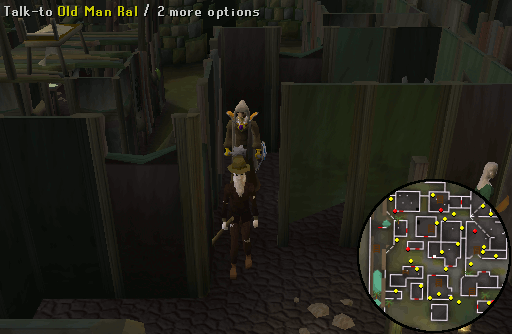
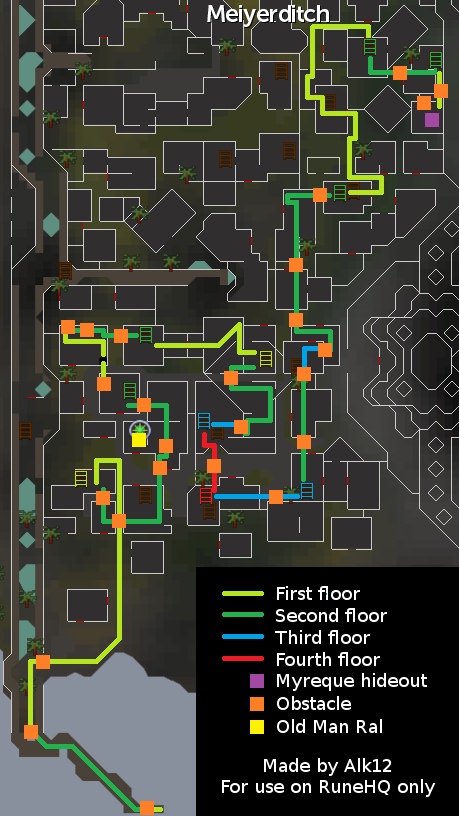
Speak (whisper) to any of the Meiyerditch citizens about the Myreque. Eventually, they will tell you to speak to Old Man Ral. Ask them to introduce you to him. Tell Old Man Ral, in a house just North of Trader Sven near the West wall, you have been told that he can help you. Continue the conversation by saying that he is the sage of Sanguinesti. He will tell you the Myreque are hidden in sector 3, the Northern part of the region, and that you should follow the symbols to reach them. Ask him to help you, and he will tell you the symbols to follow are the symbols of the Myreque, the silver sickle.
Note: If you do not ask them to introduce you, then Old Man Ral will not help you on your quest.
This map shows the route to the Myreque hideout, detailed in steps 5 to 13 below:
-
Enter the building to the South West of Old Man Ral and climb up the ladder. Slightly to the South East, you will find a gap. Click on the floor on the other side to "Jump-to Floorboards". Now do the same thing for the following gap to the East.

-
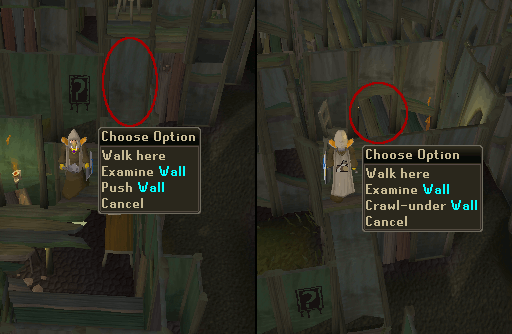
To the North, you will find a sickle logo on the wall. Push the wall to the right of the logo and walk across the resulting floor. Crawl under the wall near to you and then walk North. Push the wall on the Western side of the room, to the right of another sickle symbol, and walk across.
-
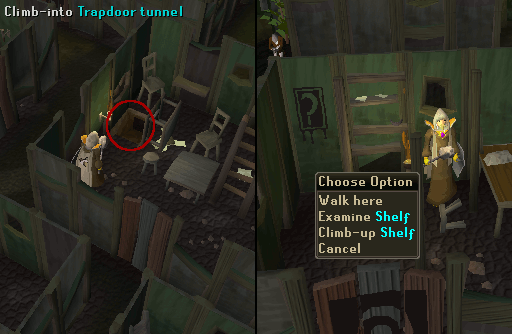
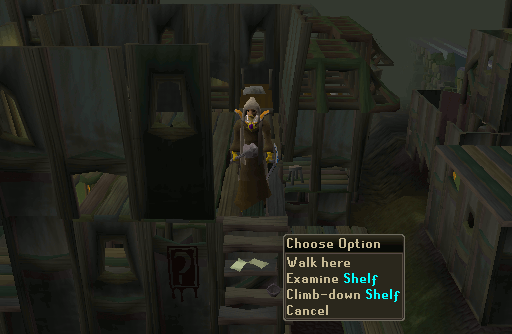
Climb down the ladder and you will end up in a locked building. Search the table to the North West to find a trapdoor. Open the trapdoor table and climb into the trapdoor tunnel. You will appear in another room. Climb up the shelf next to another sickle symbol.
-
Crawl under the Eastern wall of the room and jump across the floorboards. Climb down the ladder. Now, search the pots under the sickle symbol to find a Door key. Use the key on the nearby door and it will become stuck in the lock. You may now open the door.

-
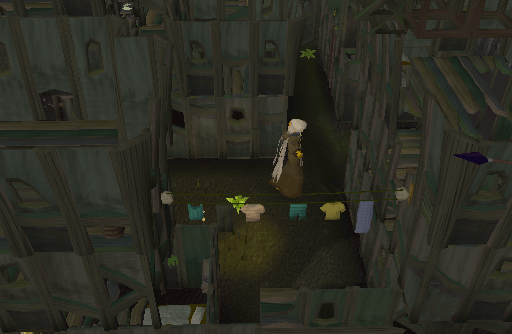
Head East and climb up the ladder. Jump across the floorboards to the South, walk a little to the South East and climb up the shelf. Climb up the ladder in that room and jump across the floorboards to the South to reach another room. Descend down the ladder in that room and walk East across the washing line.
-
When you have made it to the other side, climb down the ladder and push the wall to the North.
Walk across the floor and climb up the shelf. Head to the North East side of the room and climb down the shelf. Now, jump across two sets of floorboards to the North. Continue walking North as far as you can and then jump to the floorboards to the East.
-
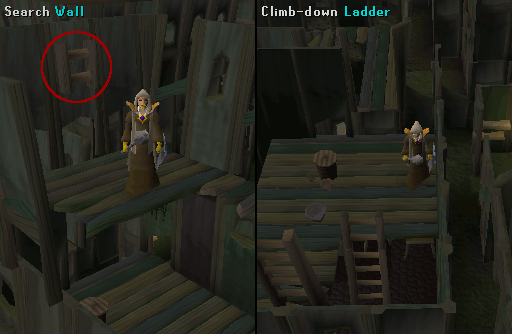
You will have reached a room with broken ladder leading to the floor below. Climb up the other ladder and search the Western wall to find the topmost part of a ladder. Climb back down the ladder and use the Ladder top on the broken ladder. Climb down the repaired ladder, open the door and you will appear in sector 3.
-
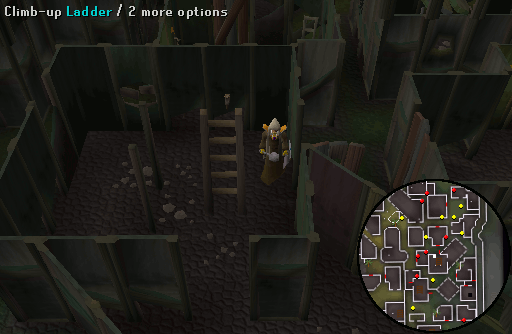
Head North West and open the door of the building with a ladder in it. Leave that same building through the exit to the North, and enter the next building to the North that has a ladder in it. Climb up the ladder, jump to the floorboards to the East, and then climb down the stairs.
-
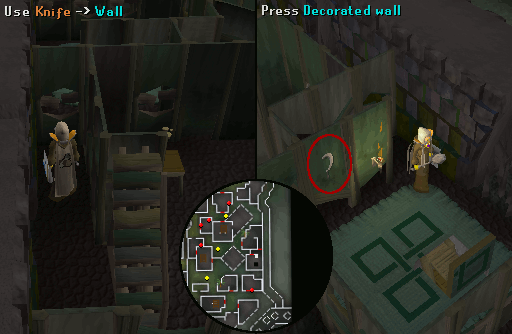
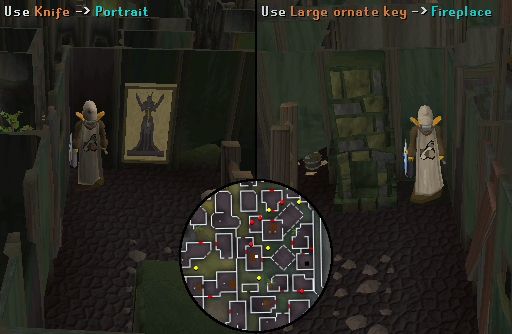
Use your Knife on the South wall to unhook the latch. Push the wall and go through. Press the decorated wall to the North and you will hear a click. Now, open the lumpy rug in the center and climb down the trapdoor that appears.
Note: If you forgot to bring a Knife, then climb up the ladder, in the house with portrait and fireplace, and pick it up from the table.
-
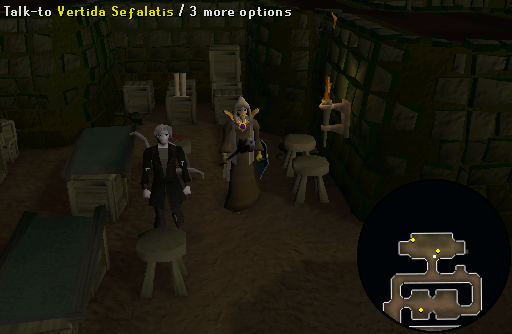
Once inside the basement, walk to the Northern end of basement and tell Vertida Sefalatis that you were asked to make contact with the Myreque. He will give you a Message to deliver to Veliaf Hurtz.
-
Return to Veliaf Hurtz in the basement of Burgh de Rott's inn. Tell him that you have a Message for him from Vertida. He will tell you that there is some disturbing news from Paterdomus which needs to be investigated, and will tell you to speak to Drezel about it. Ask him what to do about the vampires and he will suggest that you consult King Roald to see if Misthalin will come to Morytania's aid.
-
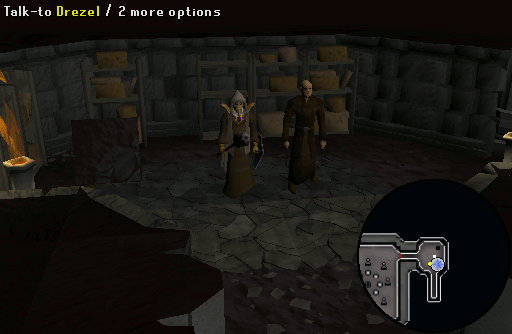
Make your way to Drezel in the basement of the temple, West of
Canifis. Speak to Drezel and he will ask you to investigate some strange noises around the temple.
Note: The easiest way to reach the temple is via the Canifis lodestone home teleport or Fairy Ring code C K S.
-
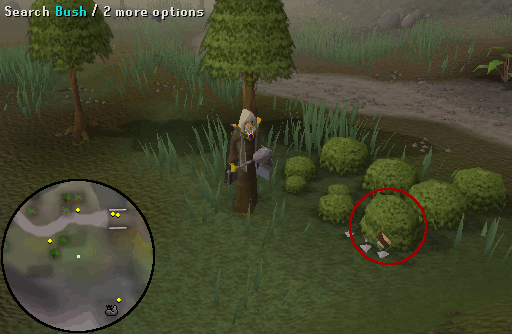
Climb up the ladder in the Western part of the basement. Once on the surface, search the bushes to the South West of the steps leading to the temple to find an unconscious person. A cut scene will occur in which shadowy figures knock you out and snatch away the body.
-
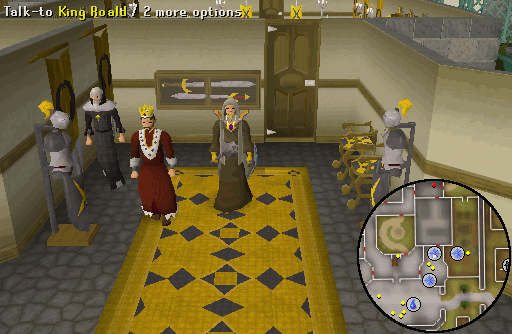
Report back to Drezel, who will give you the teleport runes to get to Varrock so that you can speak to King Roald urgently. Teleport and speak to the king in Varrock castle. You will have a long conversation with the king and his advisor Aeonisig Raispher. The advisor will then offer a free teleport back to Drezel. Accept the offer and talk to Drezel.
Note: The advisor and King Roald must be standing in the same room, or the free teleport offer will not work.
-
Return to Burgh de Rott and speak to Veliaf Hurtz again in the basement of the inn. He will send you off to speak to Vertida Sefalatis. Make you way back to the Myreque hideout in Meiyerditch using the same route as before. This time, all the walls you pushed will be seen as a floor to walk over and the doors you unlocked will still be unlocked.
Note: The easiest way to reach the Myreque hideout is to ask to a Vyrewatch to be taken to the mine. Once there, ask one of the Meiyerditch miners for a spare pickaxe and mine 15 Daeyalt ores. Put them in the cart and ask one of the Juvinate guards in the mine if you may leave. Once outside of the mine, follow the path shown on the map below.

-
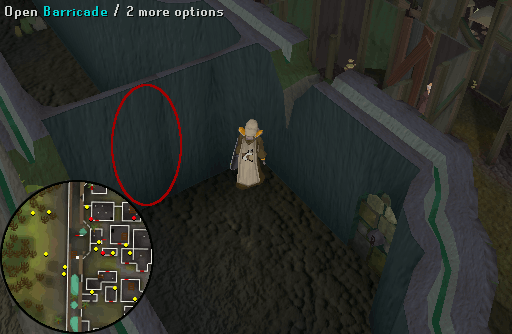
Once you have spoken to Vertida Sefalatis, he will send you to find another member of the Myreque, Safalaan. Talk to to Vertida again and he will offer to transport you back to where you started your journey in Meiyerditch because he is traveling that way himself. Accept this offer and make your way back to the boat. Climb to the top of the wall and then travel North past the kicked-in floorboards. You will come across a ladder leading downwards. Go down the ladder and you will see a barricade. Search the rocky surface to the East to find a switch. Open the barricade and continue North.
-
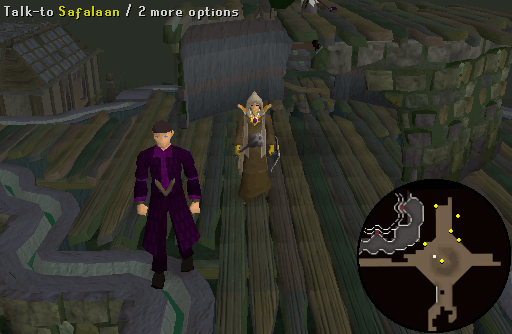
When you reach the next barricade, climb the nearby ladder and continue North. Cross a gap by going up one ladder and down another one. Head all the way North along the wall until you reach Safalaan. Tell him about the events that have happened and ask him if you can help him. He will then ask you to complete his task of sketching the castle from three angles. He will give you 3 Papyri and a chunk of Charcoal.
Note: If for some reason you run out of Papyri, then ask Old Man Ral in the South part of the Sanquinesti region for a new set of Papyri
-
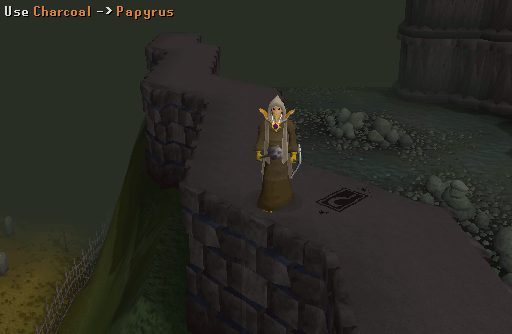
Continue West along the wall past two sickle logos. When you reach the third logo, stand on it and sketch the castle by using the Charcoal with a Papyrus. Go back the way you came to the sickle logo you just passed on the West of the castle. Sketch the castle again and a cut scene will occur of a dialog between Vanstrom Klause and the Drakan family.
-
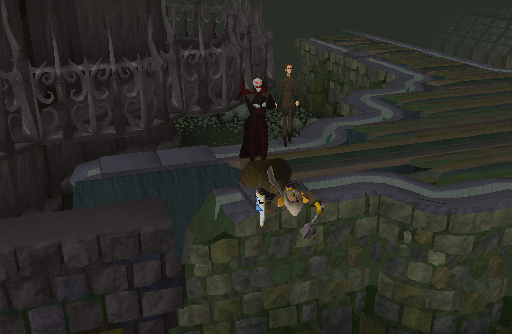
Head to the last sickle logo to the South of the castle and try to draw the third Castle sketch. A cut scene will occur after which you will be attacked by Vanstrom Klause. You cannot win and will fall down. When you wake up a woman named Sarius Guile will address you and give you some cryptic instructions on how to find her message to Safalaan. Remember to complete the third Castle sketch before you leave.
-
Once finished, head back to the Myreque hideout. The quickest route is to be sent to the mines as mentioned earlier and mine 15 Daeyalt ores. Give the sketches to Safalaan and he will tell you to search for Sarius Guile's message. Leave the hideout and climb up the stairs. Jump onto the floorboards to the West and descend the ladder. Leave the house and enter the one with a ladder to the South West. Use a Knife on the portrait and search it to acquire a Large ornate key. Now to obtain the Message, use a Knife on the fireplace to loosen a tile.
Note: If you forgot to bring a Knife, then climb up the ladder, in the house with portrait and fireplace, and pick it up from the table.
-
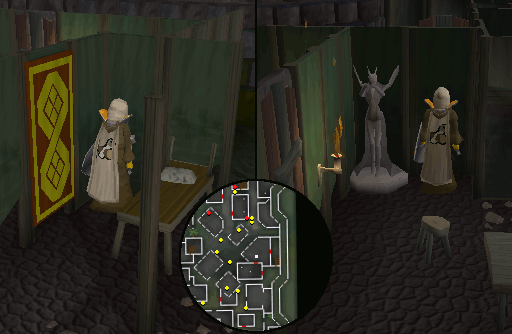
Return to the Safalaan and give him the Message. He will then tell you to find the lab mentioned in the message. Go back out into sector 3 and head far North East to a building with an ornate tapestry, near the Eastern wall. Use a Knife on the tapestry, walk through the slashed tapestry, and then use the Large ornate key on the vampire statue.
-
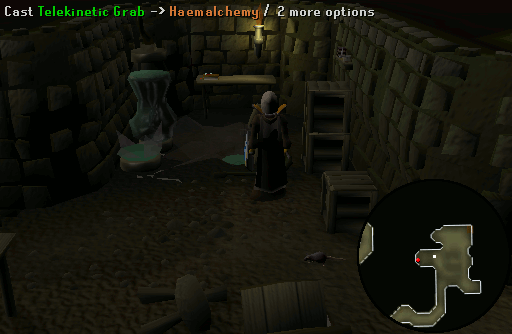
Go through the door that appears on the Eastern wall and then down the stairs. You will find your self inside of a laboratory. Use the Telekinetic grab spell to get your hands on the Haemalchemy book.
Note: If you forgot to bring the runes required for the telekinetic-grab spell, then search the broken rune case in the laboratory to acquire the needed runes.
-
Take the book to Safalaan, who will give you a Sealed message and a Shortcut key to unlock the doors between sectors 1, 2, and 3. Take the message to Veliaf Hurtz in Burgh de Rott's inn to claim your reward.
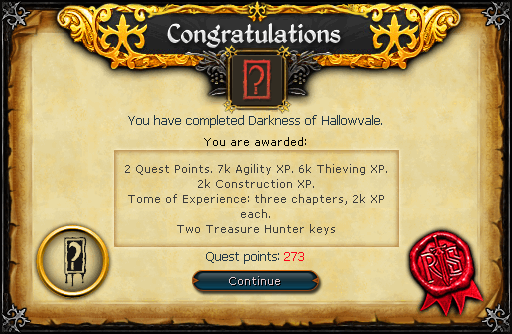
Congratulations! Quest complete!
This Quest Guide was written by budmash, flyinzamboni, and Rampsorlen. Thanks to Belgarath, sksfrontiers, p4plus2, army_cadet8, Andro_Girl, Olorin, Clamball, Chaosblade77, notasenator, Sven Knutsen, feppie64, Im4eversmart, Mythiquedame, The_Peleton, doublejk2000, Plxda, Bob, Egekalaycan, BobbehMan, Alfawarlord, PaigeTheWise, Sir Trakio, m ickey, Jarkur, Ruperthood69, Noob Demonic, and Alucks for corrections.
This Quest Guide was entered into the database on Mon, Sep 04, 2006, at 02:48:54 PM by Im4eversmart, and it was last updated on Tue, Jan 29, 2019, at 10:41:24 PM by Alk12.
If anything is incorrect or missing, or if you have any new information to submit to this database, please submit it to us on our Content Submissions Forums.
If you see this guide on any other site, please report it to us so we can take legal action against anyone found stealing our content. This guide is copyrighted by RuneHQ, and its use on other sites is expressly forbidden. Do not ask if you can use our guides or images, the answer is and always will be NO!
Print this page with images - Back to the Quest Guide Index Page - Back to Top
